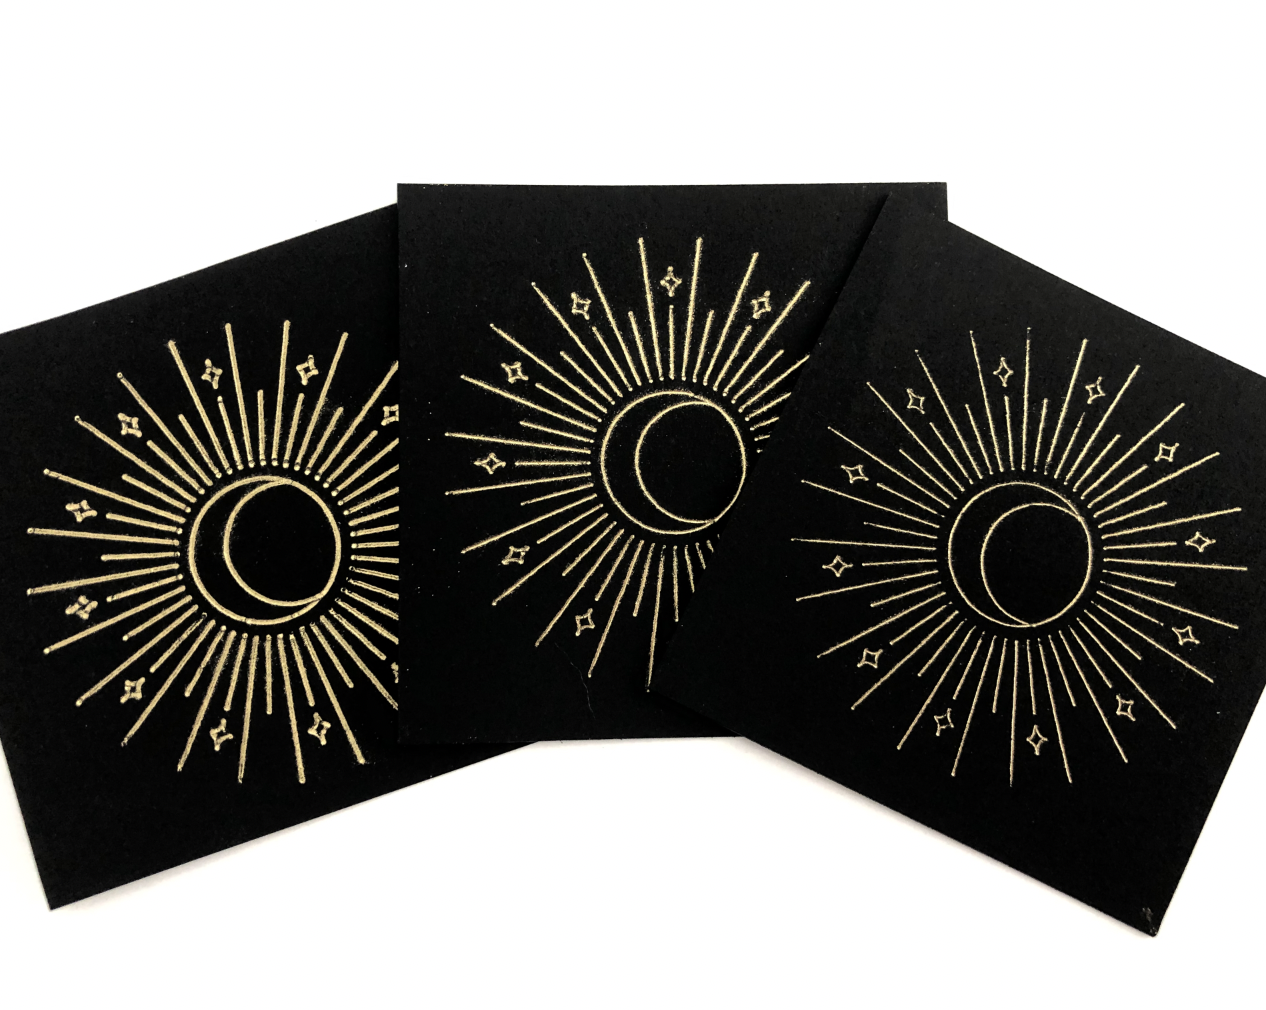
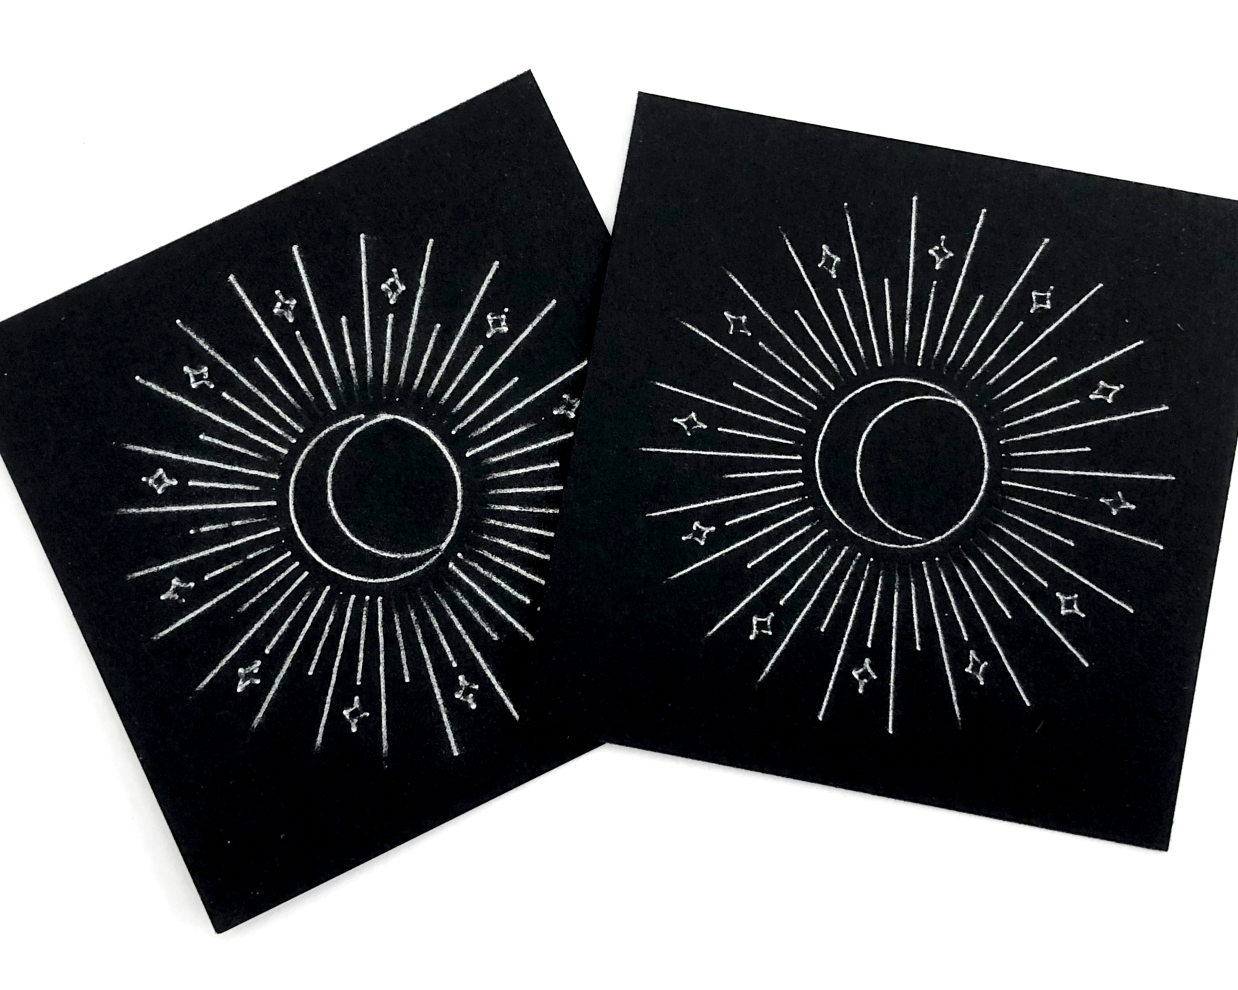
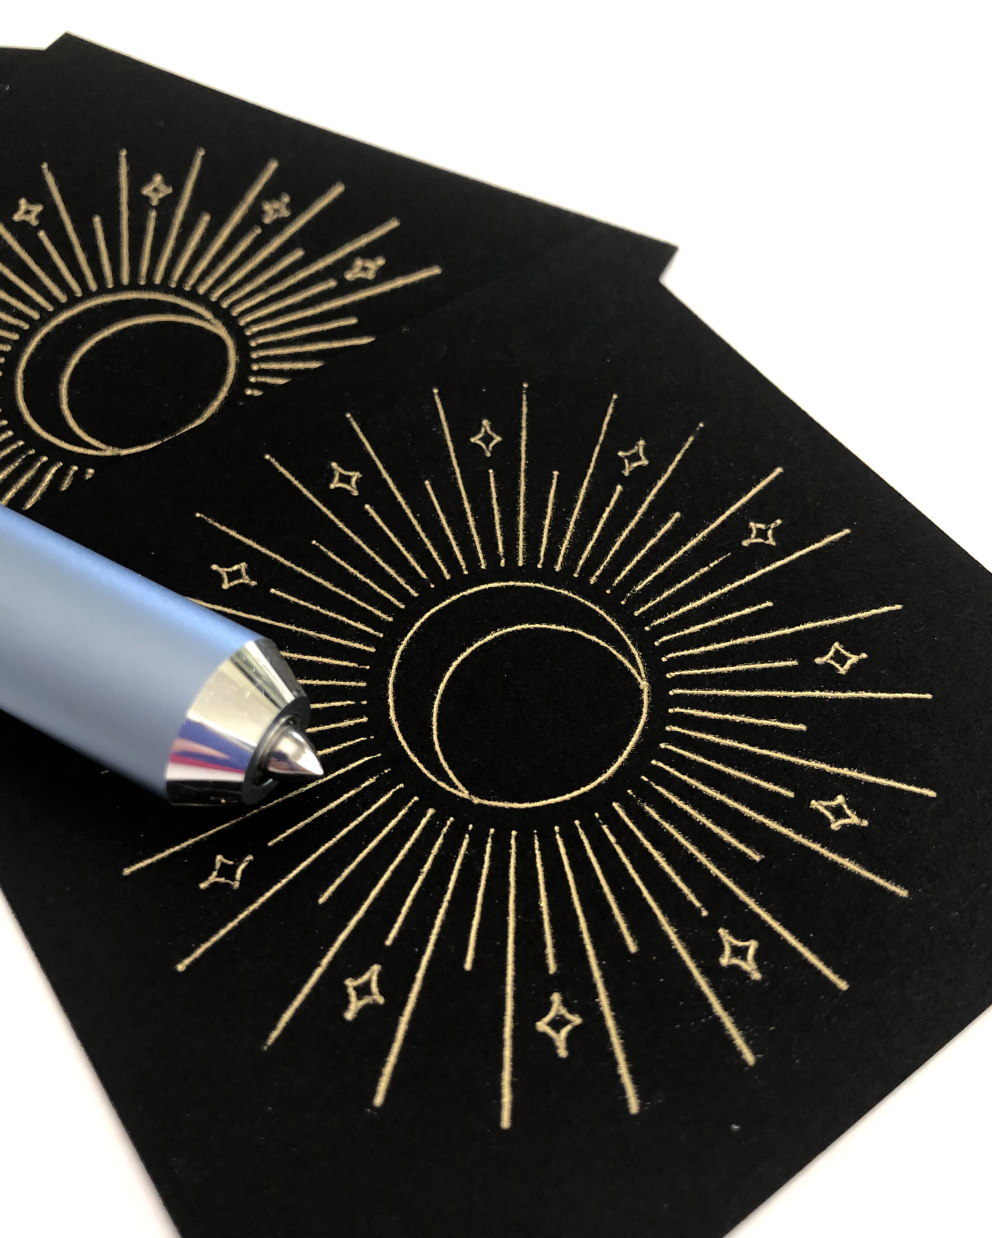
Etching on Acrylic with the Silhouette Portrait 3

Hi Everyone!

This week I’m going to share another technique you can use to decorate some acrylic blanks for holiday ornaments. I’m going to use my WRMK Etch Quill to engrave my design into the acrylic. If you see settings for etching, embossing, debossing, etc in Silhouette Studio, those are meant for the Curio machine. The Portrait 3 really isn’t designed to etch, that’s why I’m using the 3rd party etching tool.

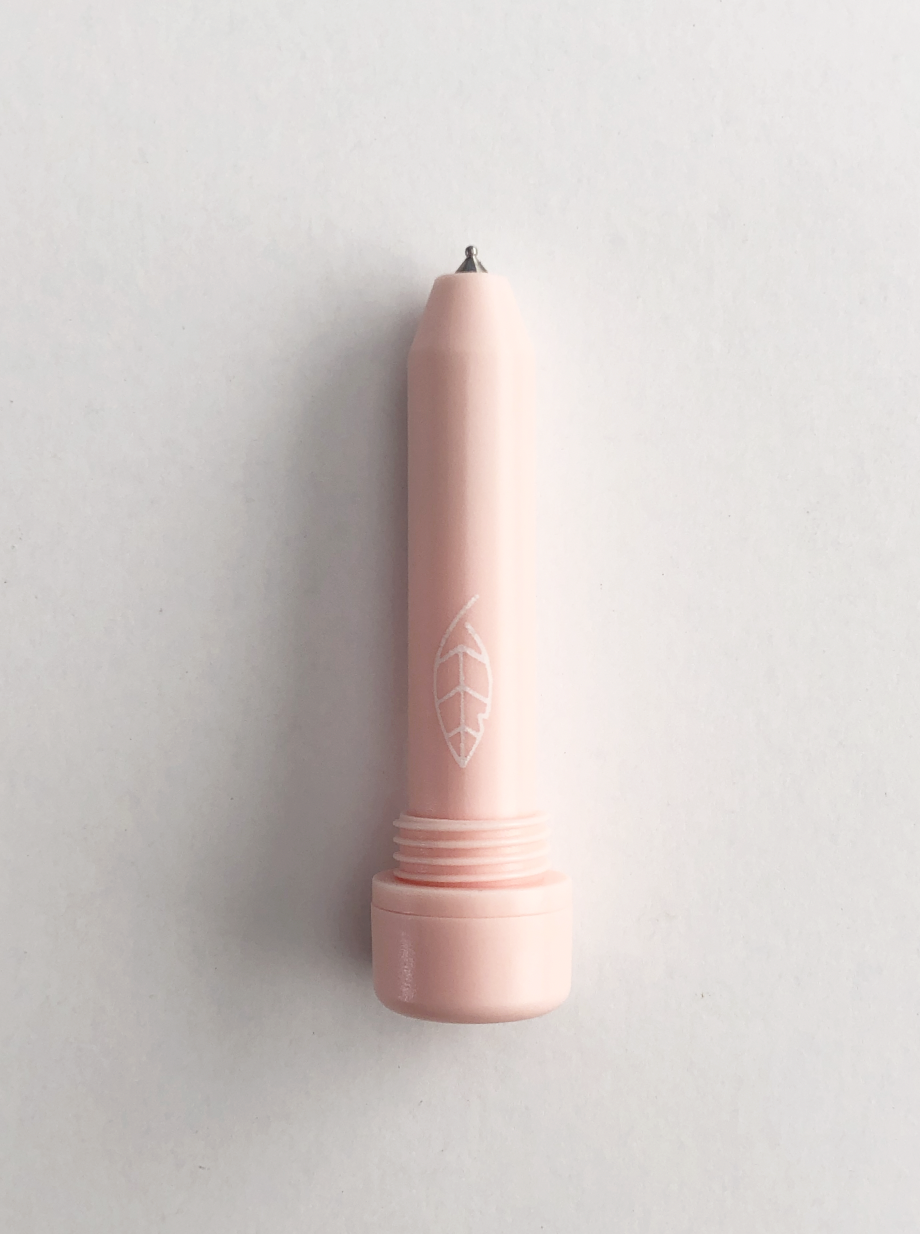
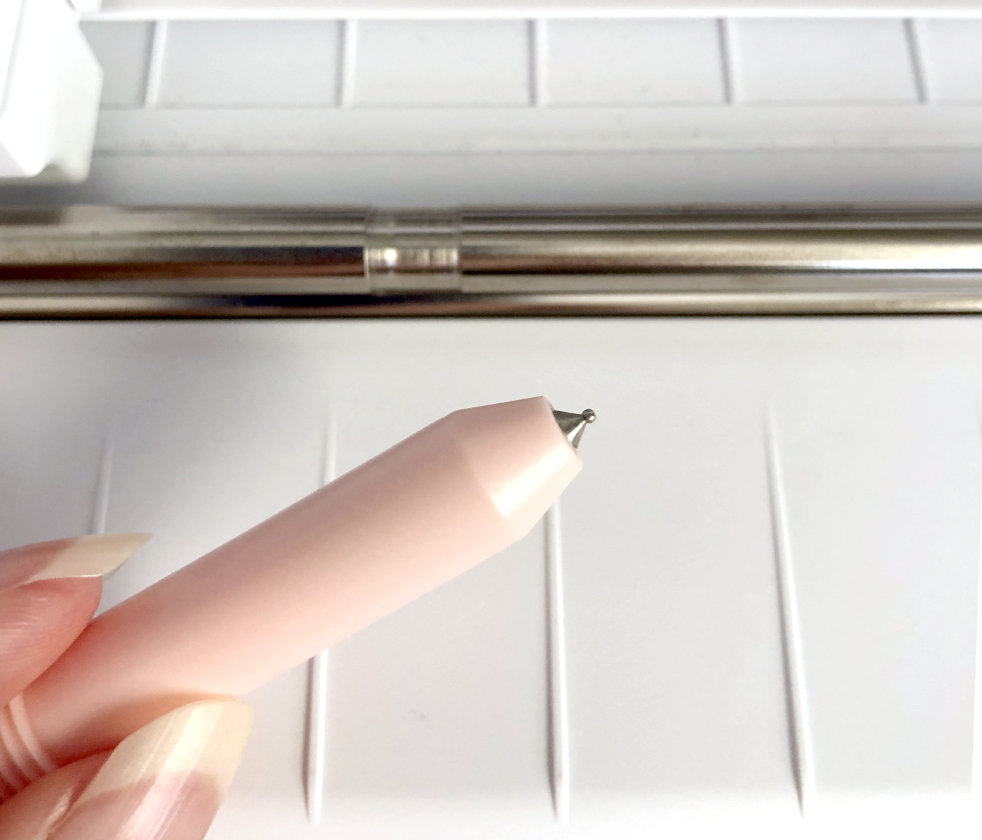
WRMK Etch Quill

Let’s get started!

Supplies:

(Links below may be affiliate links)

Silhouette Portrait 3

Standard Grip Mat

Chipboard with 3” circle cutout (optional)

3 inch round 2mm thick acrylic ornament blanks

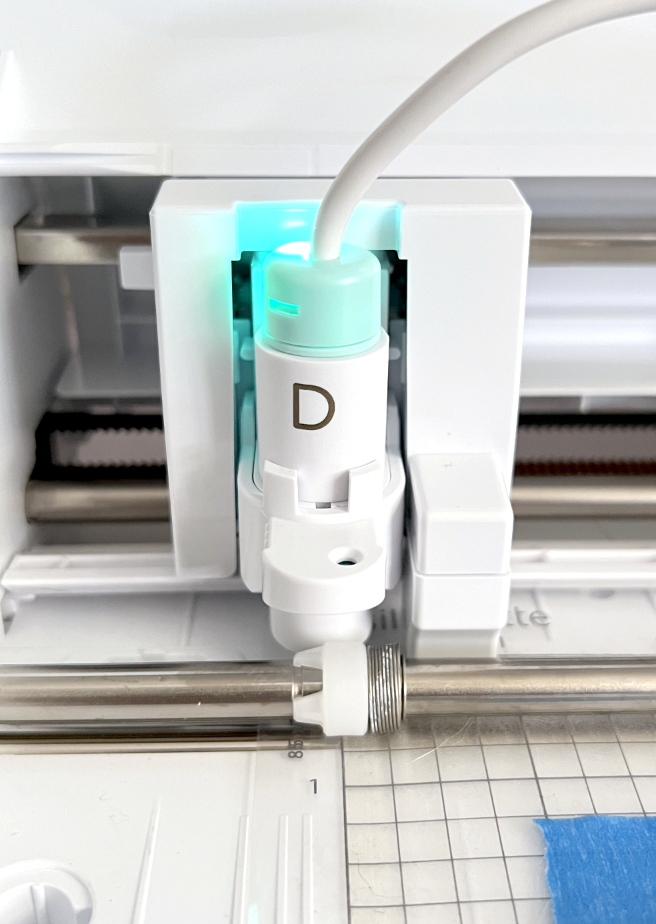
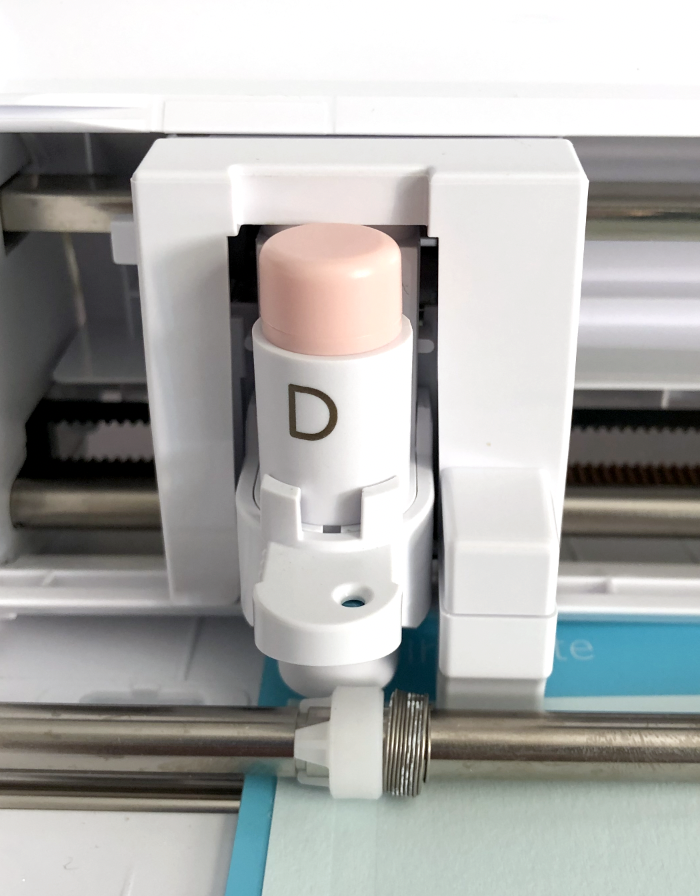
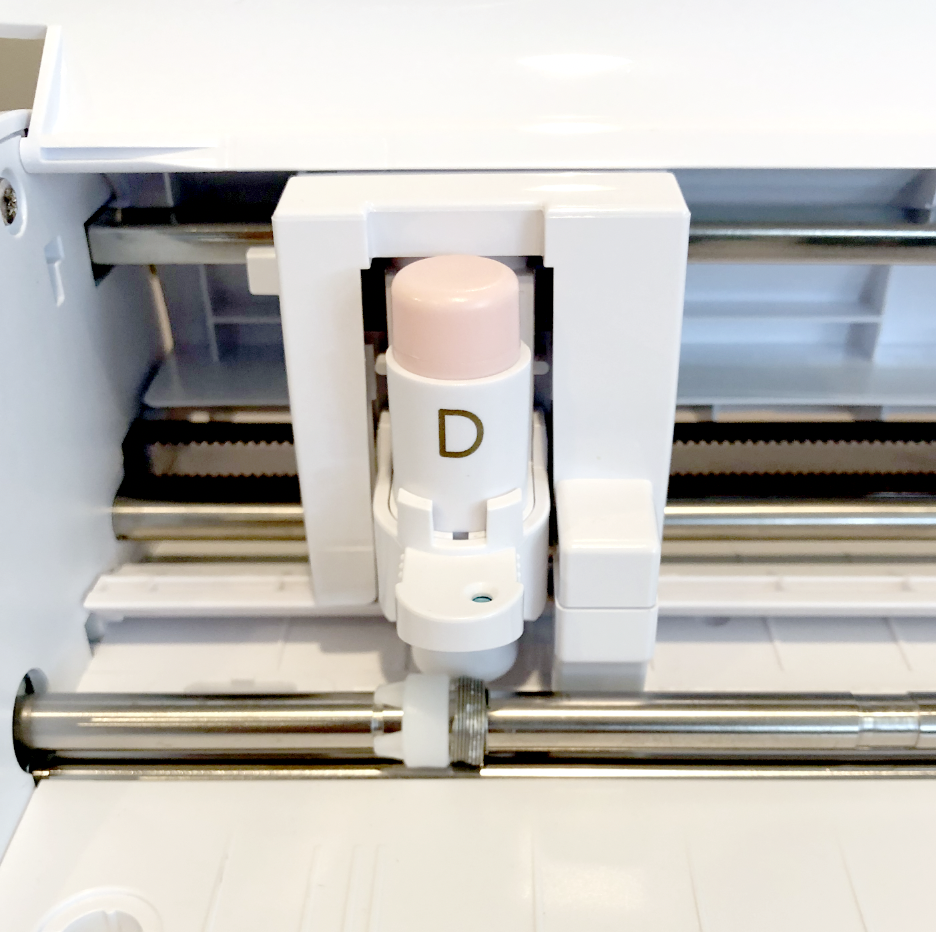
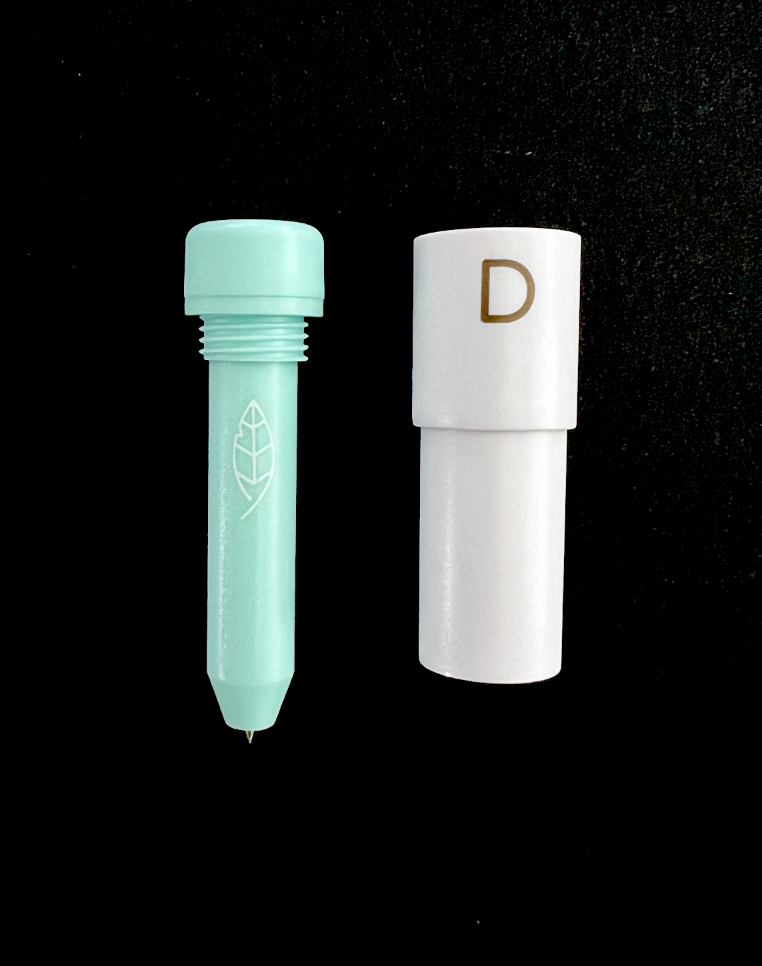
WRMK Etch Quill (with D adapter from Foil Quill)

9-12 inch length of ribbon or twine

Project:

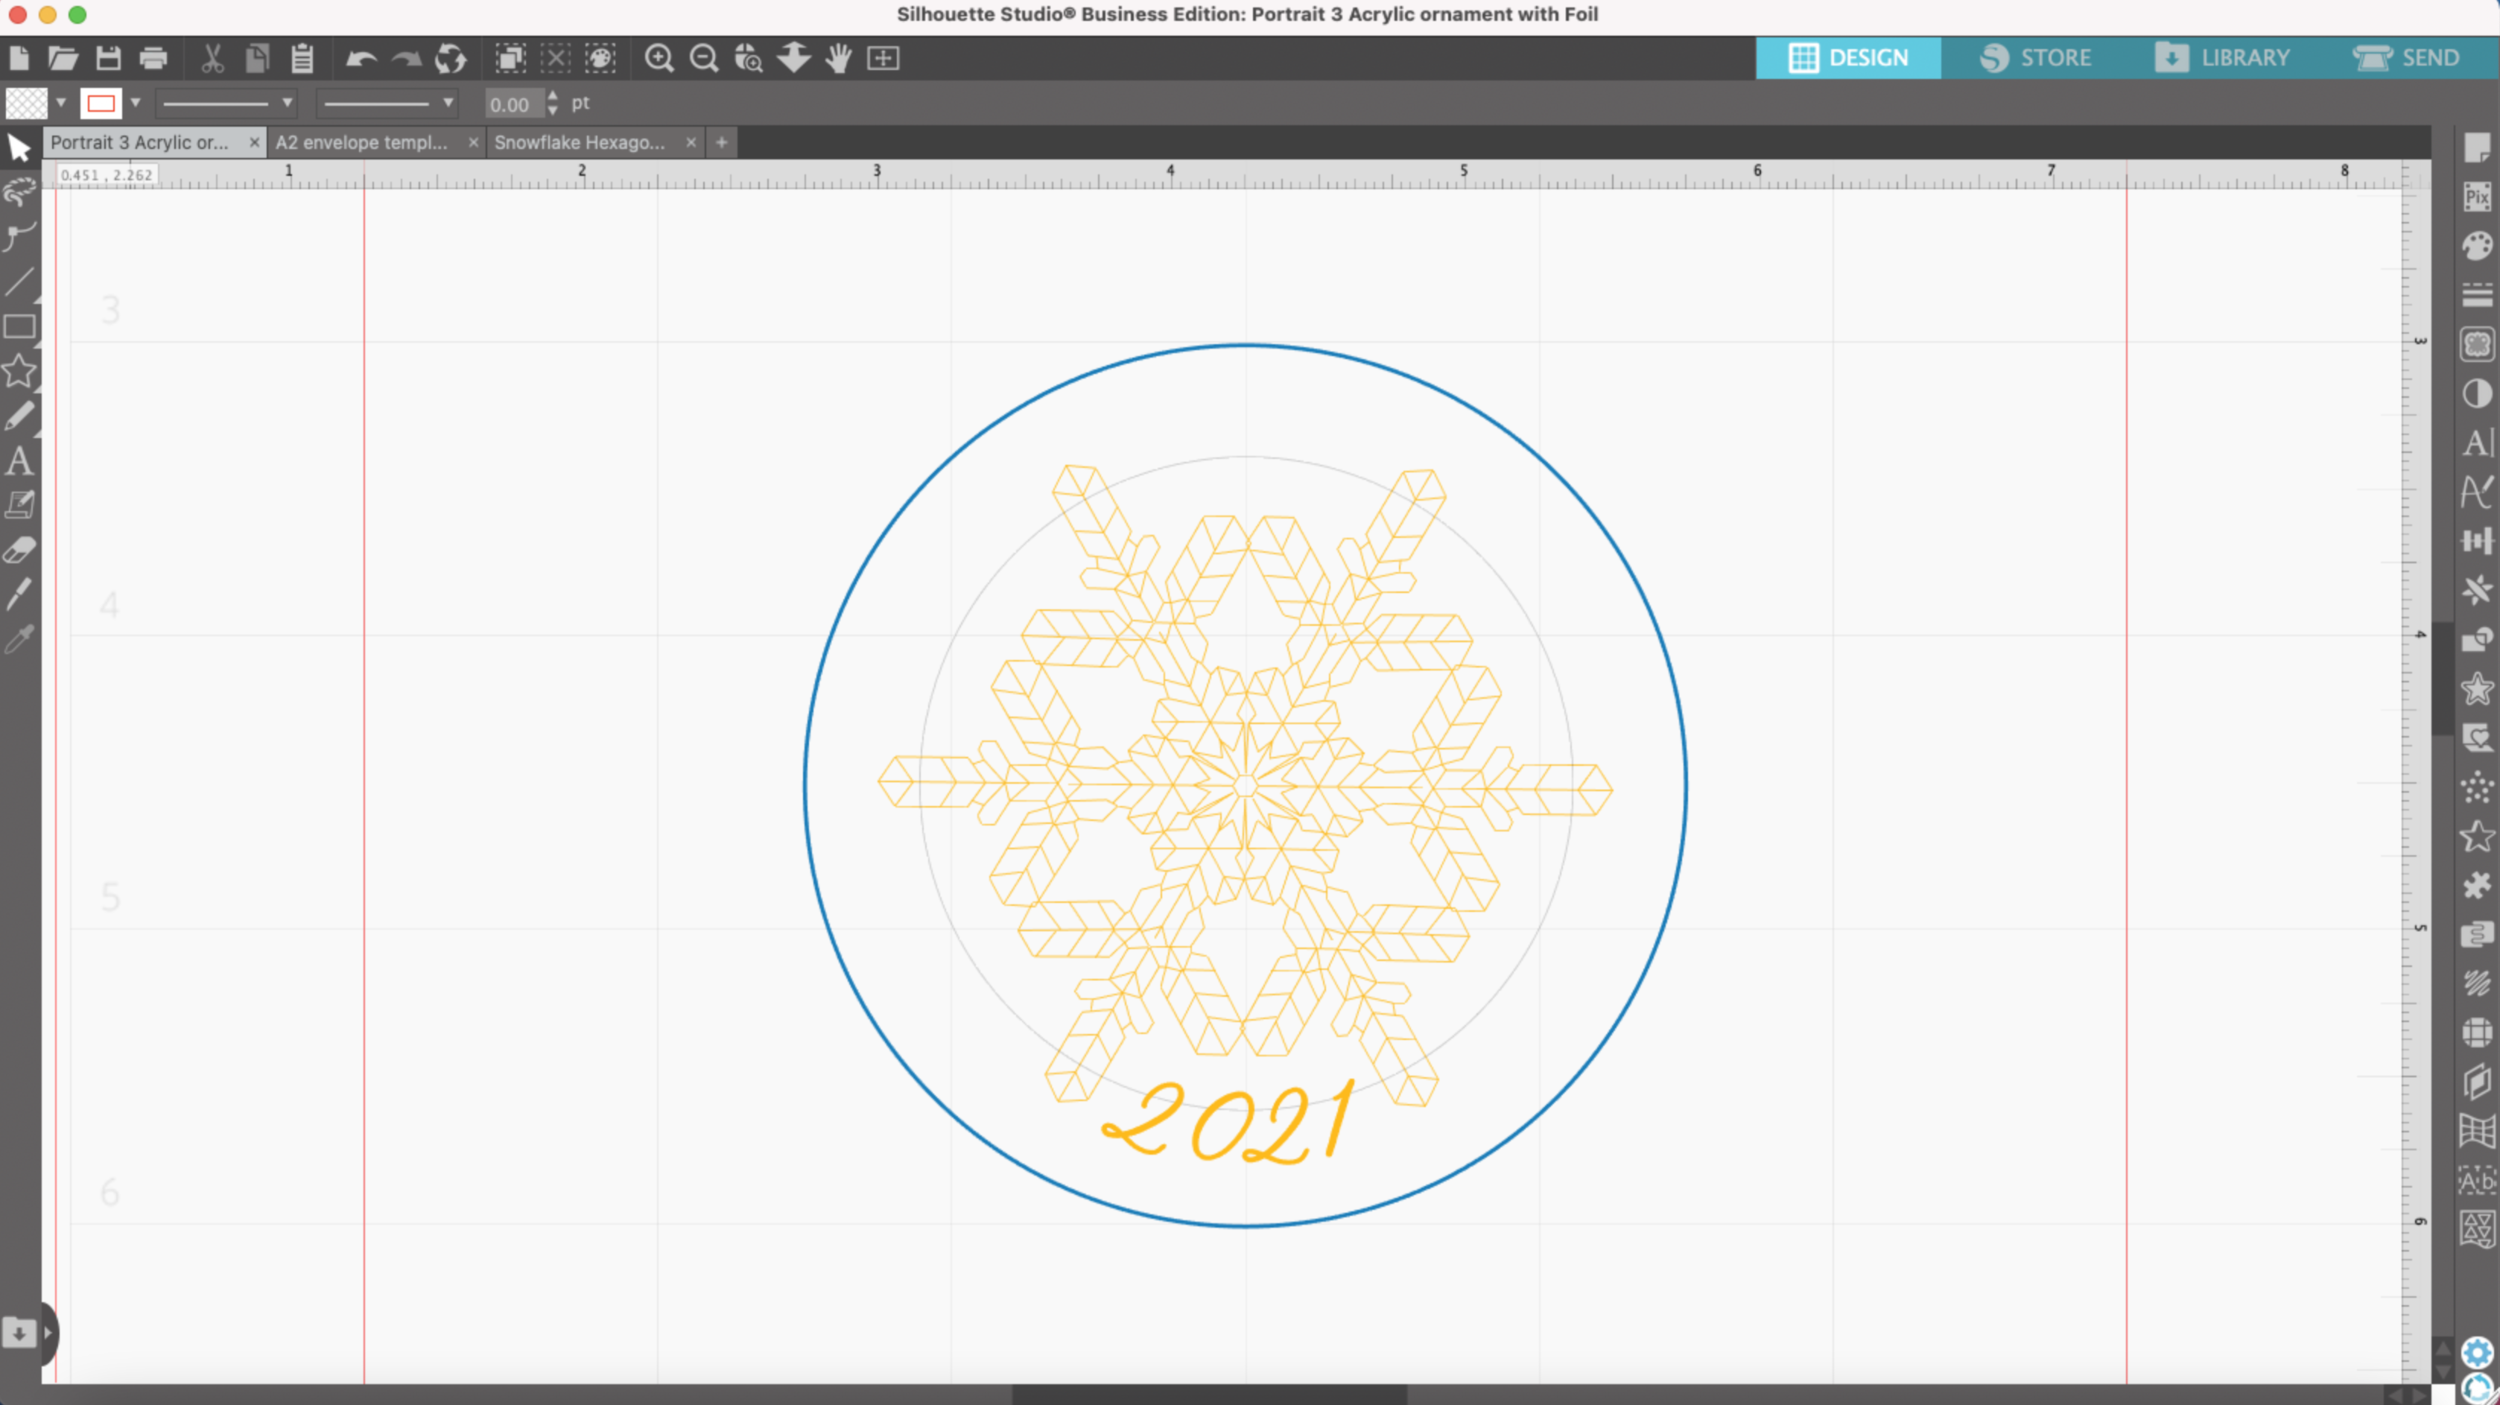
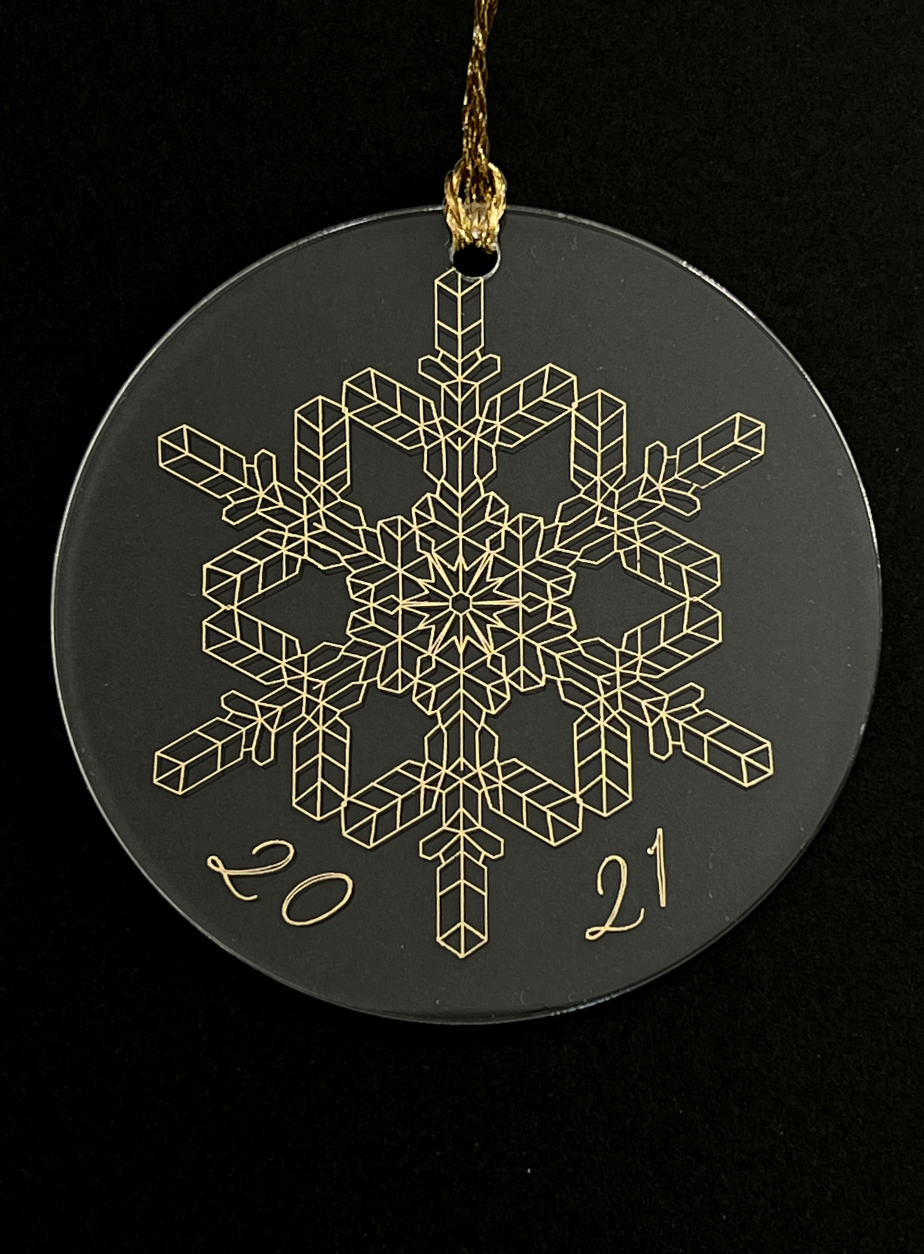
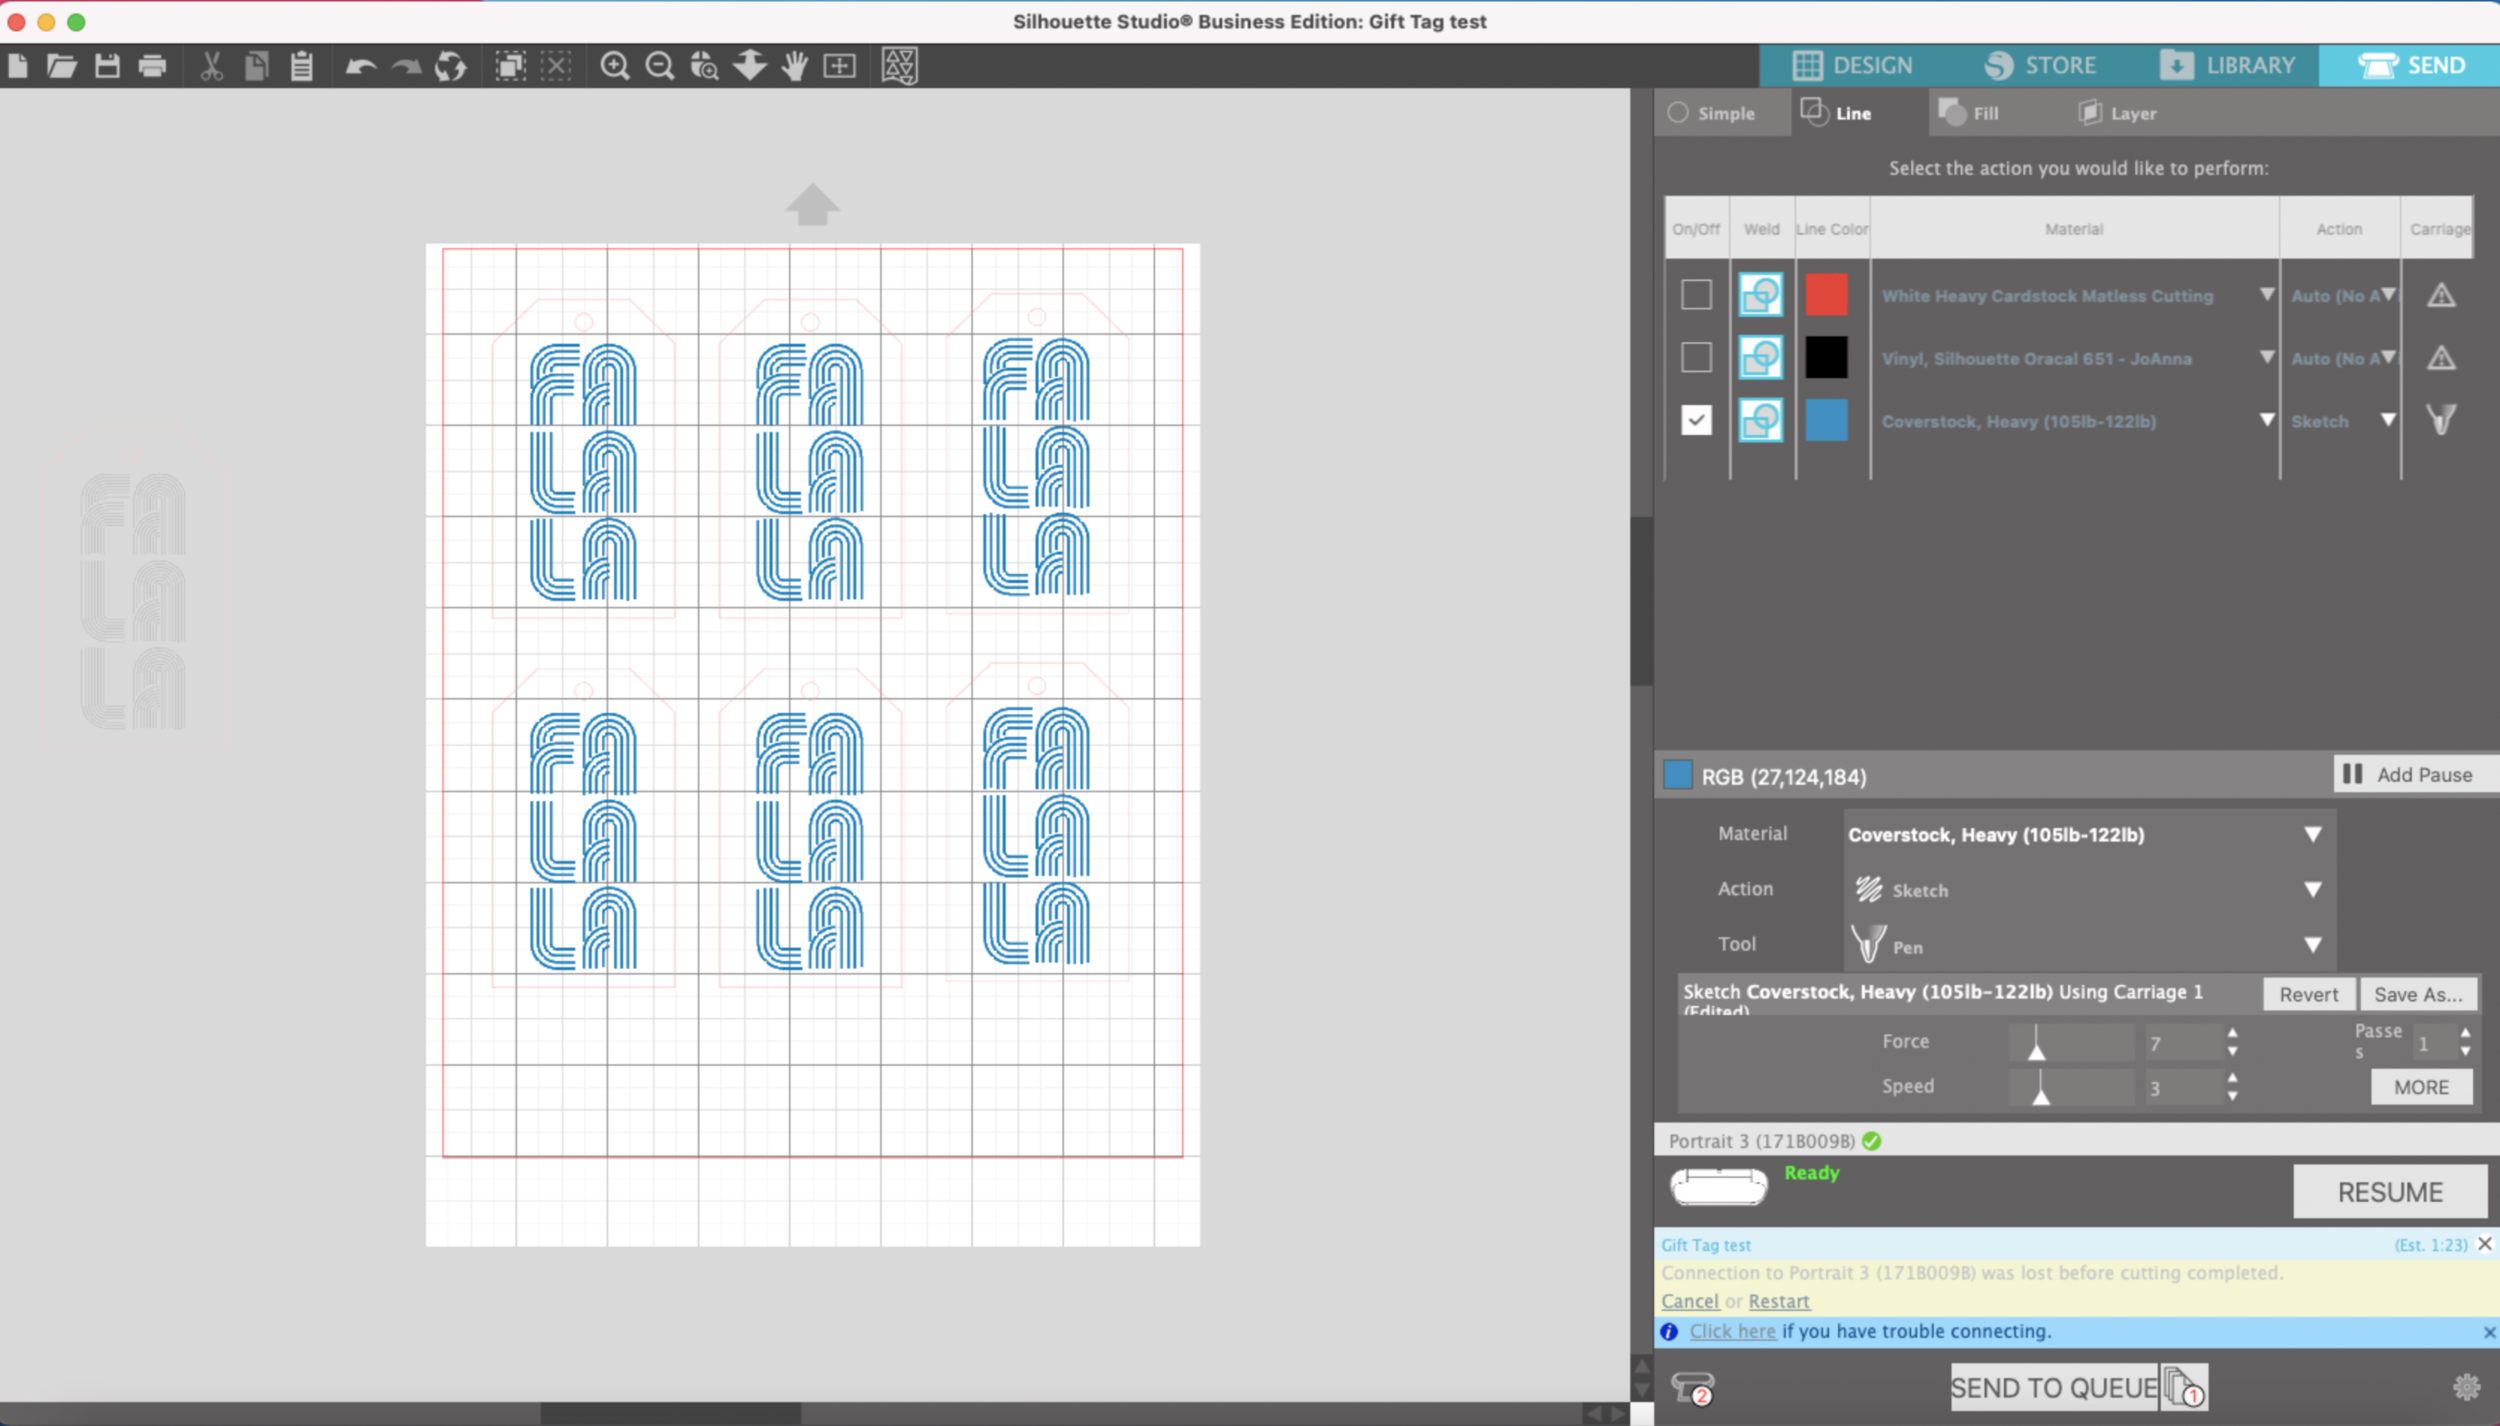
I’m using the same 3” round snowflake design that I used last week. However, I did need to make some minor tweaks to the layout of this design. I rotated the snowflake 45 degrees so it’s not so close to the hole in the top of the acrylic. During my first attempt, the tip of the etch quill got stuck in the hole and it couldn’t move around to make the design properly. So lesson learned!

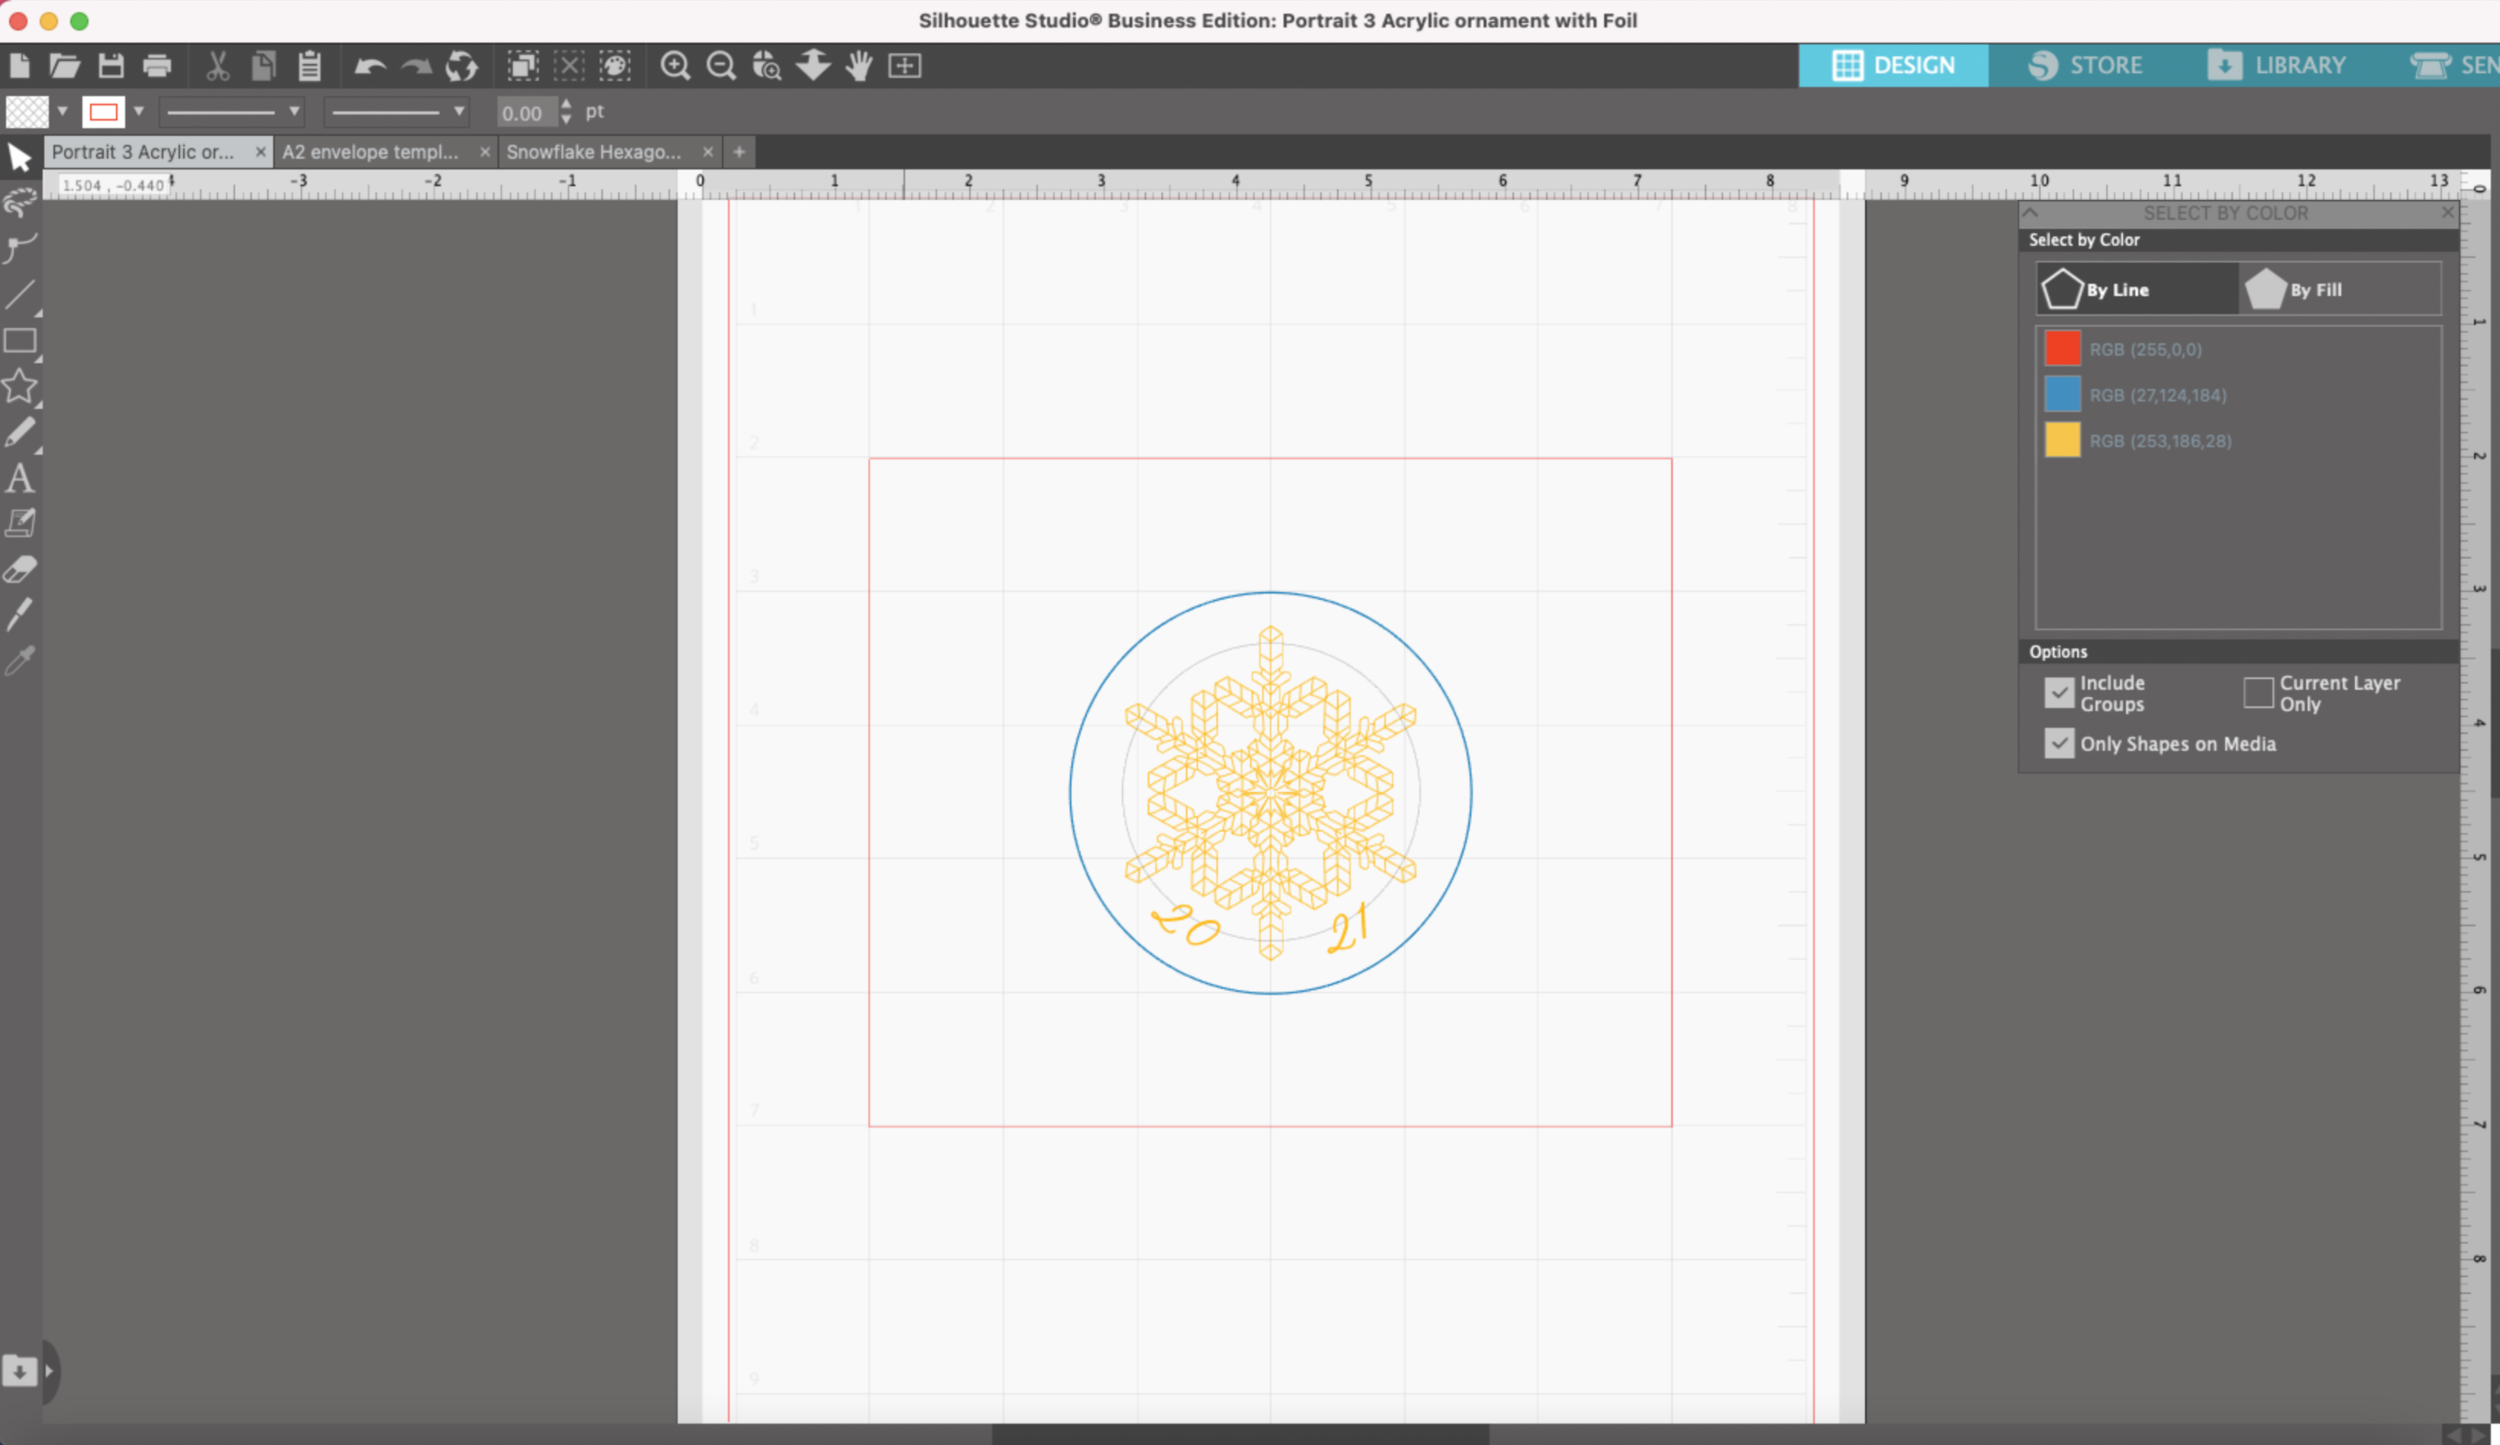
I already have the updated design saved in Silhouette Studio.

Snowflake artwork to etch on Portrait 3

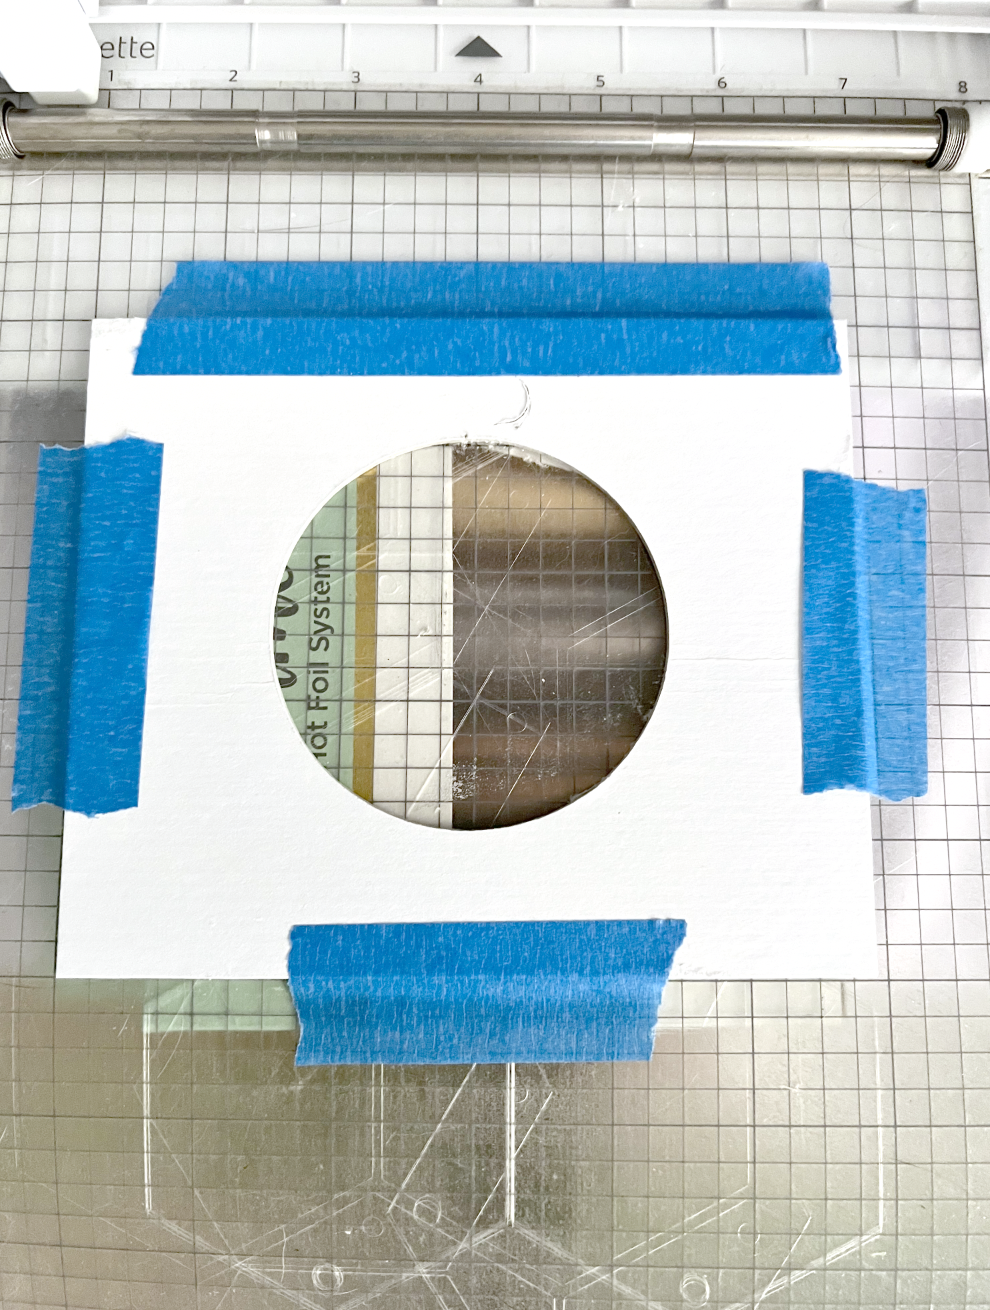
I’ve got my chipboard template already set up on my mat (I will create another post showing you how to line up your template on your mat so you can use it over and over again even after you have removed it from your mat).

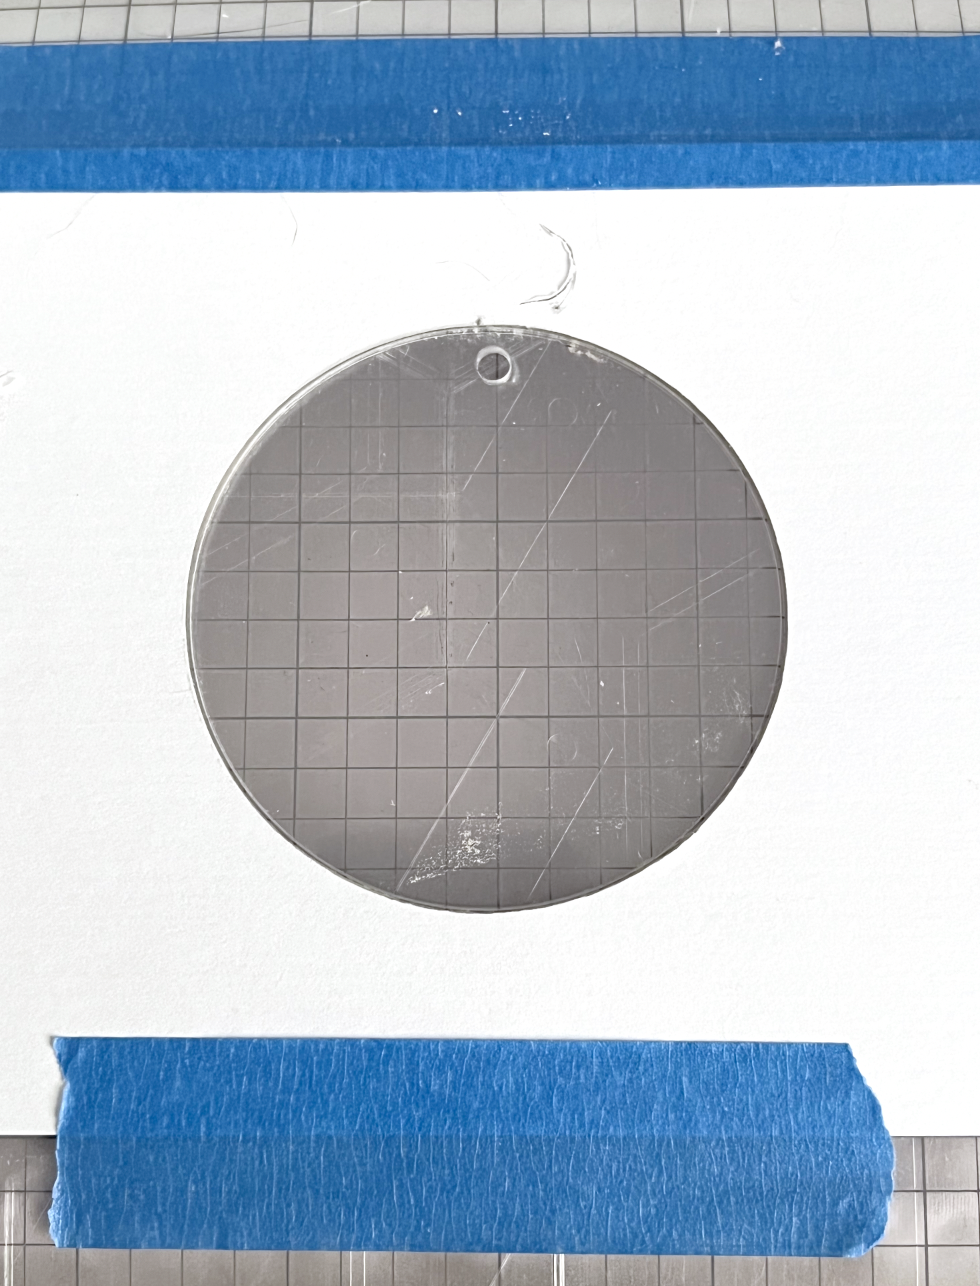
Template for acrylic blank

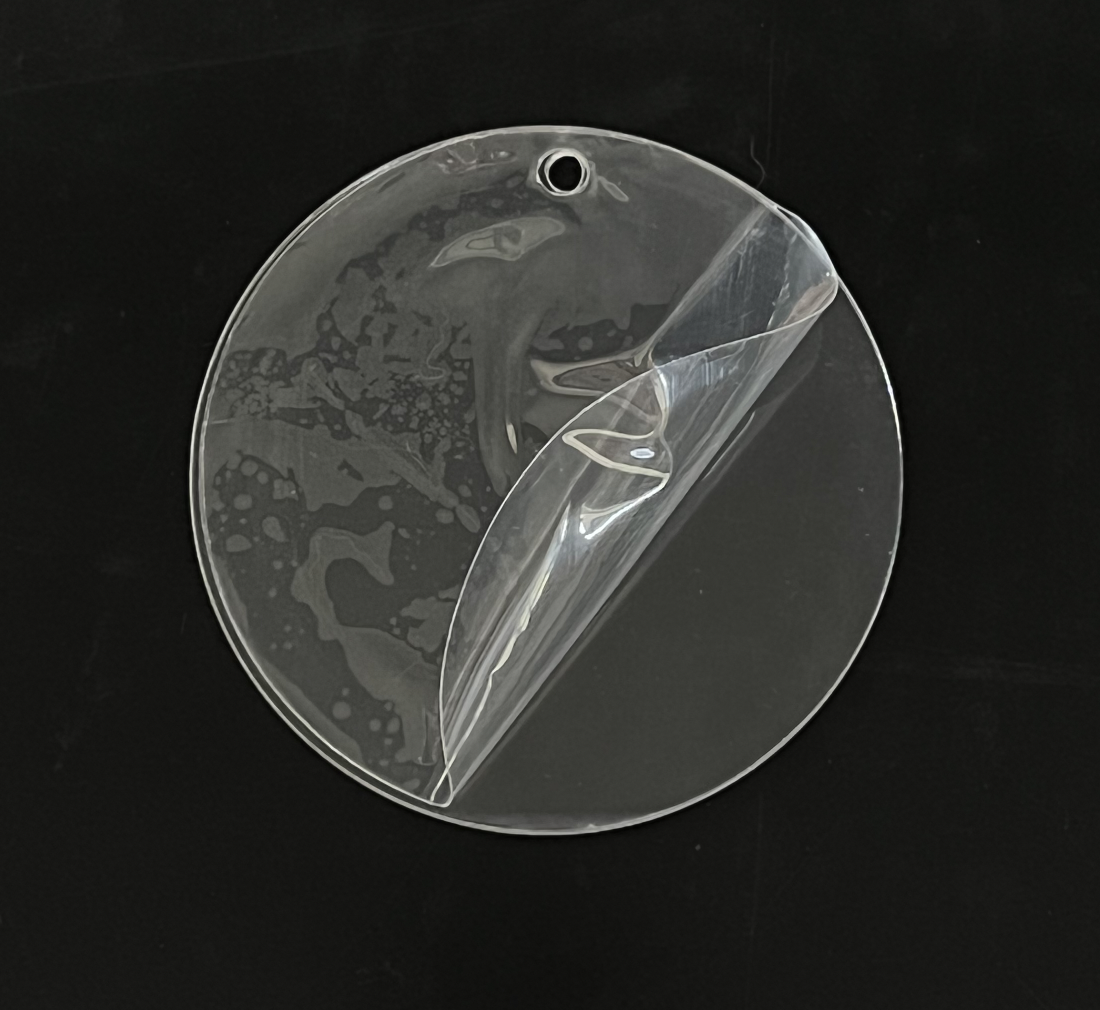
Peel off the layer of plastic on the side of the acrylic that you will be etching on. Leave the plastic on the back side of the acrylic to protect the acrylic from the stickiness of the cutting mat. You will peel the plastic from the back once the design is completed.

Acrylic blank for etching

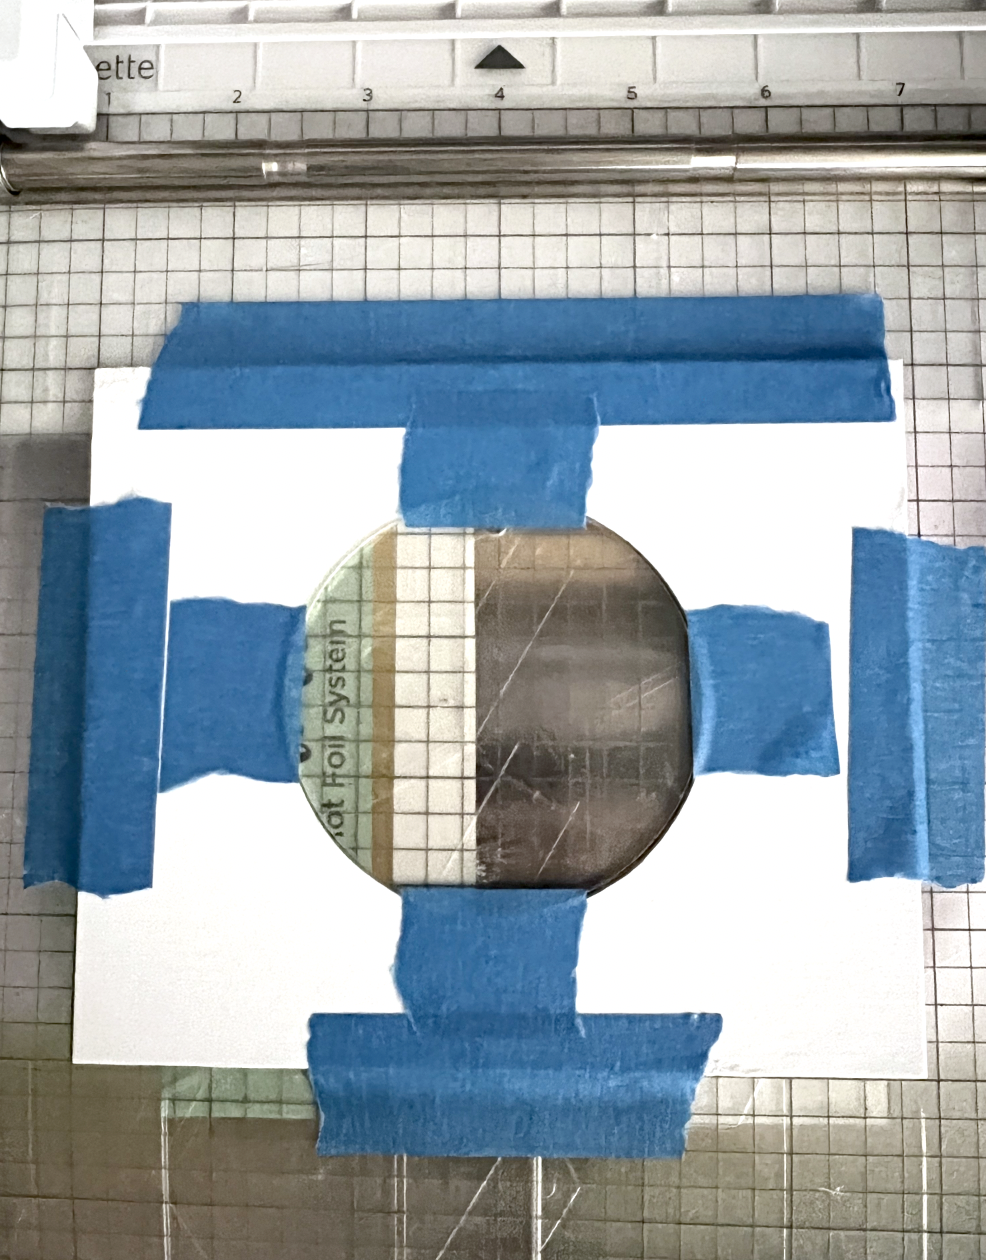
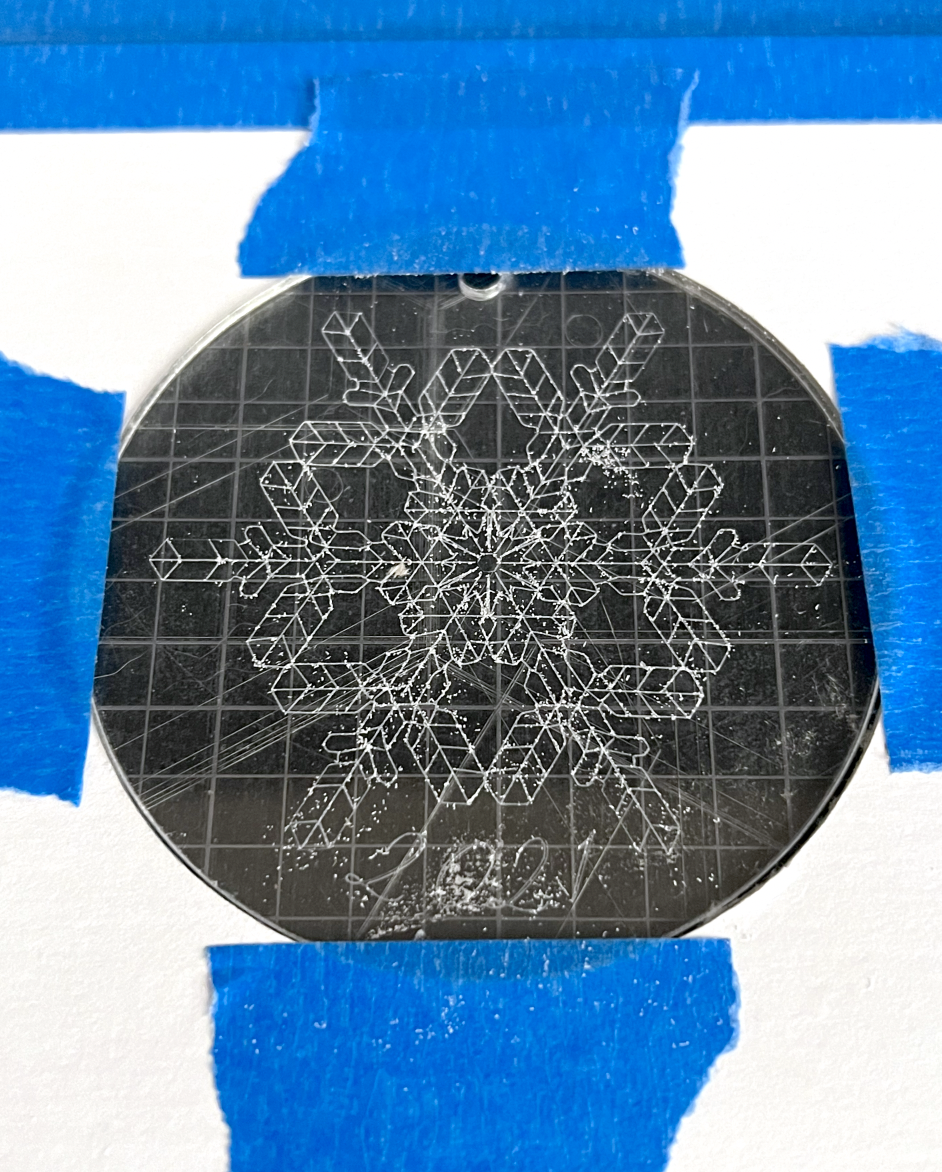
I place my acrylic disc in the hole cut out on my template with the small hole at the very top. I also put some small pieces of tape on the edges of the acrylic to make sure it doesn’t shift around while it’s being etched. Make sure the tape doesn’t overlap any part of your design.

Silhouette Portrait 3 etching on acrylic

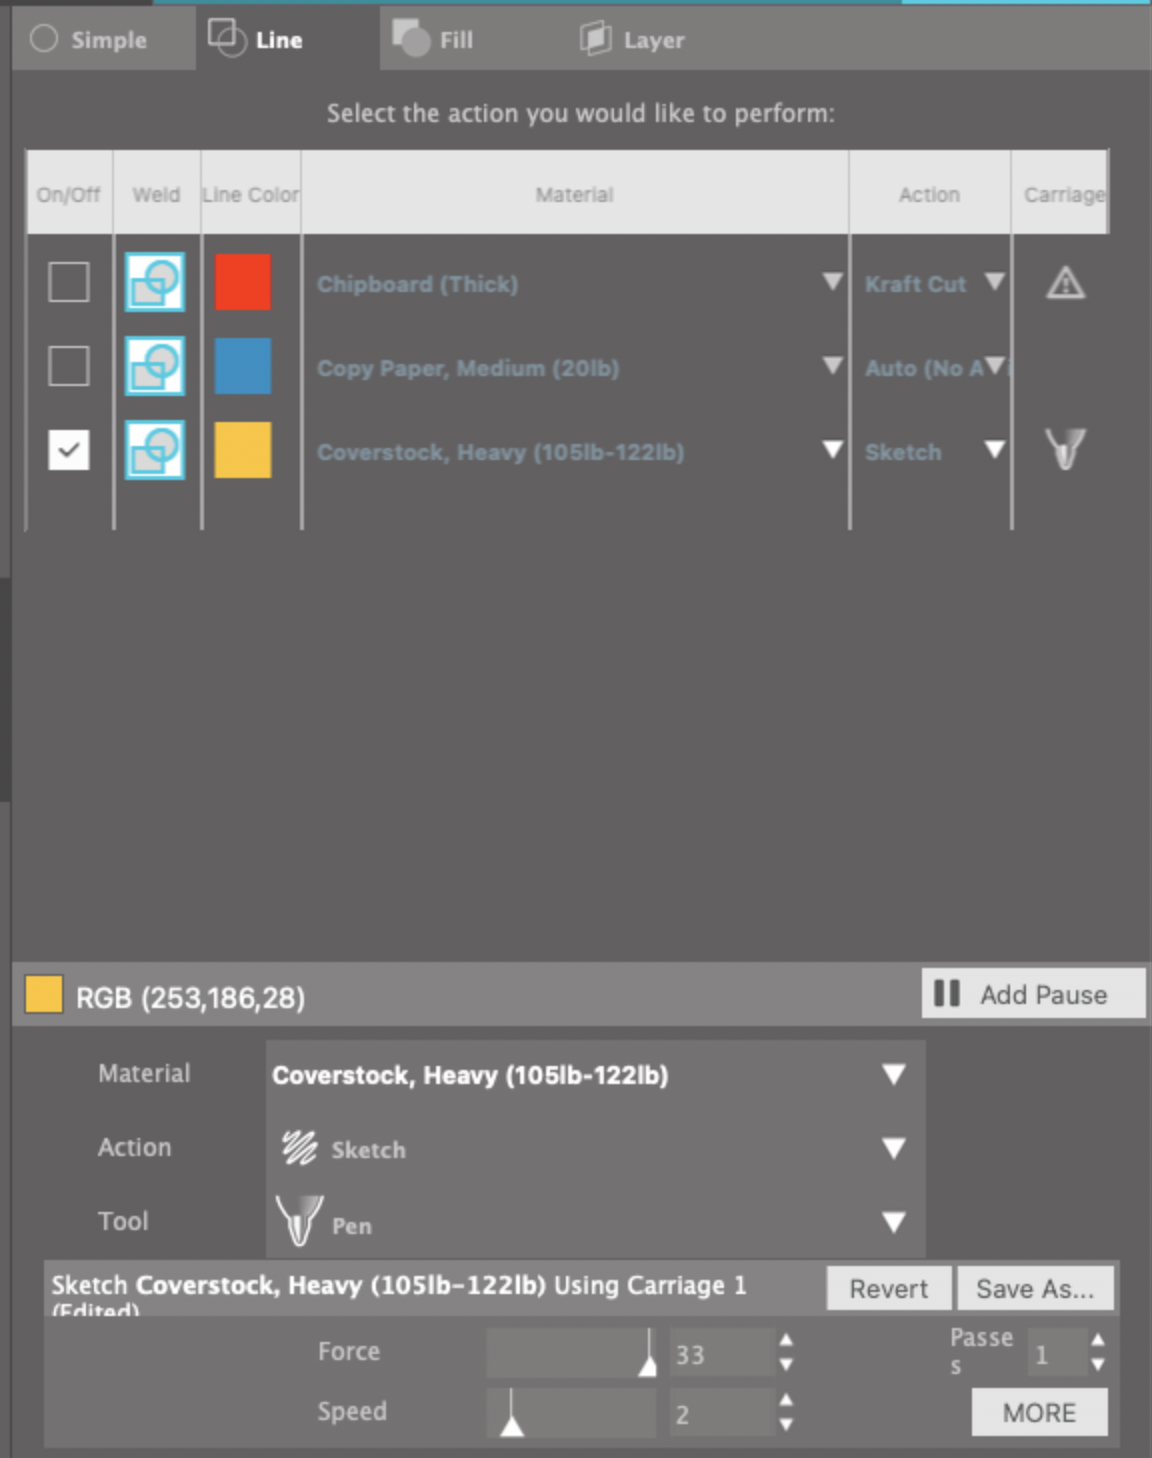
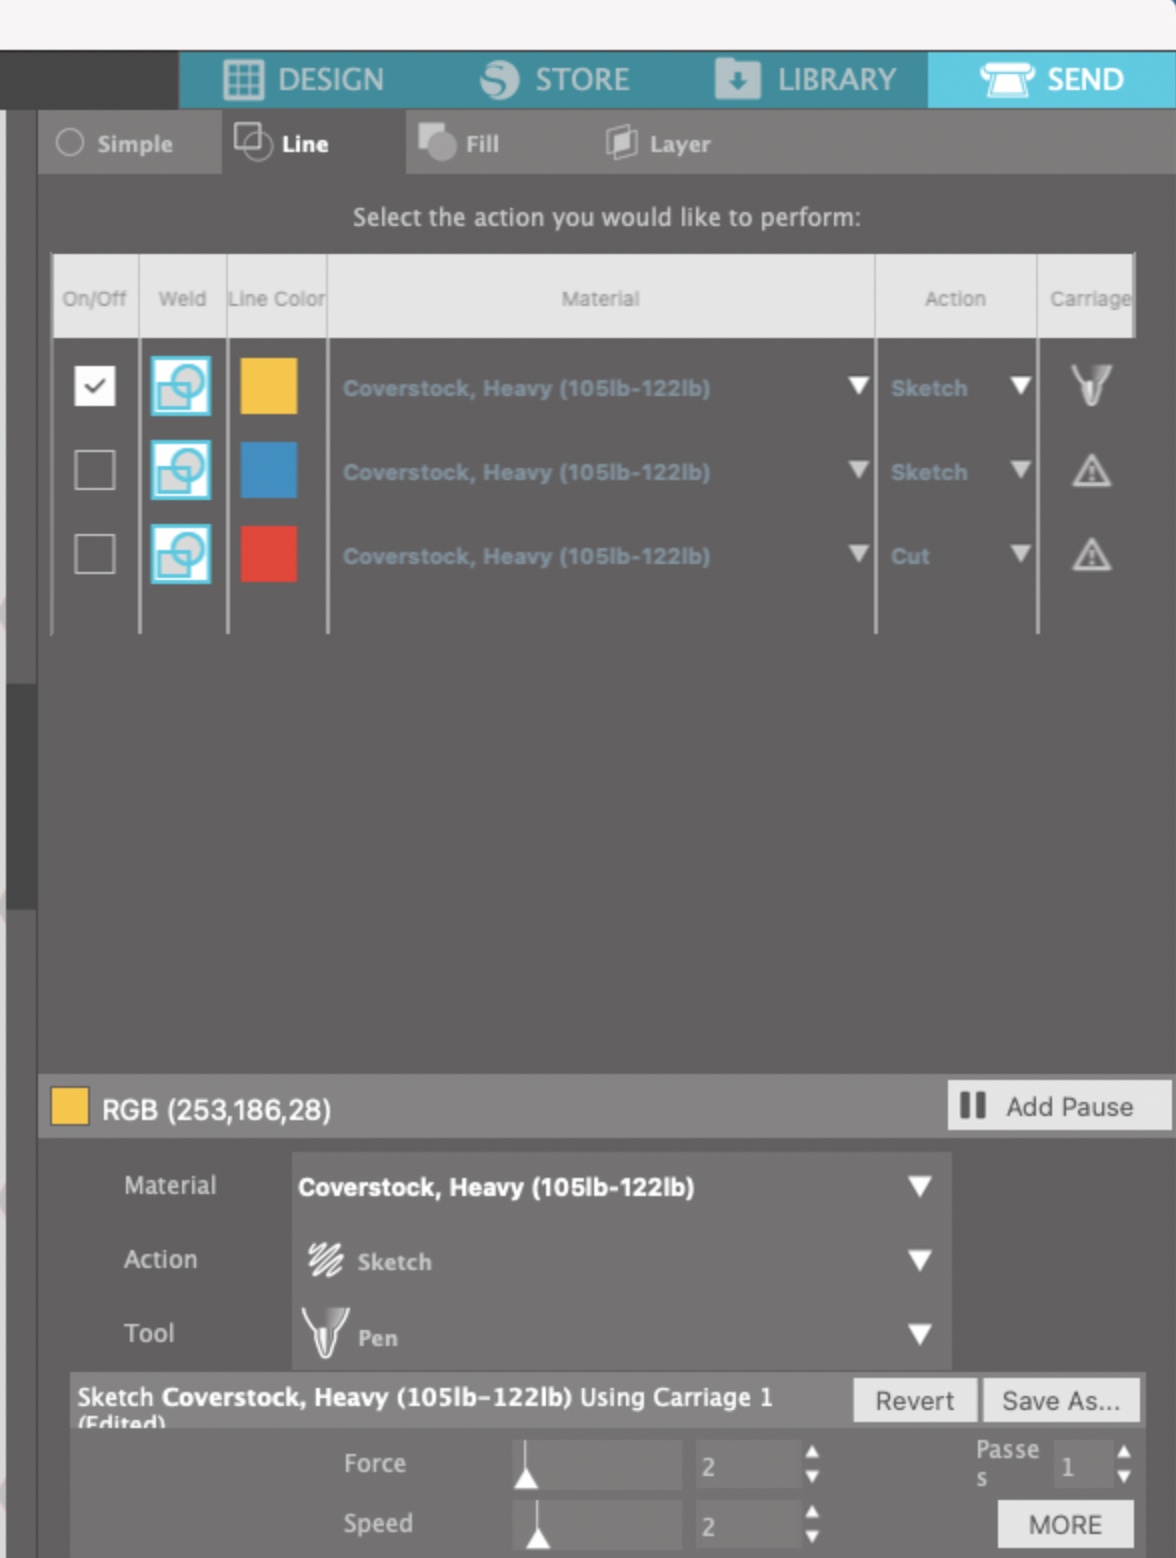
I select the yellow lines in the send tab. I have my material set for Heavy Coverstock, Action is Sketch, Force 33, Speed 2.

Settings for etching on acrylic

I click send and my little machine does it’s magic! I ended up doing 3 passes for this design. Depending on your design, you may need to do more or less passes to get the etching deep enough that it’s visible.

Silhouette Portrait 3 etching on acrylic

I use some tape to lift off the little acrylic dust bits before I remove the disc from my mat.

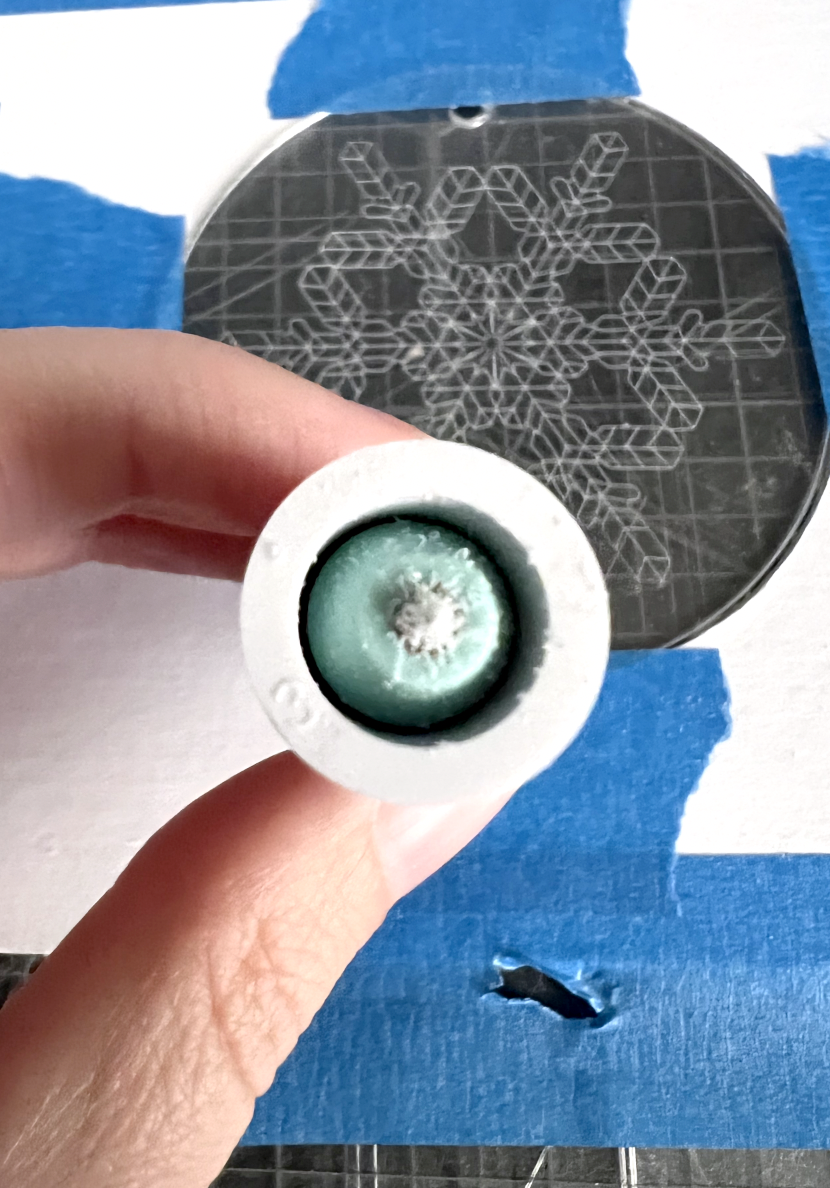
If you are doing a lot of etching, make sure you remove the tip every now and then to clean off the acrylic bits that have built up.

Silhouette Portrait 3 etching on acrylic

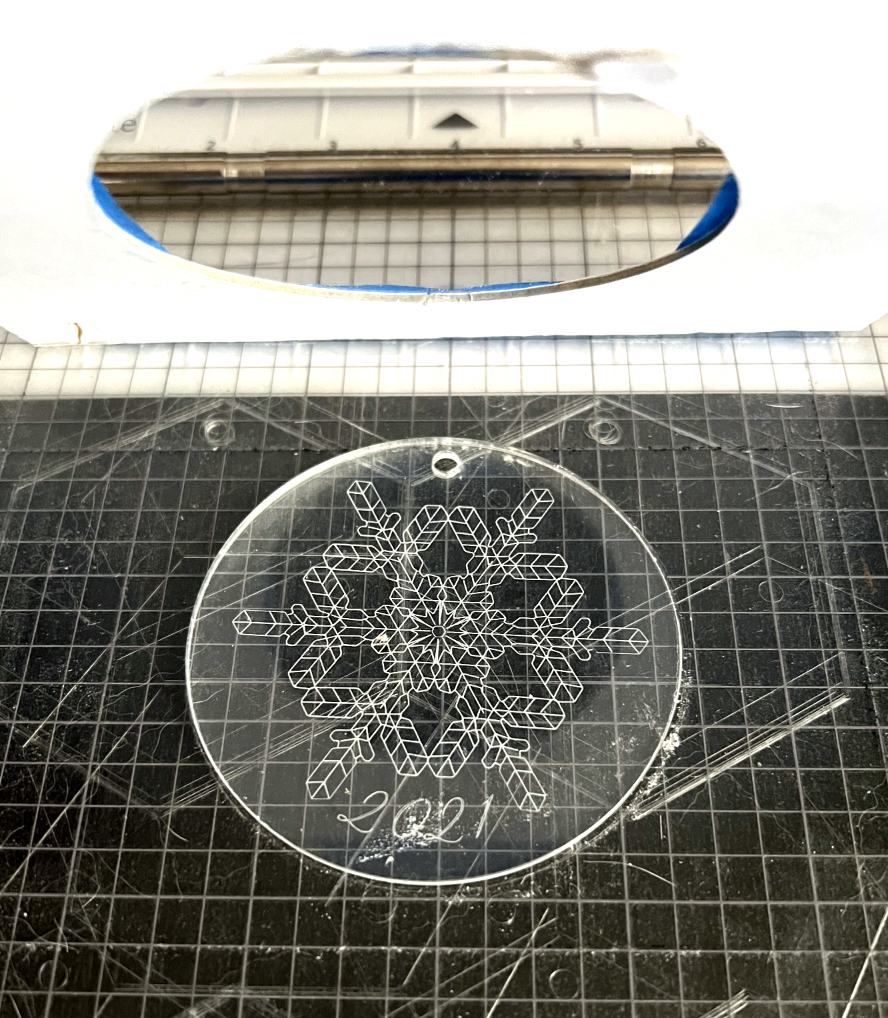
If you leave your mat in the machine, you can do this design again on another blank disc. To remove my ornament I just lift up the template, keeping it still attached to my mat the the top edge. I lay the template back down on my mat and now I can place another disc inside the template.

Silhouette Portrait 3 etching on acrylic

I remove the plastic from the back of the ornament and then tie my ribbon through the little hole in the top.

It’s definitely more subtle that the foil on the acrylic, but it’s another nice way to create custom holiday ornaments or gift tags.

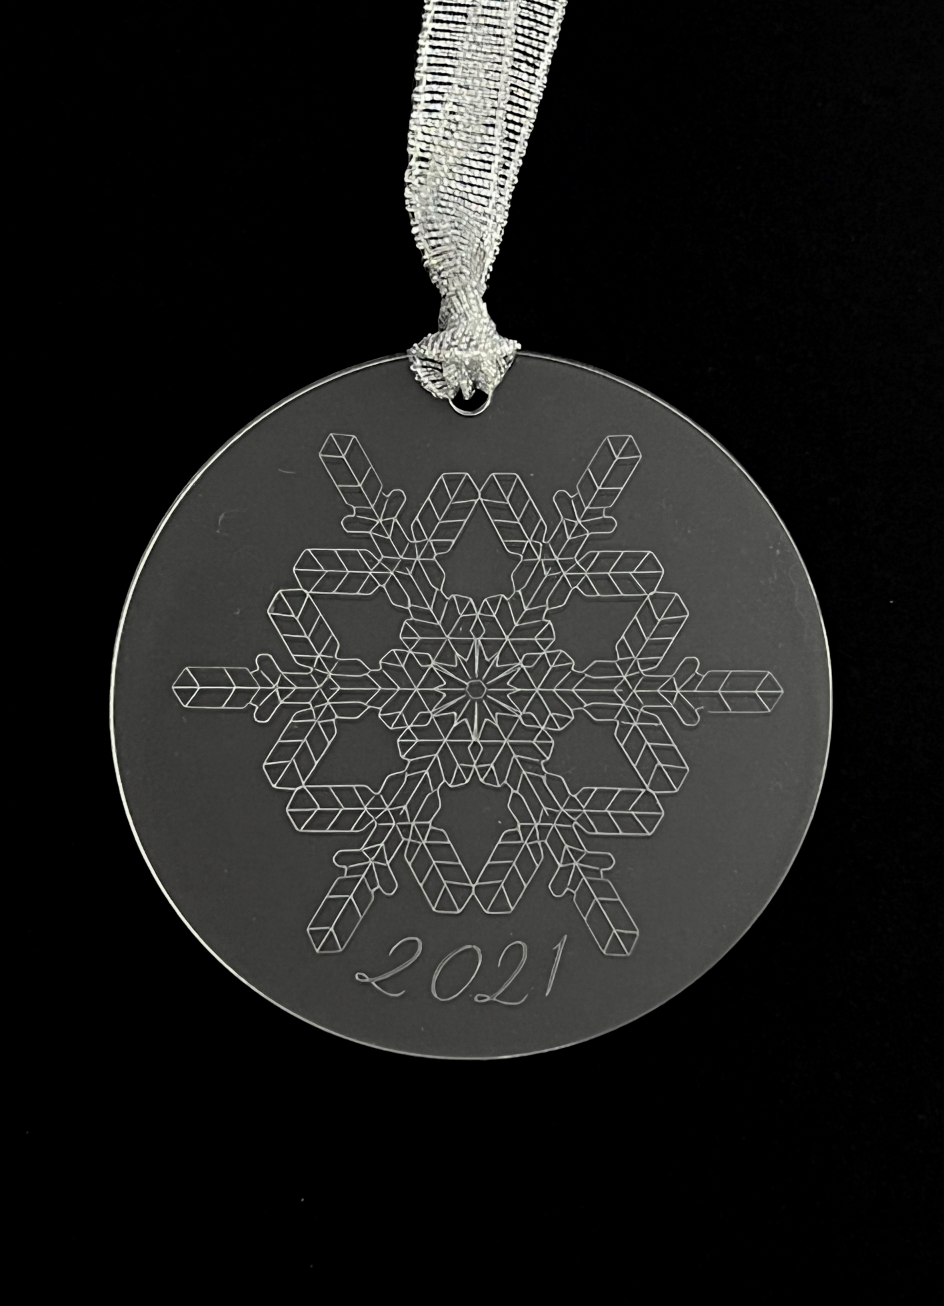
Finished etched acrylic ornament
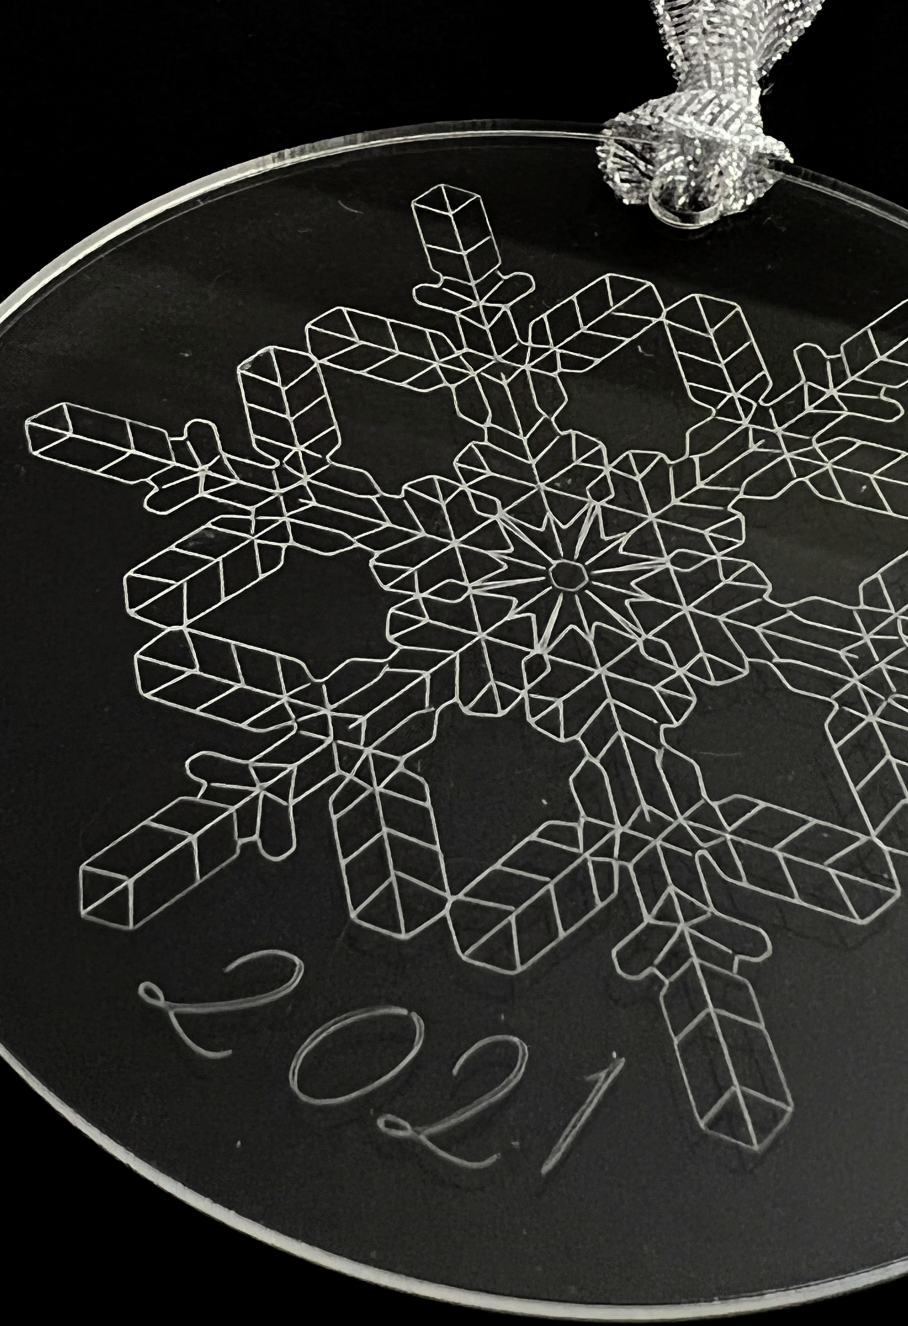
Detail of finished etched acrylic ornament

Foil Quill on Acrylic with the Portrait 3

Hi Everyone!

It’s hard to believe it’s already November! This month I’m going to be focusing on projects for the holidays. Today’s project will be acrylic ornaments decorated by using the WRMK foil quill. Let’s get started!

Supplies:

(Links below may be affiliate links)

Silhouette Portrait 3

Standard Grip Mat

Chipboard with 3” circle cutout (optional)

3 inch round 2mm thick acrylic ornament blanks

Medium Tip Foil Quill

Gold Foil heat reactive foil or any foil color of your choice

9-12 inch length of ribbon or twine


Project:

I created a 3 inch circle in Silhouette Studio and I centered one of the snowflakes from my Snowflake Single Line SVGs

I added 2021 at the bottom using the font La Bohemienne.

Artwork set up in Silhouette Studio

I am going to send this to my machine by line color. Everything in Yellow will foiled.

My acrylic blanks are already cut into 3 inch circles, so I won’t need to actually cut them.

I already had a piece of chip board with a 3 inch circle cut out so I will be using that to help align my acrylic pieces on the cutting mat. I have it placed pretty far down on my mat so I can easily remove the foil and the ornament without removing the mat from the machine. (I will create a post later showing you how to make a chip board pattern and how to realign it to use it if over and over again.)

Mat prep for foil quill on acrylic

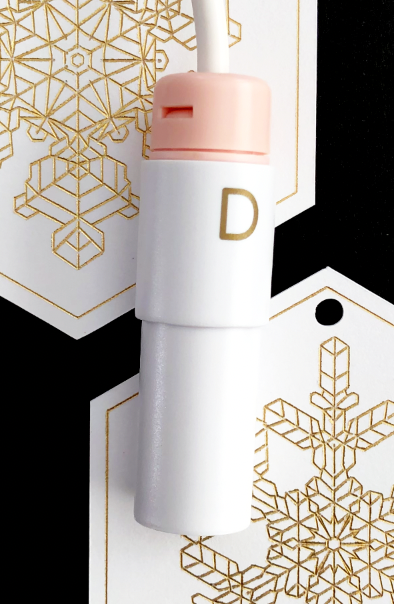
Plug in your Medium Foil Quill tip so it has time to heat up. I’m using the D adapter that came with the foil quill.

Medium tip foil quill using D adapter

Remove only one side of the clear plastic coating from the acrylic blank - this is the side you will have face up to foil on.

Remove plastic coating from acrylic blank

Place the acrylic blank inside the circle in the chipboard with the side that still has the plastic coating is face down against the mat.

Acrylic blank inside chipboard template

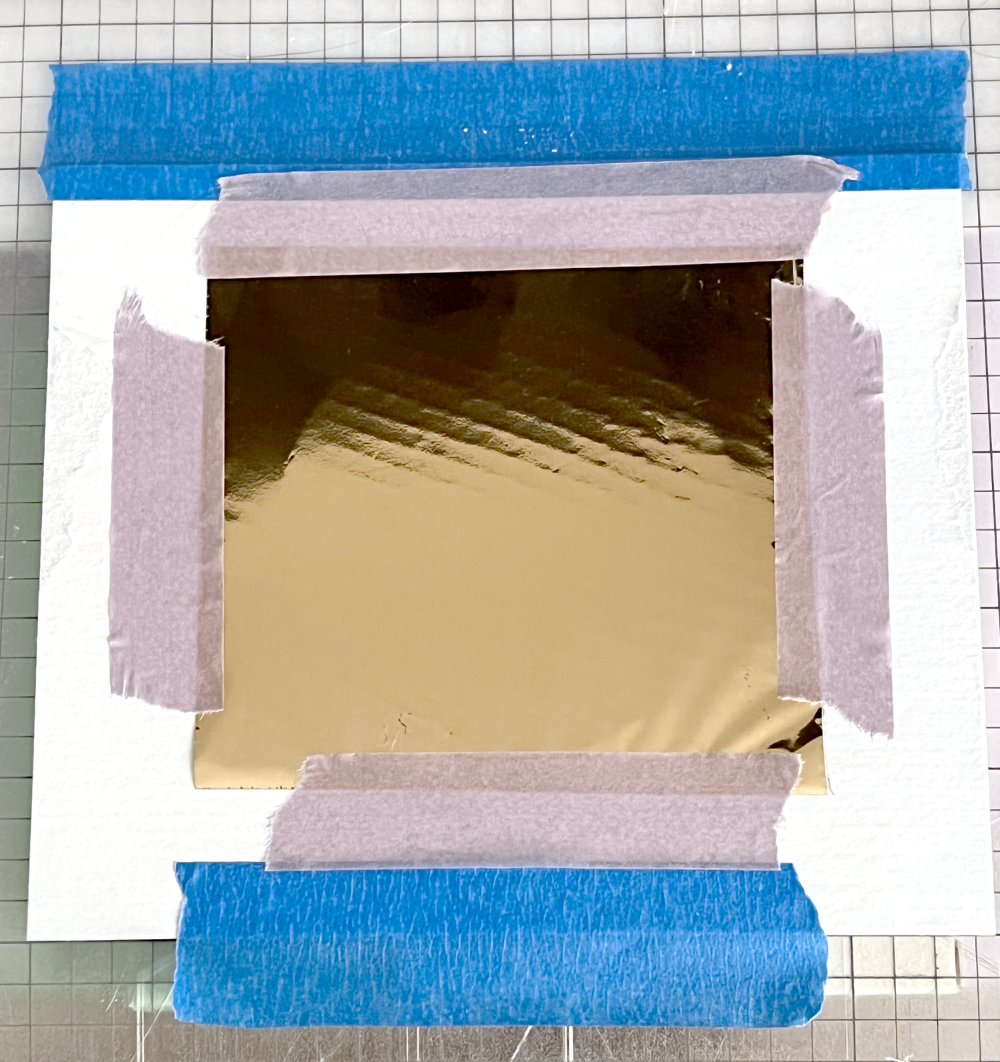
Tape down your foil over the acrylic round, make sure it’s nice and tight. My foil piece is about 4 inches x 4 inches

Tape foil over acrylic blank

In Silhouette Studio, I have just the Yellow line selected. For my material I chose Craft Foam since that’s a thicker material. My Action is Sketch, Tool is Pen, Force of 5, speed 2.

machine settings for foil on acrylic

I load my mat and press send.

After the machine is done, if you plan to make multiples, DO NOT unload the mat.

Carefully remove the foil and ornament from the mat, without taking the mat out of the machine.

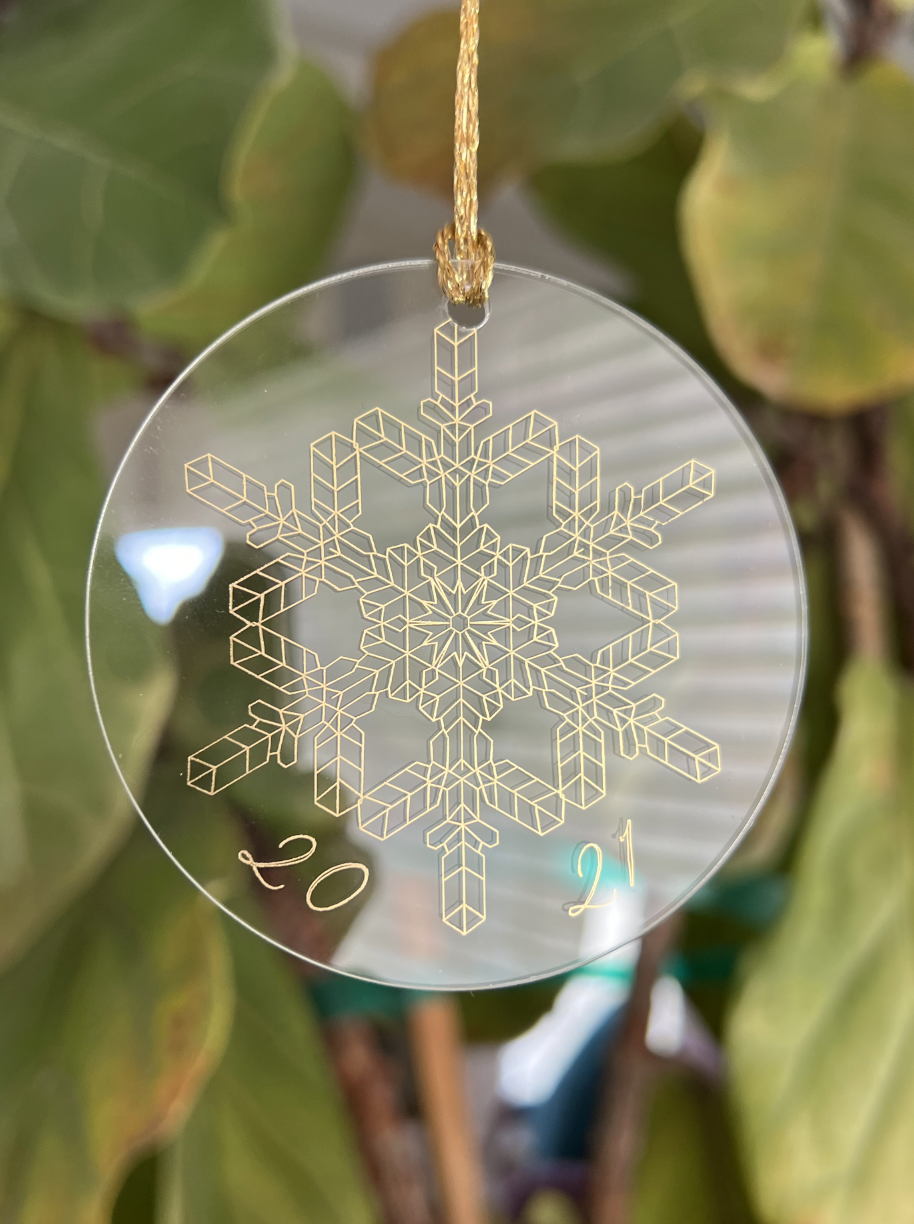
I put a piece of metallic twine through the top hole and now you have pretty ornament to give as a gift or use it to jazz up your gift wrapping!

Finished ornament with gold foil on acrylic

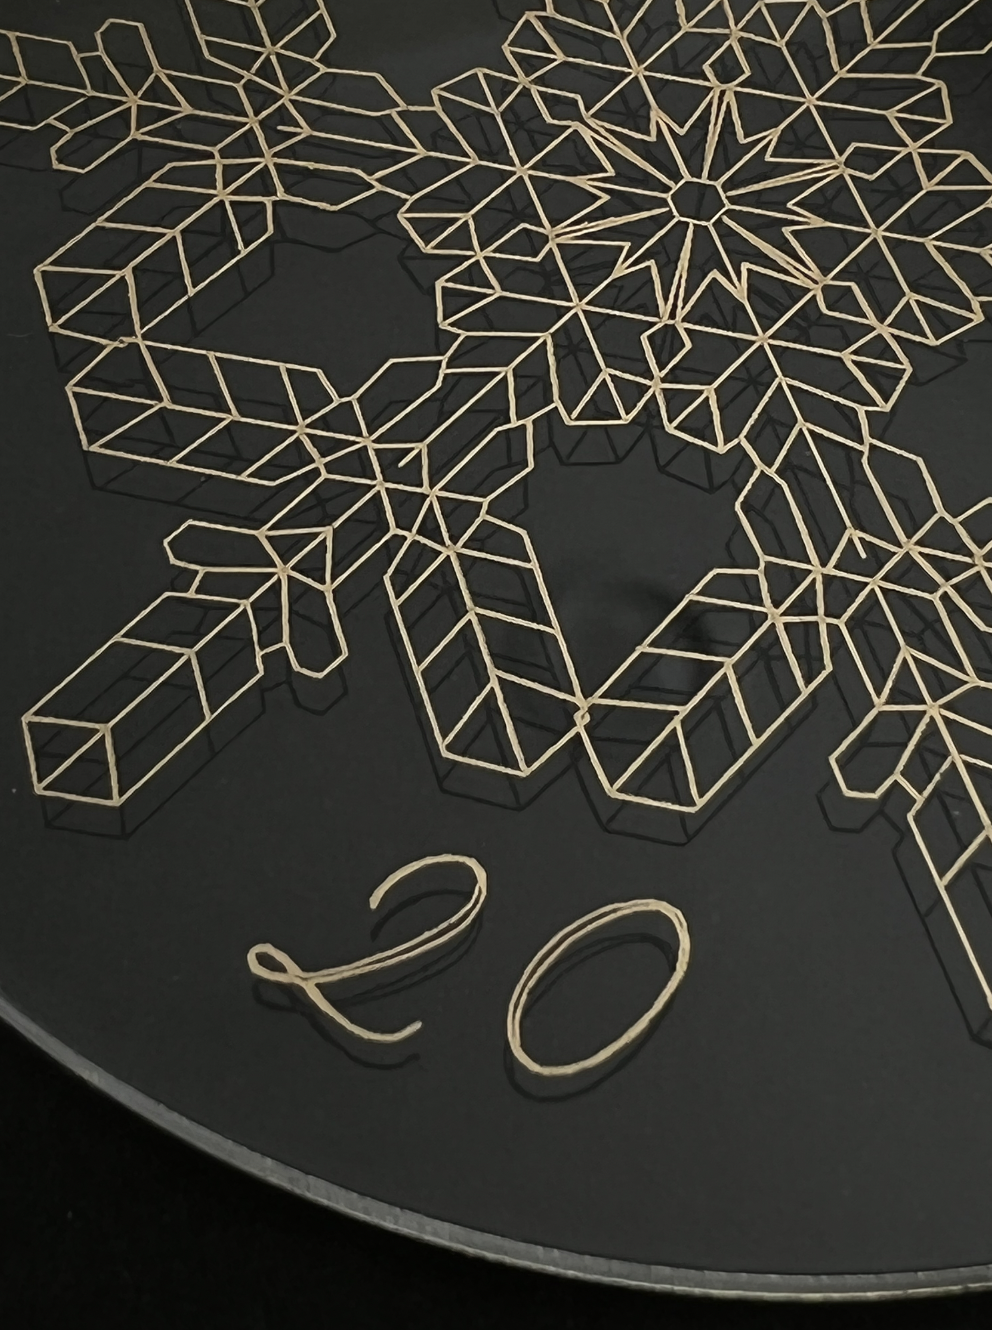
The metallic foil sticks really well to the acrylic, the heat from the foil quill kind of melts it into the ornament. It’s so pretty, I can’t wait to try this out with different artwork on different foil colors!

Detail of gold foil on acrylic
Finished ornament gold foil on clear acrylic

Scoring with the Portrait 3 Using the Cricut Scoring Stylus

Hi Everyone!

This year I bought a Silhouette Portrait 3 machine because I wanted something smaller than my Cricut Maker that I could easily set up for quick little projects. I was also going to have to buy new mats, blades, etc anyway if I had purchased a Joy. So I decided on the Portrait 3 because it’s capable of doing so much more than the Cricut Joy.

So far, the only thing I haven’t really liked about my Portrait 3 is the scoring capability. As I mentioned in last week’s post, I don’t really like the dashed score lines or the shallow cut it uses for a solid score line.

This week I’m trying out my Cricut scoring stylus with my Portrait 3.

One of the things I really like about Silhouette is all of the adapters you can use with with their machines so you can use a variety of different brands of tools.

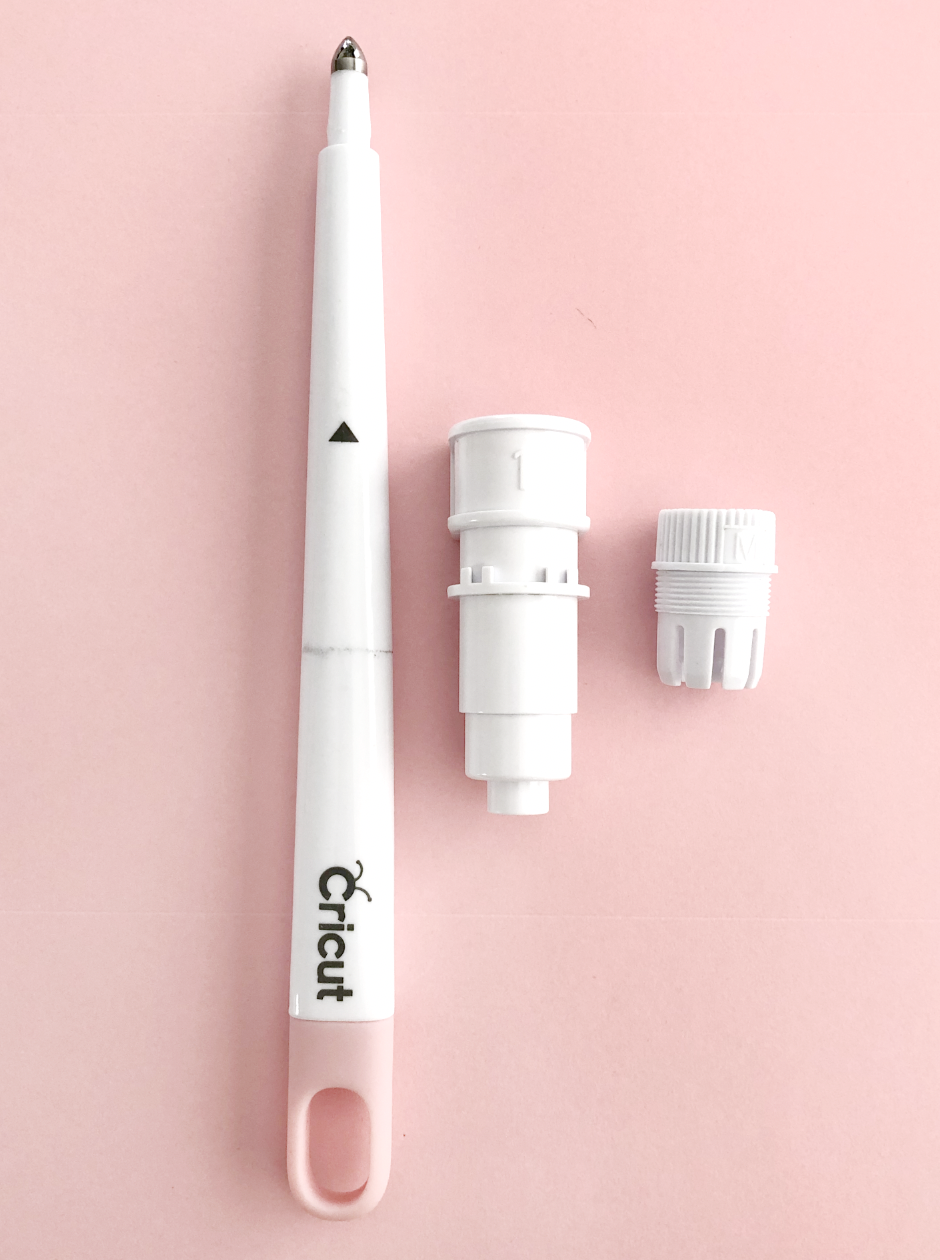
I’m using the Silhouette pen adapter that goes with my machine (it’s the same one that’s for the Cameo 4) and the M ring that screws into it.

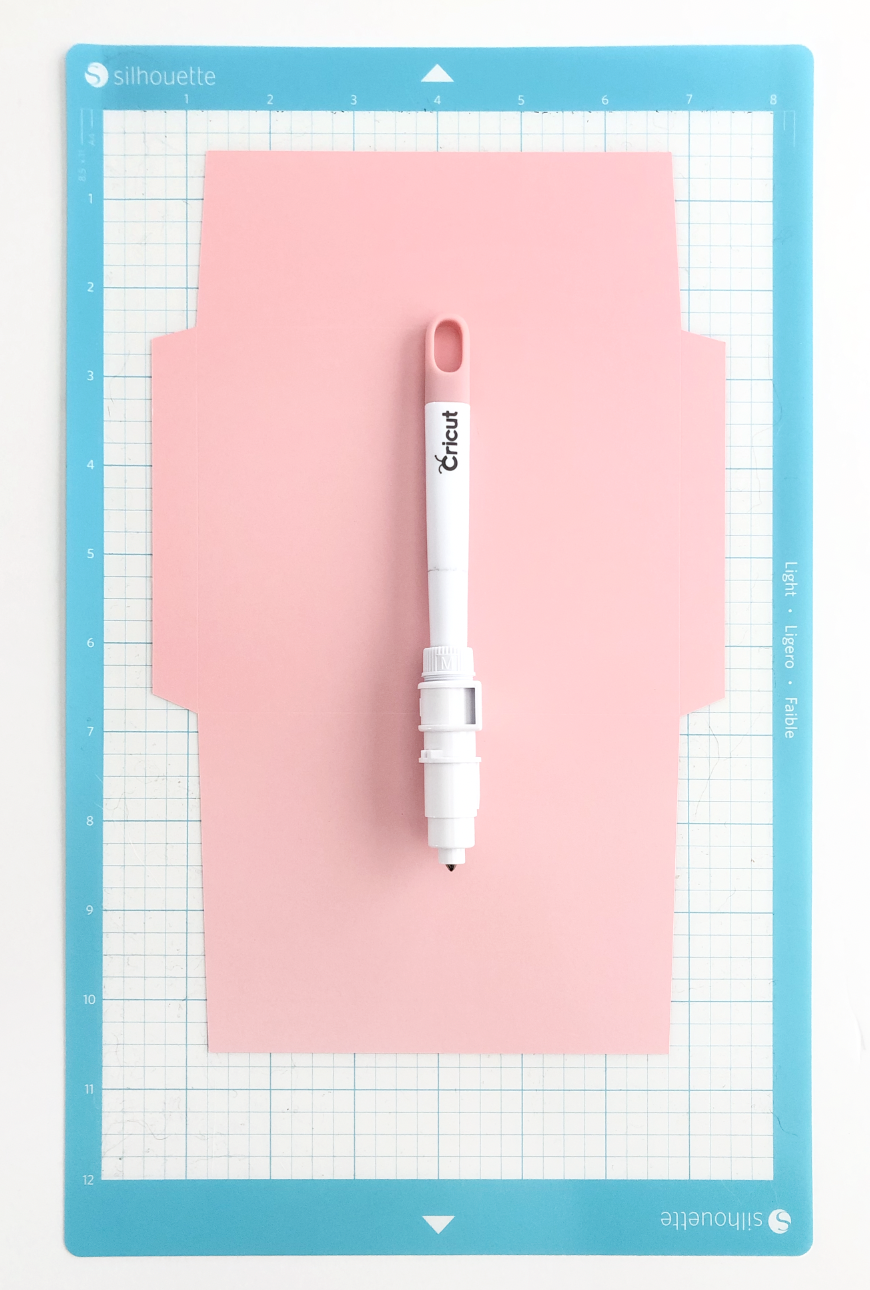
Cricut Scoring Stylus and Portrait 3 pen adapter

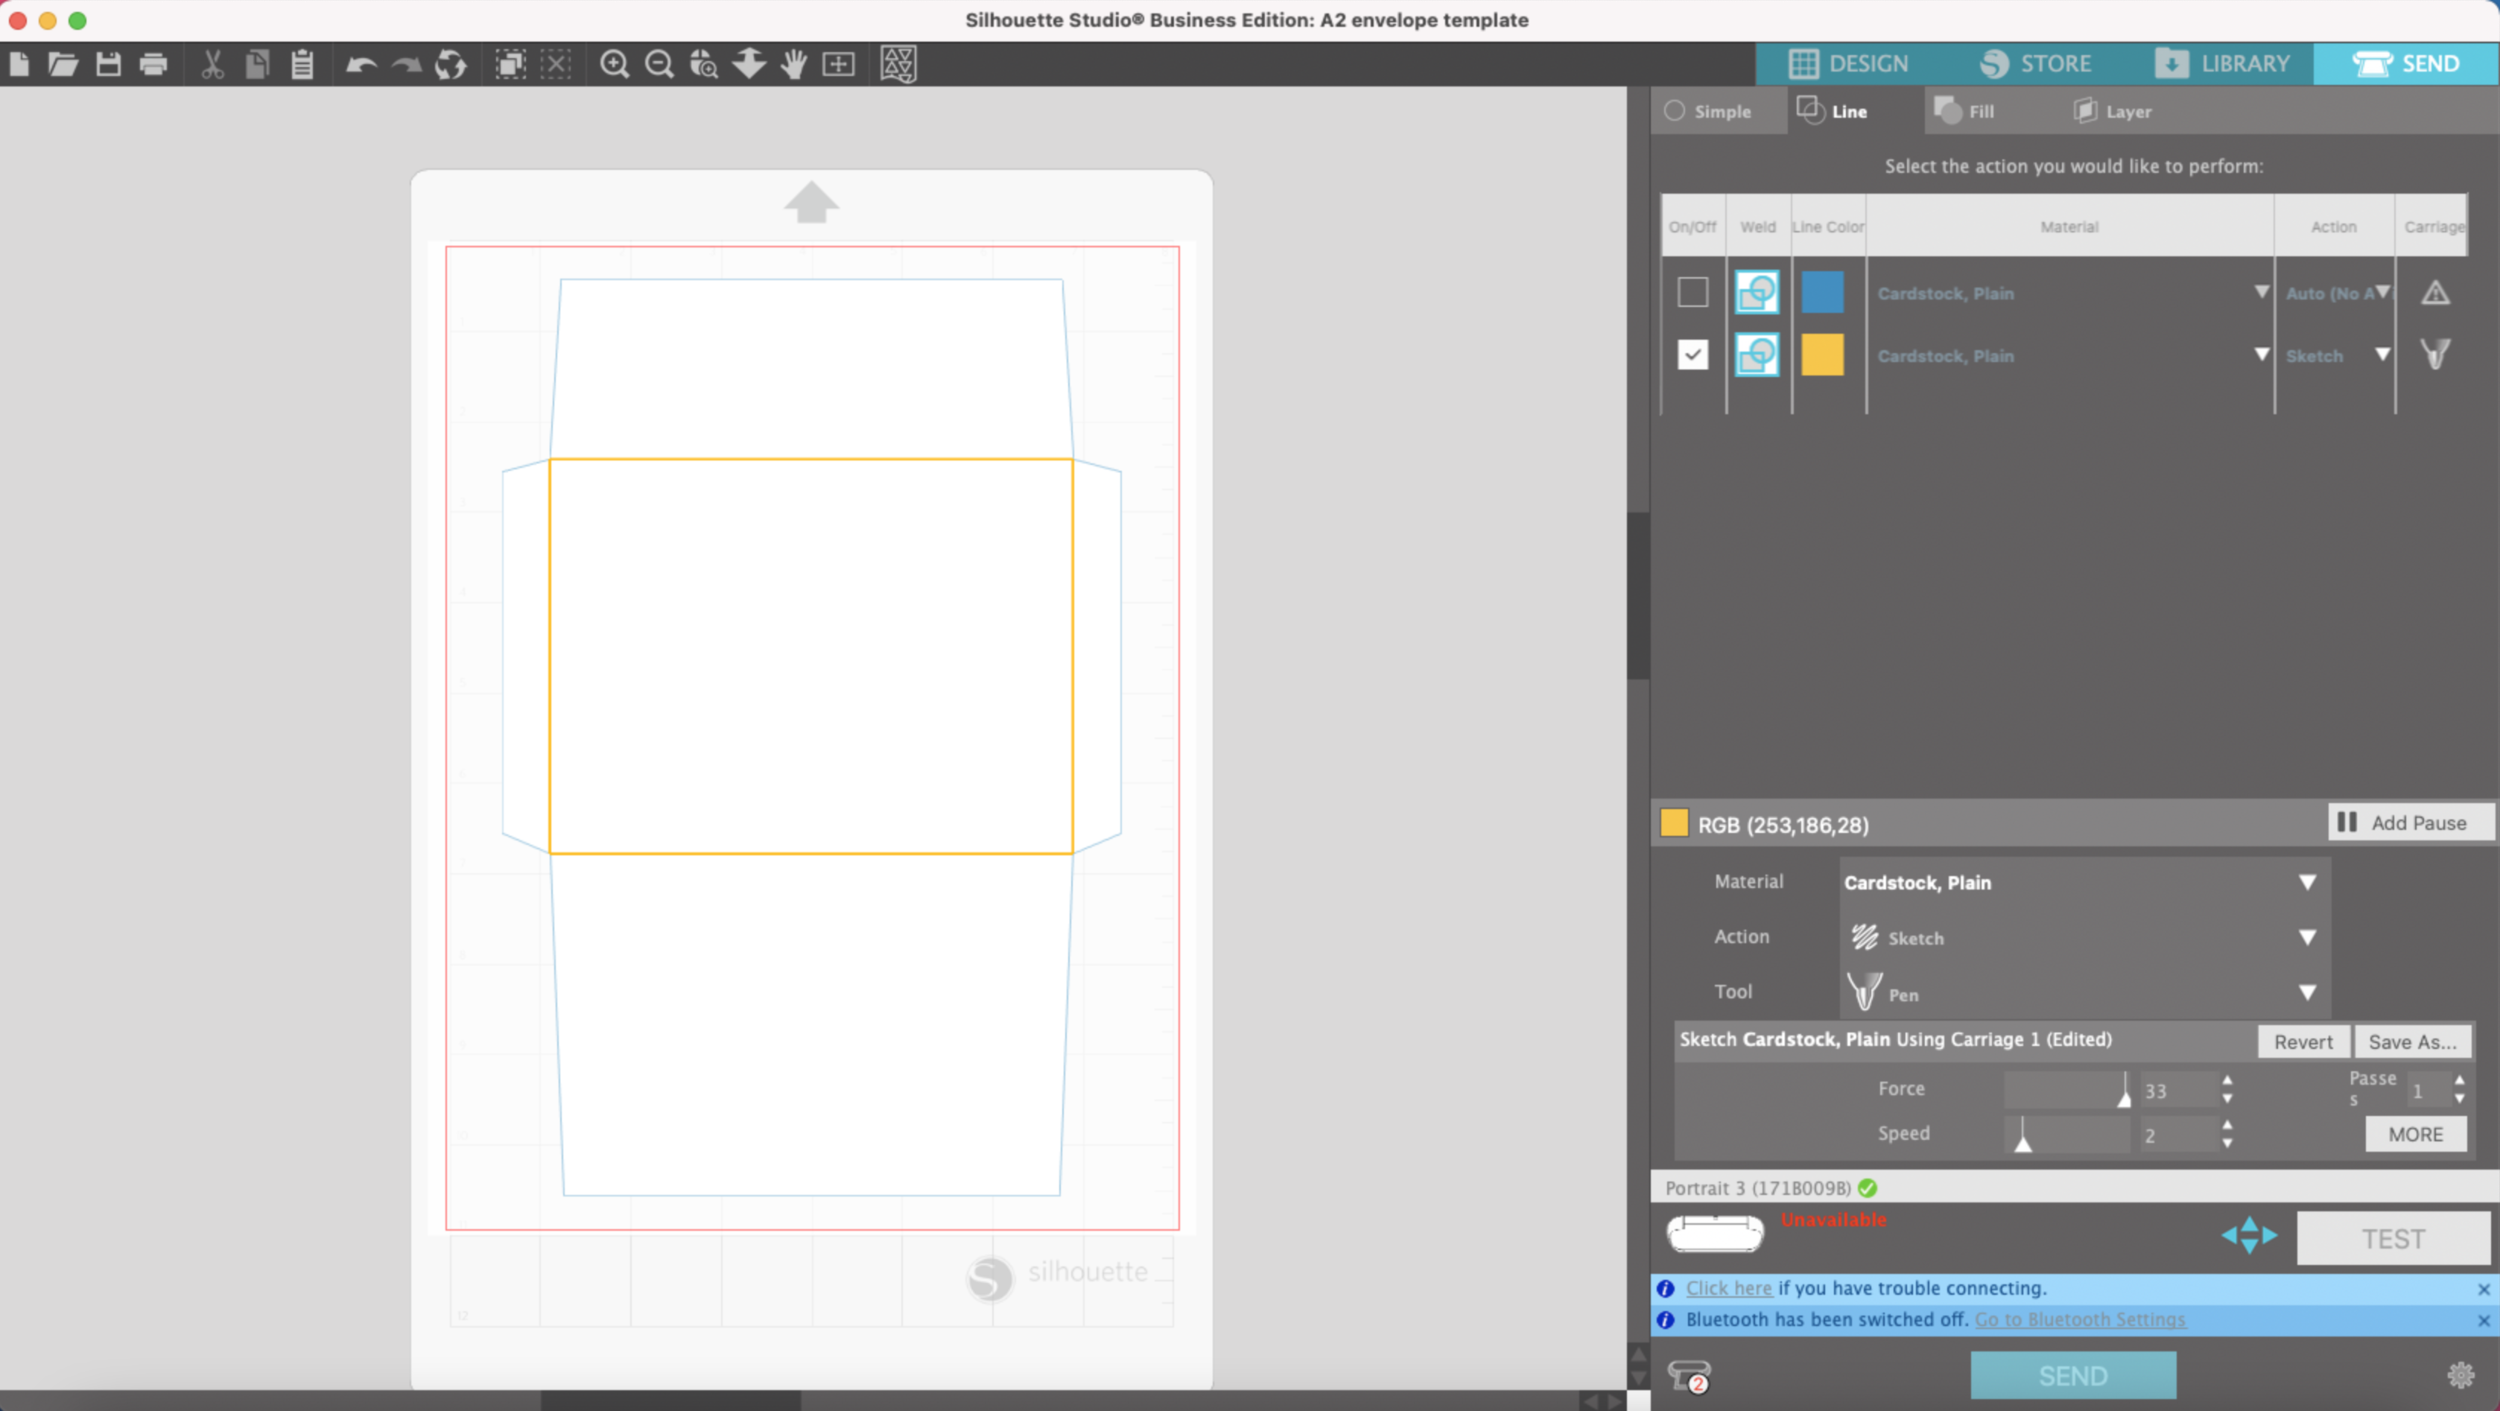
I tried out my same A2 envelope pattern with some light 65lb cardstock, the Force set at 33, Speed 2.

project set up in Silhouette Studio

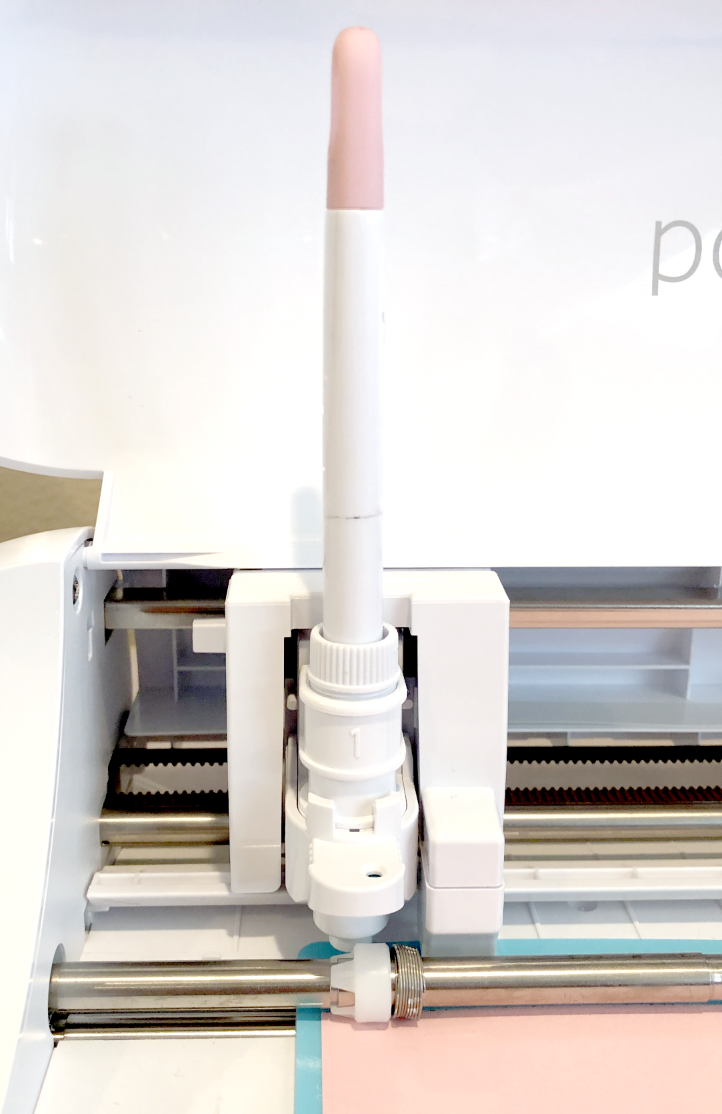
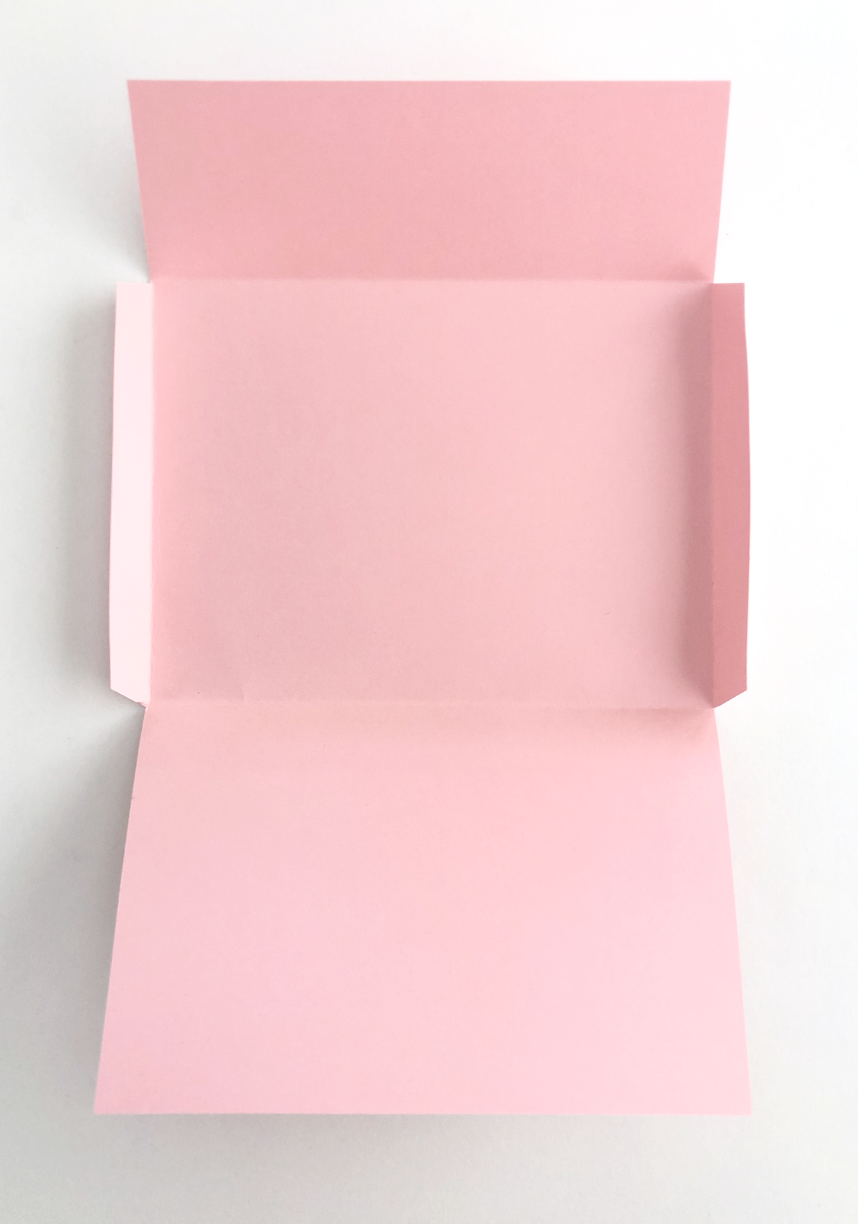
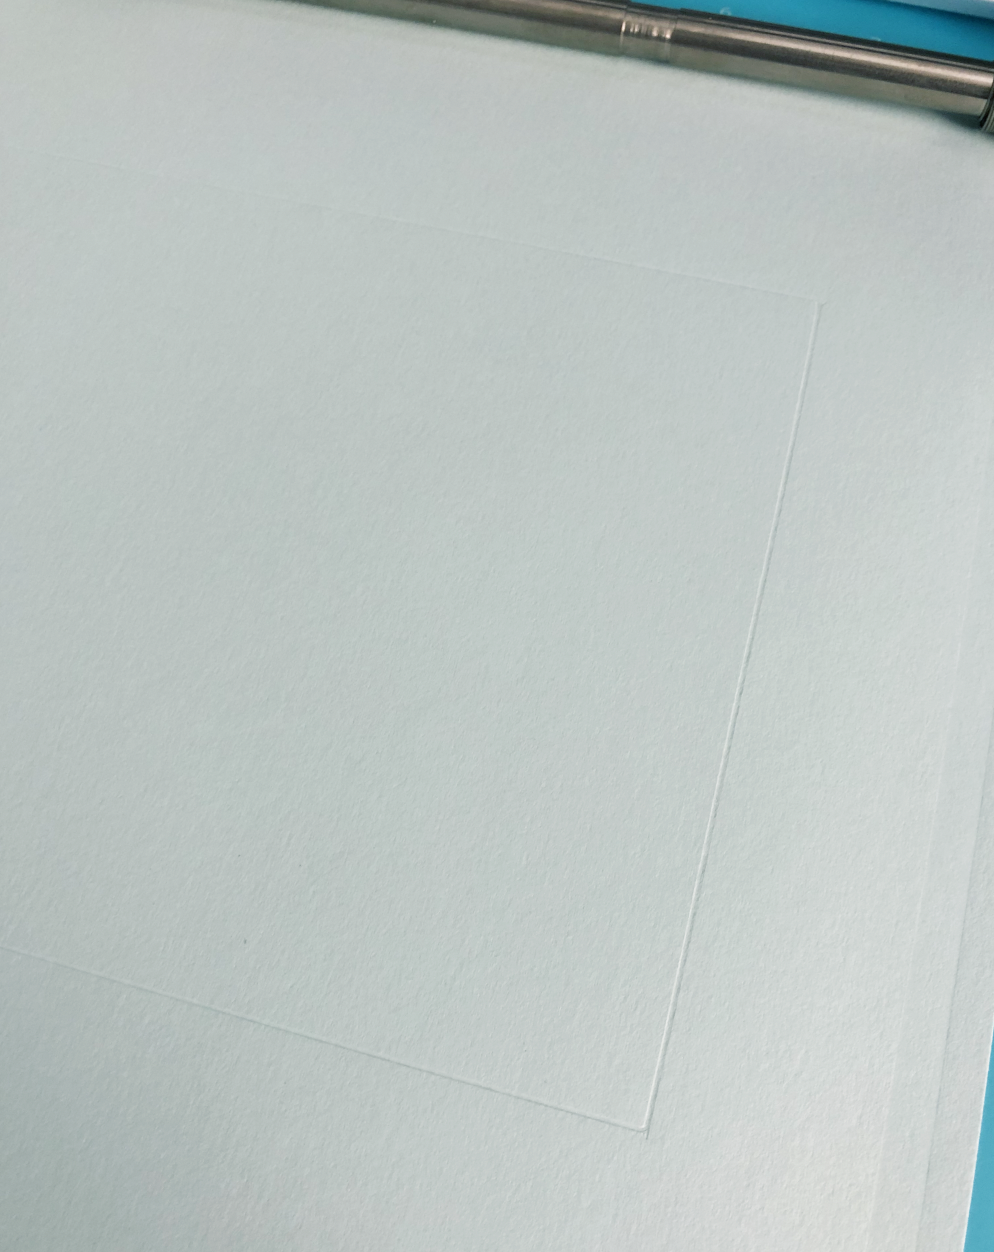
It definitely scores the cardstock! Not quite as deep of a score line as my bevel quill. But if you’re like me and have both a Cricut and Silhouette machine, this is another viable option for scoring with your Silhouette machine.

Cricut scoring stylus in Portrait 3 pen adapter
using Cricut scoring stylus with Portrait 3
score lines with portrait 3

Silhouette Portrait 3 Scoring with the Bevel Quill

Hi Everyone!

I like to make special little envelopes for birthdays or Christmas and I sometimes decorate them with my Silhouette Portrait 3 machine using pens or the foil quill. In order to make the envelopes I need to create score lines as well as cut lines. Unfortunately, I don’t really like the little dashed lines that are the default score lines for Silhouette. I’m also not really of fan of the solid score line using the auto blade or ratchet blade because it does cut into your paper or cardstock slightly and if you’re using a printed or colored paper it can leave a very visible line.

I’ve been experimenting with some of the different little tools I have for my machine and so far I’ve liked the scoring results best when I use my WRMK Bevel Quill.

Silhouette Portrait 3 Scoring with Bevel Quill

This little tool has never quite reached the popularity of the foil quill, so it might be slightly difficult to find if you don’t already have it. I managed to get one on clearance from my local JoAnn’s and it looks like they’re still available on Amazon.

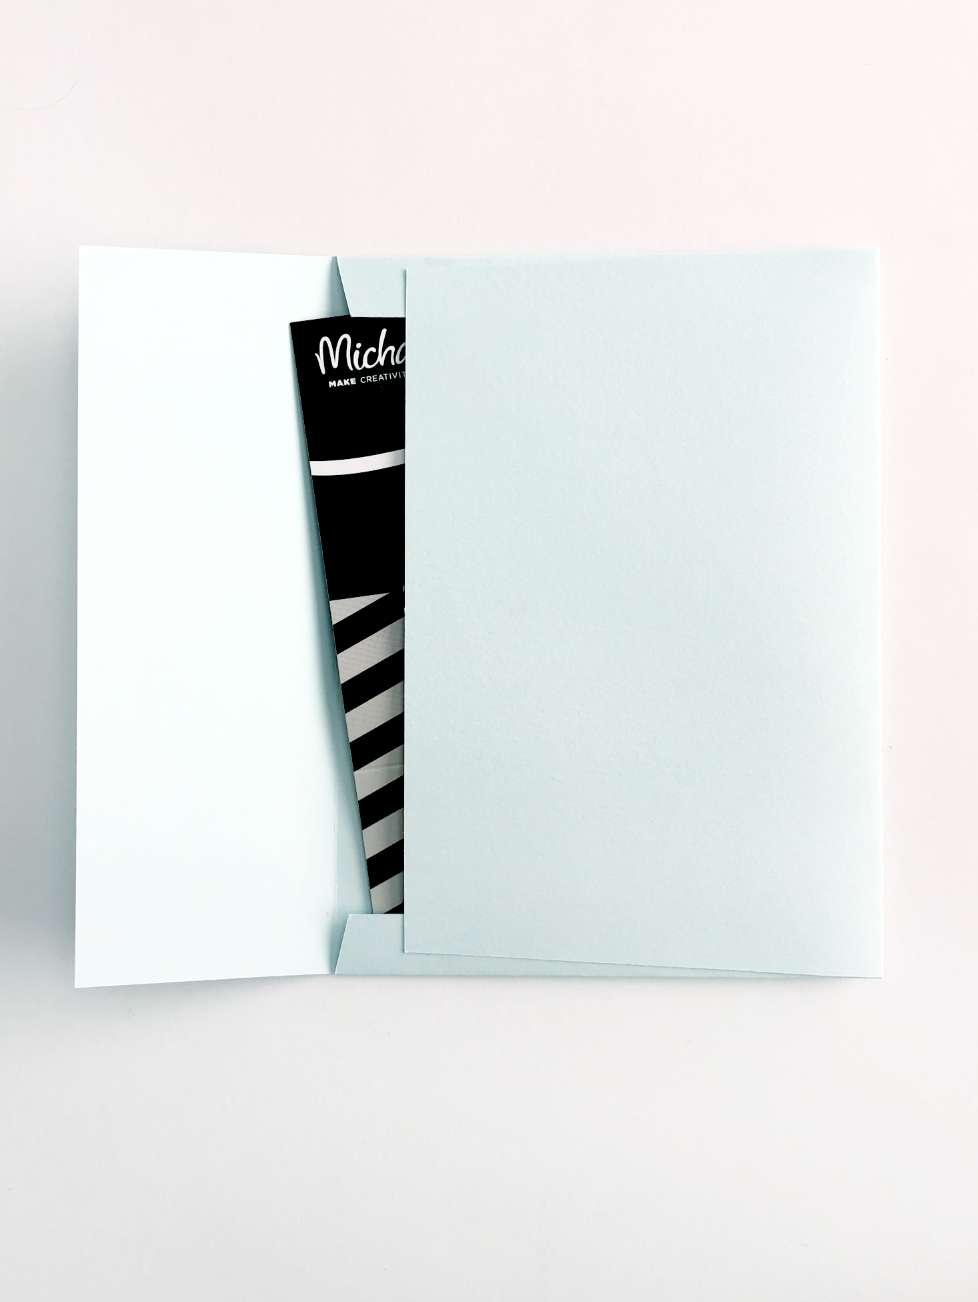
I’m going to be useing my A2 envelope template. A gift card from the kiosks that you see at the grocery stores fits perfectly into this envelope!

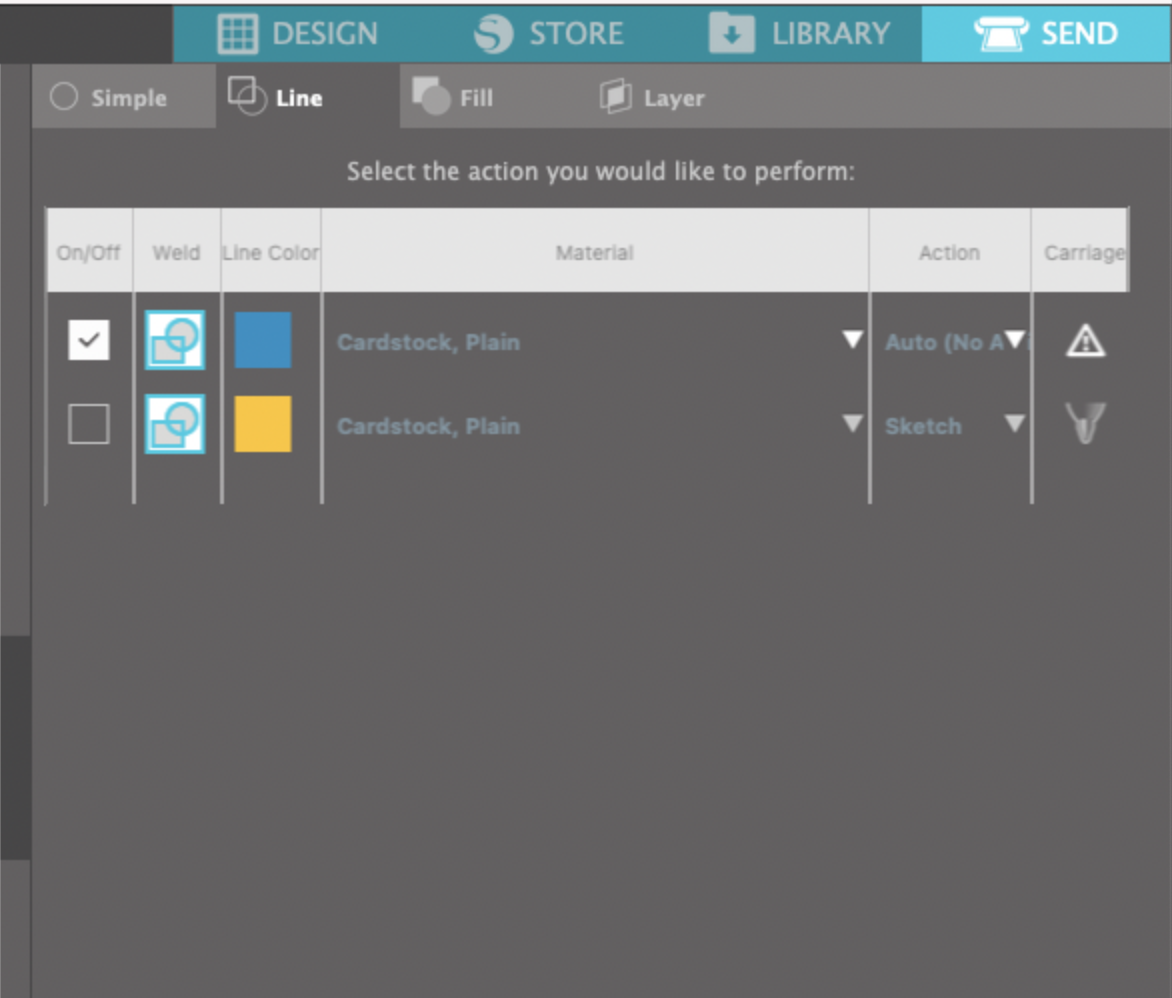
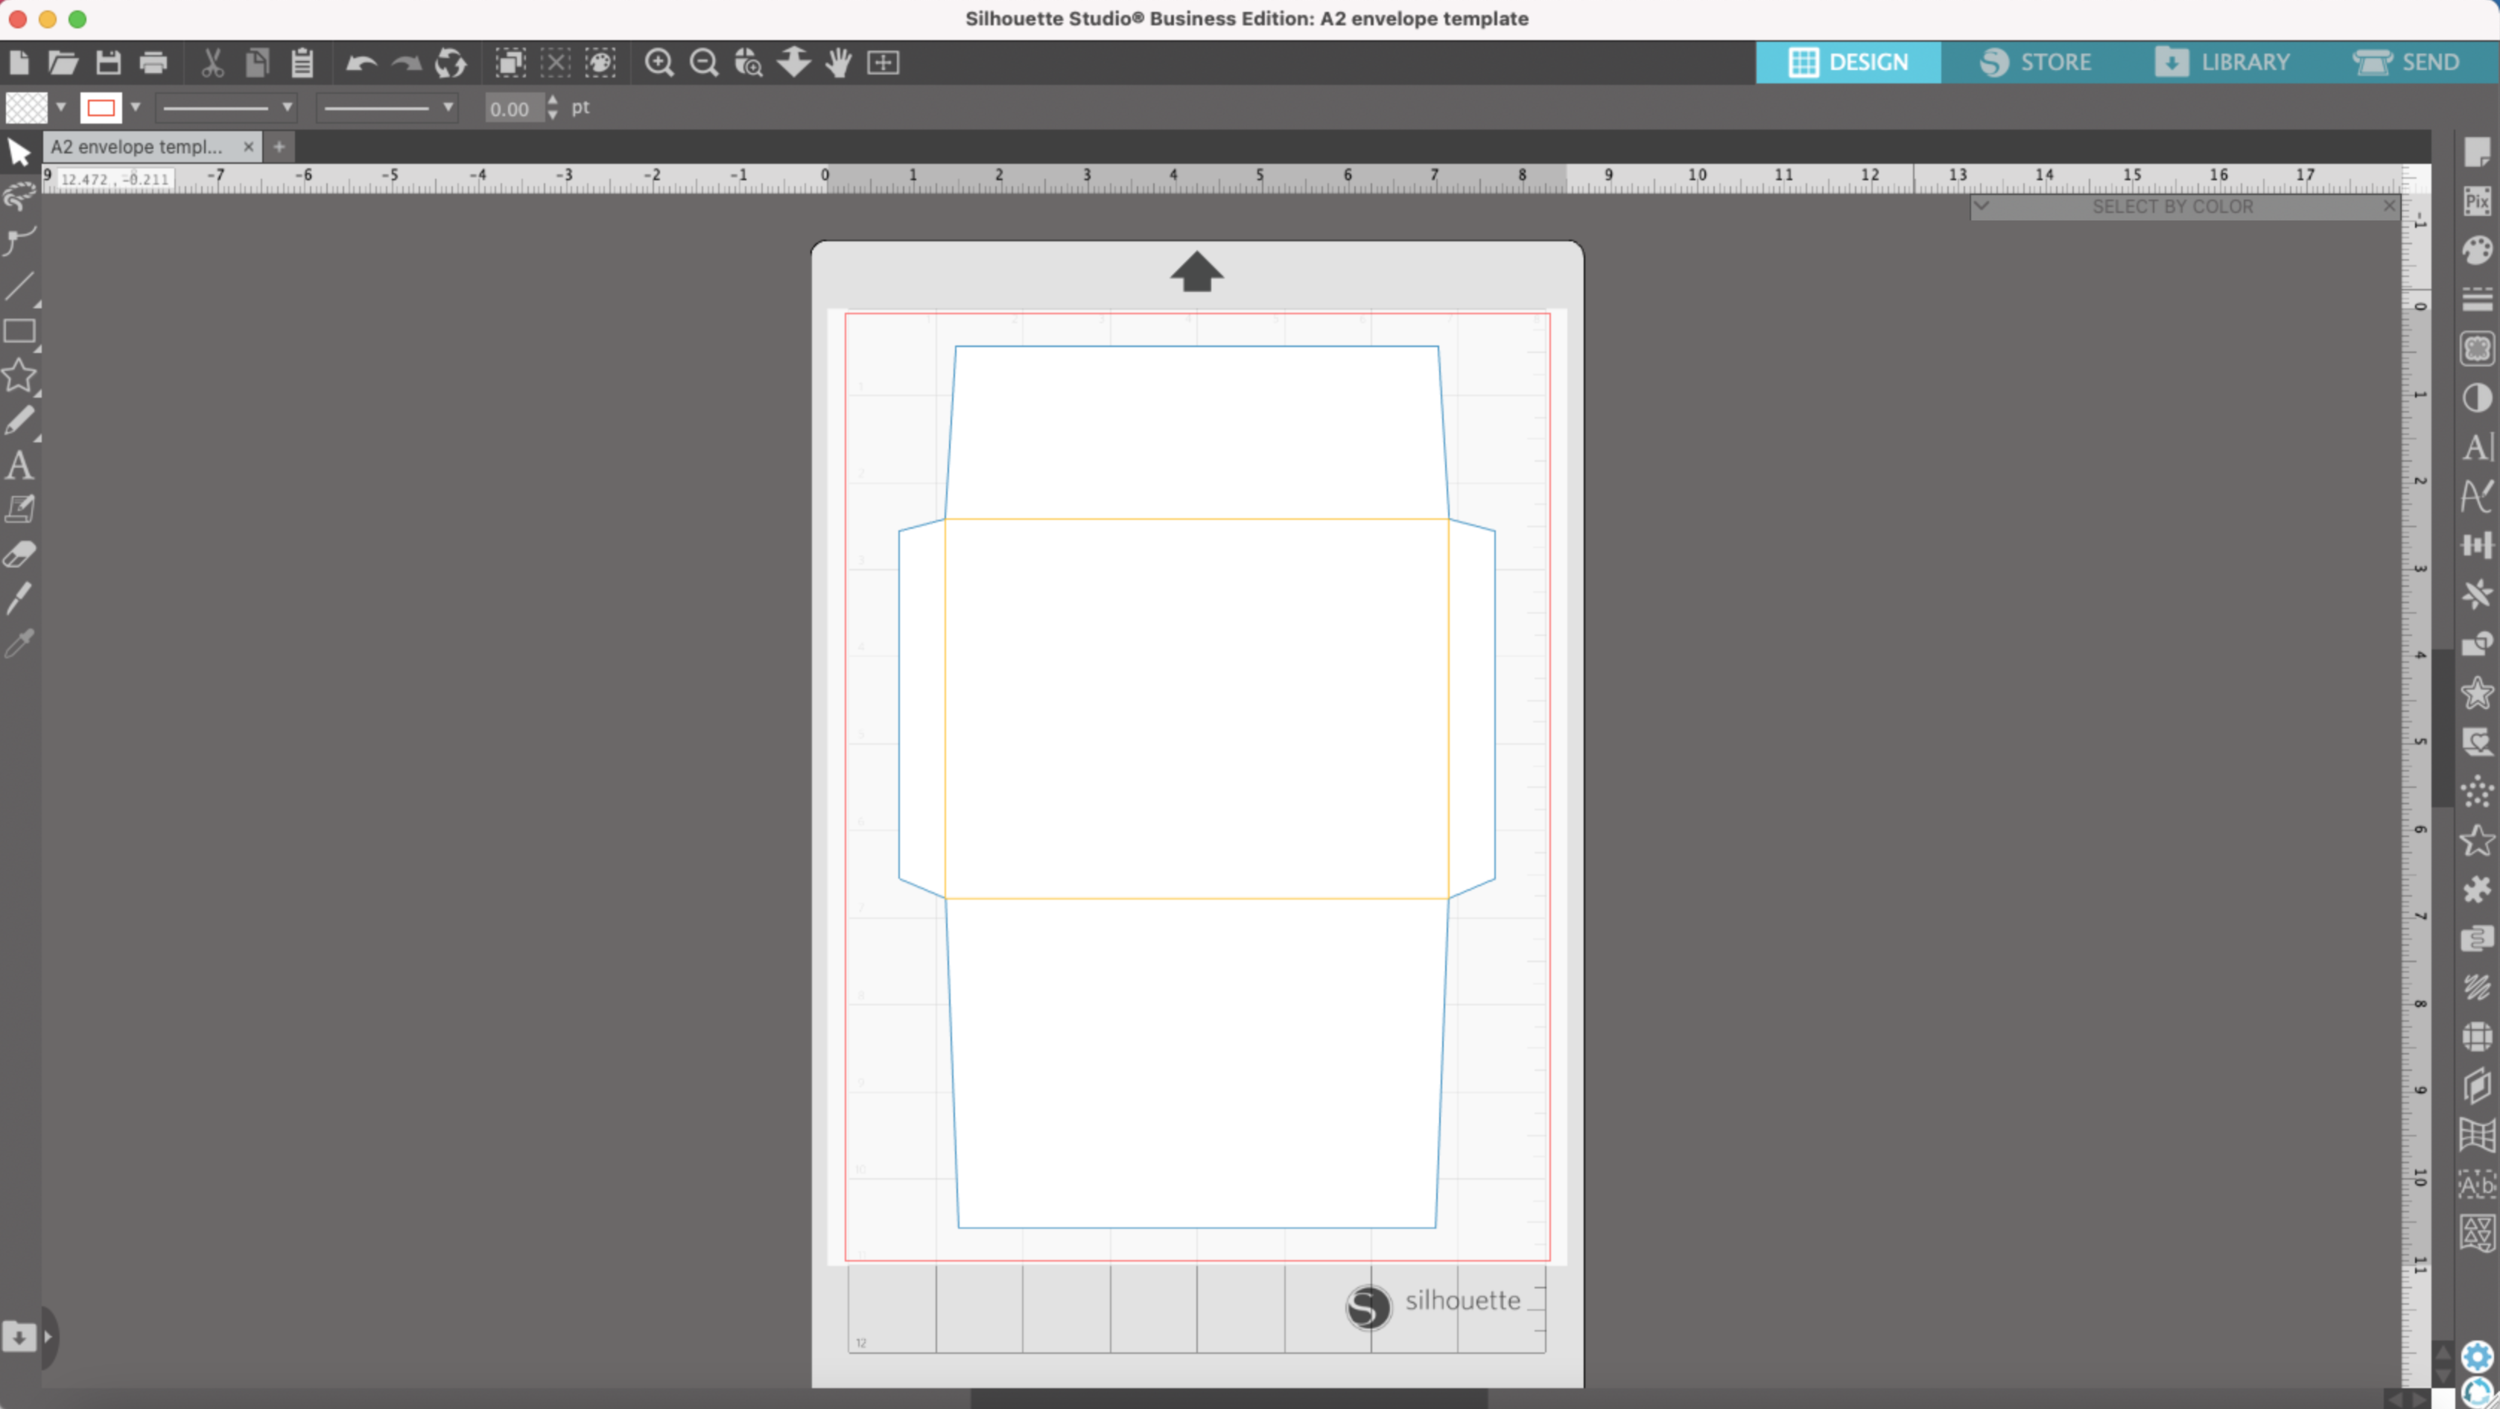
I have my template open in Silhouette studio, I’m going to change the line color of the inner rectangle to yellow (you can pick any color) since those are the lines that I will need to score.

Silhouette Portrait 3 Scoring with Bevel Quill

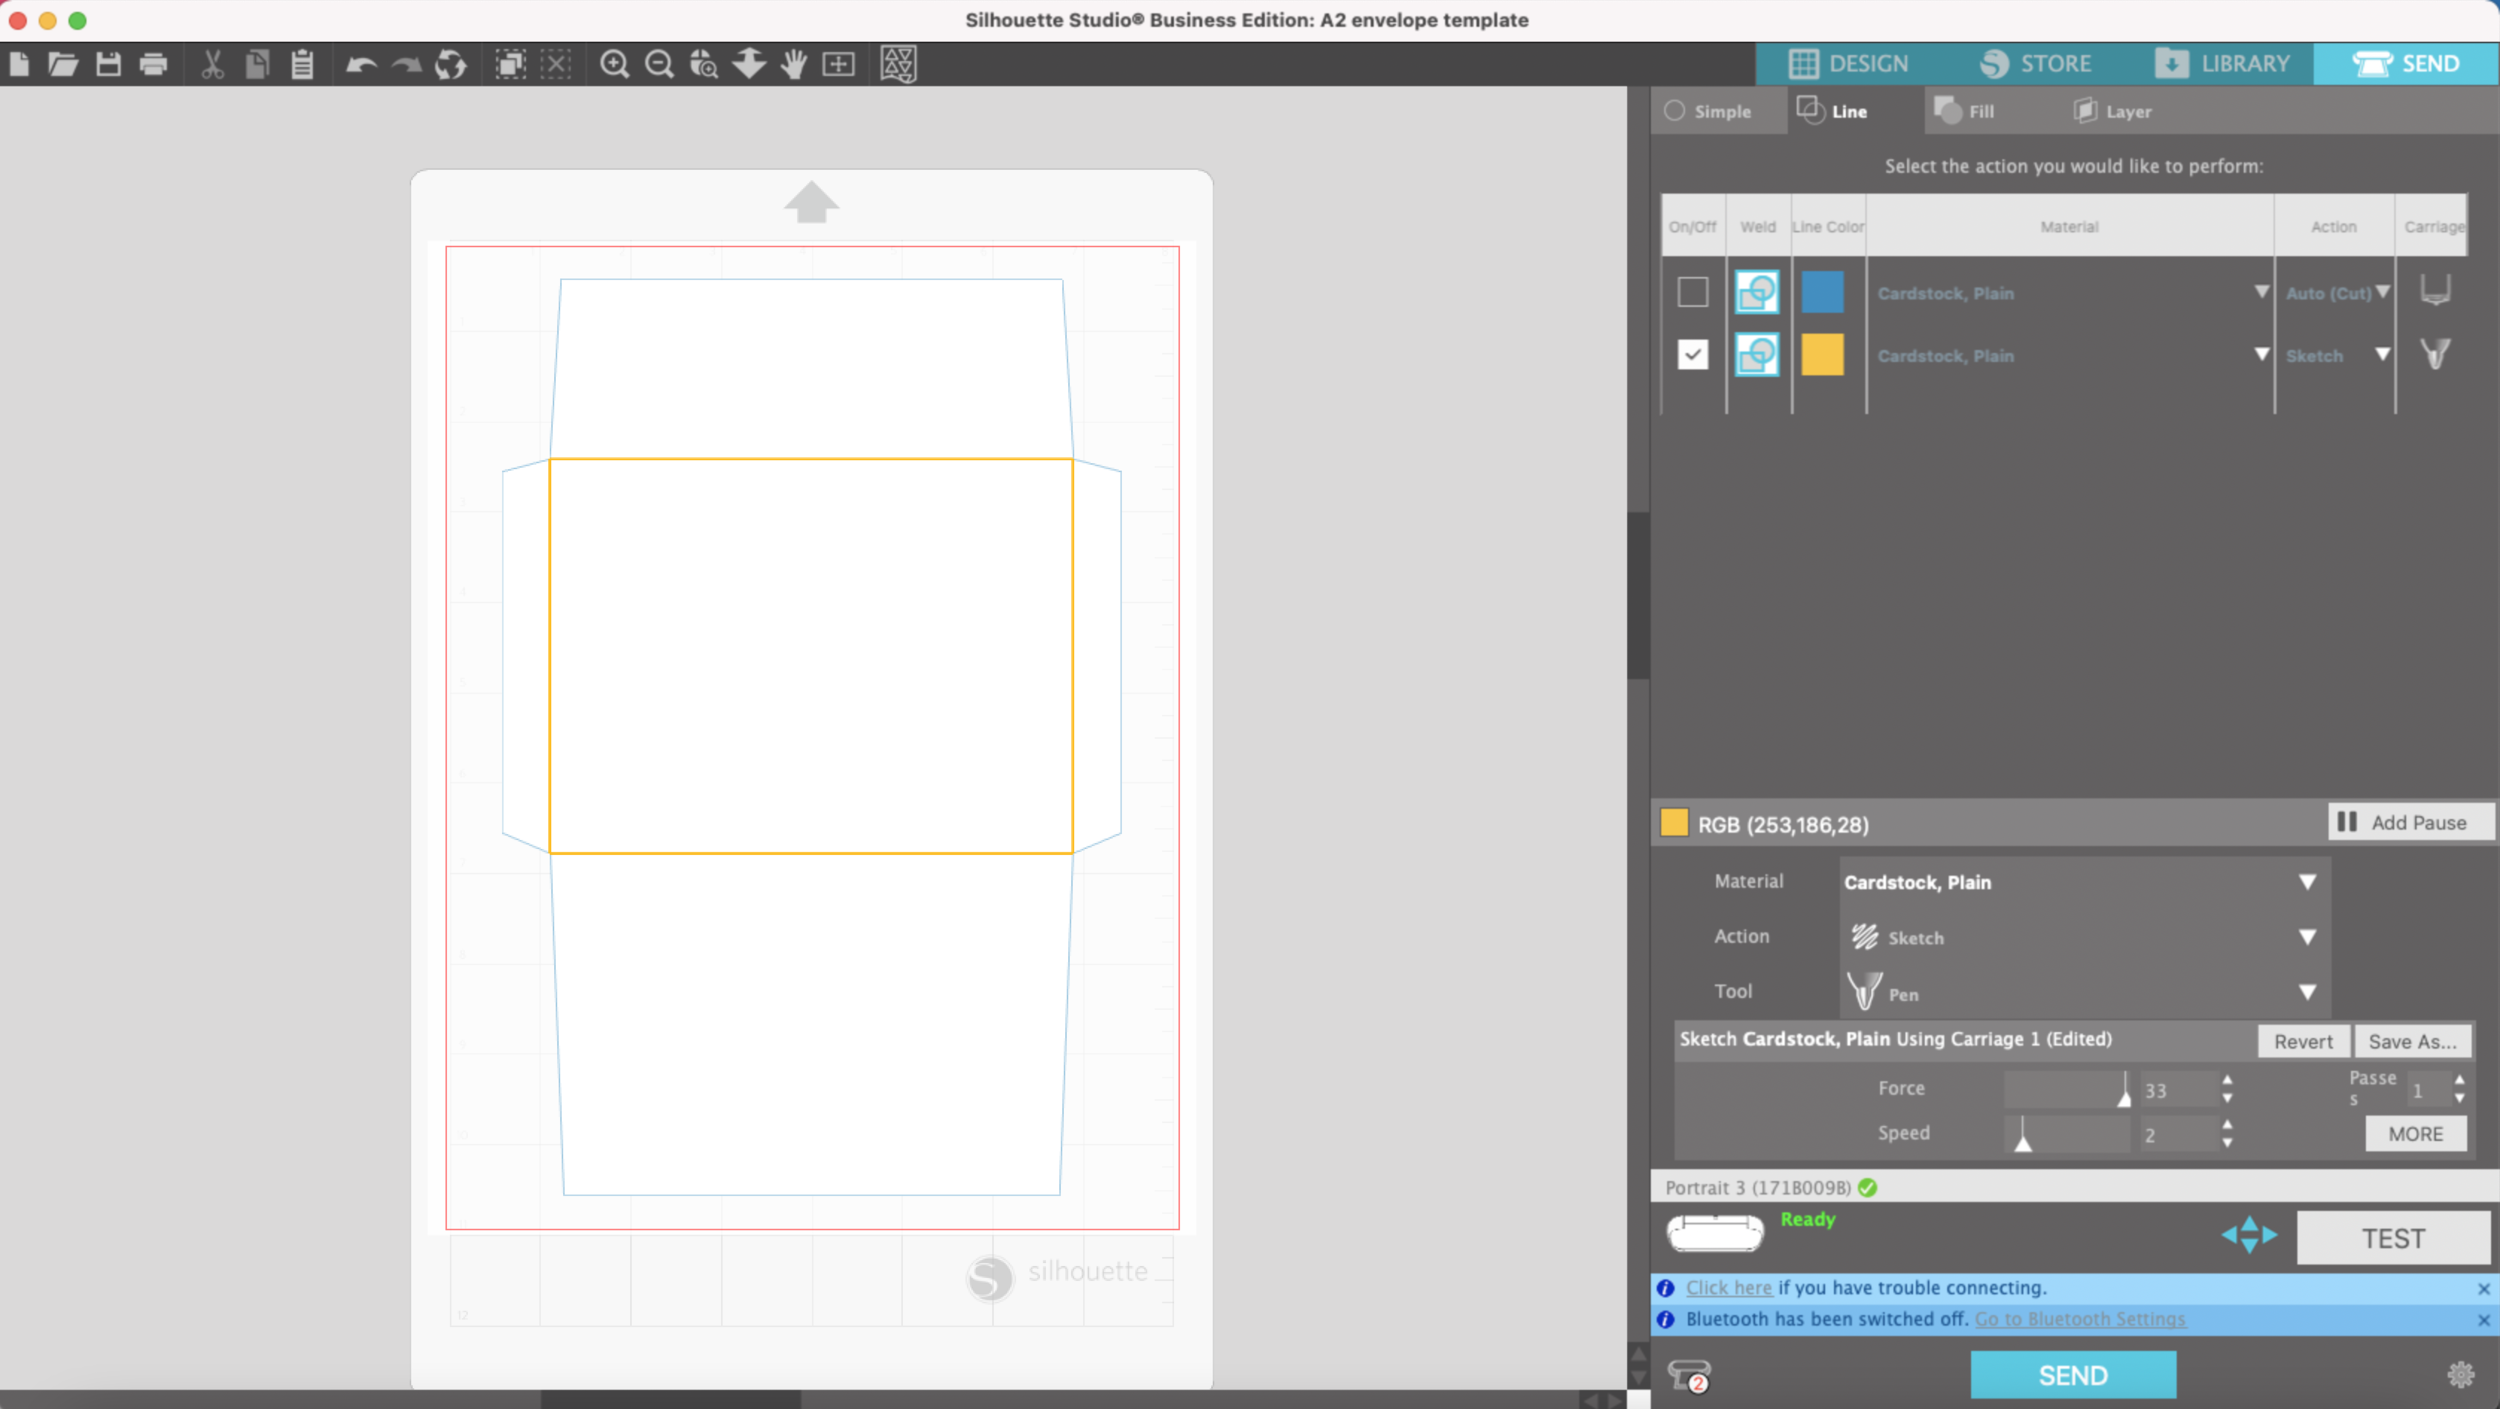
I go to the send tab in Studio and I’m going to work by line color. I made my score lines yellow, my cut lines are blue. The little box next to the the yellow is checked as I will be scoring first, then cutting. Instead of SCORE, I actually have SKETCH selected as my action, Force 33, Speed 2.

Silhouette Portrait 3 Scoring with Bevel Quill

I’m using a lightweight 65lb cardstock to make my envelope and I will also be using my Light tack mat since it’s a little thicker than the standard mat.

I have my Bevel Quill loaded into my machine. Note: I am using the D adapter that came with the Foil Quill. The D adapter that came with the bevel quill doesn’t fit as tightly into my machine and the quill pops up and out of place once it’s pressed down onto the cardstock.

Silhouette Portrait 3 Scoring with Bevel Quill

I load my mat and press send. The little Bevel Quill did it’s magic.

Silhouette Portrait 3 Scoring with Bevel Quill

I’m going to swap it out for my auto blade to do the cut around the outer edge. I uncheck the box for the yellow line & I check the box for the blue line in Silhouette Studio.

Silhouette Portrait 3 Scoring with Bevel Quill

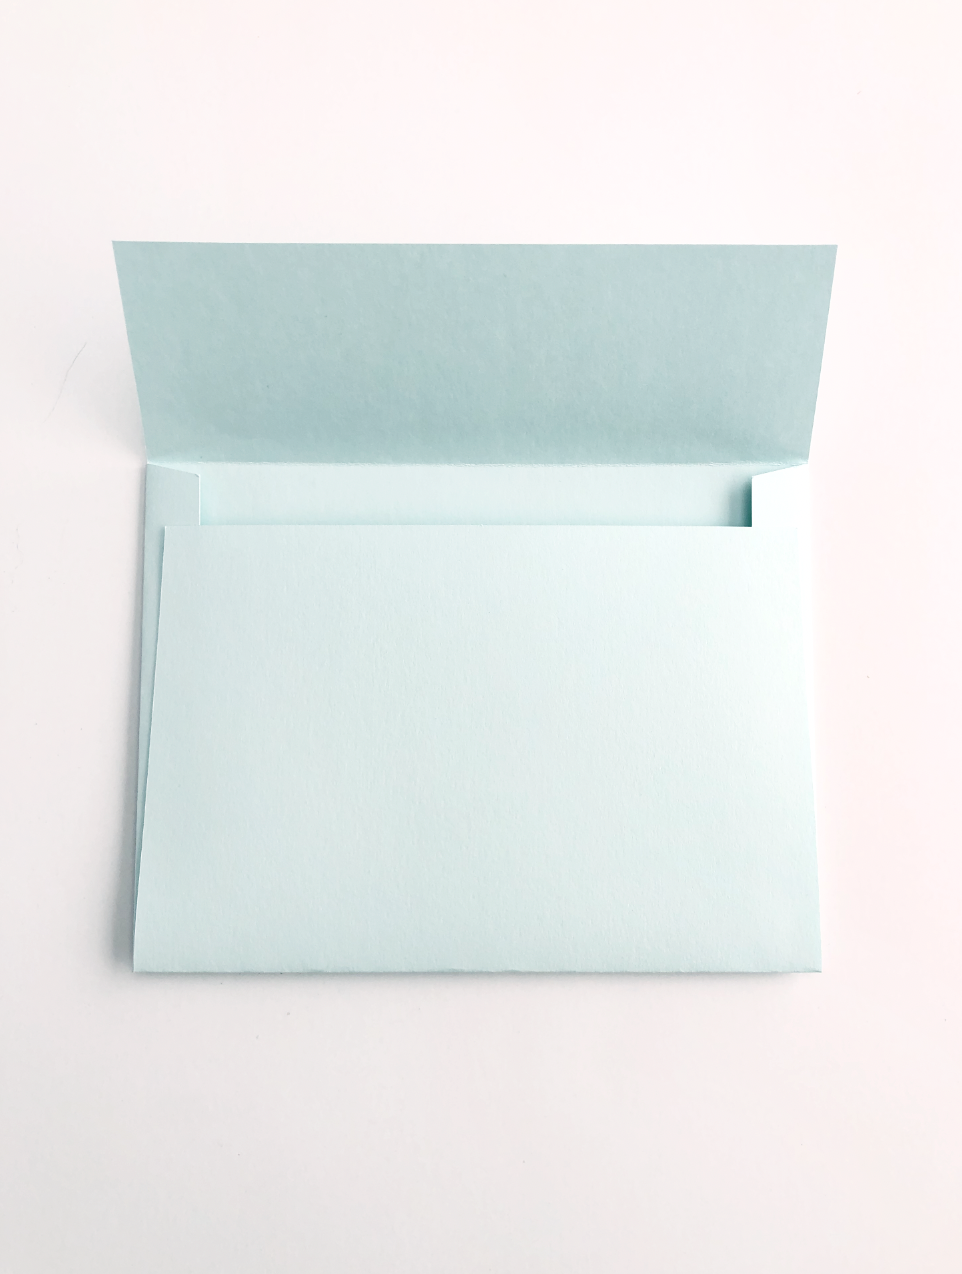
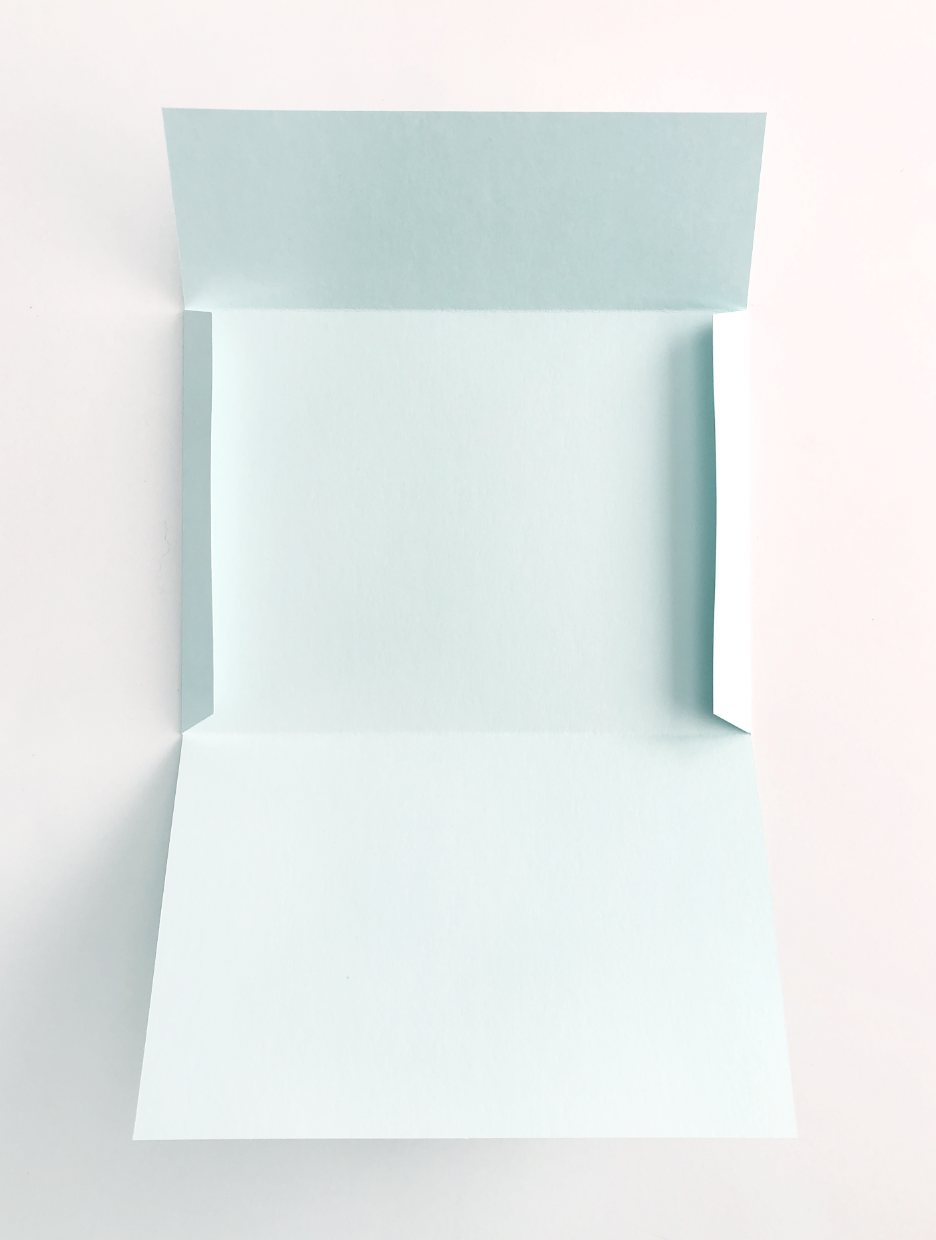
Once it’s done cutting, I fold along the score lines, add some glue tape along the sides. Now I have a perfect little envelope!

Silhouette Portrait 3 Scoring with Bevel Quill


Tips for Using the WRMK Fine Tip Foil Quill with the Silhouette Portrait 3

(Links in article below may be affiliate link)

Hi Everyone!

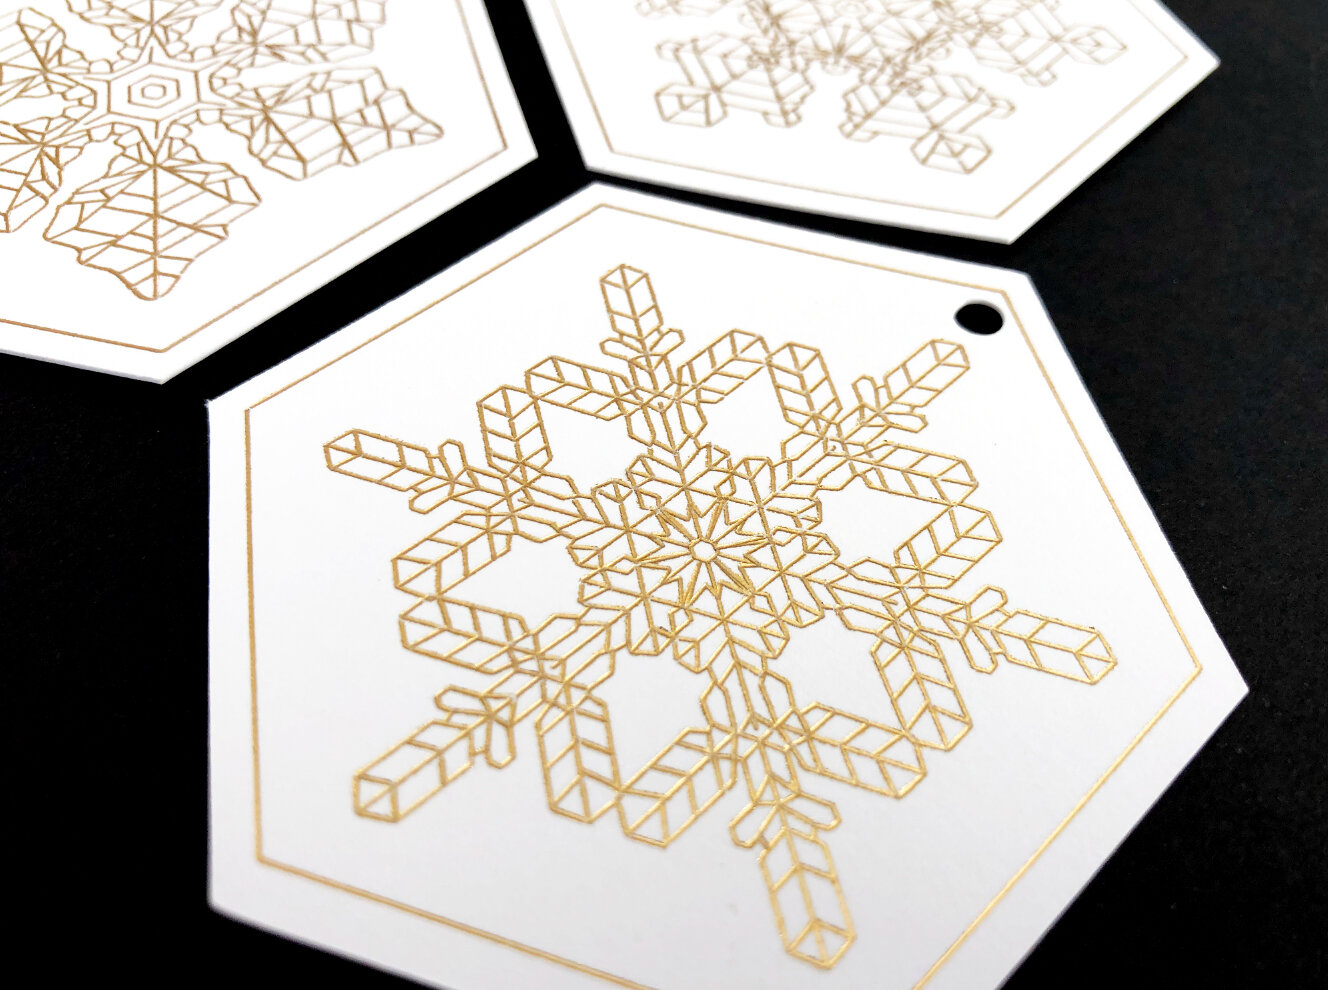
This week I was fulfilling an Etsy order for my snowflake gift tags, I typically make these on my Cricut Maker, but I wanted to try making them on my Silhouette Portrait 3 to see how they turn out.

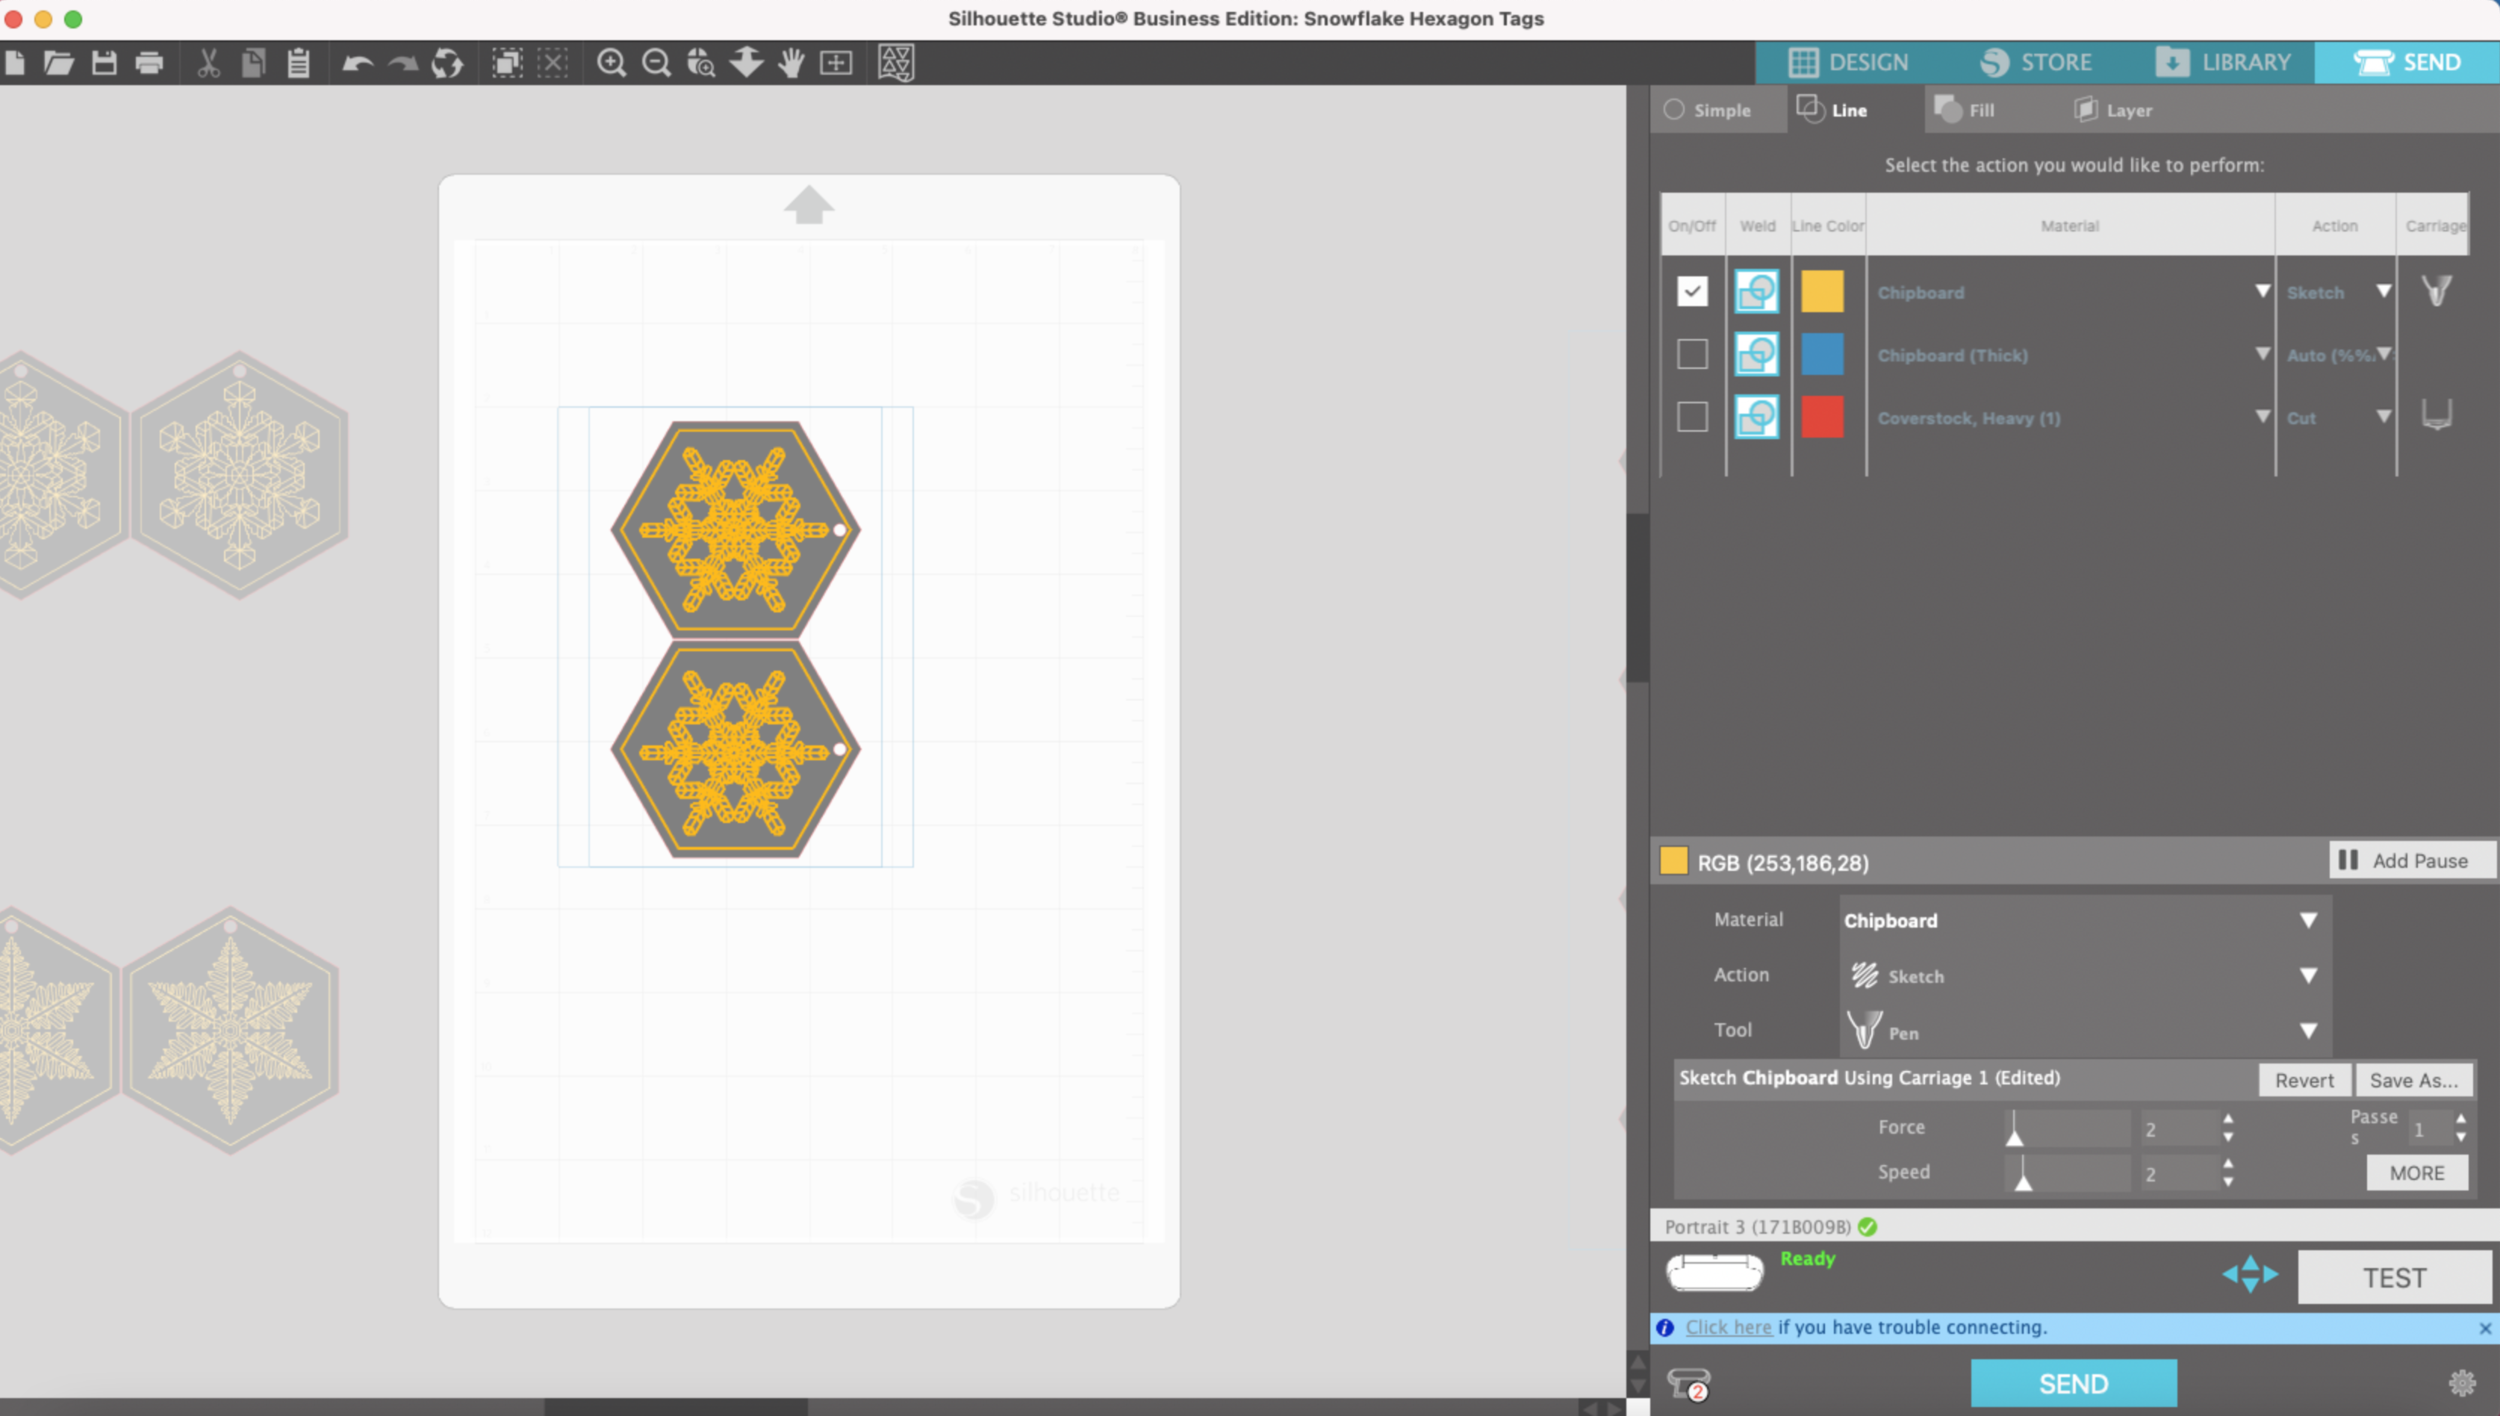
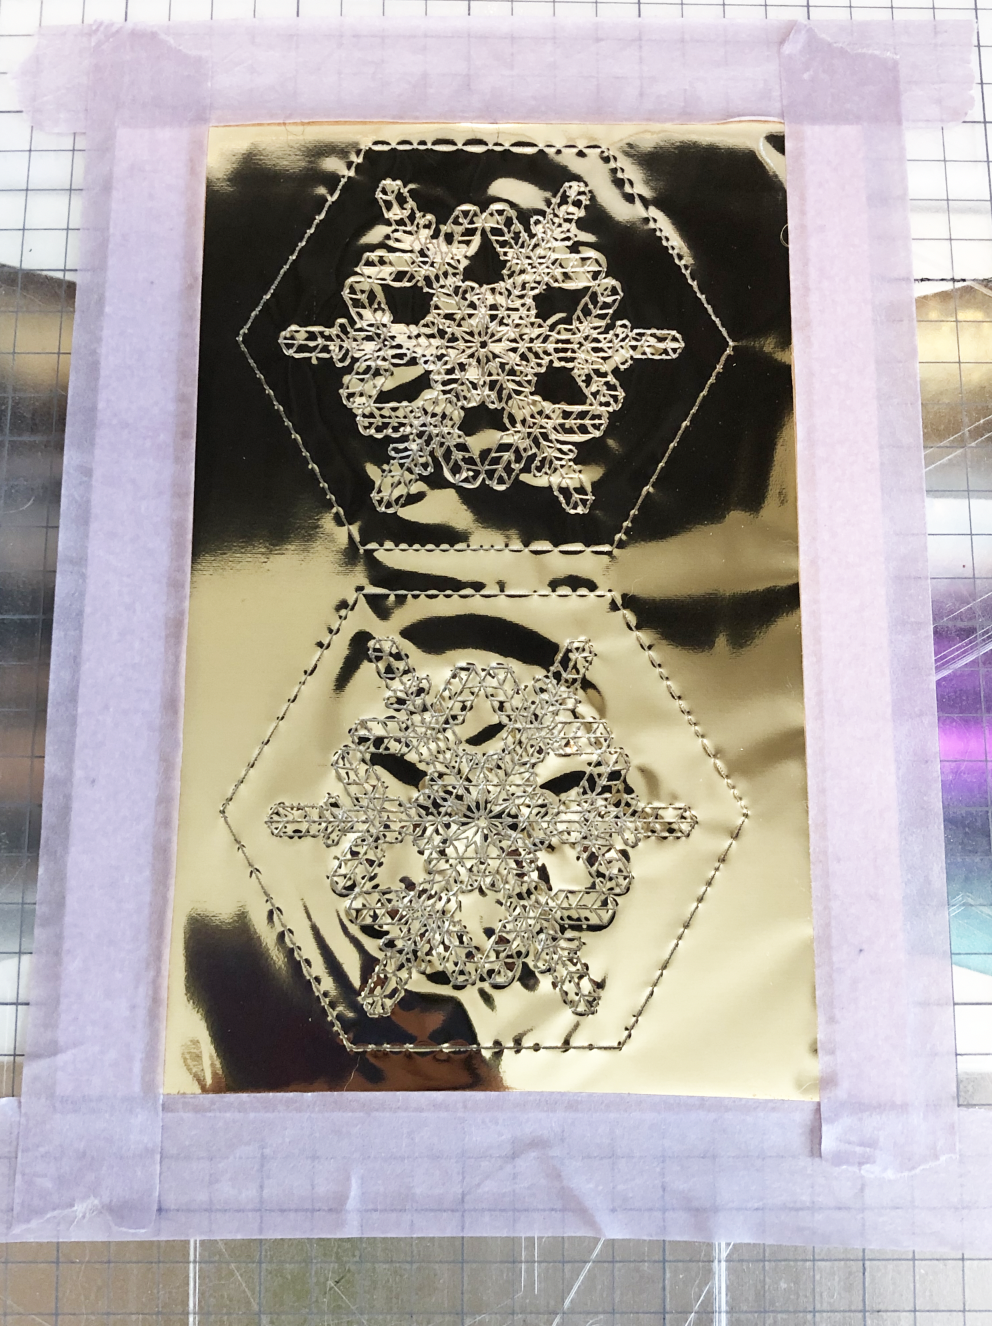
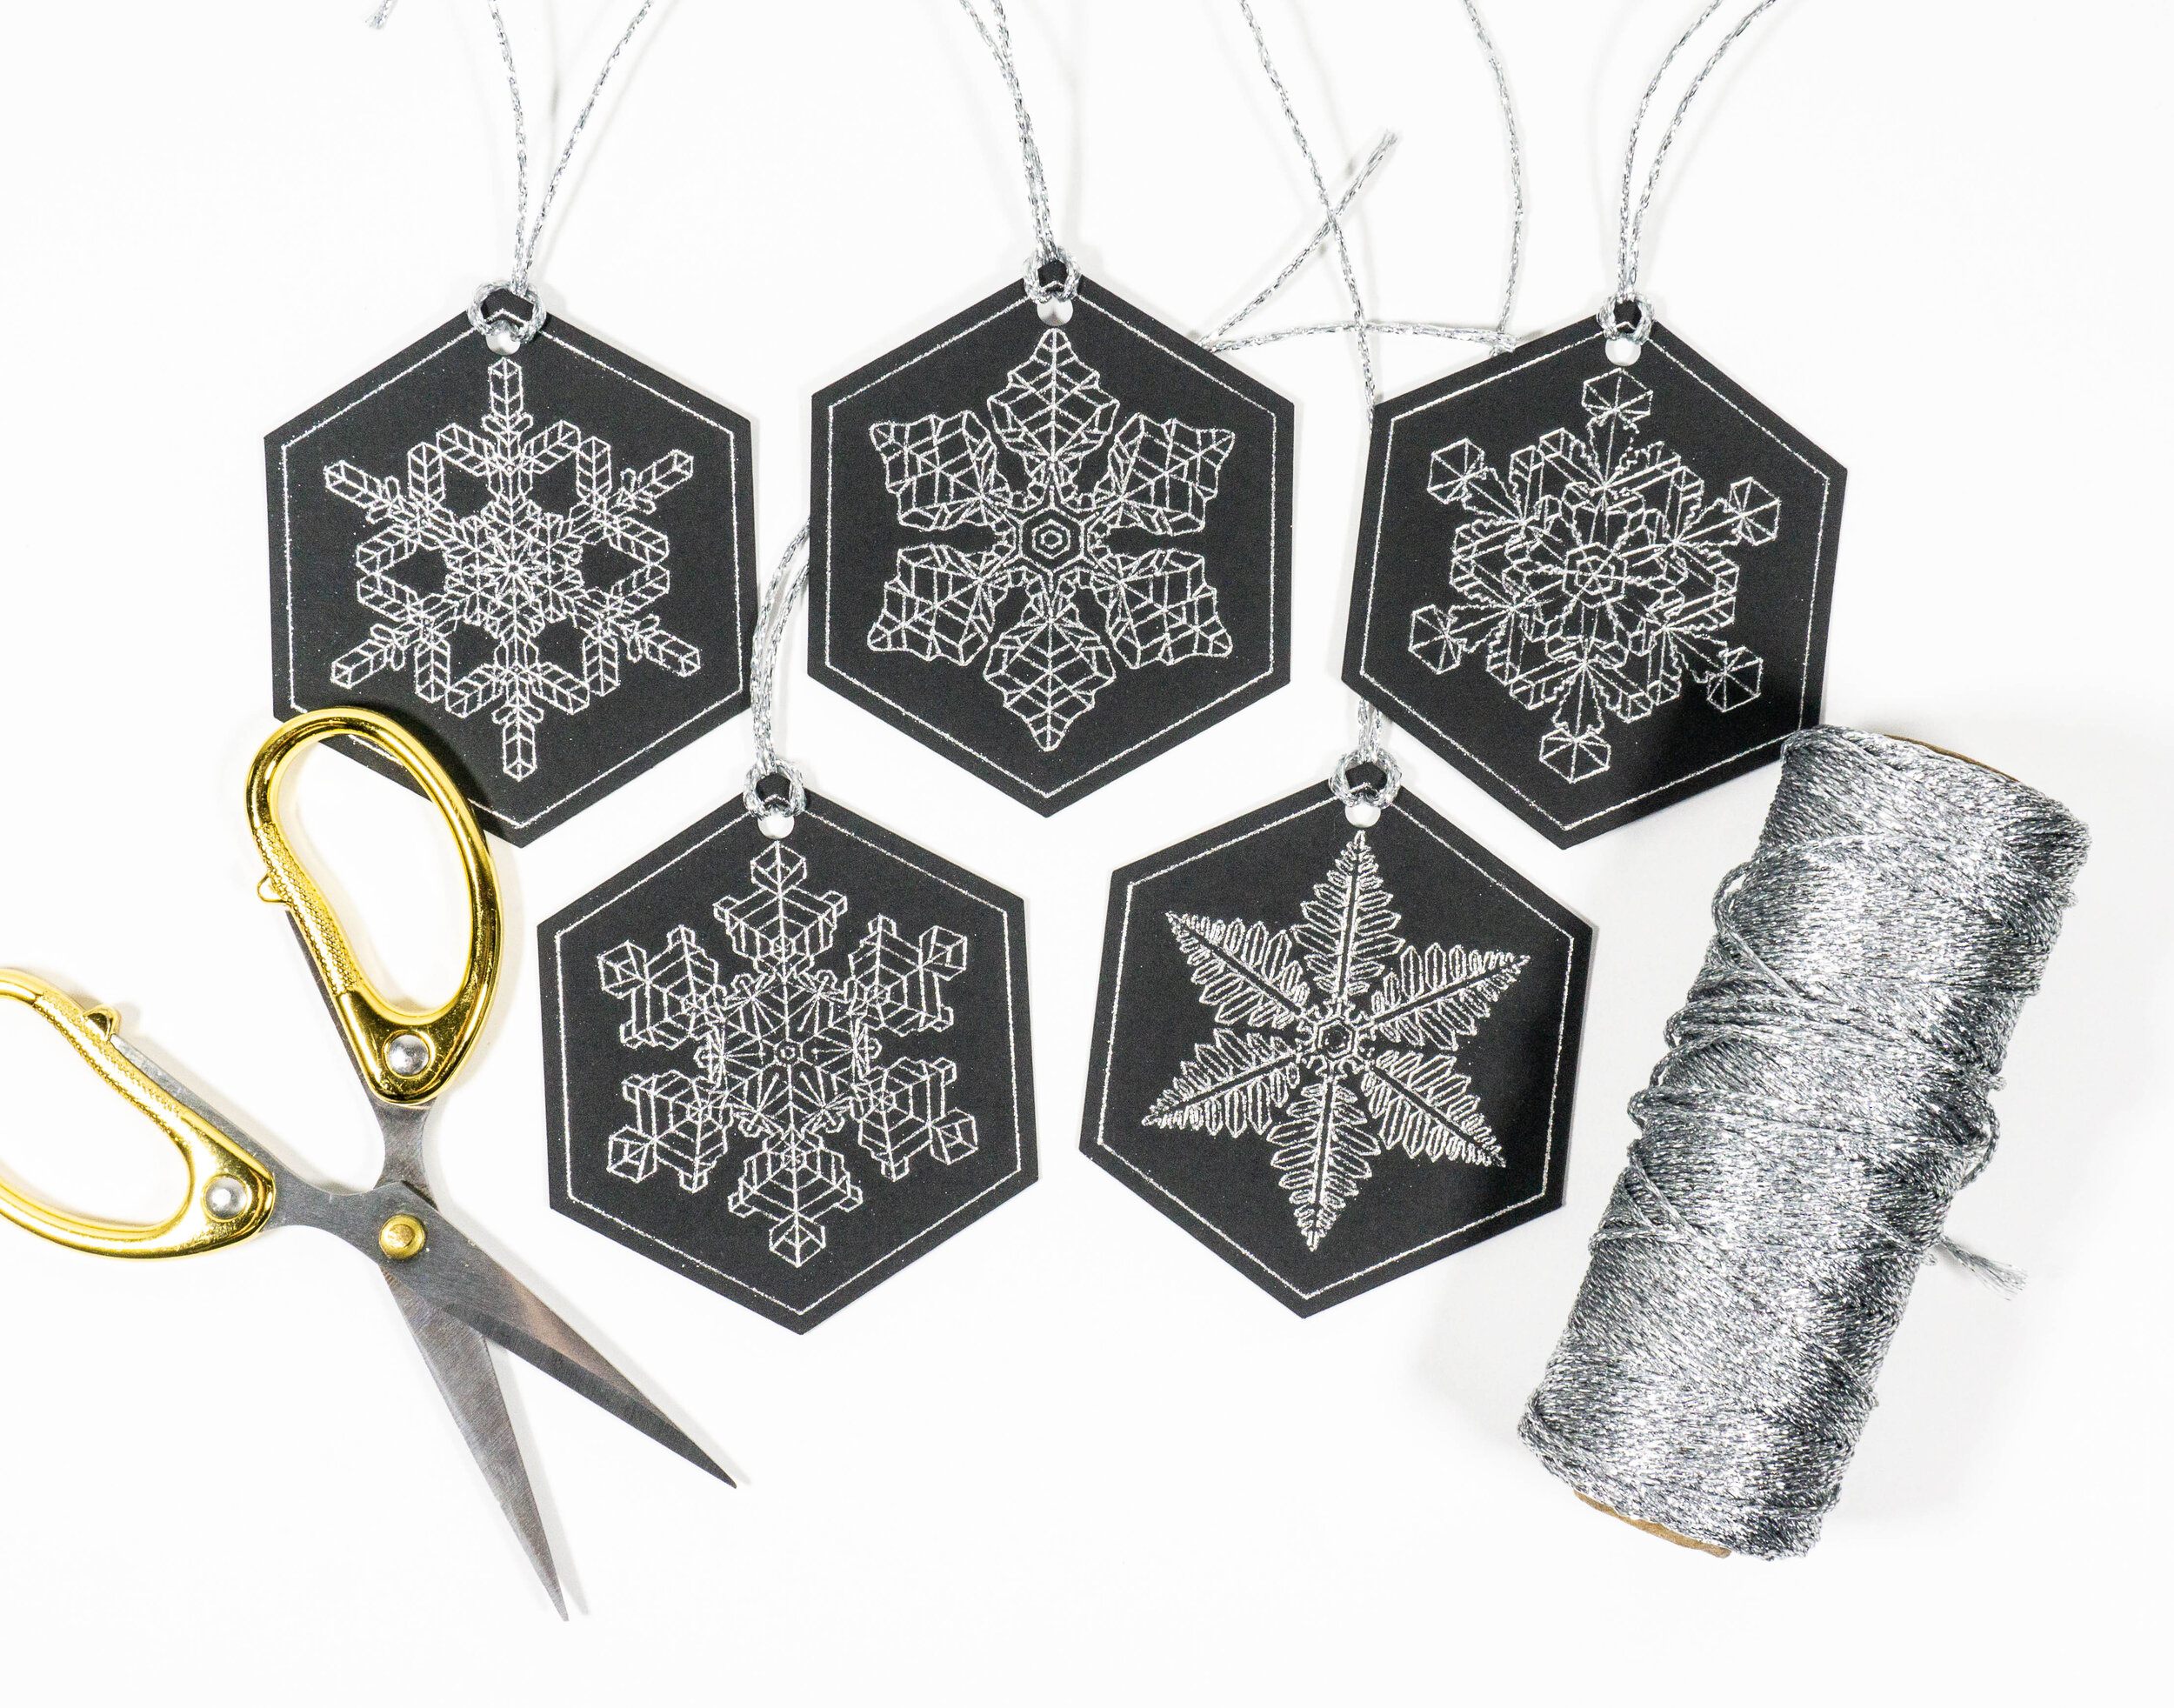
I make these gift tags using my snowflake single line SVGs, heavy 100lb cardstock, the fine tip WRMK Foil Quill, and WRMK foil in gold for the white cardstock and silver for the black cardstock.

For the Portrait 3 and Cameo 4, the adapter A for the Silhouette machines doesn’t work. So I use the adapter D that came with my foil quill set.

Fine Tip Foil Quill Silhouette Portrait 3

In the Send screen set my Portrait 3 to sketch, Coverstock, Heavy (105-122lb), Force 2, Speed 2.

Fine Tip Foil Quill Silhouette Portrait 3

Initially I started out using an off brand mat with my Portrait 3, they’re a little thicker and stiffer than the Standard Portrait 3 mat.

I load my mat and press Send from the Silhouette software.

Almost immediately my foil starts ripping!!!!

Fine Tip Foil Quill Silhouette Portrait 3

I switch to my Silhouette brand Standard grip mat, it’s thinner and floppier that my off brand mat. I also switch my material to Chipboard, Force 2, Speed 2.

Fine Tip Foil Quill Silhouette Portrait 3

Reload my mat and press Send. This time the foil didn’t rip and the results are beautiful!

Fine Tip Foil Quill Silhouette Portrait 3

So here are my top 6 tips for using the WRMK Fine Tip Foil Quill:

  1. Use the D adapter that comes with the Foil Quill set

  2. Use the Silhouette brand Standard grip mat

  3. Place something like a book or a small box in front of your machine to help keep the mat level while it’s foiling. You want something that is roughly the same thickness as the front of the machine.

  4. Select a material that is thicker than the material you are foiling. For example, I was using heavy cardstock (overstock) so I selected chipboard.

  5. Select a lower force and speed. The default settings for Chipboard were Force 7, Speed 5. I got the best results with Force 2, Speed 2. Your settings will differ depending on the materials you’re using.

  6. Don’t try to foil everything at once. I can typically get 8 gift tags out of one piece of cardstock, but I cut the cardstock down into smaller pieces and foil the smaller pieces instead of one giant piece at once. That way, if something happens while foiling, I’m not wasting an entire piece of cardstock and a big piece of foil.

Using the Trace Tool in Silhouette Studio

Hi Everyone!

Last week I showed you how to use the Pix Scan mat with the Portrait 3. This week I’m going to go a little more in depth with how to use the trace feature in Silhouette studio to make a sticker offset. Here we go!

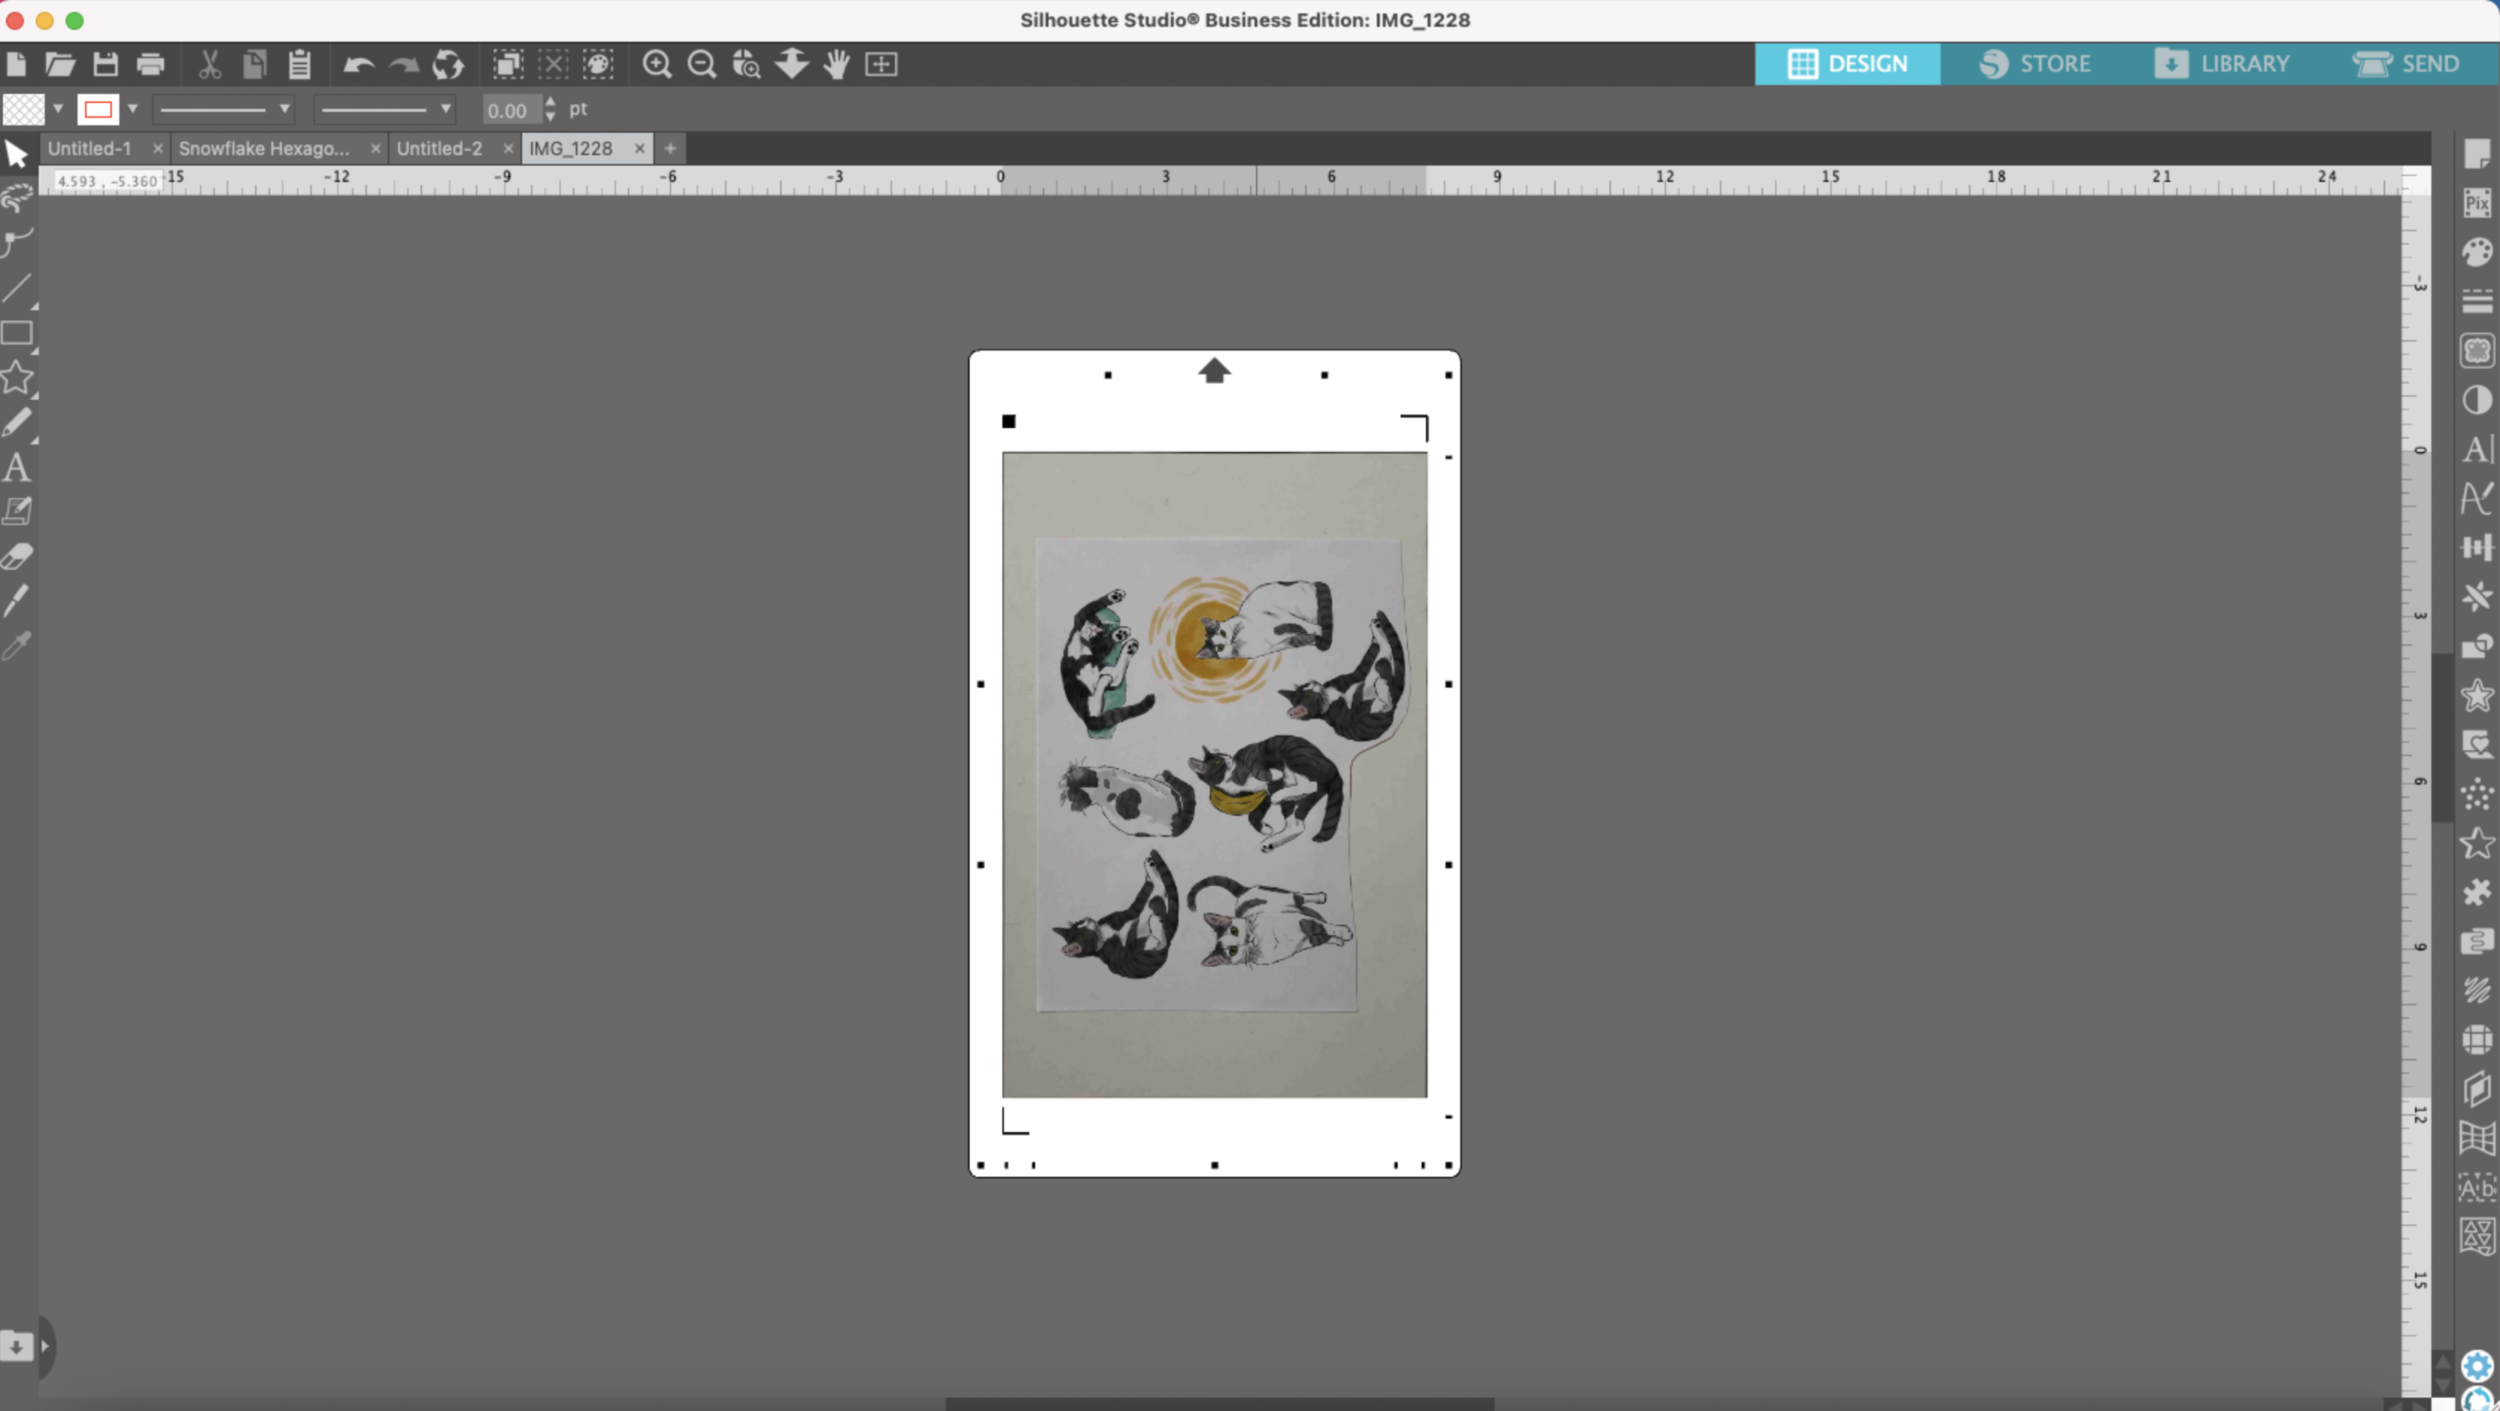
I’ve already taken a photo of the designs I’m going to use on my Pix Scan mat and imported it into Silhouette Studio.

Trace Tool Pix Scan Mat

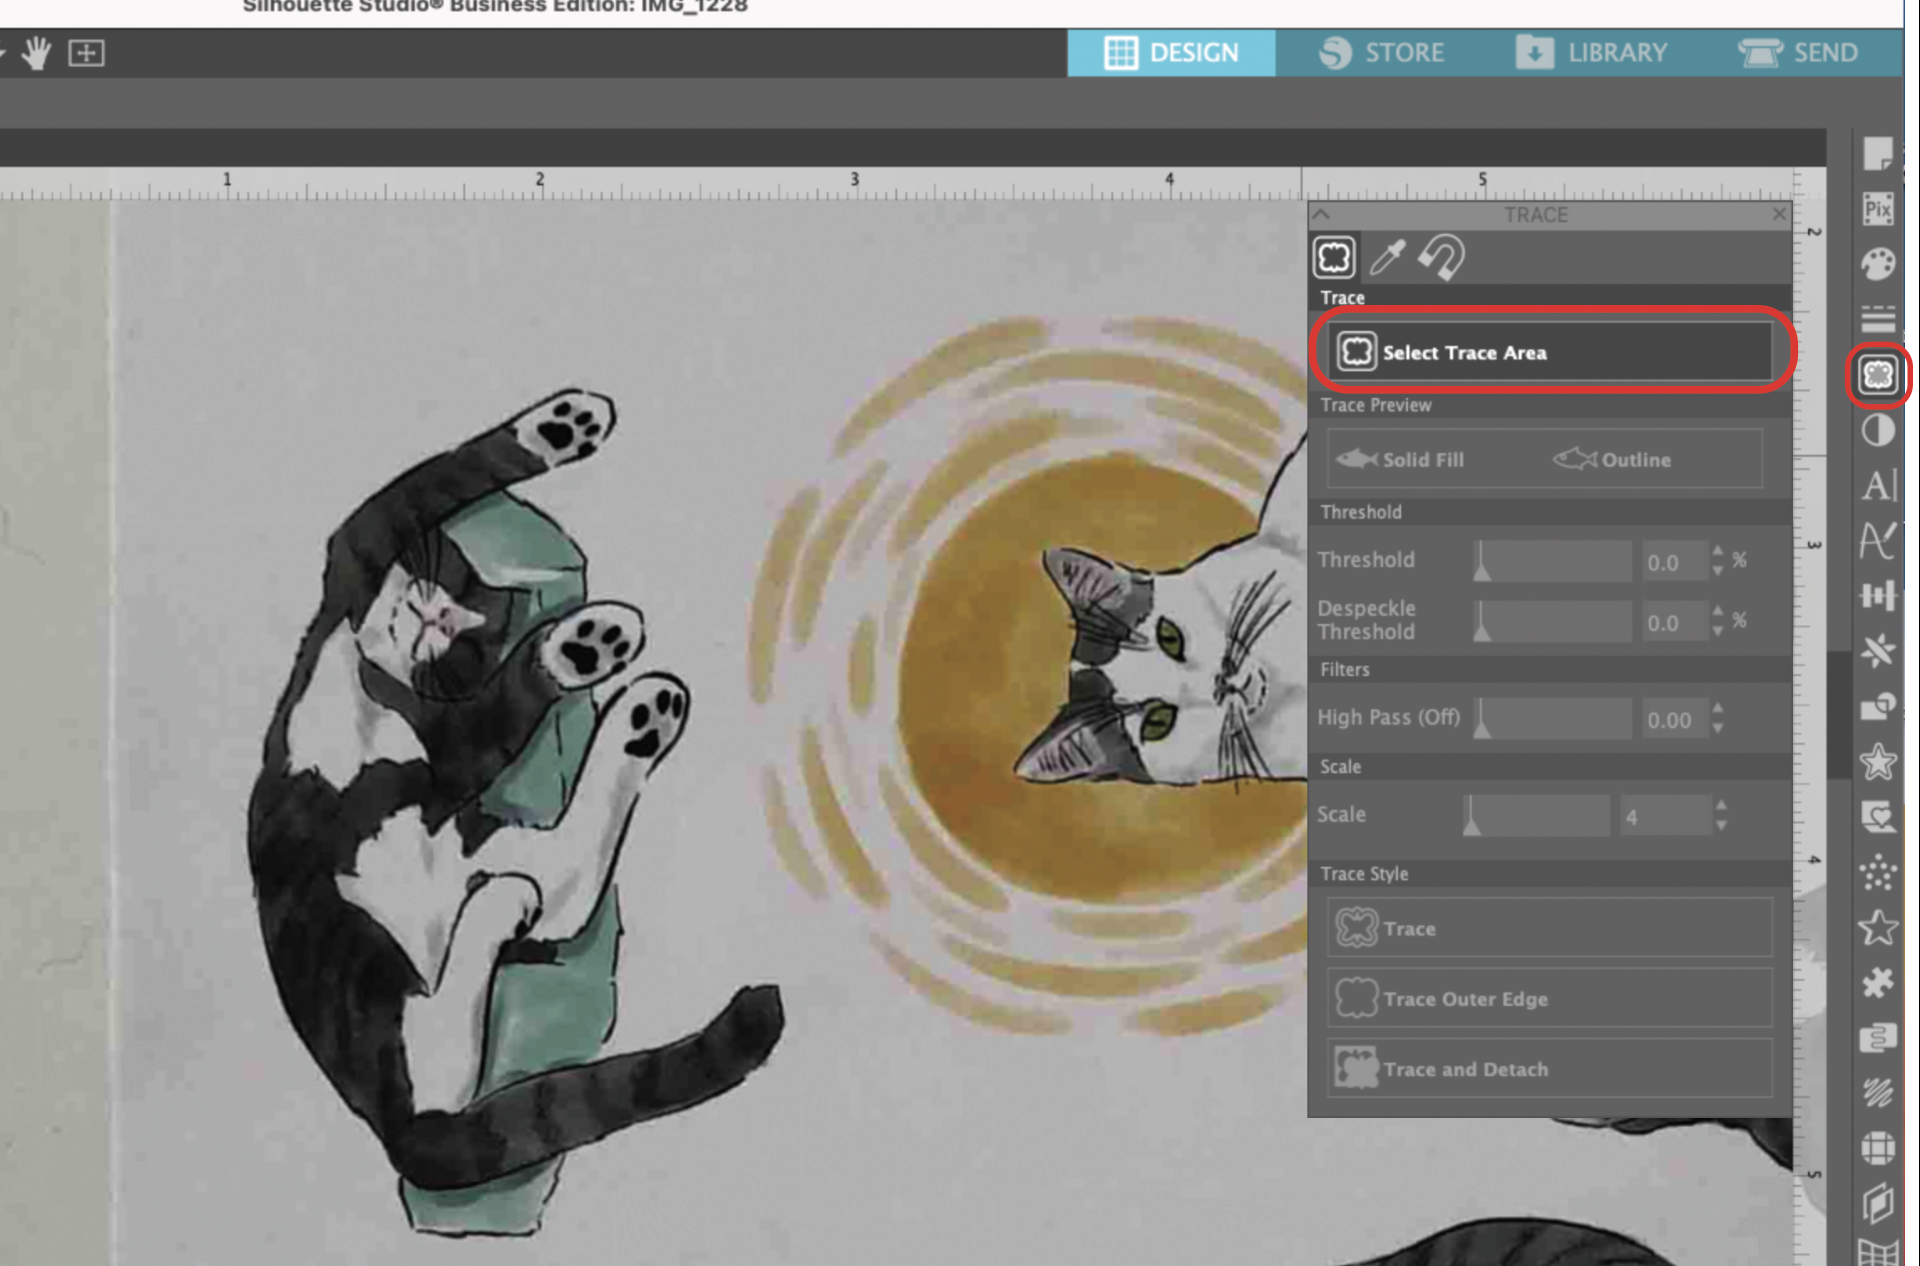
Then I’m going to zoom in the the first little kitty that I’m going to trace and I select the Trace tool from the little toolbar on the right hand side of my screen. It kind of looks like a little butterfly.

Trace Tool Pix Scan Mat

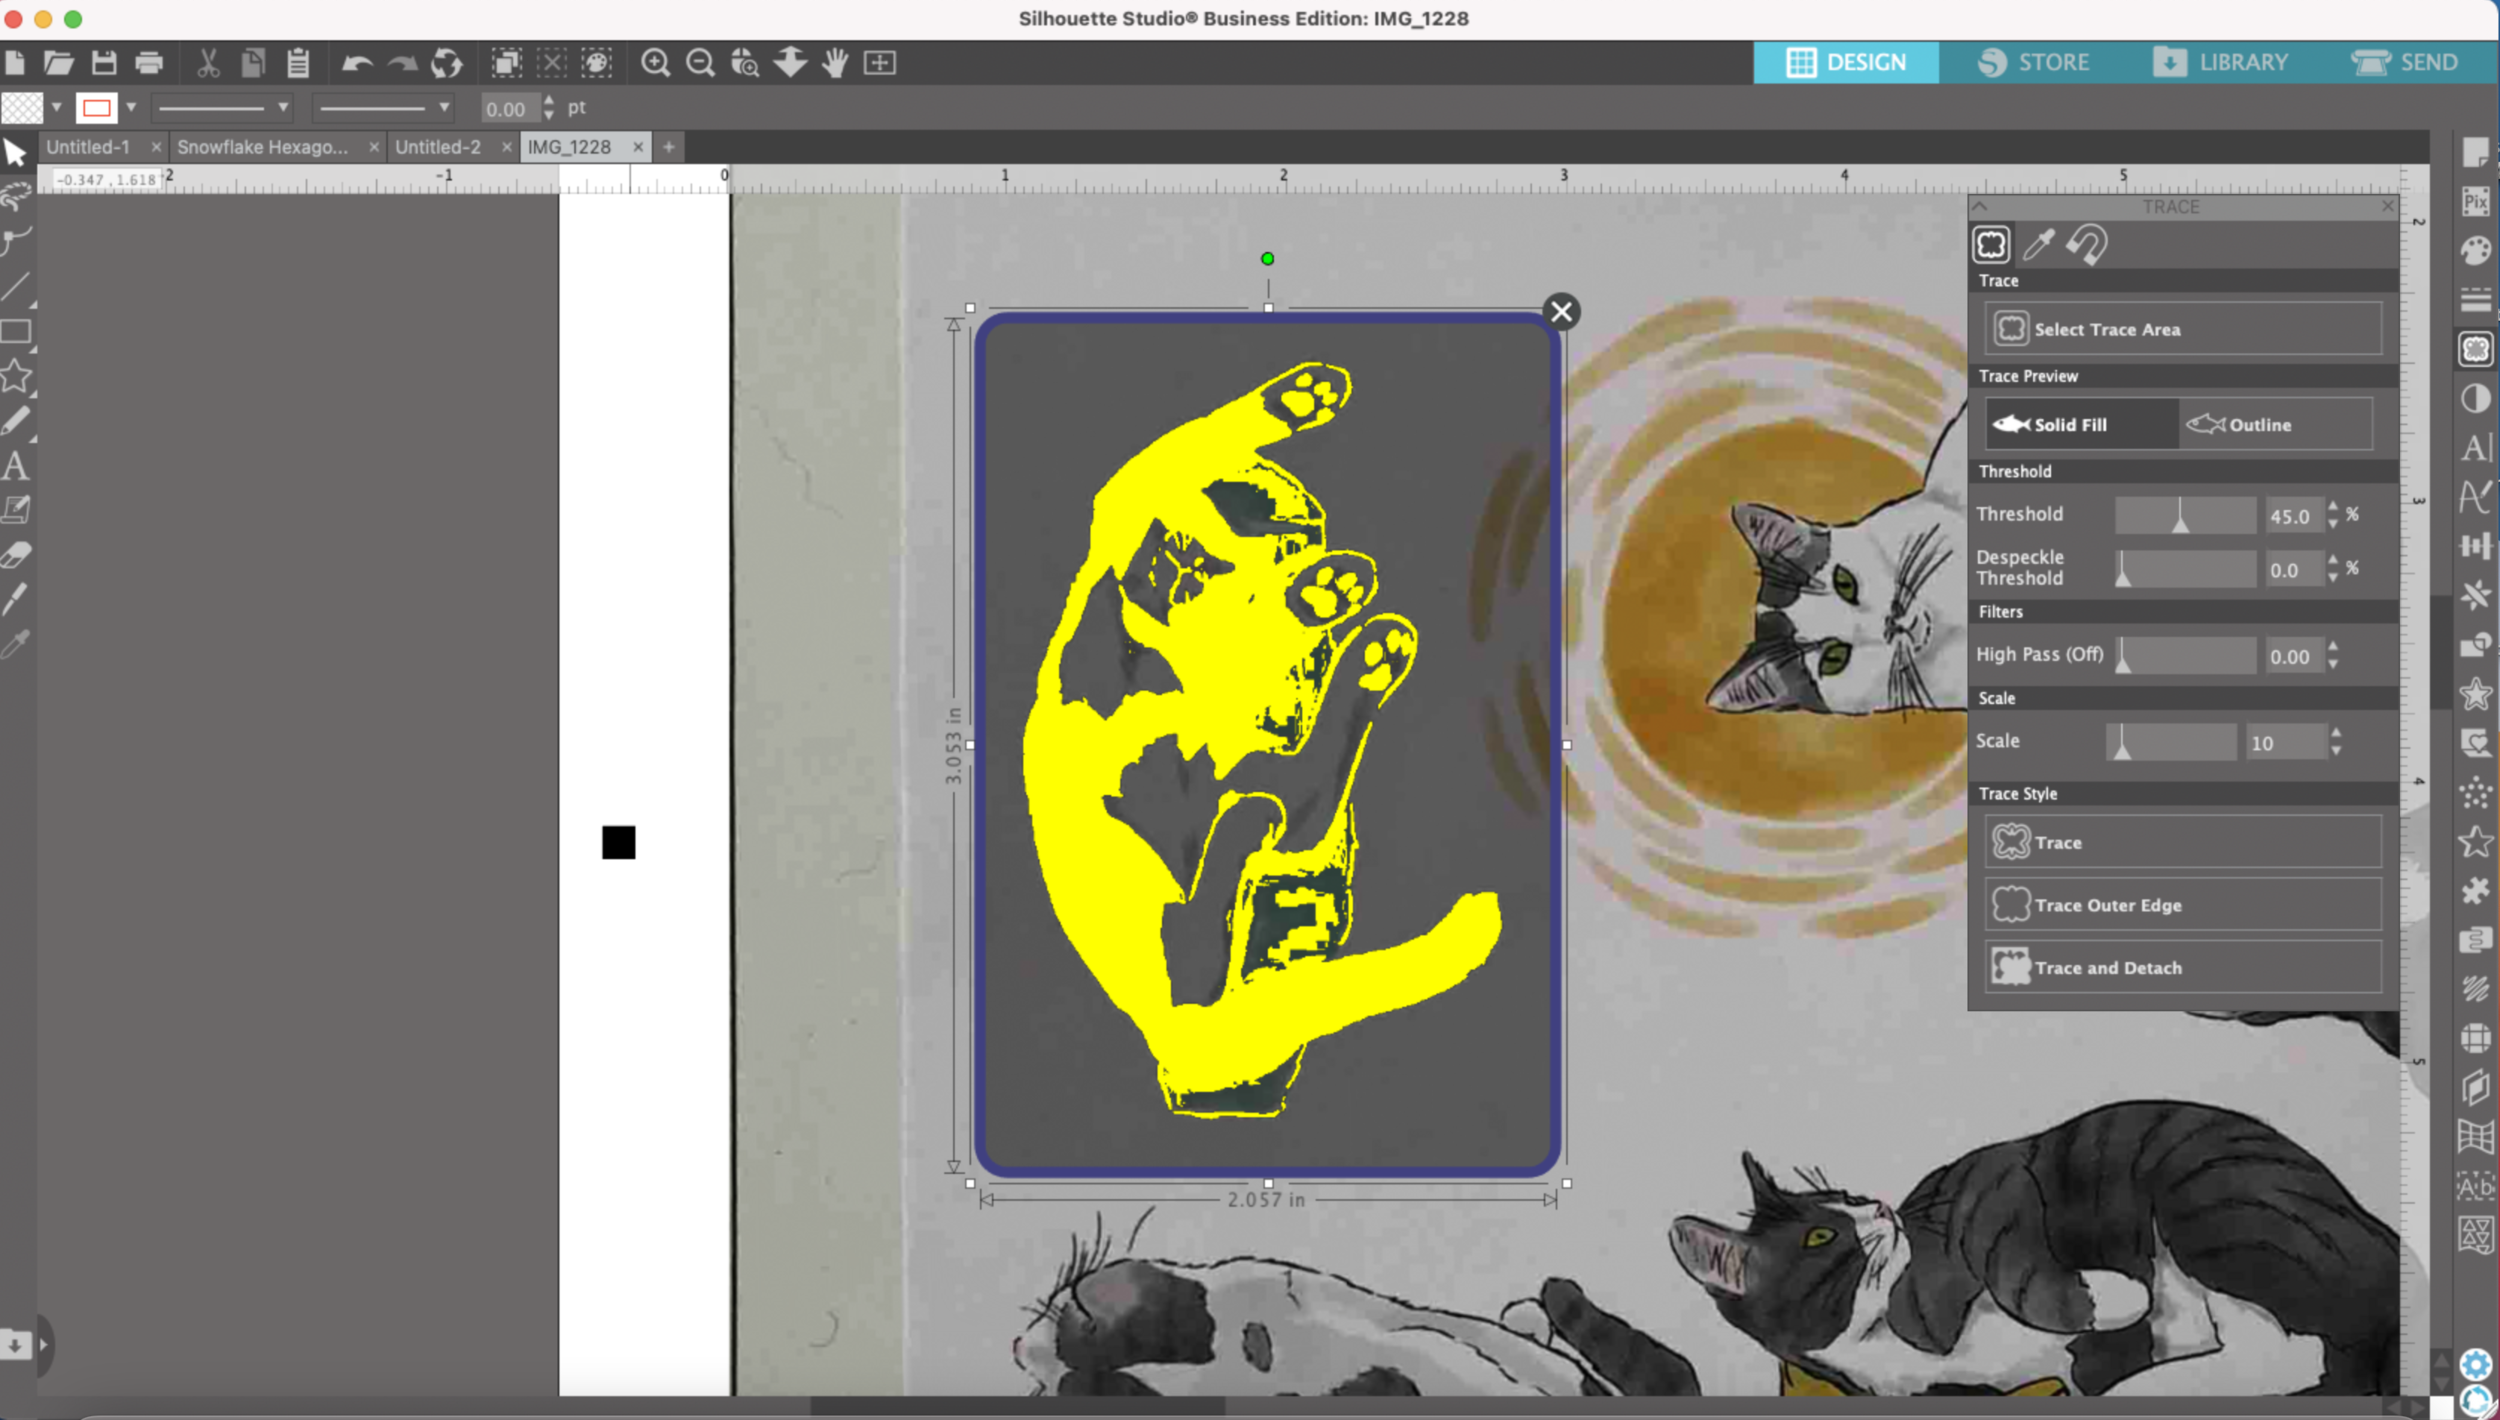
Next, I click on “Select Trace Area” from the Trace tool dialog box. I draw a rectangle around the kitty I want to outline. I have “Solid Fill” selected in the Trace tool dialog box so the area I’m trying trace is easier to see.

Trace Tool Pix Scan Mat

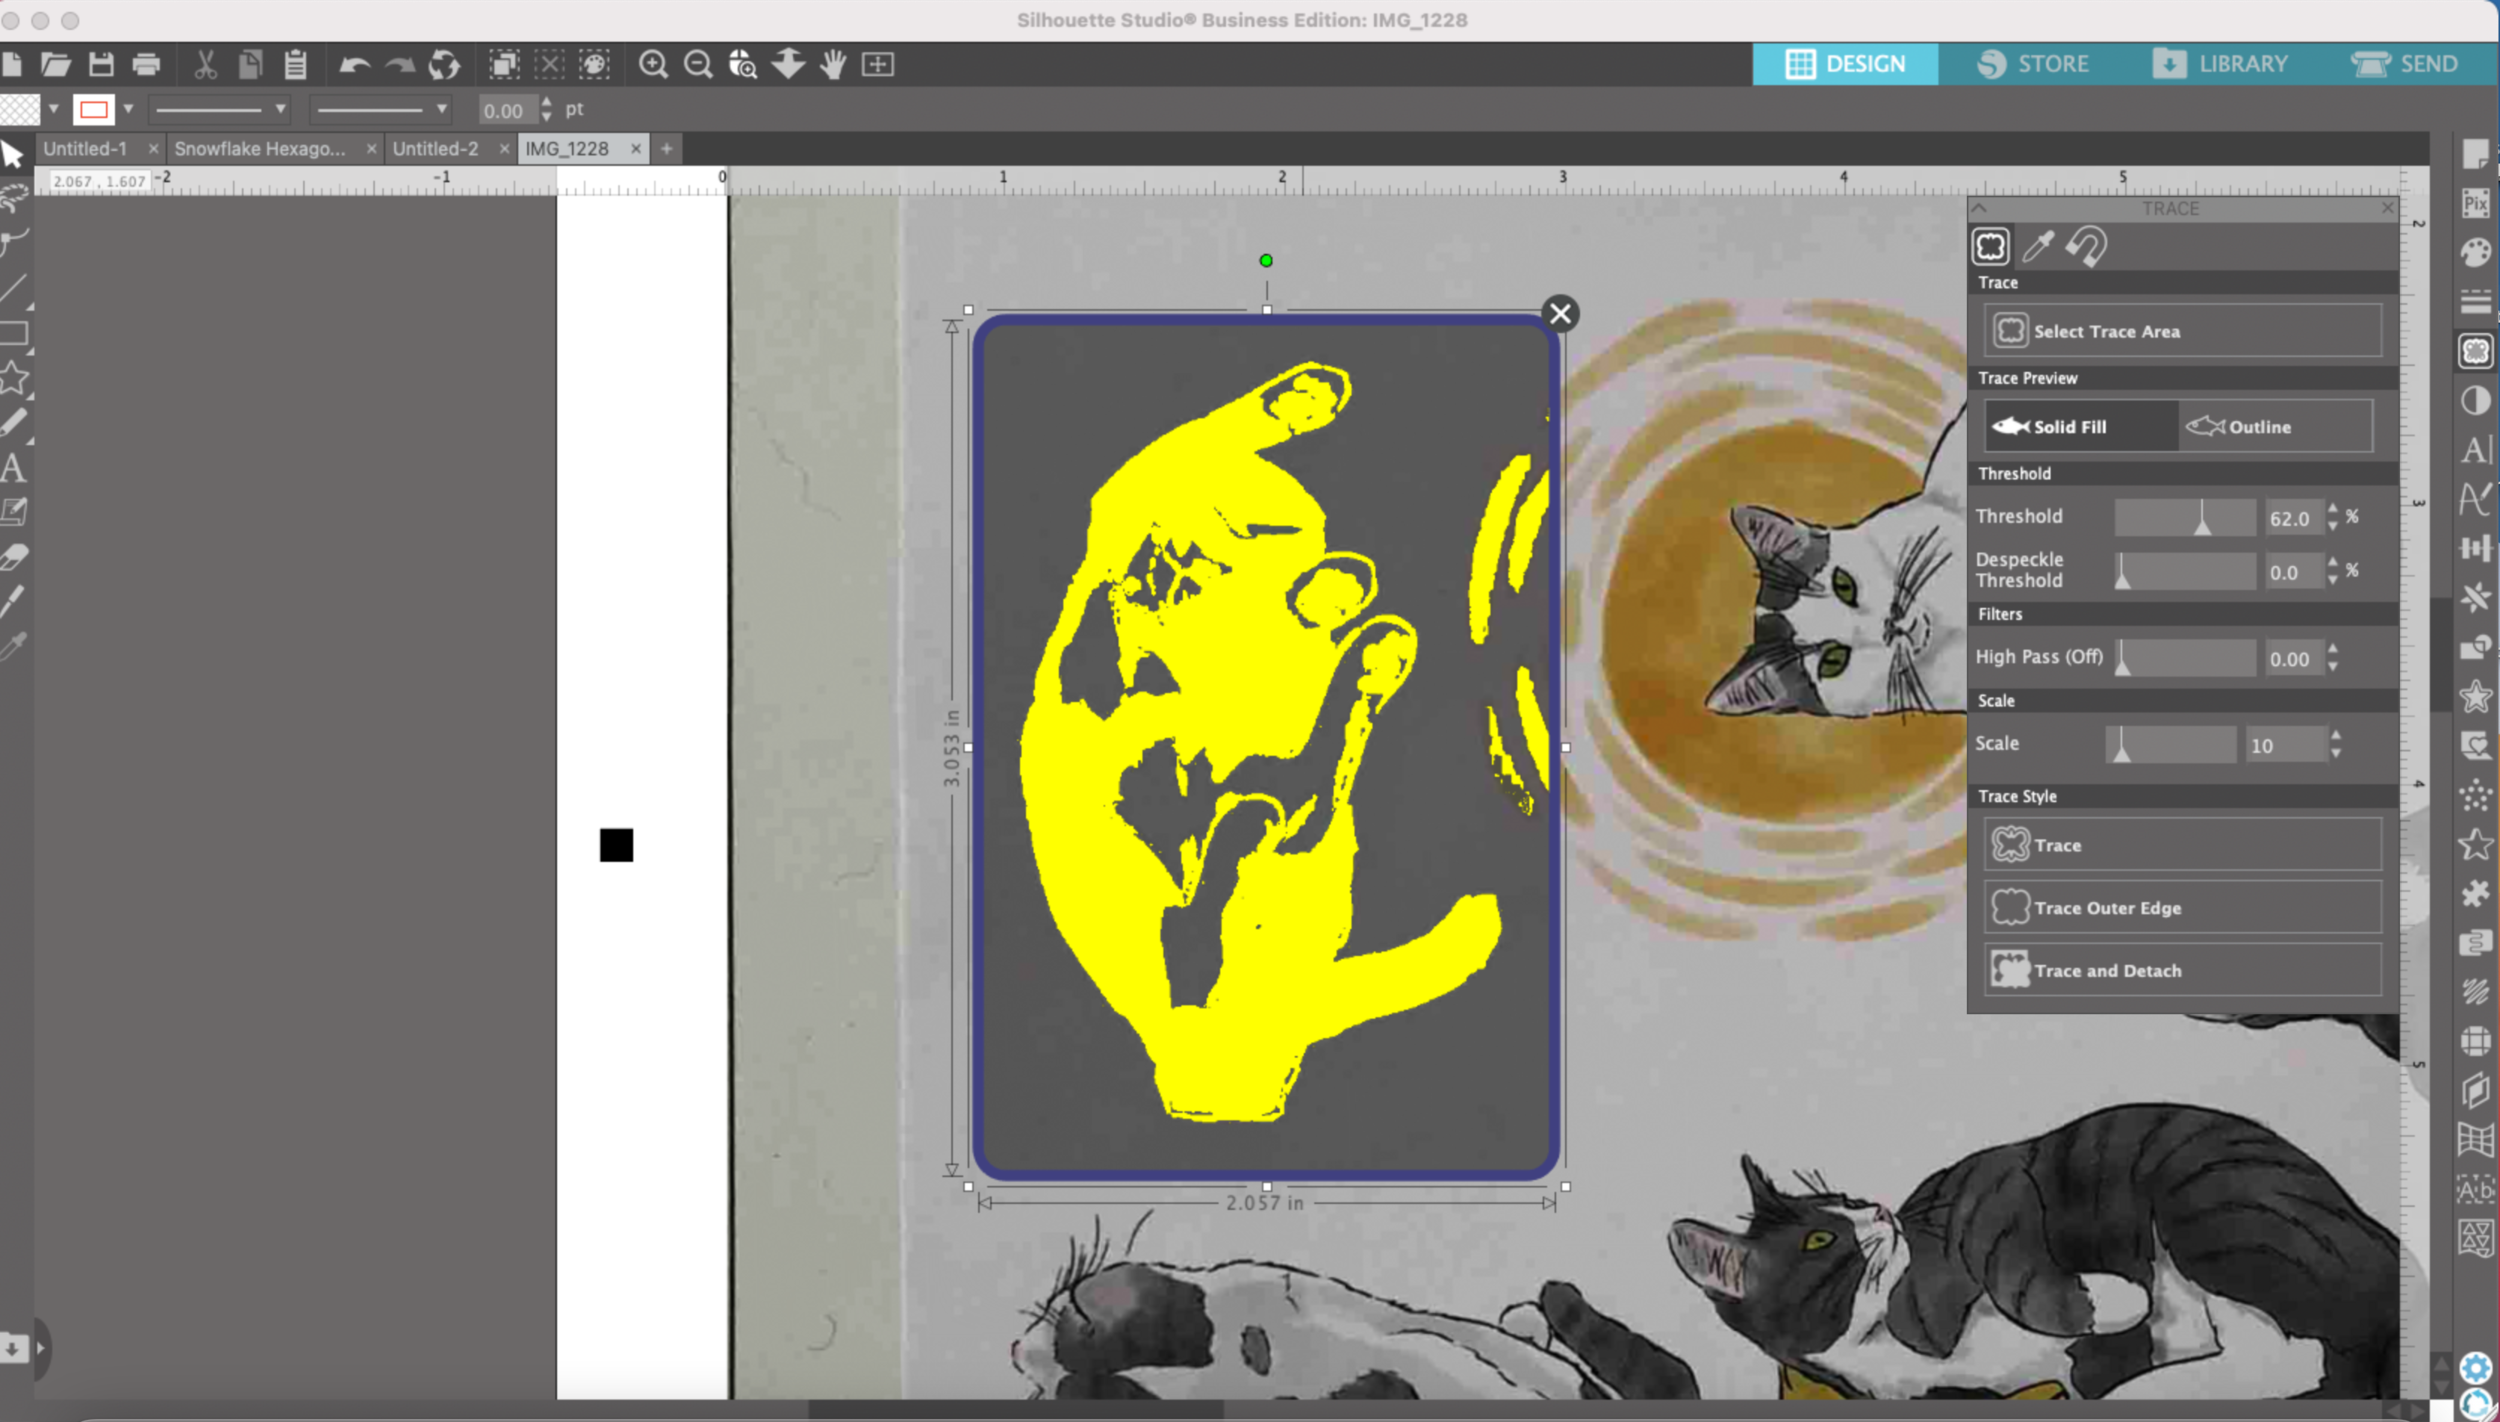
I use the Threshold slider to try to get him little more filled in with the yellow, I’m really trying to get my outer edges completely yellow, there are some small gaps but we’ll fix those later.

Trace Tool Pix Scan Mat

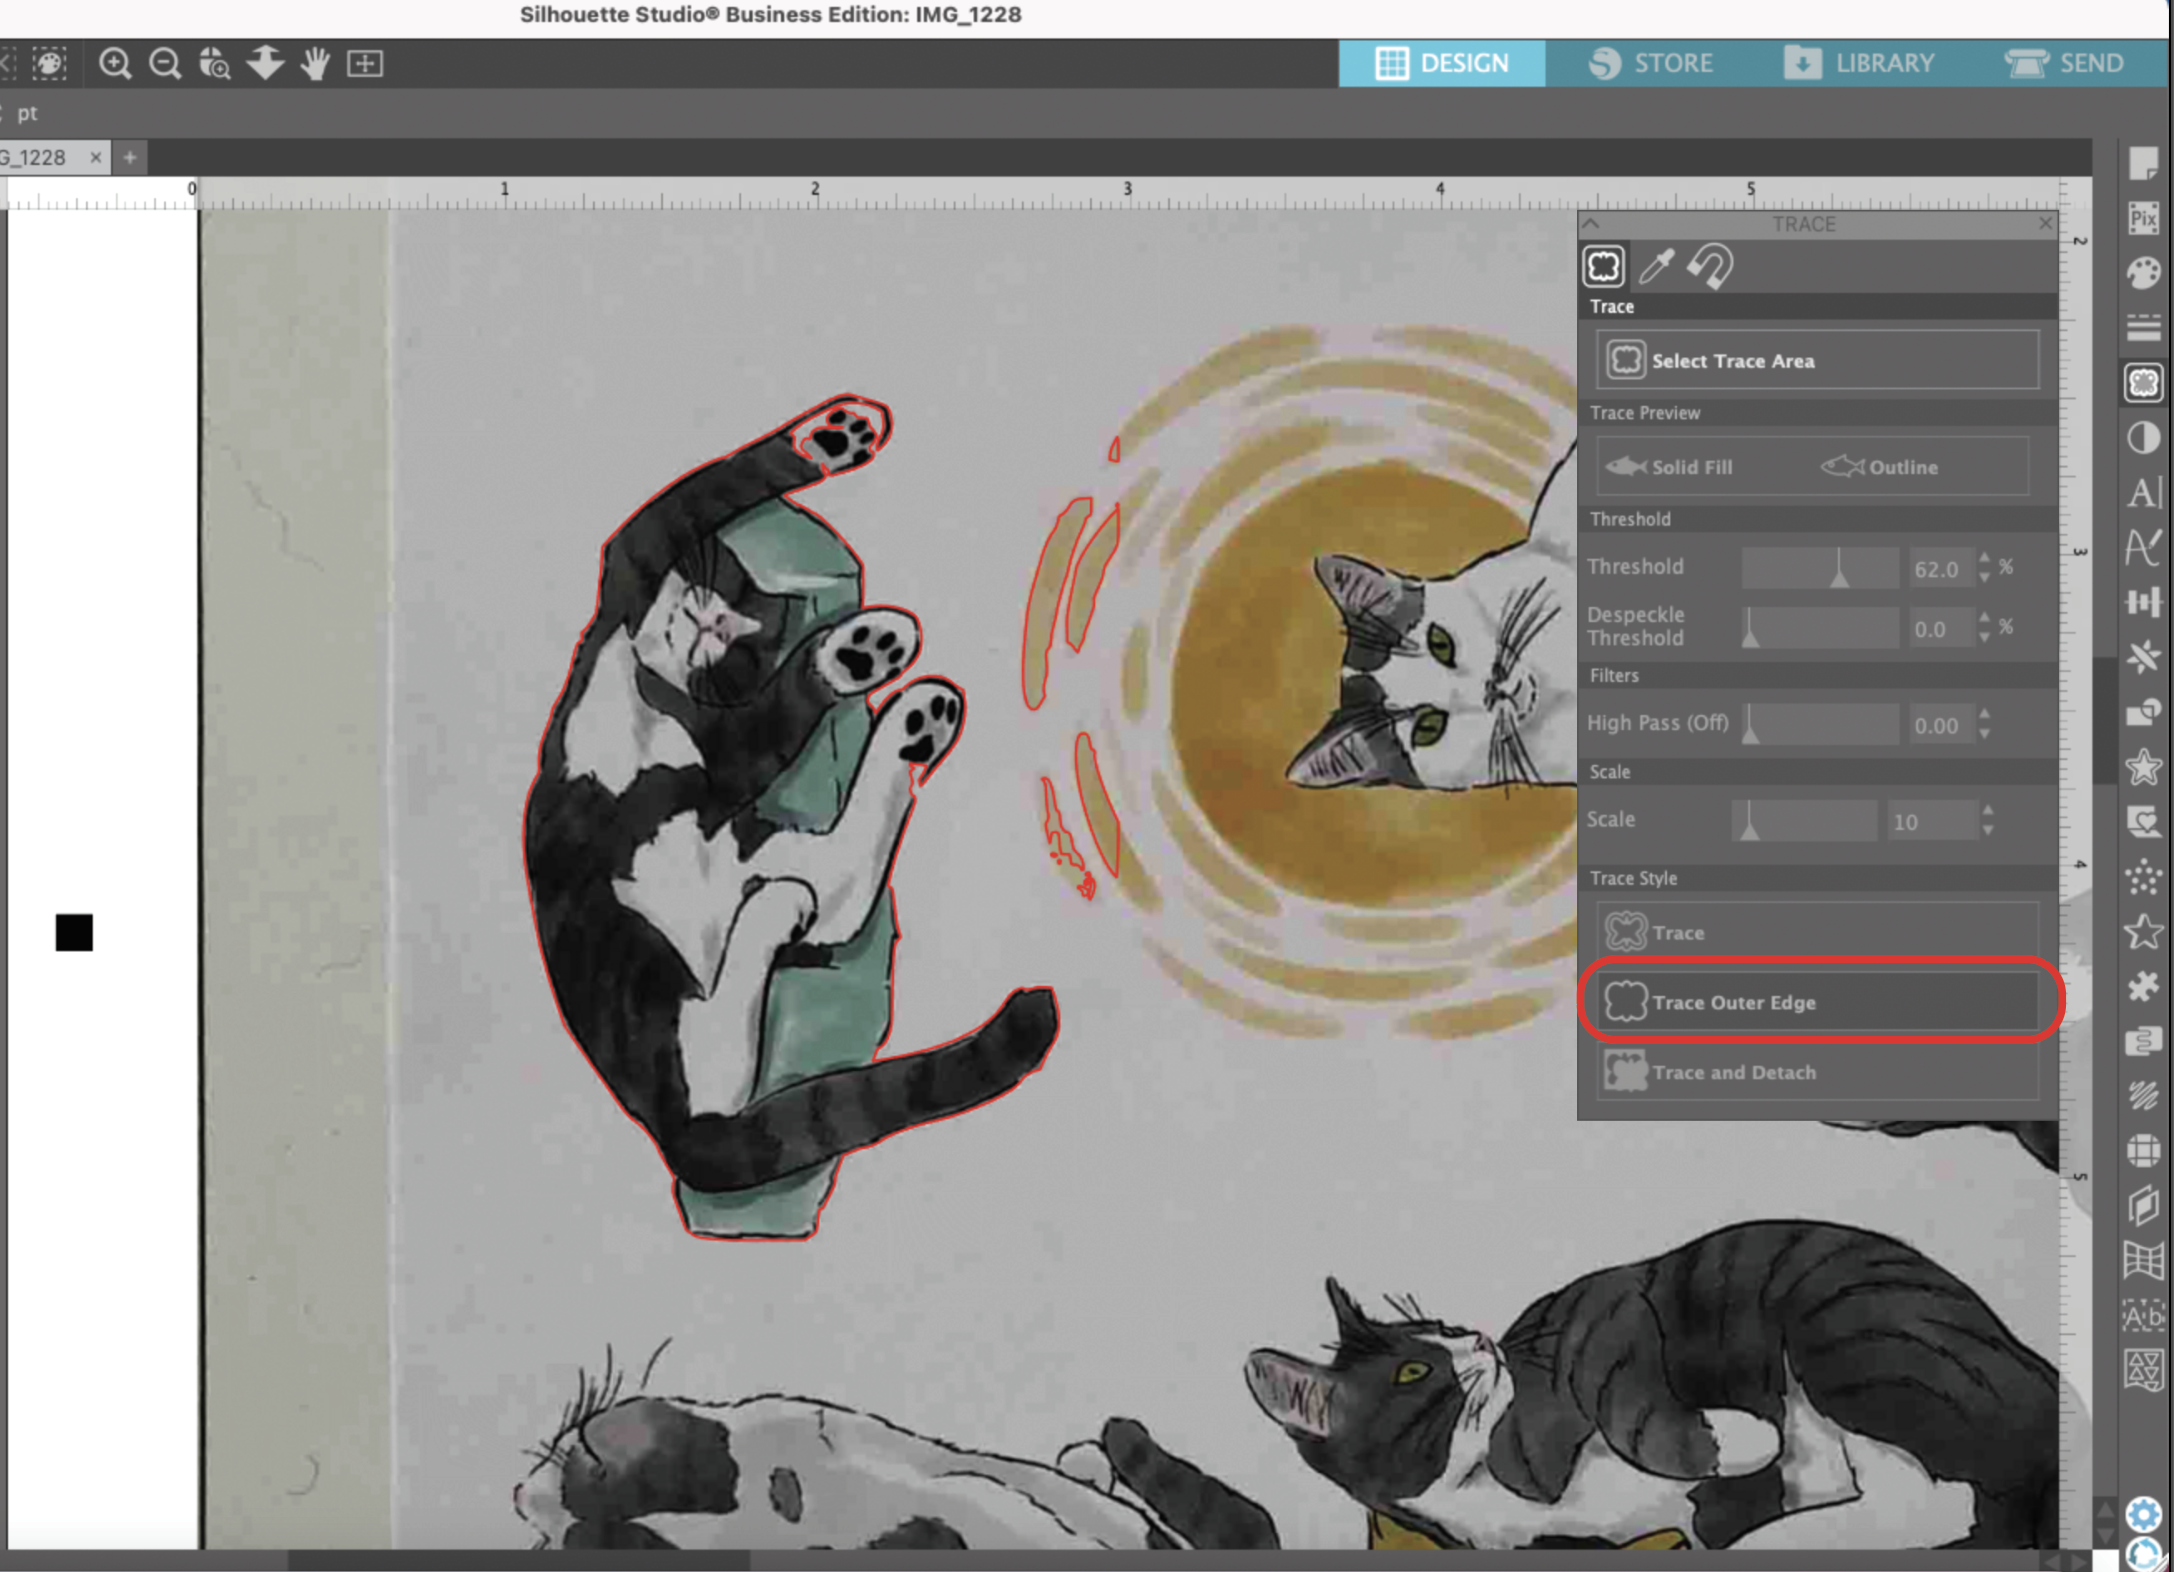
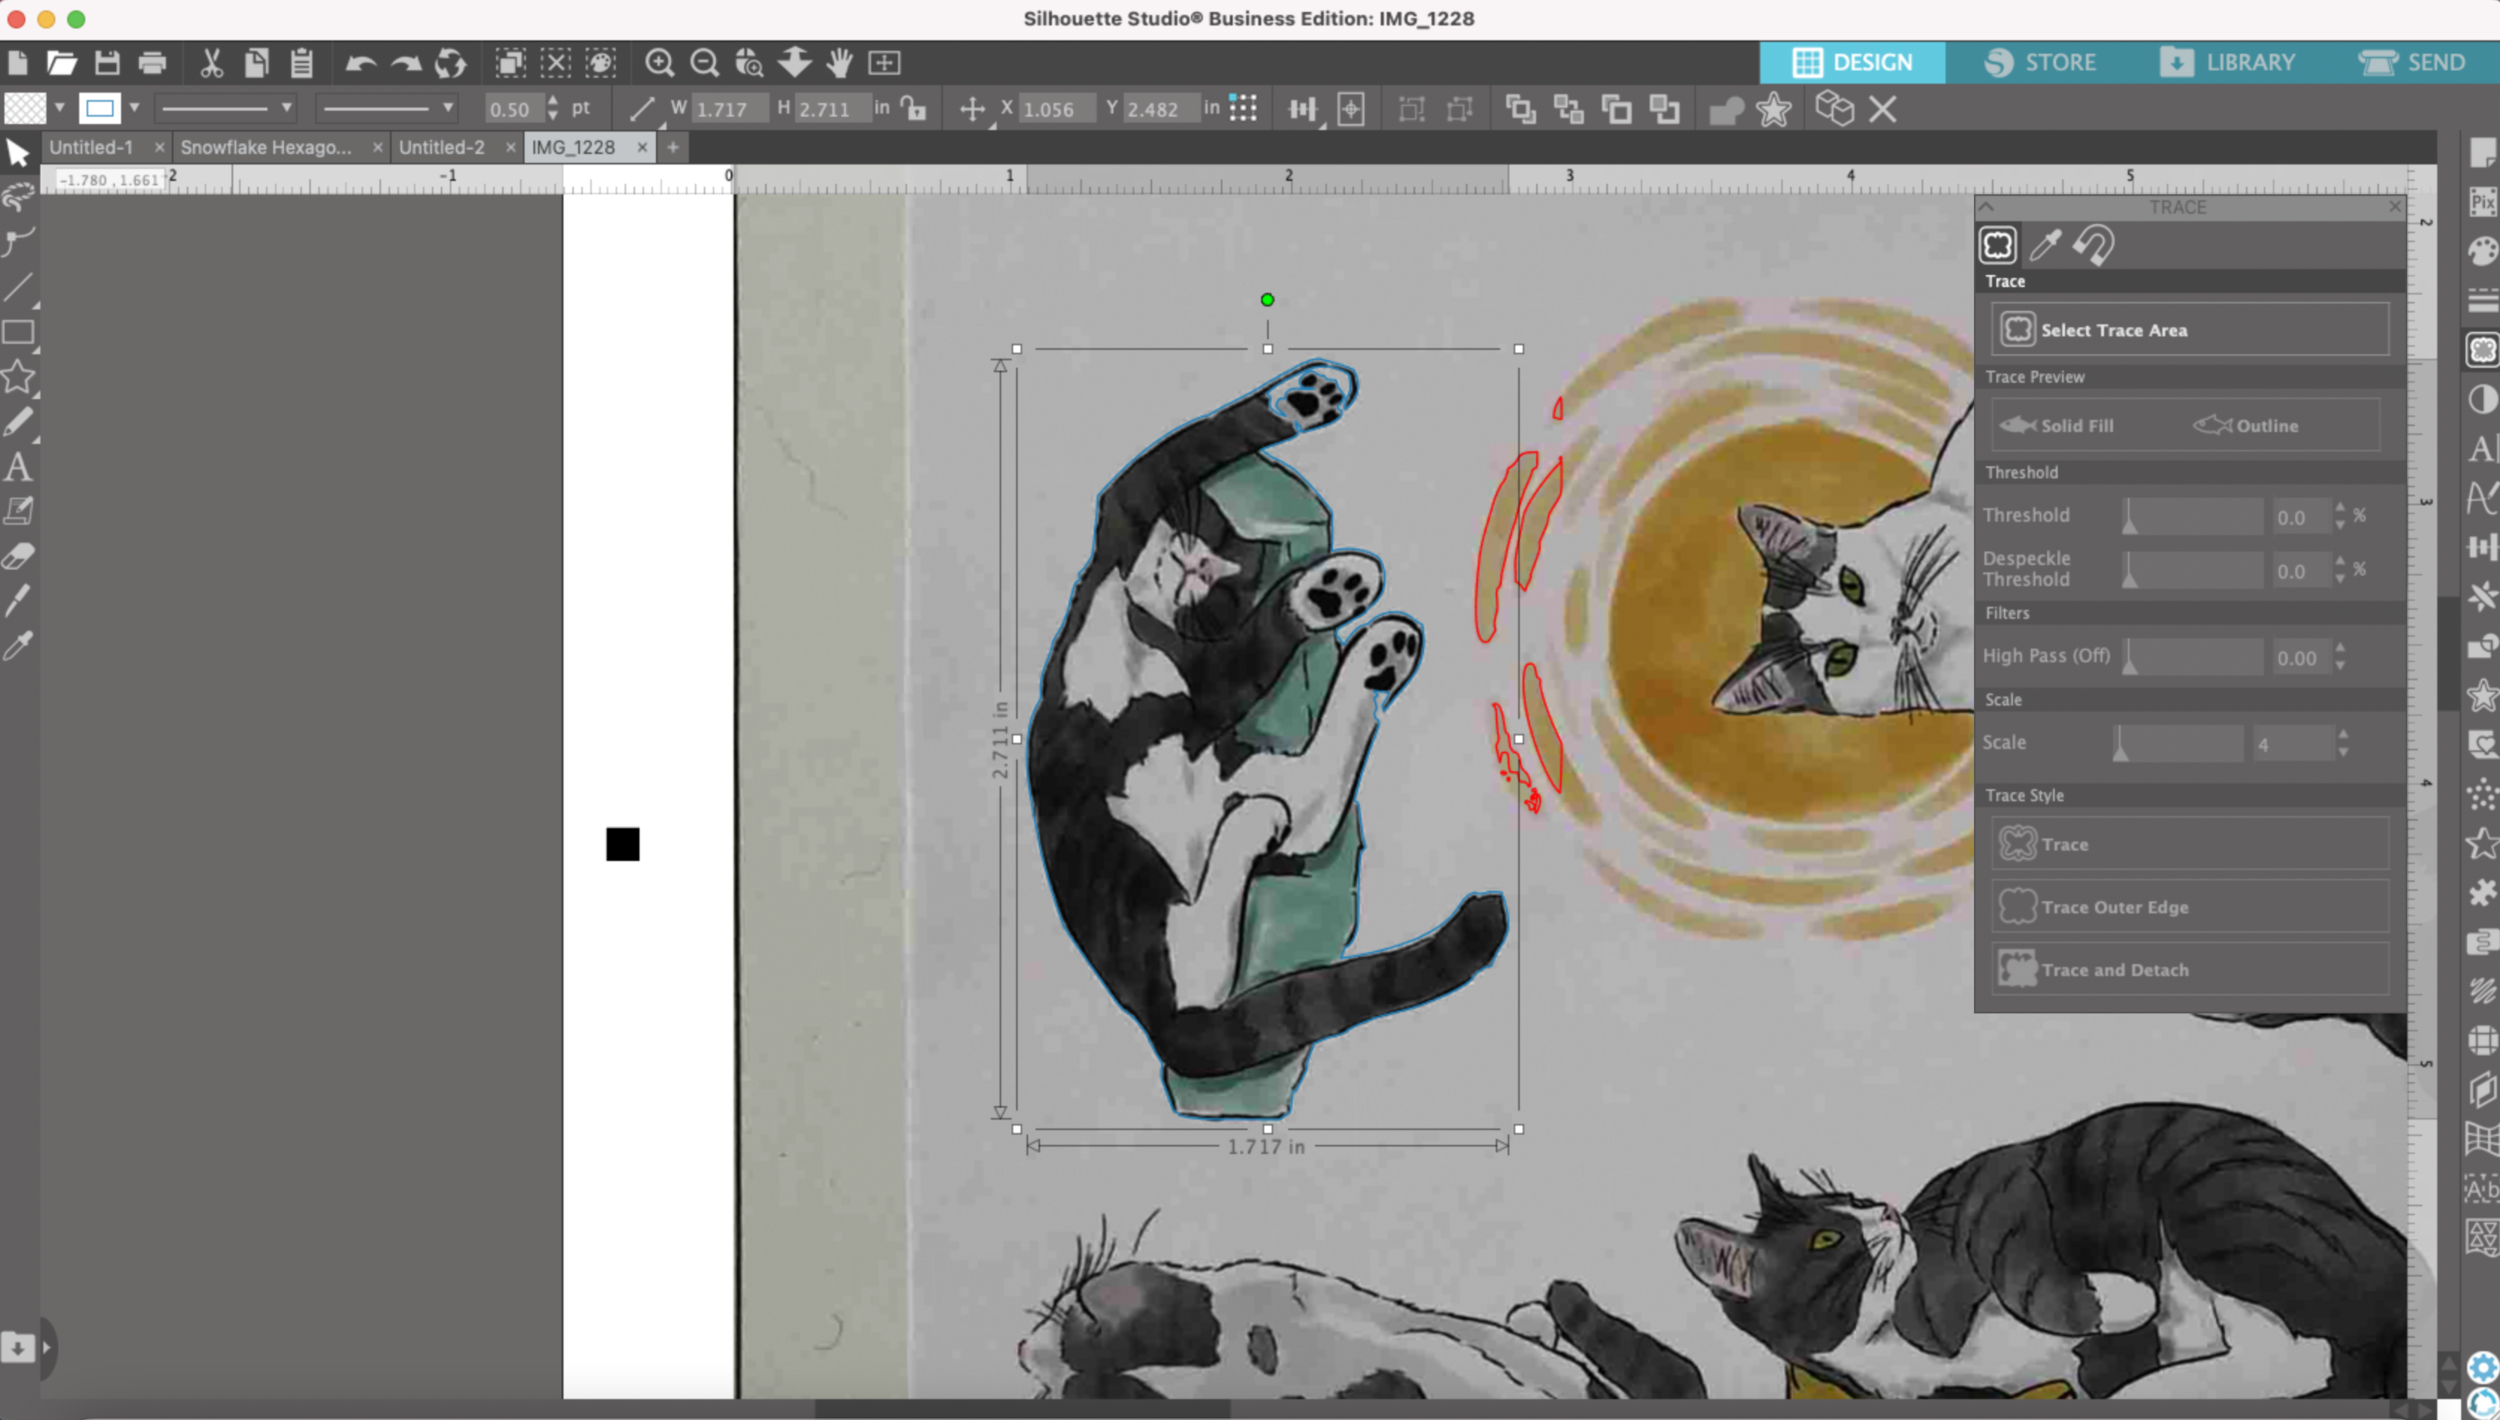
Once I get the yellow area to my satisfaction, I select “Trace Outer Edge.” Then it shows me red cut lines around the area that I just traced.

Trace Tool Pix Scan Mat

Now I need to do a little clean up since my outer edges didn’t quite get the whole outline of the kitty and there are some areas from another sticker that got selected.

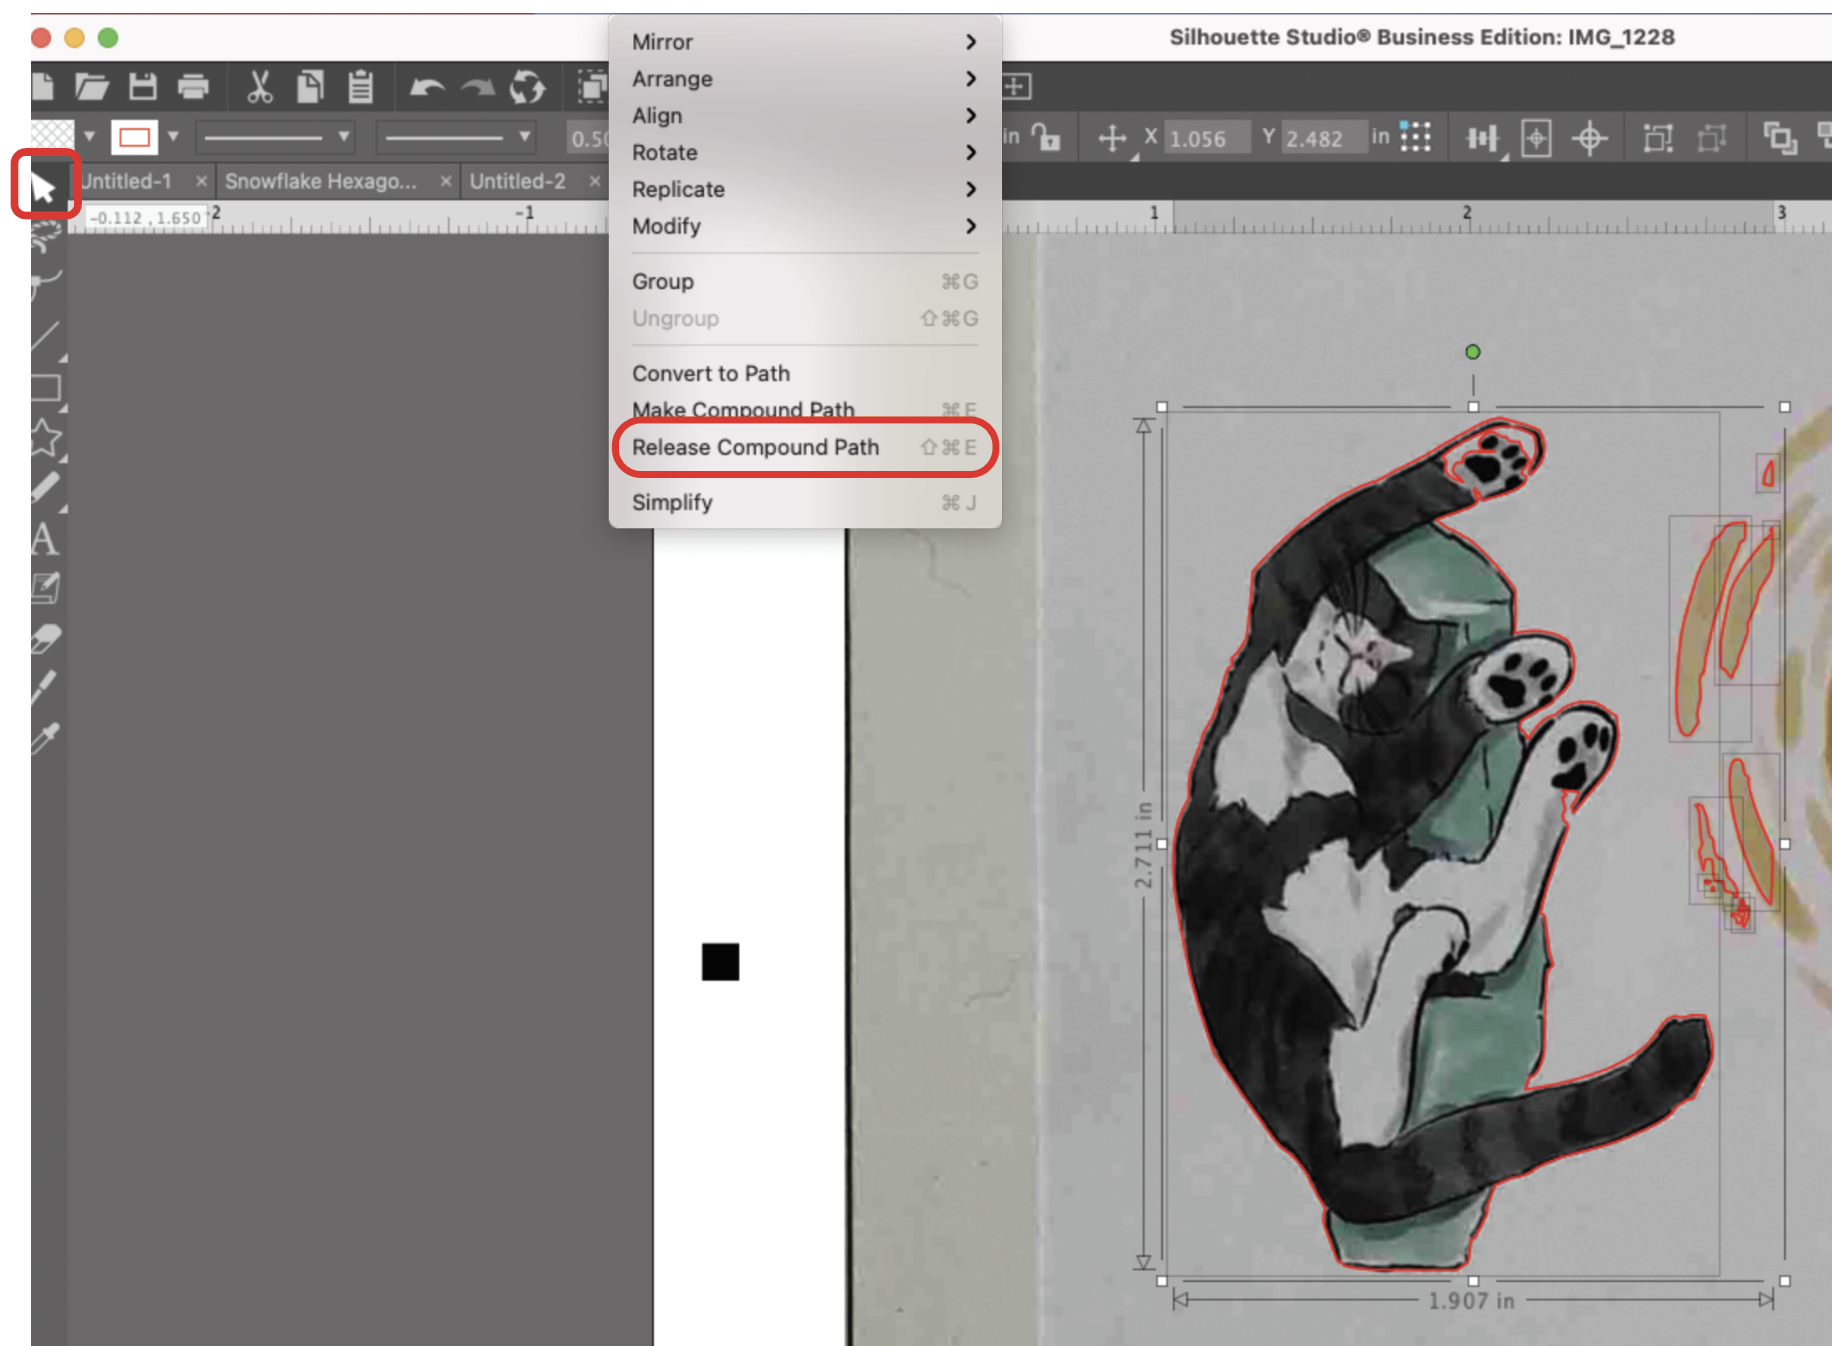
Using the Arrow from the left hand side tool bar, I select the red lines. I’m going to release the Compound Path.

Trace Tool Pix Scan Mat

Then I’m going to select the red line that goes around the outer edge of the kitty and change the line color to blue (you can use any color, I’m just using blue because it’s easy to see).

Trace Tool Pix Scan Mat

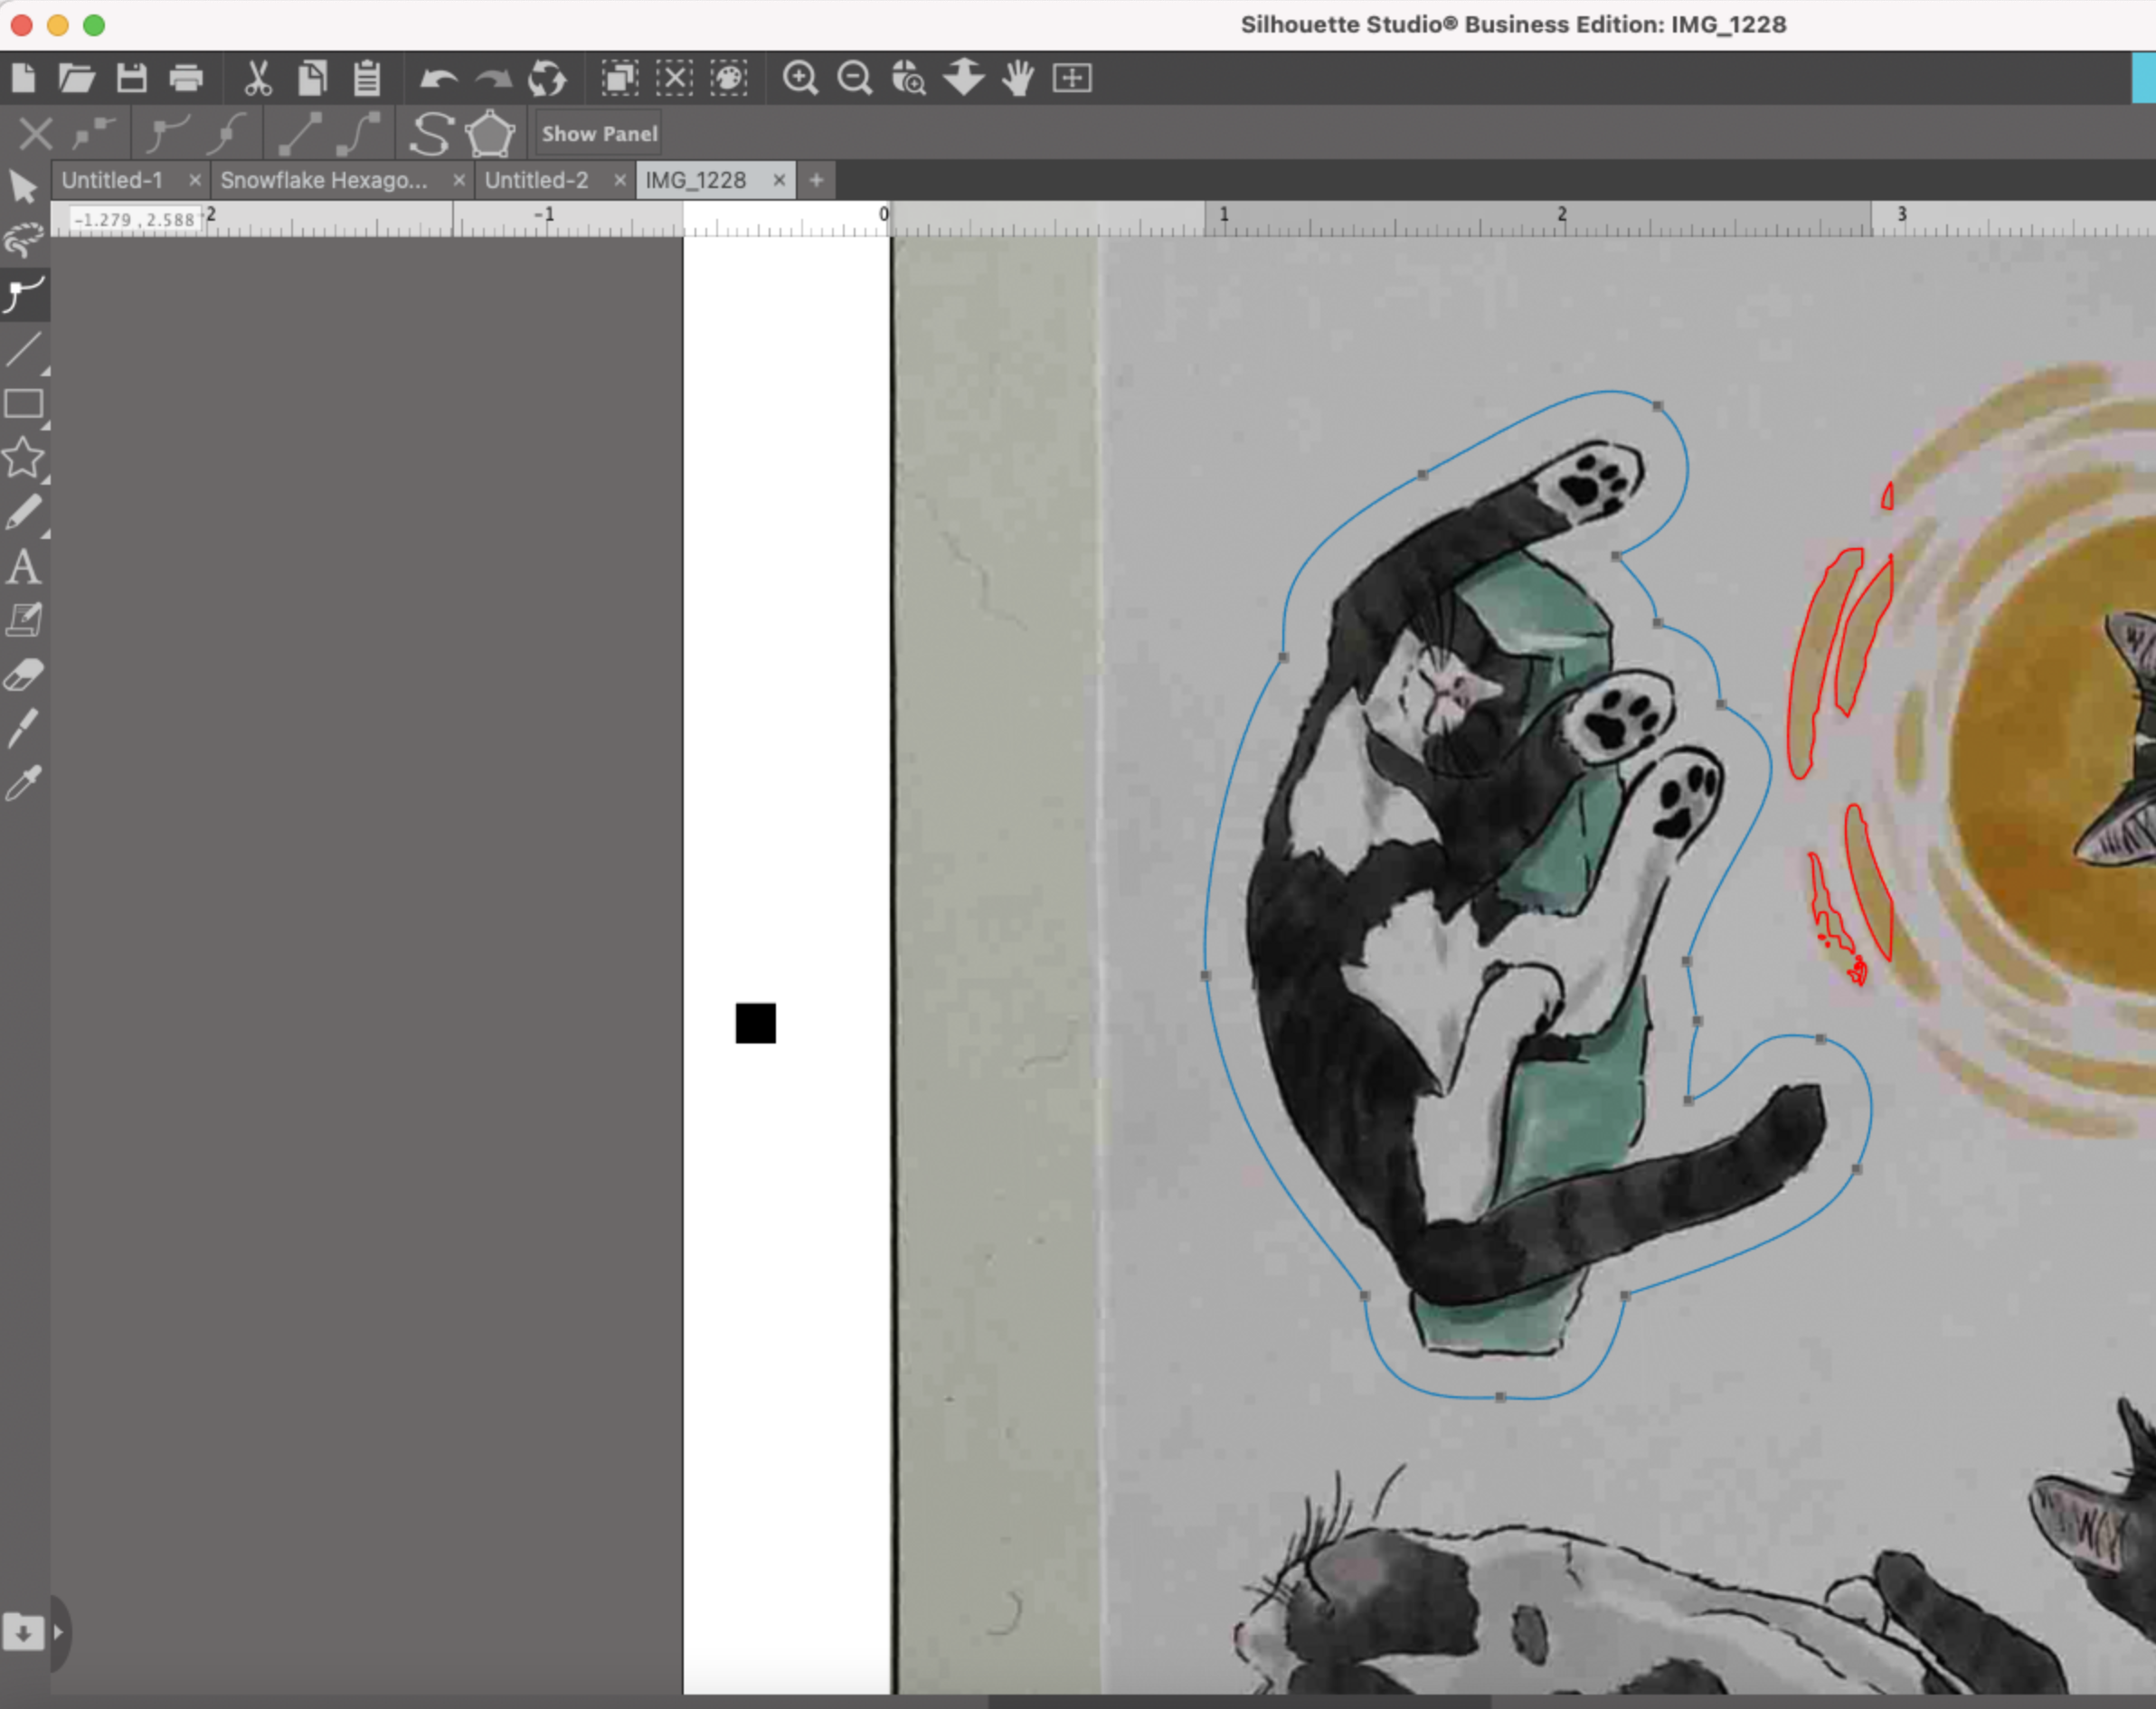
Now I’m going to make the offset. Select the little star from the tool bar on the right hand side. I’m going to make an outer offset at 0.125”. Then click Apply.

Trace Tool Pix Scan Mat

I’m going to delete the inner blue line. Then I’m going to smooth out the offset a little bit using the smooth tool.

Trace Tool Pix Scan Mat

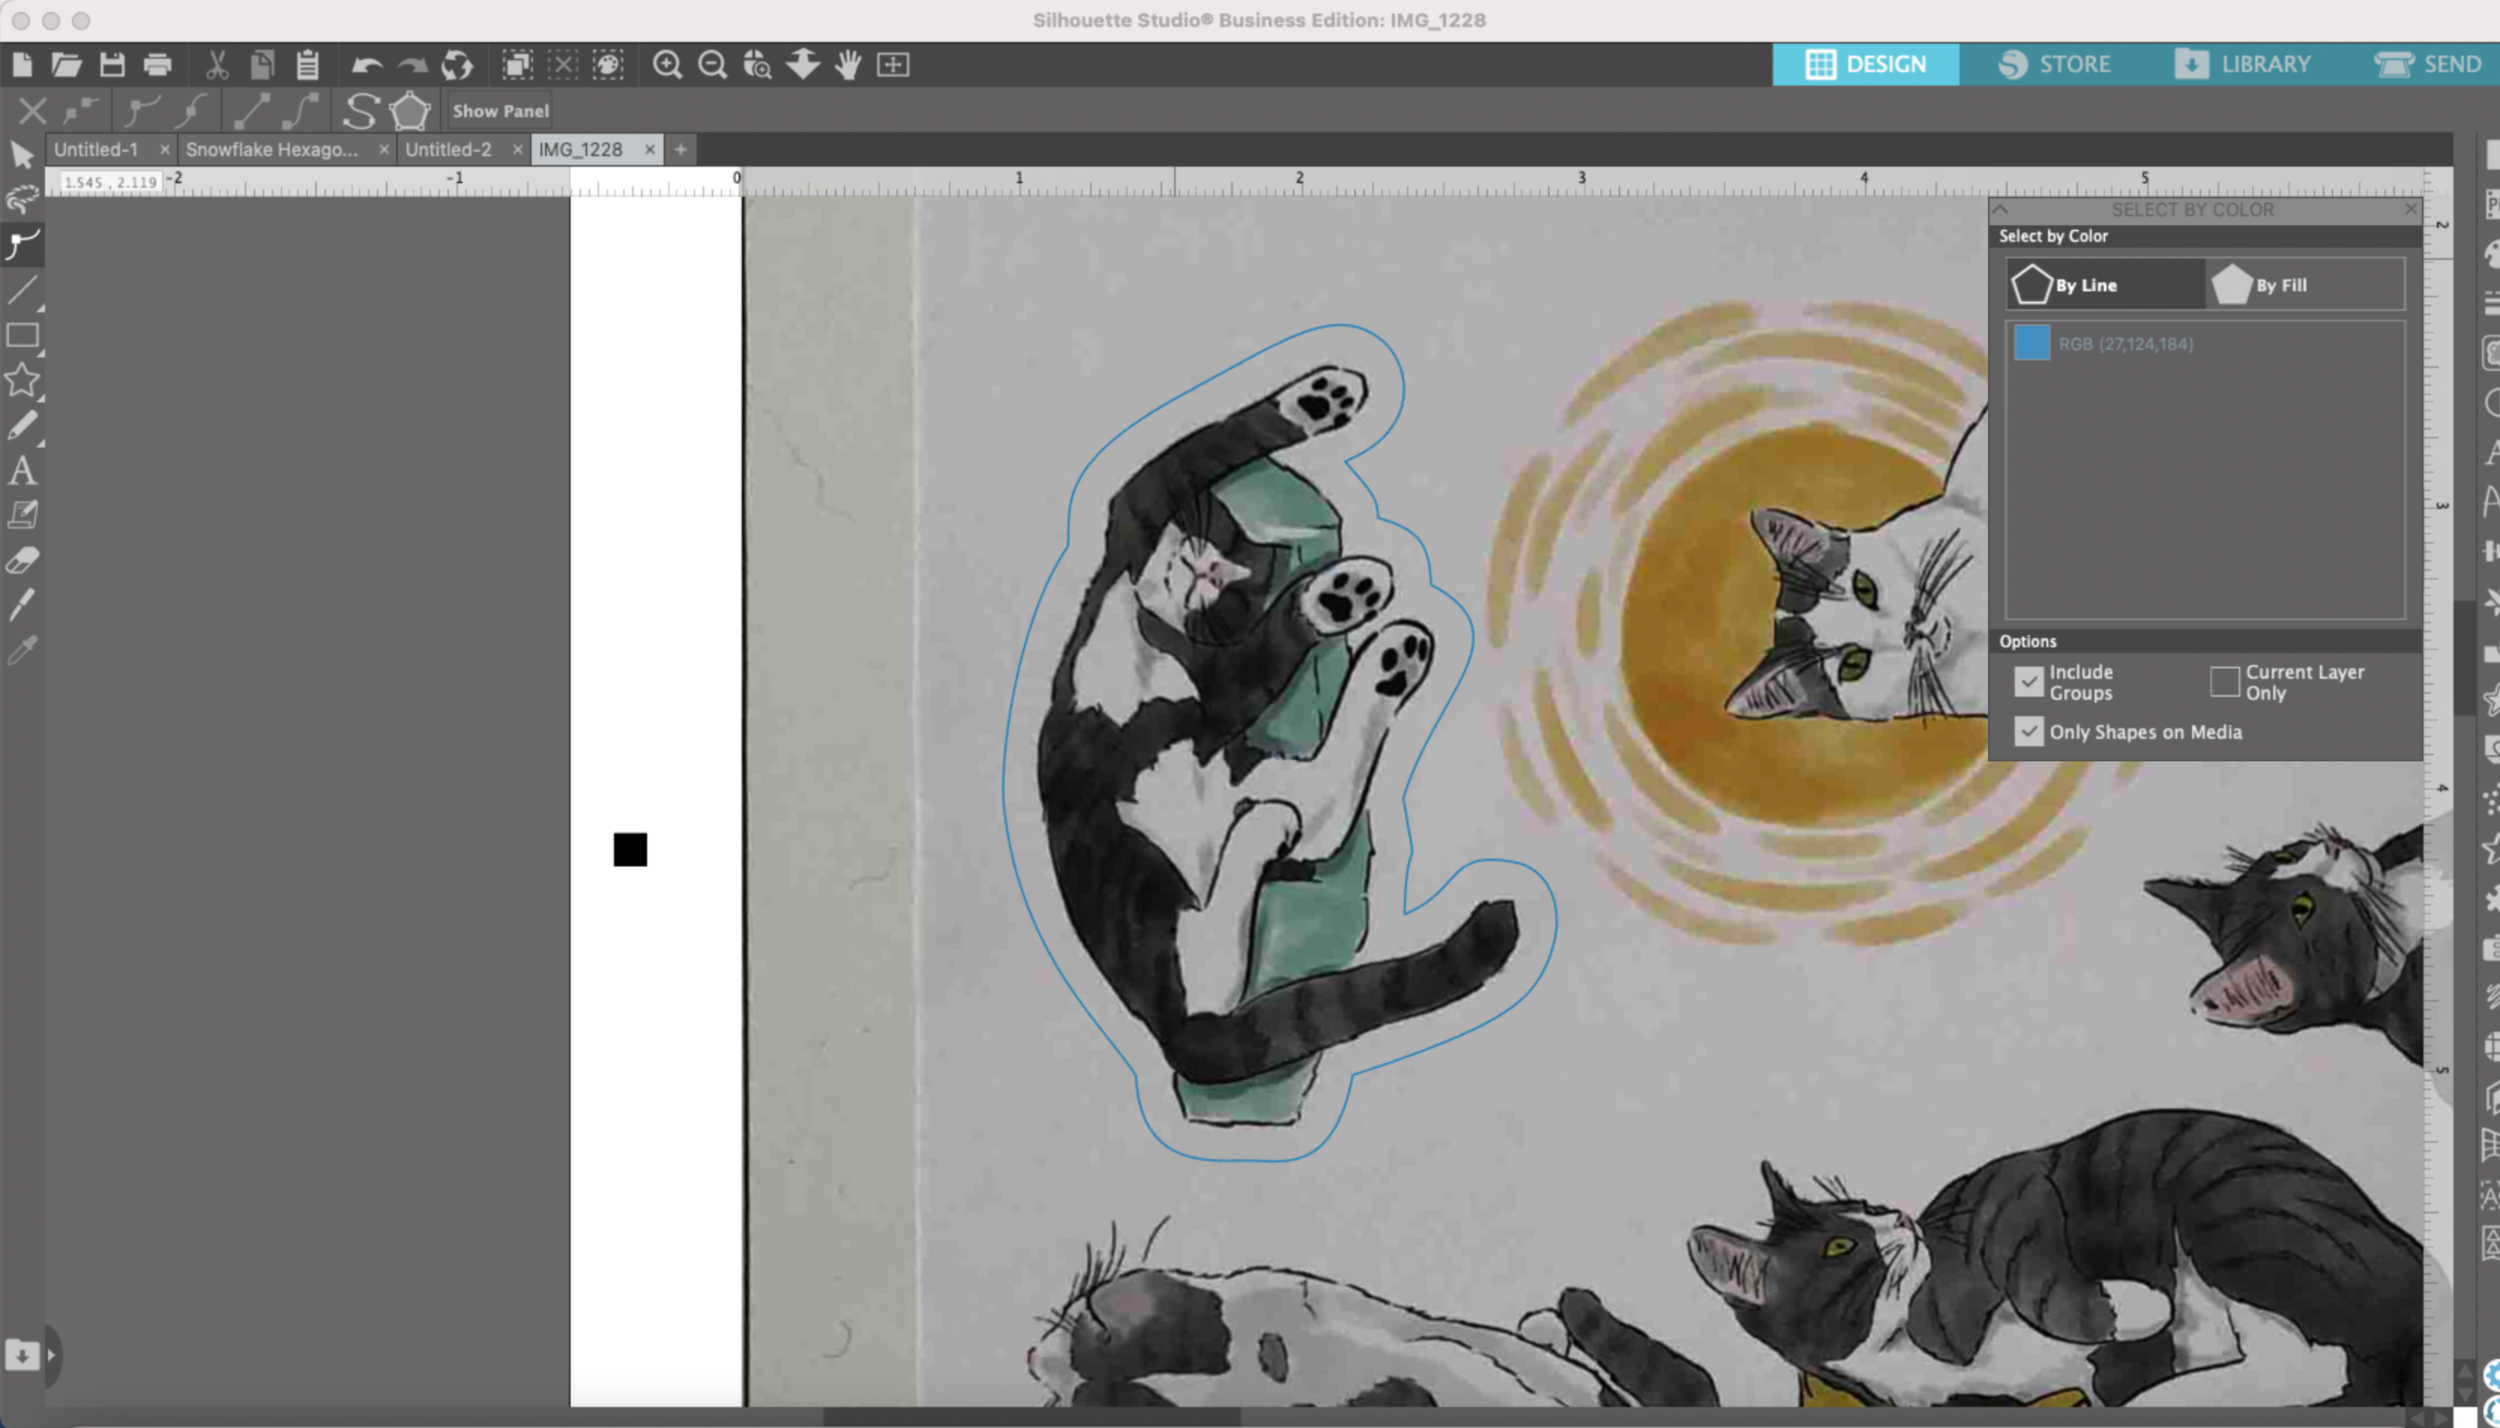
Next, I’m going to get rid of the red outlines that are part of the other sticker. I could click each individual piece to get rid of it, but instead I’m going to use the “Select by Color” feature.

In the tools bar that goes across the top edge, I select the little paint palette with the dotted line around it. In the dialog box I have “By Line color” selected. Then I click on the red and it selects everything with a red outline.

Trace Tool Pix Scan Mat

I click delete and now all of the red lines are gone!

Trace Tool Pix Scan Mat

I repeat the same process for the other images on my mat. One thing I love about Silhouette Studio is I can can save my cut lines and use them for the next sheet of stickers too!

Using the Silhouette Portrait 3 Pixscan Mat to Cut Stickers

Hi Everyone!

This week I want to share another favorite accessory for my Silhouette Portrait 3, the Pixscan mat! It’s super helpful for cutting stickers or things you may have already printed and now you want to cut them.

First, if you haven’t done so already, you will need to calibrate whatever camera you care going to use. I’m going to be using my iPhone X.

Open Silhouette studio. I currently have not mat selected. I’m going to the little PIX icon on the toolbar to the right of Silhouette Studio.

Click on “Show Calibration Test Card.” A page full of little black dots will pop up.

Pix Scan Mat Calibration

Now we need to print this sheet with all the little black dots. I click on the little printer icon in the toolbar across the top.

My print screen pops up and I’m going to click Print.

Pix Scan Mat Calibration

Then I’m going to select the printer that I will be using to print my stickers which is my Epson P600 and I print out the sheet full of dots on an 8.5” x 11” plain sheet of paper.

Next I need to take a photo of the dotted sheet with my phone or whatever camera you are using. I placed the dotted sheet on the floor (you need to use a flat surface), and tried my best to get all the dots without and background or edges of the paper showing. DO NOT use zoom.

Pix Scan Mat Calibration

Then I airdrop the photo from my phone to my laptop. If you can’t airdrop, you can email it to yourself as well. You need to somehow save the photo onto your computer so you can upload it to Silhouette Studio.

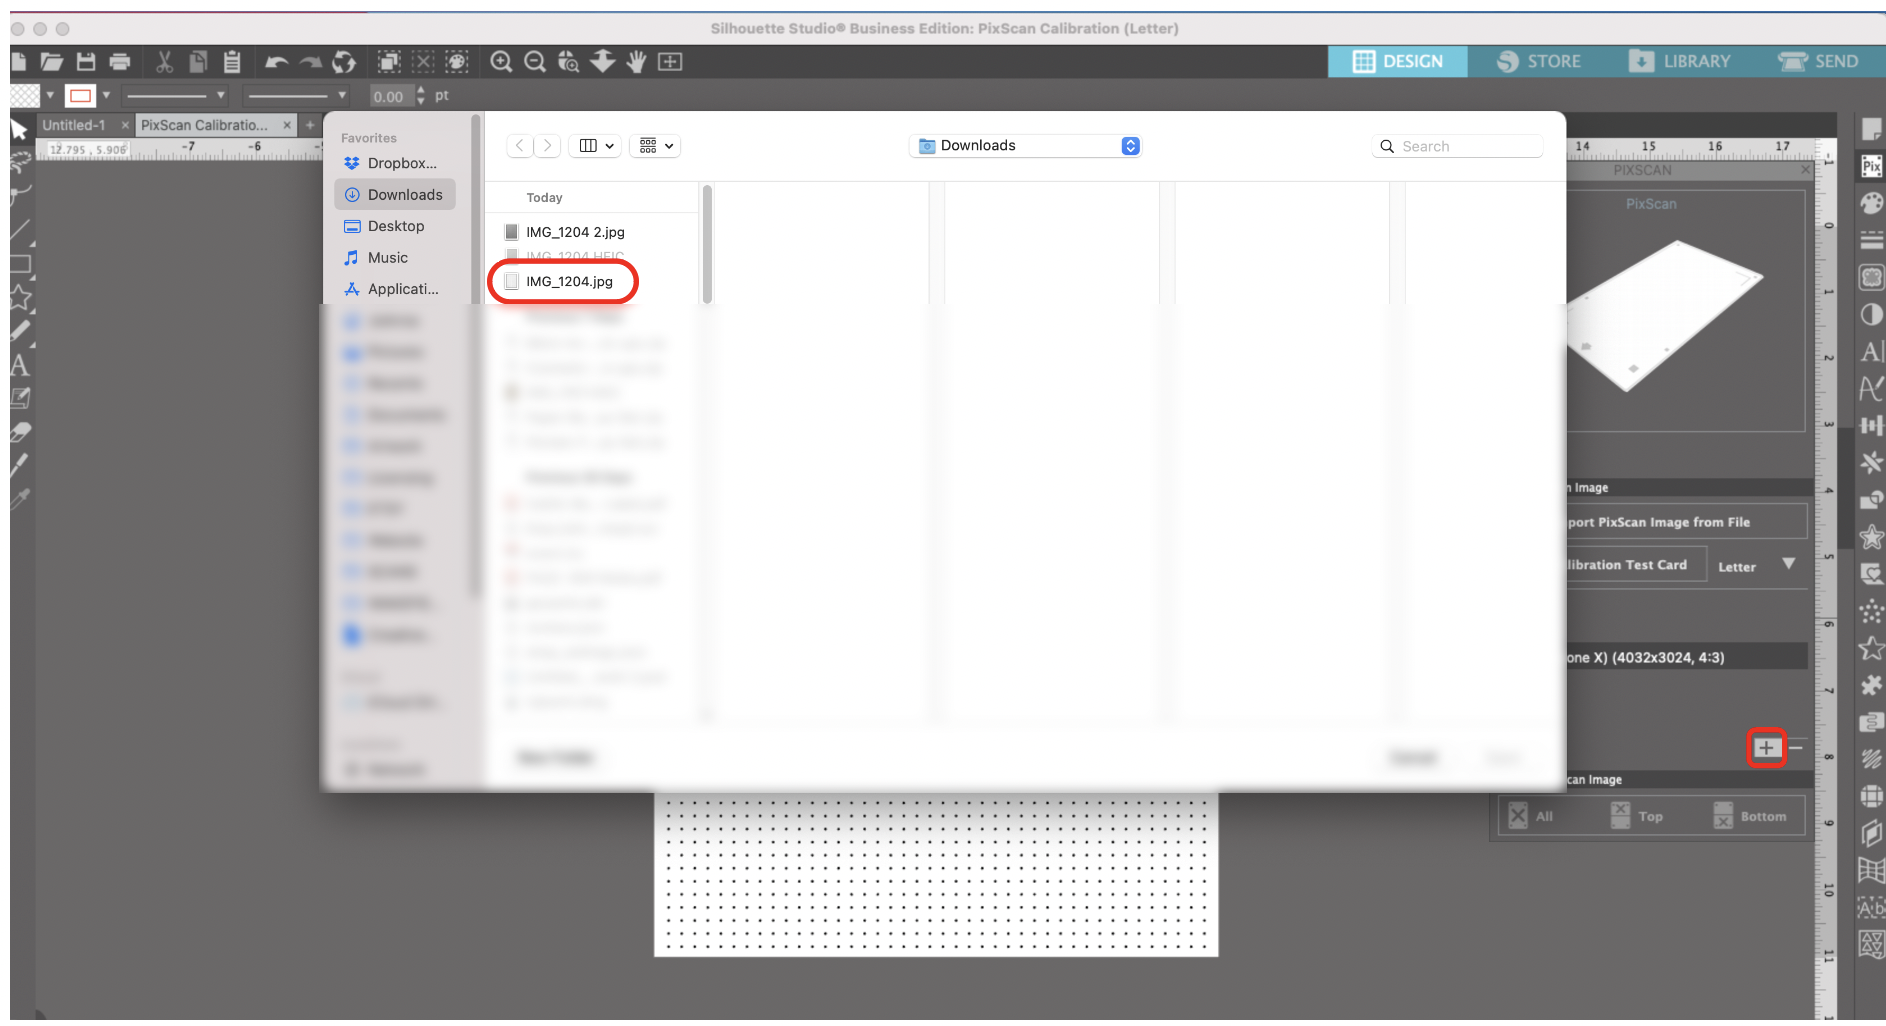
Back in Silhouette Studio in the Pix Scan dialogs box make sure the camera icon is selected. Below that, there is a Plus (+). Click on the (+), and find the photo that you just saved to your computer. Mine is saved to my Downloads folder.

Silhouette Studio automatically reads all the information attached to photo and it adds my iPhone X to the list of cameras.

Pix Scan Mat Calibration

Now it’s time to get our mat ready! Unfortunately the Pix Scan mat for the Portrait 3 is a little too small to fit a full sheet of 8.5” x 11” sticker paper, the max area is 7.6” x 11.7”. Make sure to plan your project accordingly! I already had my print outs, so I just cut them into two parts to fit on the mat.

Silhouette Portrait 3 Pix Scan Mat

Place whatever you are cutting on the mat, make sure you are NOT covering any of the little black boxes around the edge of the mat. The software will need to read those when you’re importing your picture.

Then you need to photograph the ENTIRE mat with the same camera that you calibrated. Make sure the mat is on a flat surface and there is even lighting. Don’t use zoom!

Silhouette Portrait 3 Pix Scan Mat

After you get your photo, you need to upload the photo to your computer. I use airdrop, but you could email it to yourself as well.

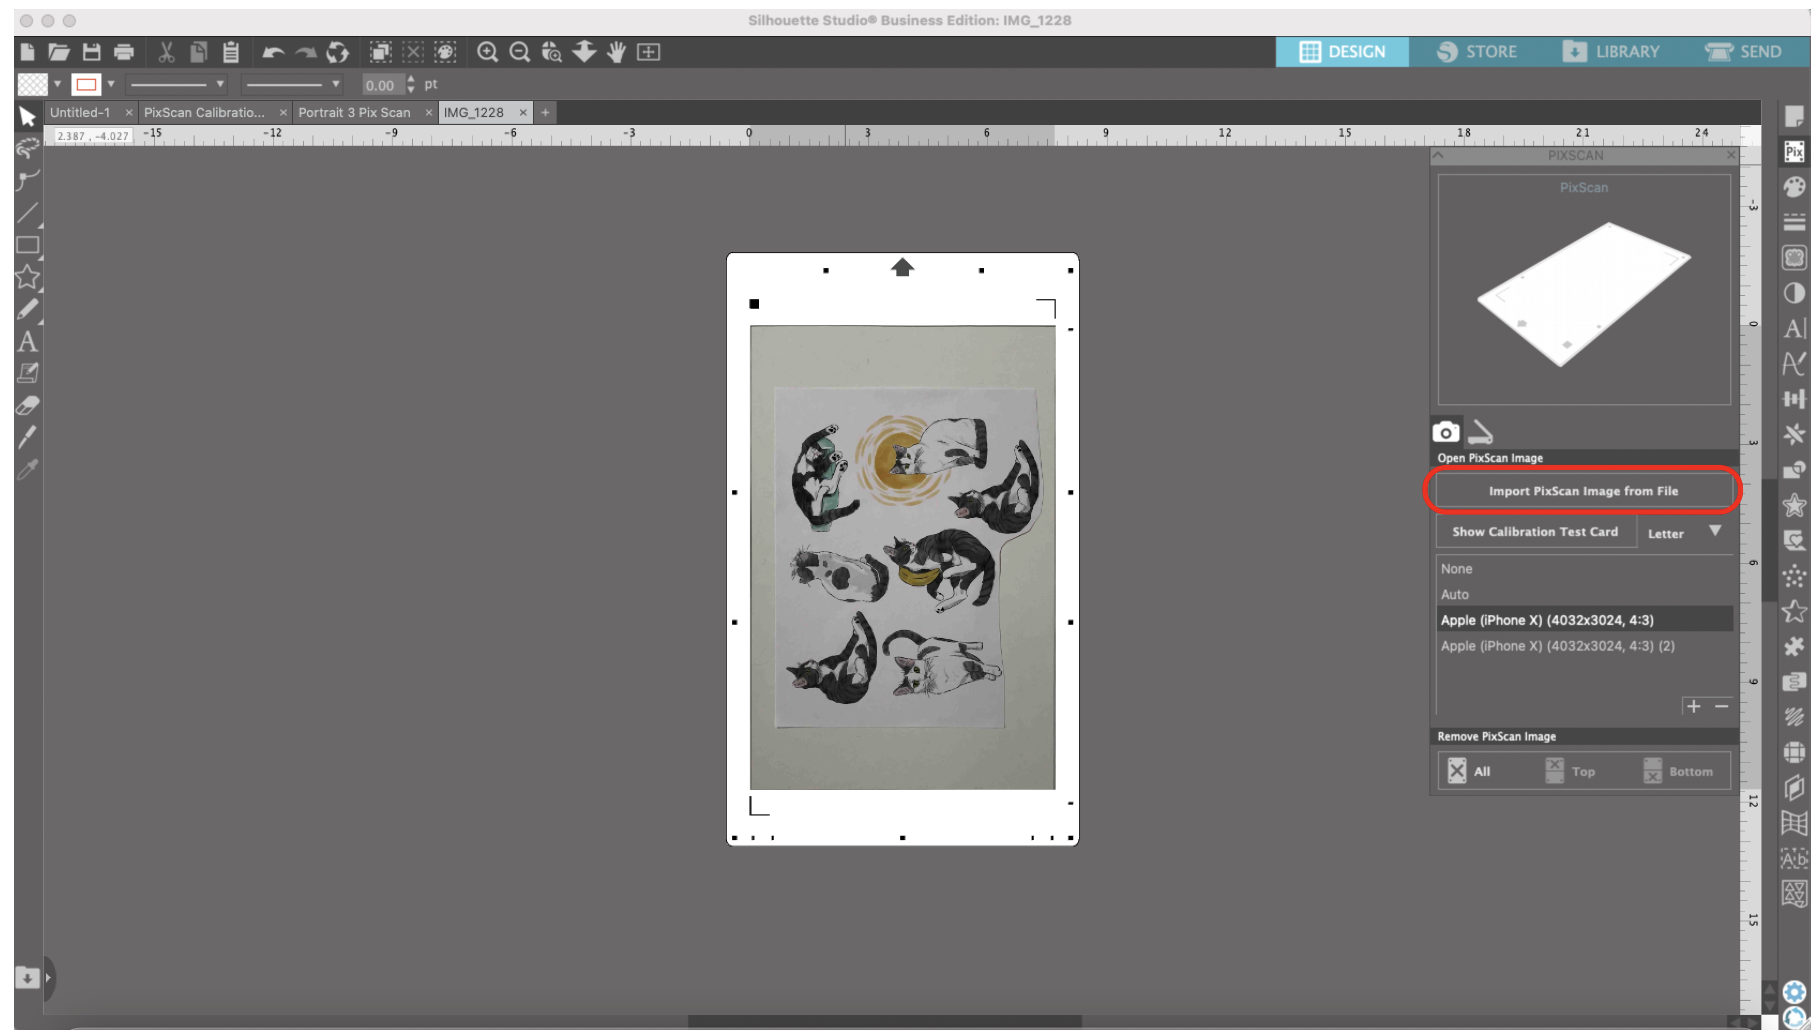
In the Pix Scan dialog box in Silhouette Studio, select “Import Pix Scan Image From File.” Locate your file wherever you have it saved on your computer, mine is in my Downloads folder again.

Silhouette studio is then going to place the photo that you just took and place it on the Pix Scan mat in the software.

Silhouette Portrait 3 Pix Scan Mat

Now we need to create our cut lines and there are a few ways to do that. I already have cut lines I created in Illustrator, I could import them as an SVG since I have the Business version of Silhouette Studio.

If you do not have the business version of Silhouette Studio, you can also draw the cut lines freehand in Silhouette Studio or you can use the Trace function.

I’m going to use the Trace function for these stickers since they’re irregular shapes. I will make a separate post later on how to use the trace tool.

Silhouette Portrait 3 Pix Scan Mat

I’m finished making my cut lines, and now it’s time to send to my machine! But first, I’m going to save my file so I can use these cut lines again on the second piece of sticker paper.

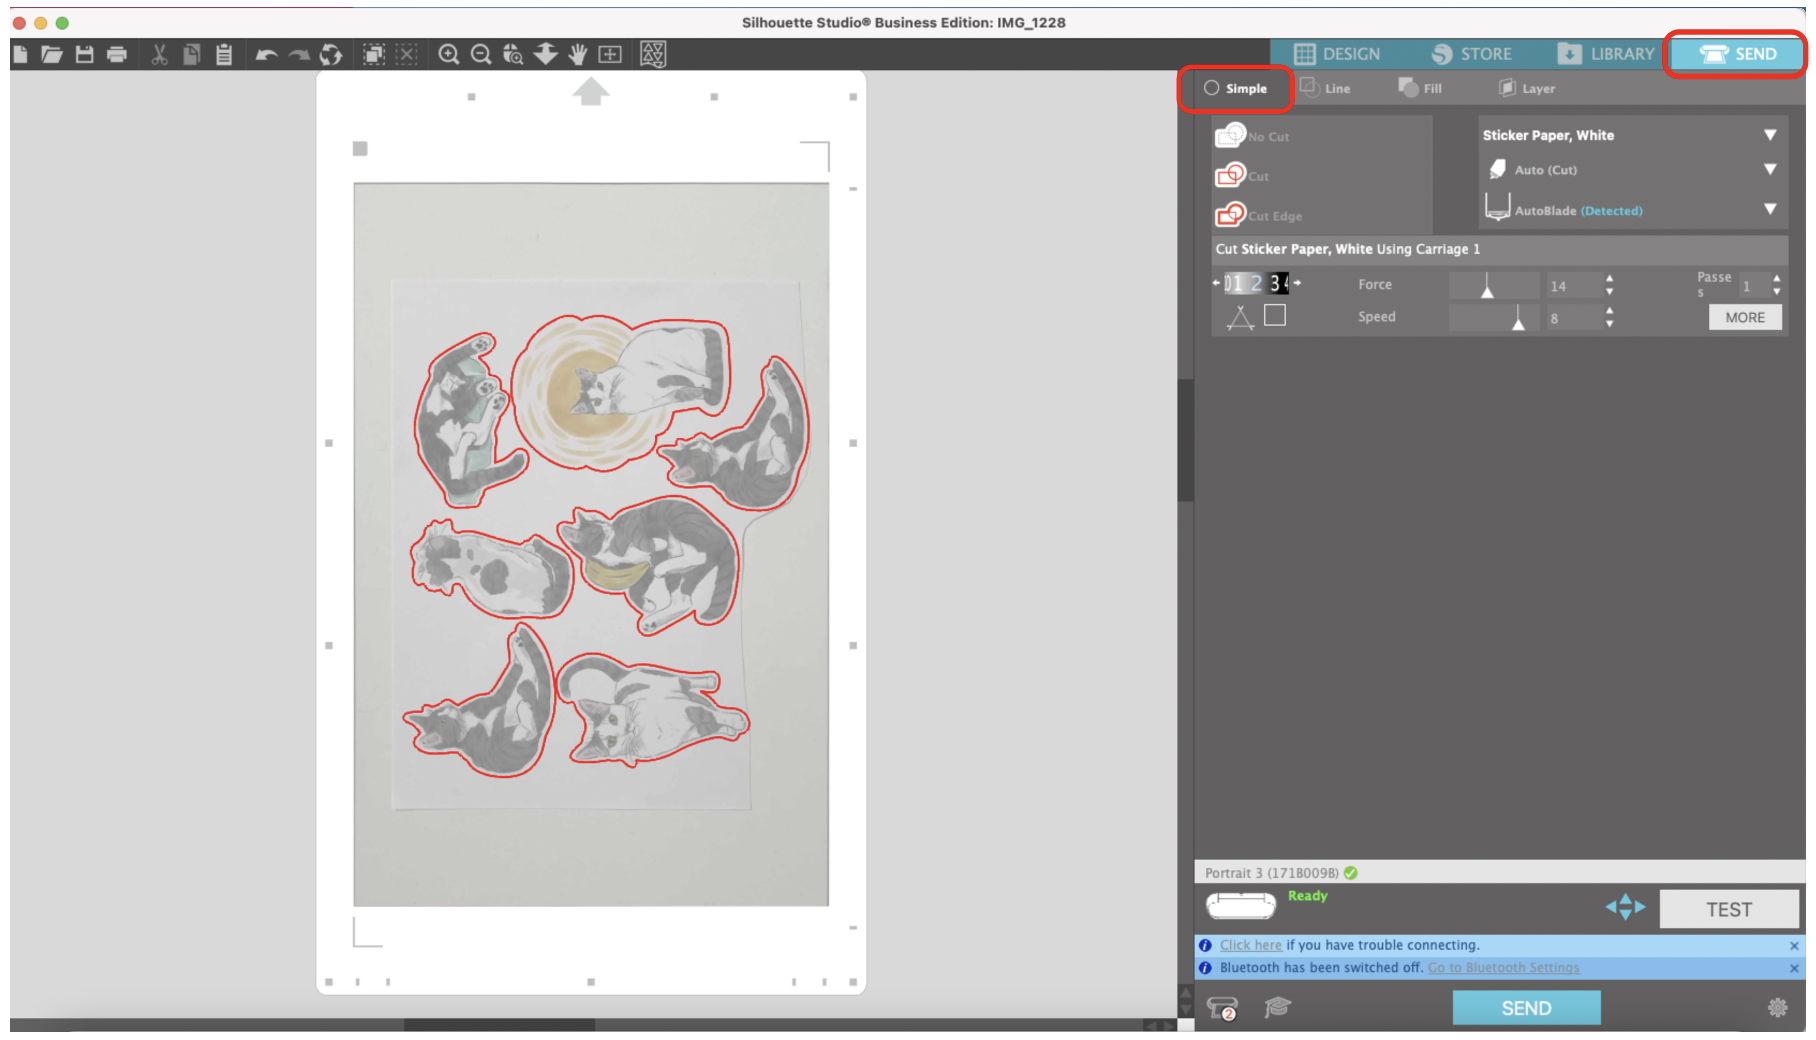
I go to the SEND tab in Silhouette Studio and since we’re just cutting, I’ll keep it on the Simple screen.

Silhouette Portrait 3 Pix Scan Mat

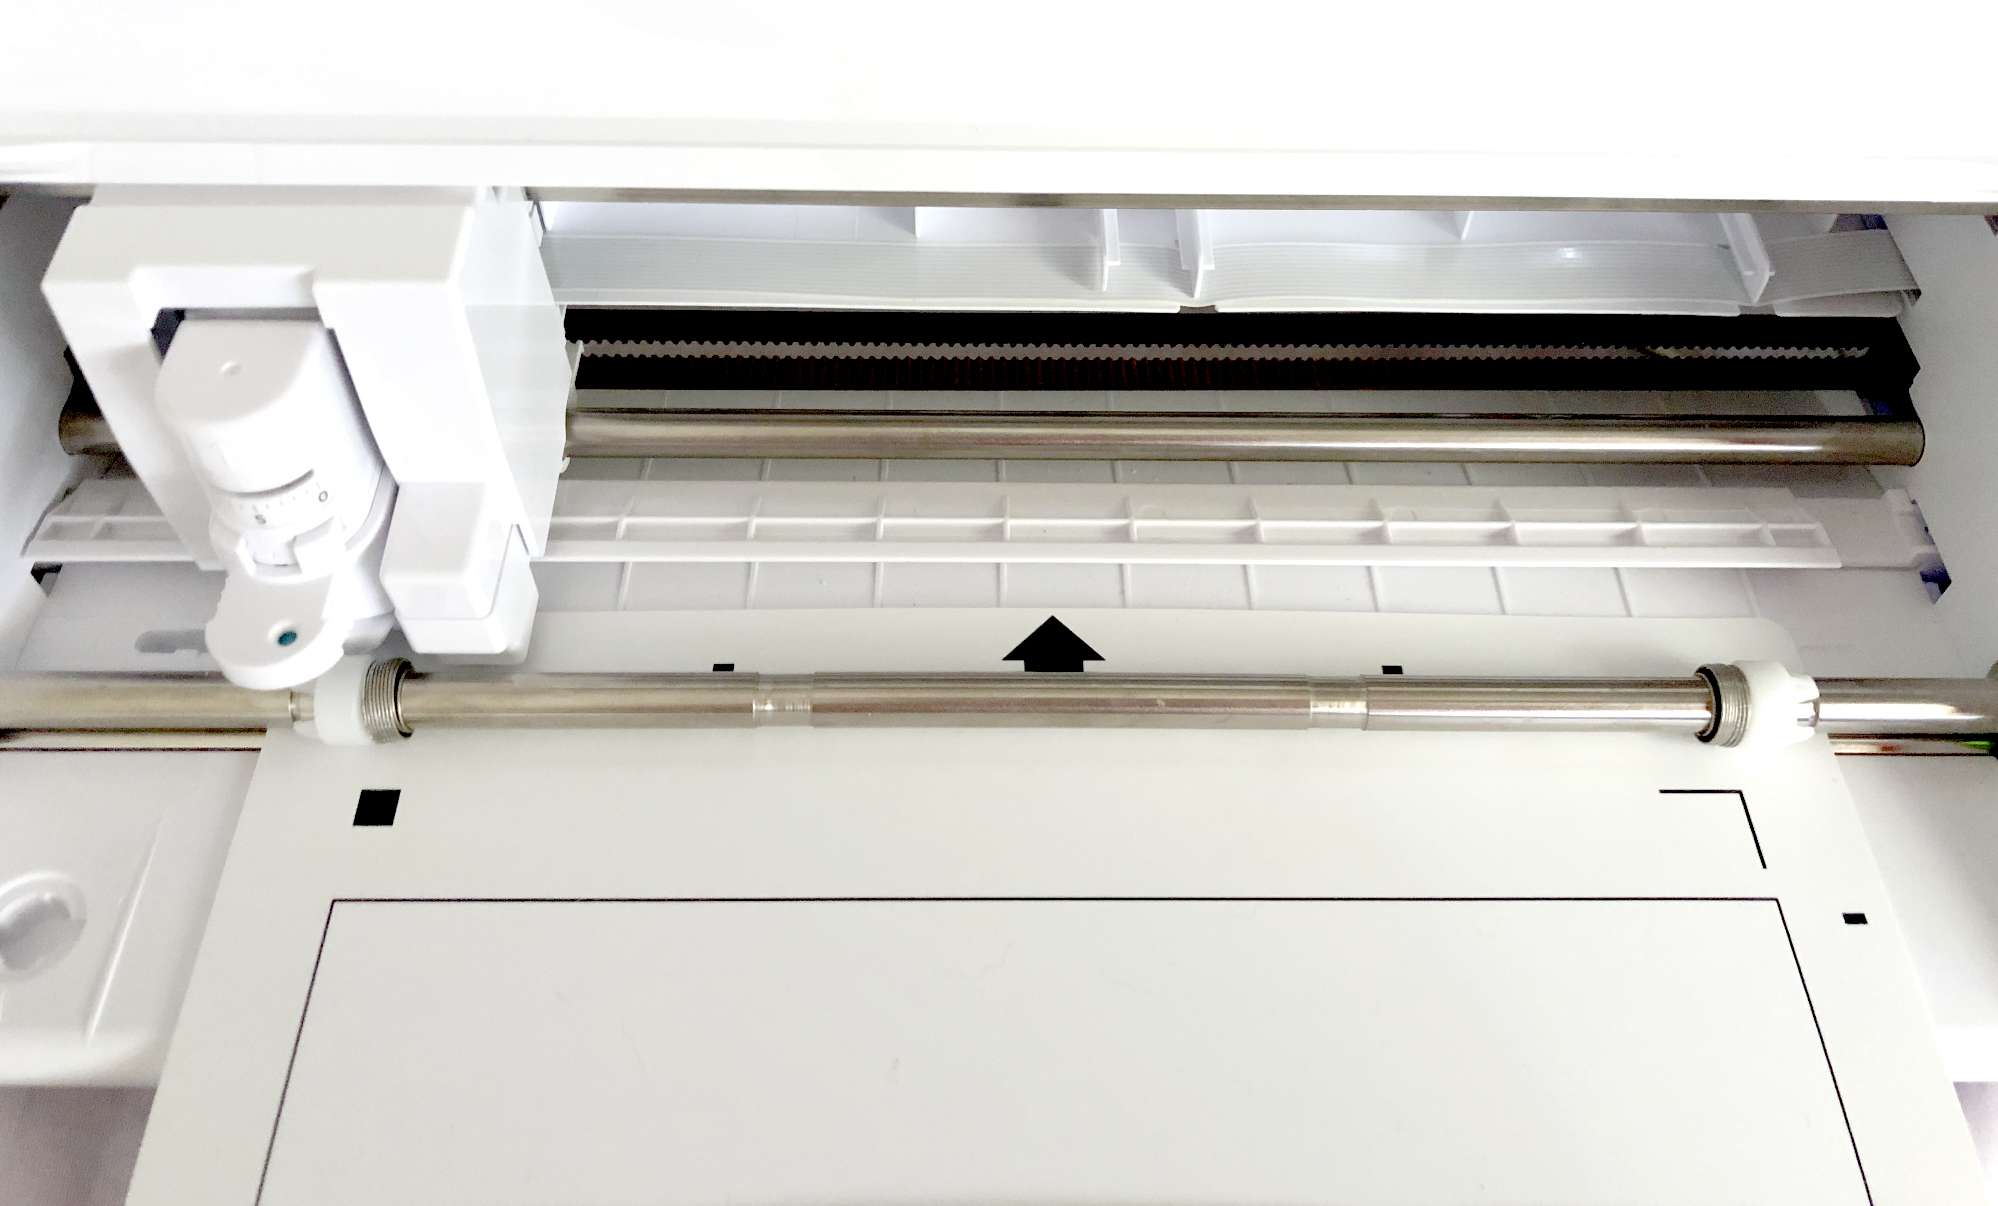
I load my mat into my machine, make sure the side with the arrow get’s fed through the machine first.

Silhouette Portrait 3 Pix Scan Mat

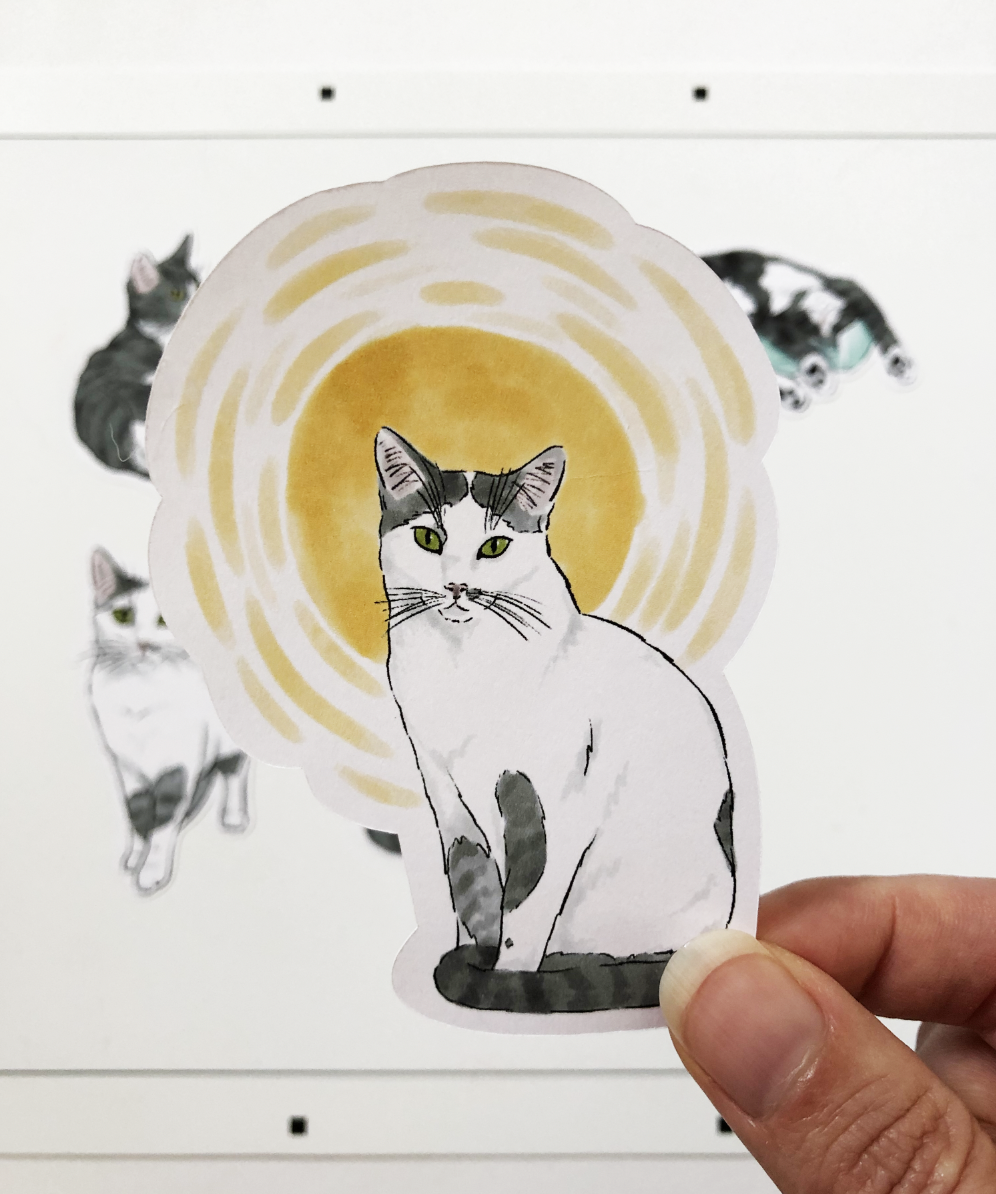
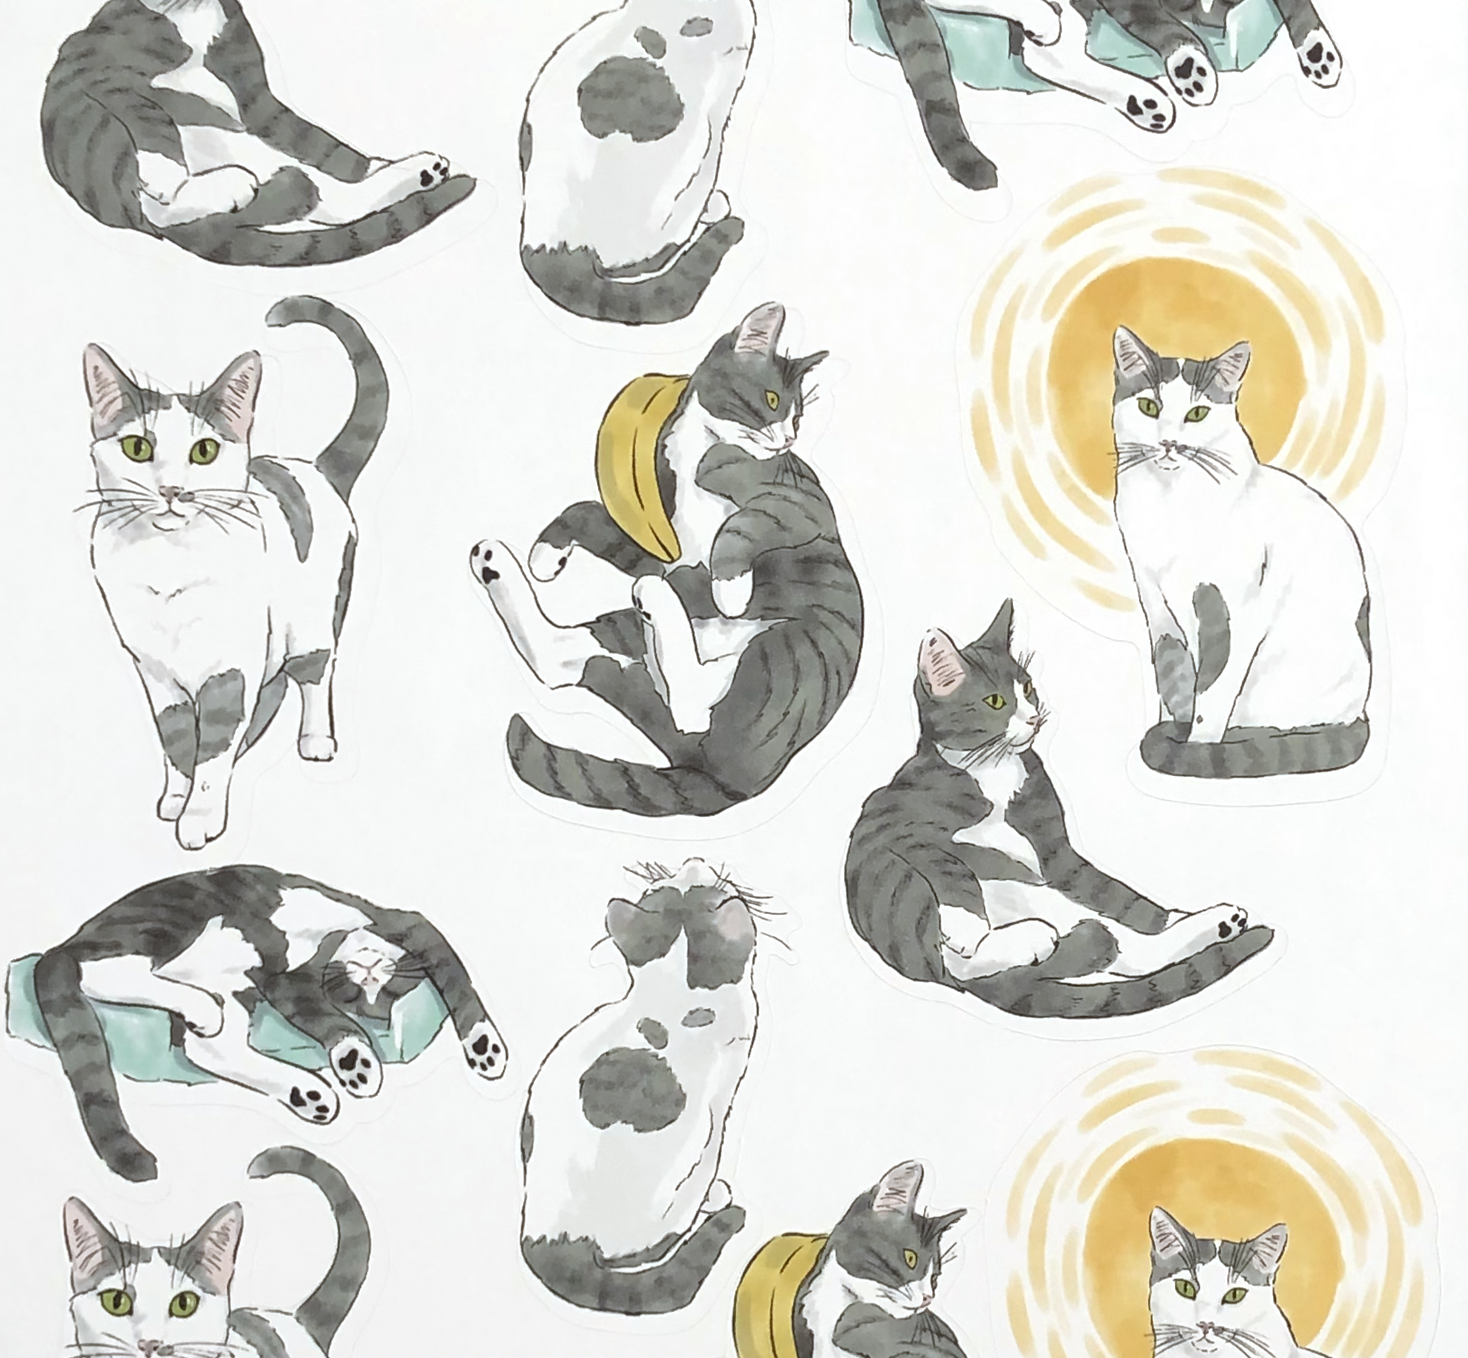
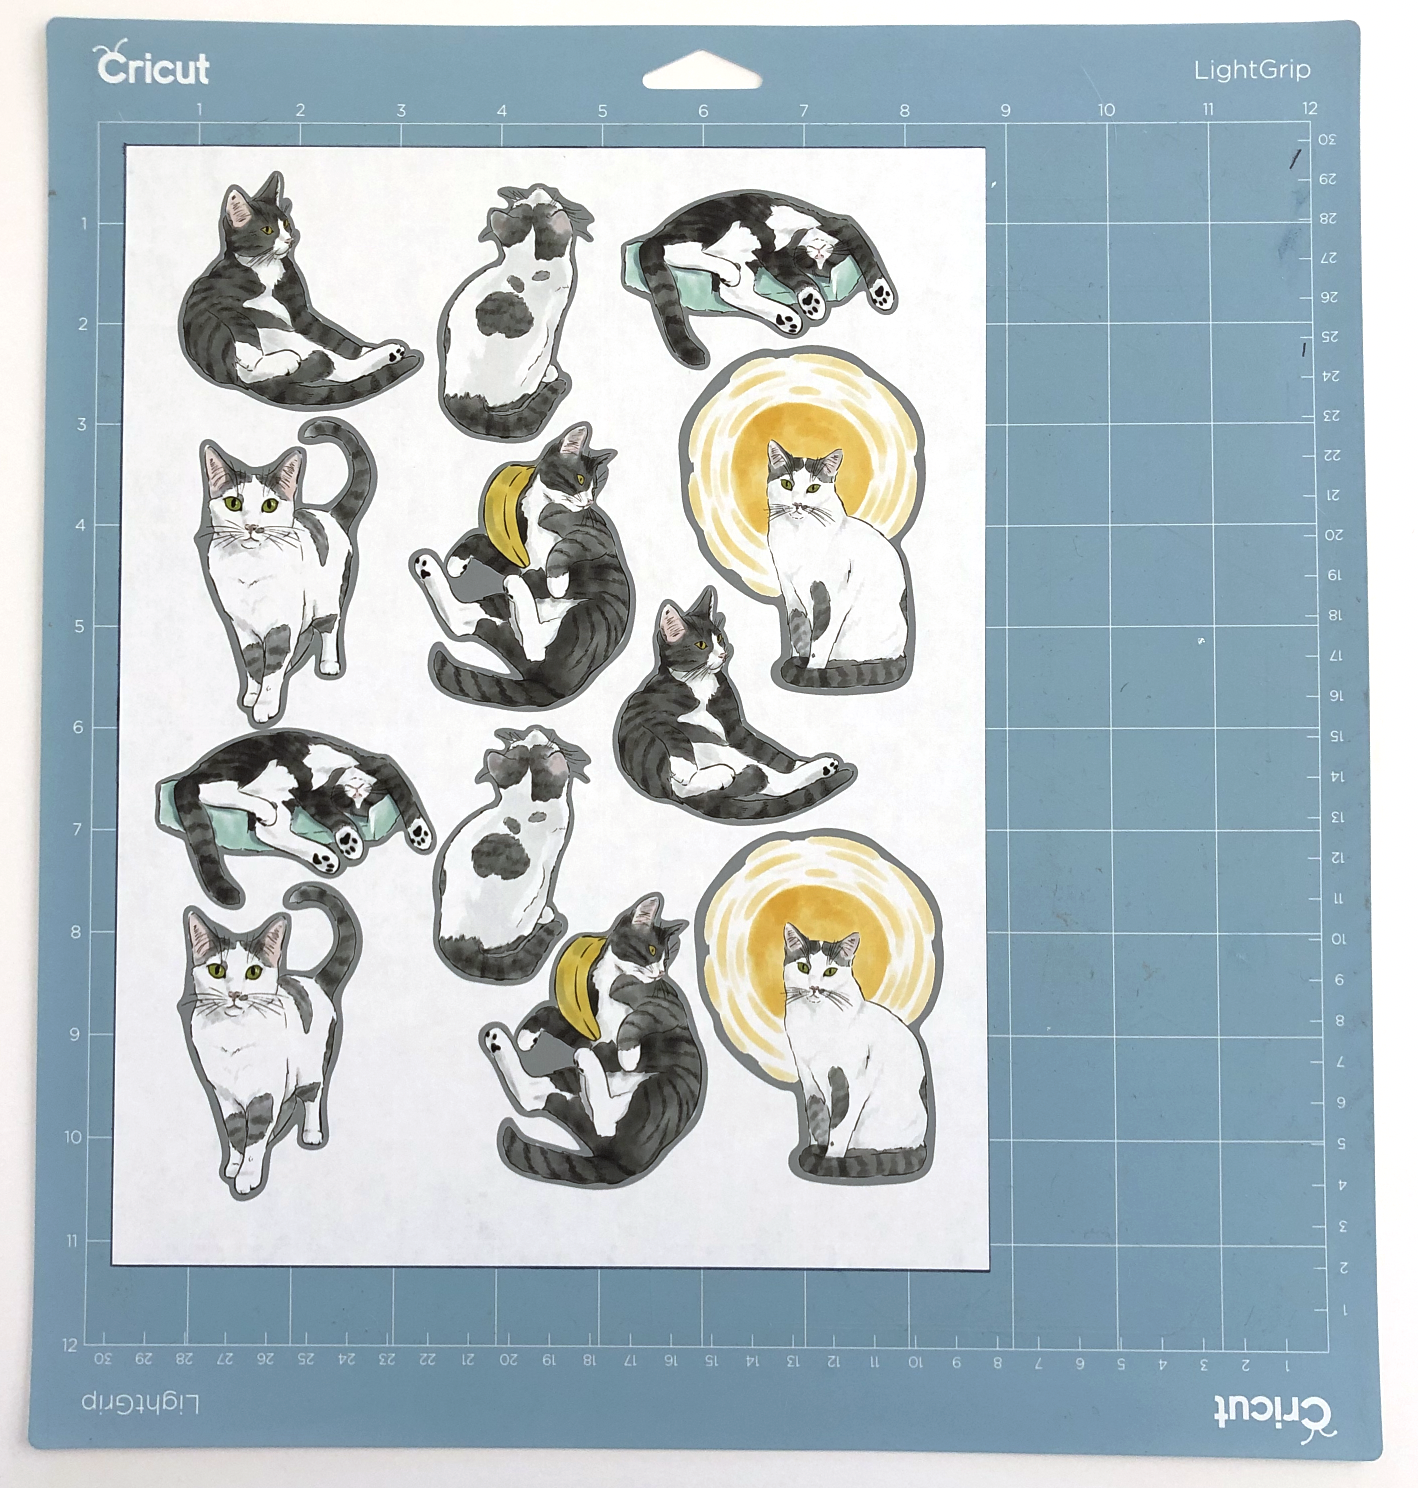
Press send, and now I have some cute little kitty stickers!

Silhouette Portrait 3 Pix Scan Mat

The accuracy of the Pix Scan Mat is so much better than the Cricut Snap Mat feature. I also really like that I can create and save my cut lines directly in Silhouette Studio. When I go to cut the the 2nd piece of this sticker sheet I can use the same cutline for the same kitties.

Cricut Snap Mat Feature to Cut Stickers

Hi Everyone!

Online, I see suggestions all the time for using the Cricut Snap Mat feature to cut stickers. I’m going to give it try this week! (SPOILER ALERT: This is not one of my preferred methods to cut stickers).

First things first, Snap Mat is only available on the Cricut App, not the desktop version of Design Space. I’m going be using my iPad Pro, but you can also use your phone.

I’m going to try cutting the same kitty stickers I’ve been cutting the last few weeks so we can also compare the results.

I’m going to test this out initially on plain paper so I don’t waste my sticker paper. I’ve got a test sheet already printed on plain paper and I’m going to place it on my mat. For this feature, I should be able to place it anywhere on the mat.

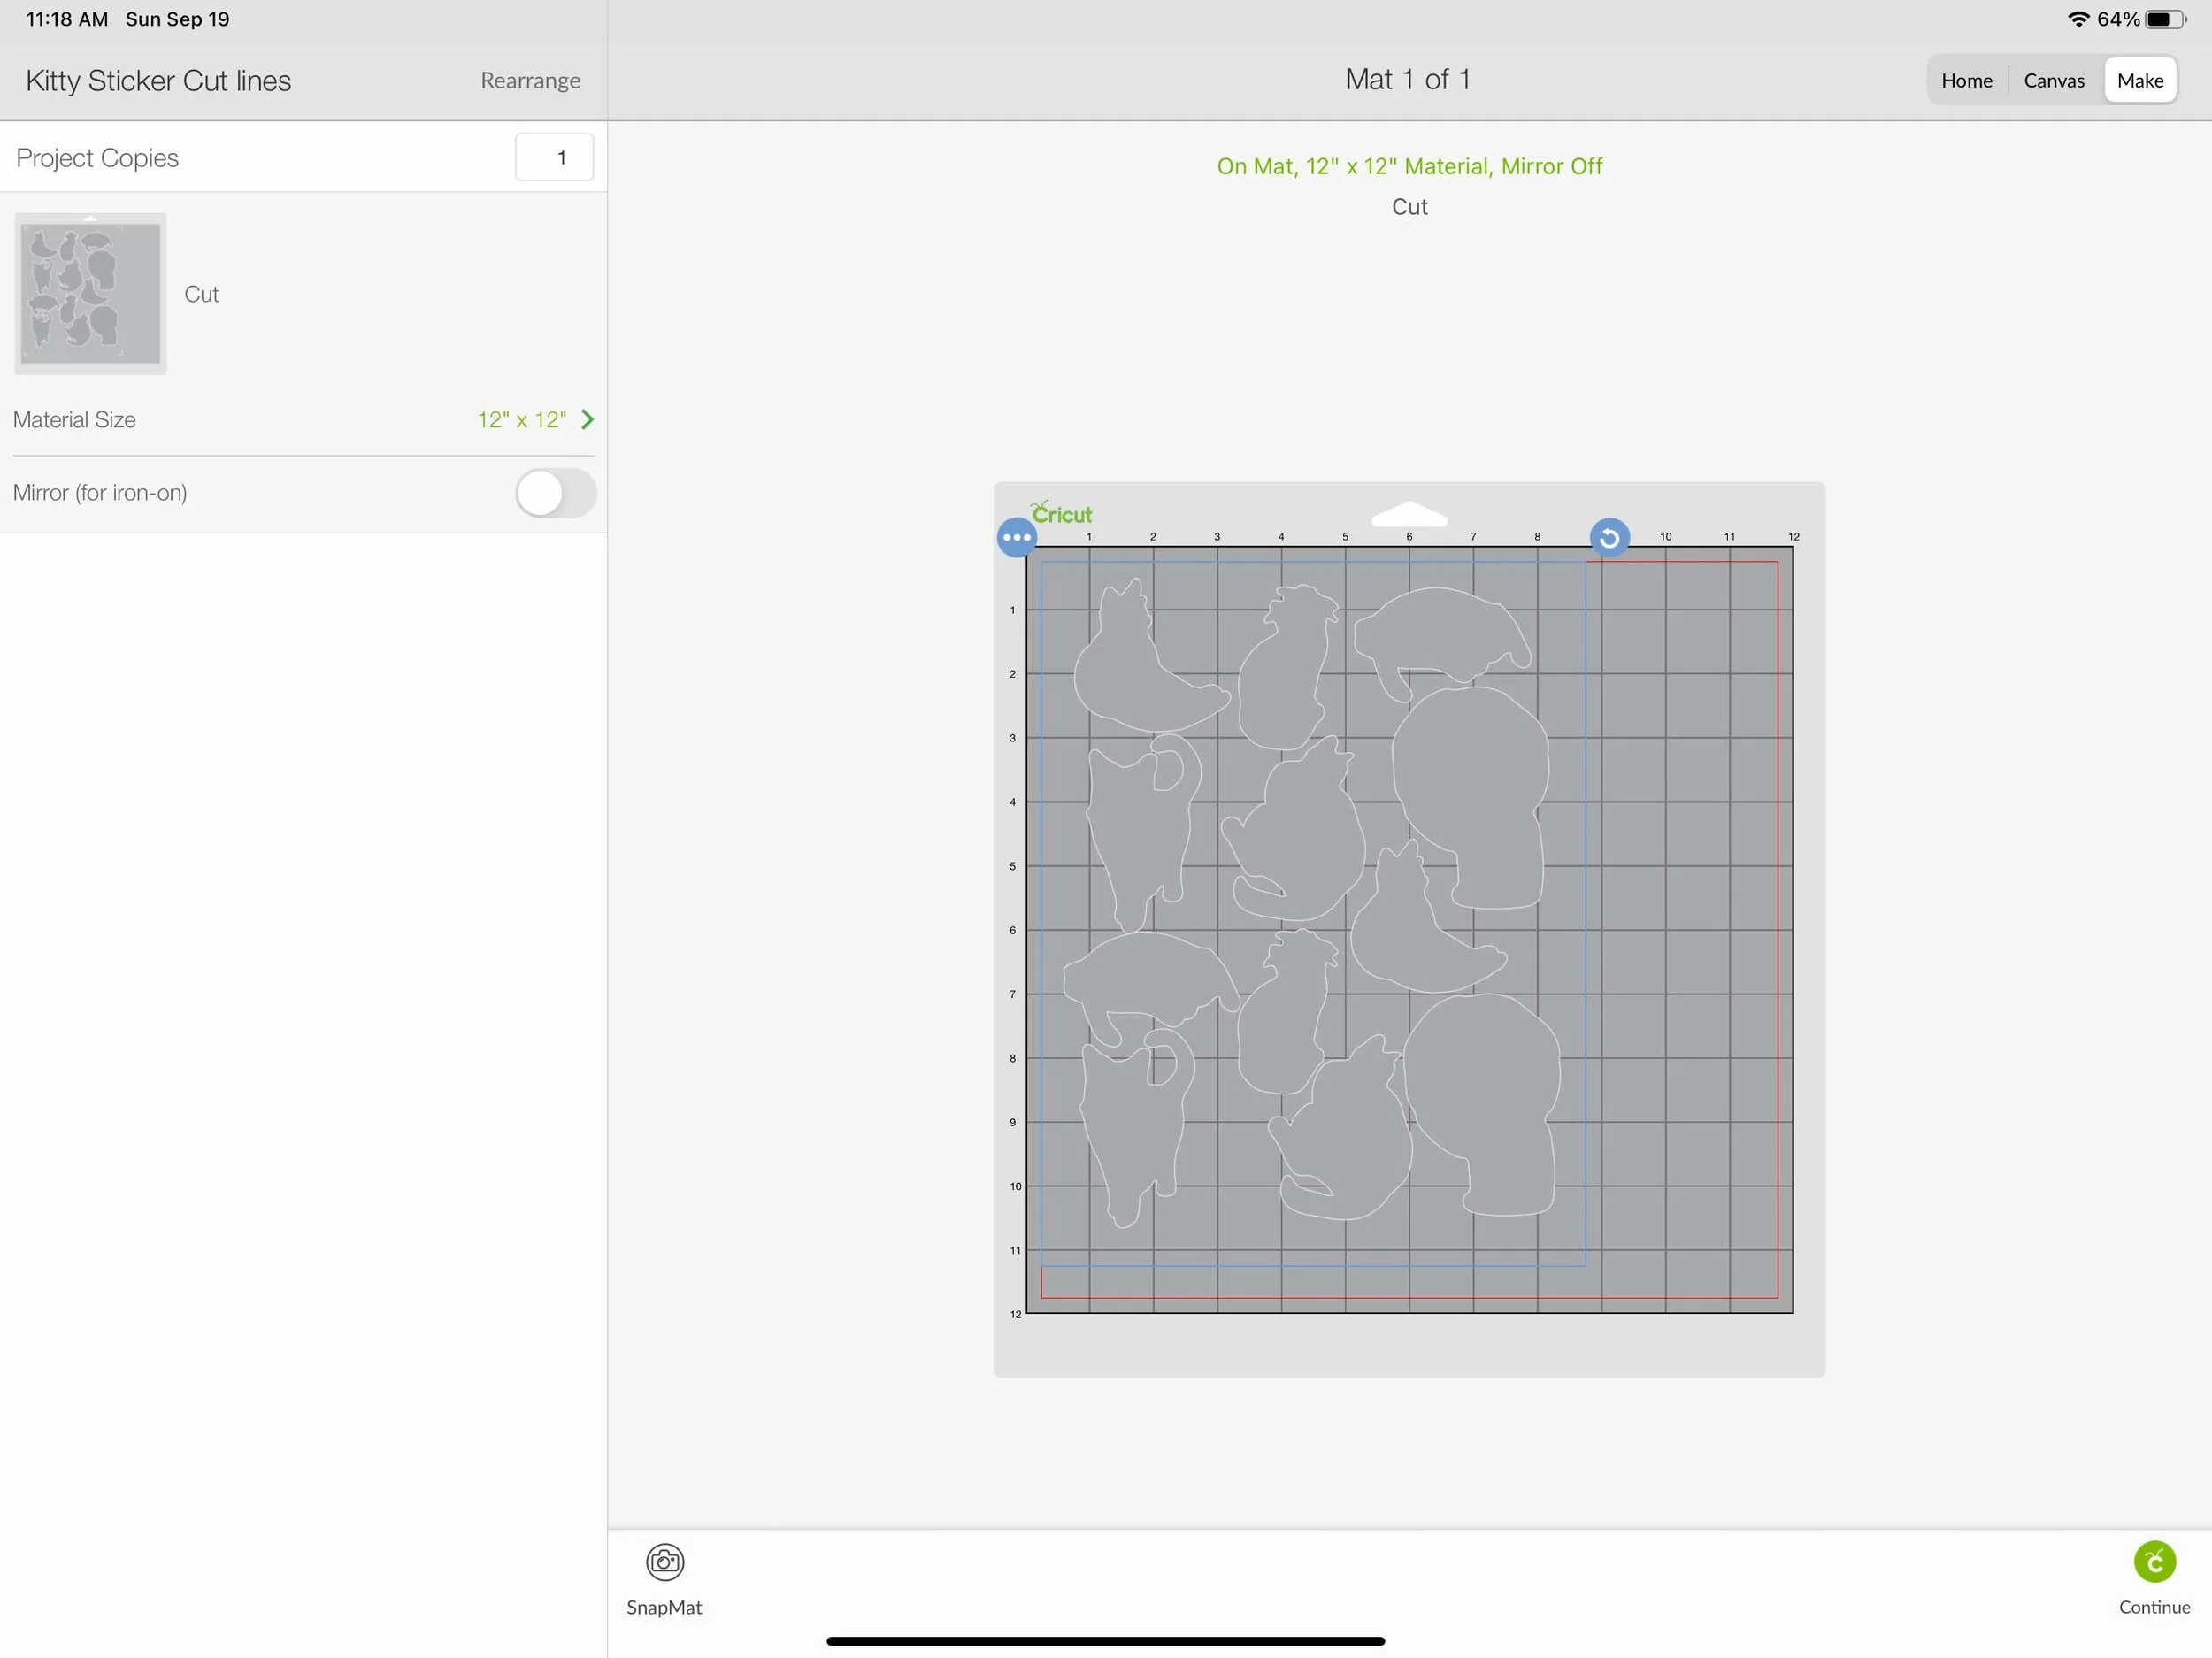
In order to access the Snap Mat feature, you need to have your cutlines already created in Design Space or uploaded into Design Space from Illustrator or other software. I’m going to open the cutlines for the kitty stickers that I already have uploaded from Illustrator and saved to Design Space.

Cutting Stickers Cricut Snap Mat

Then I’m going to tap the little green Make It in the bottom right corner.

Cutting Stickers Cricut Snap Mat

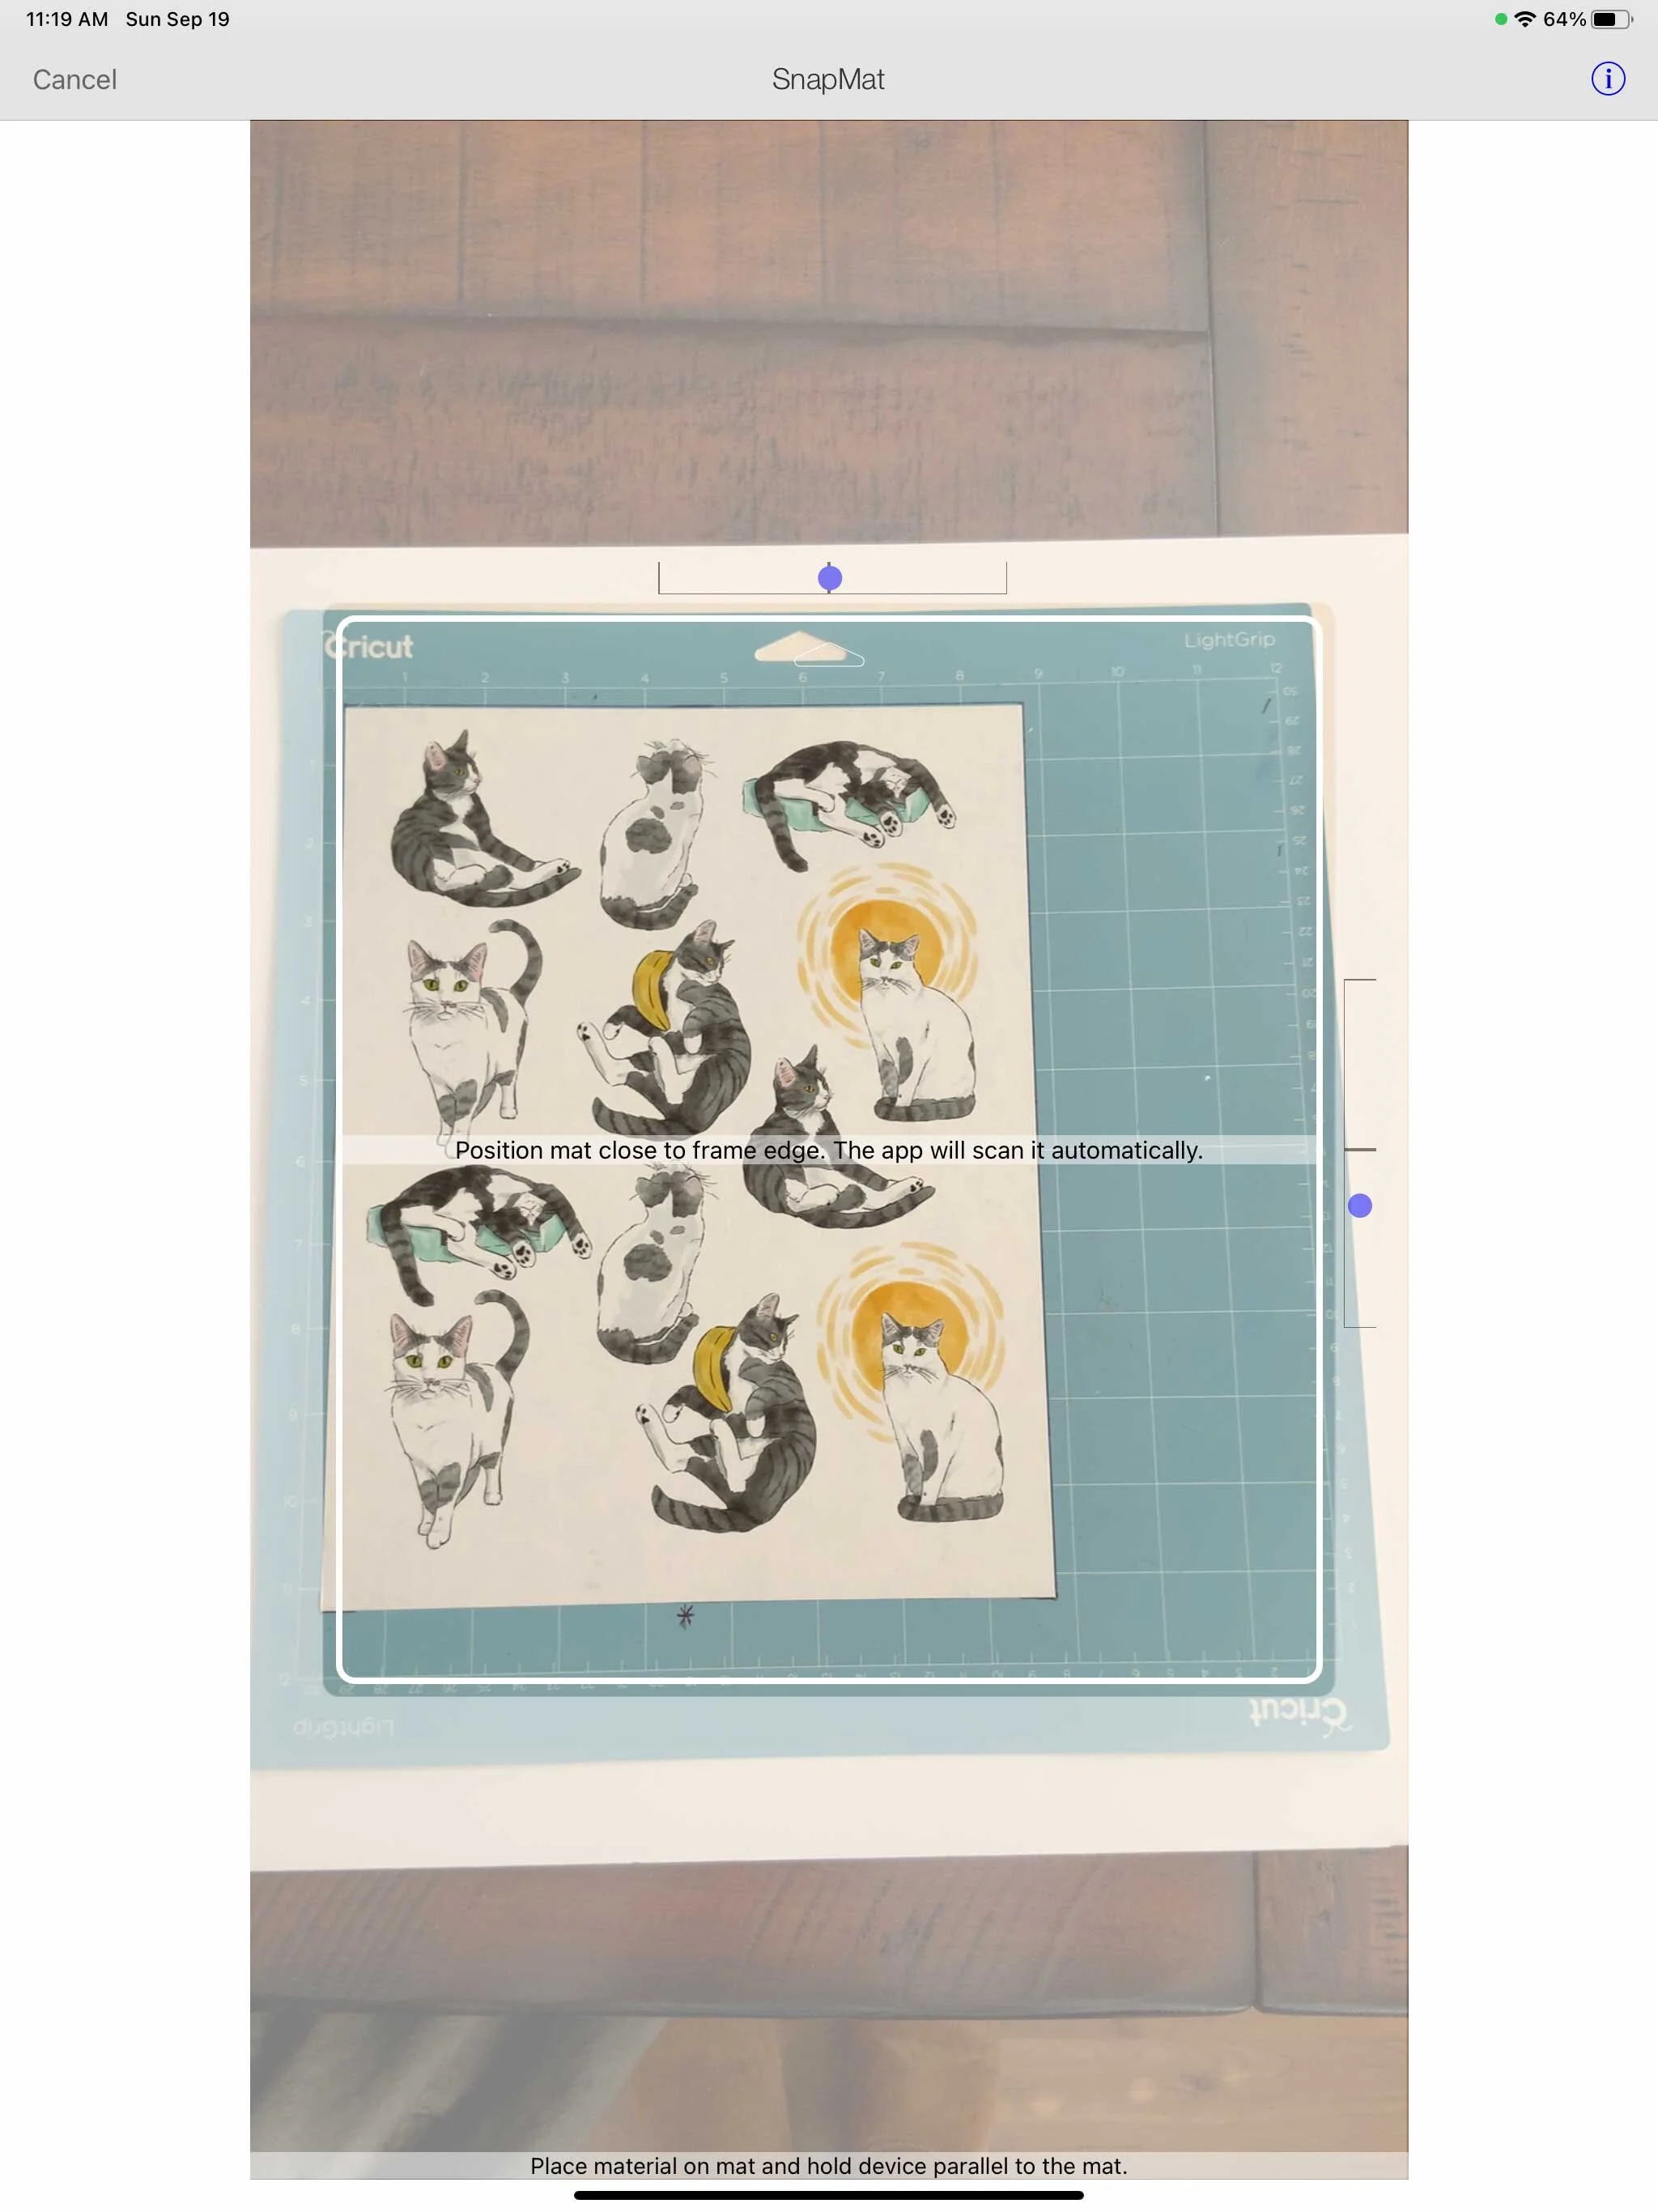
It takes me to the Make It screen, and down in the bottom left corner there is a little camera icon. Press the camera icon and it’s going to bring us into the Snap Mat feature.

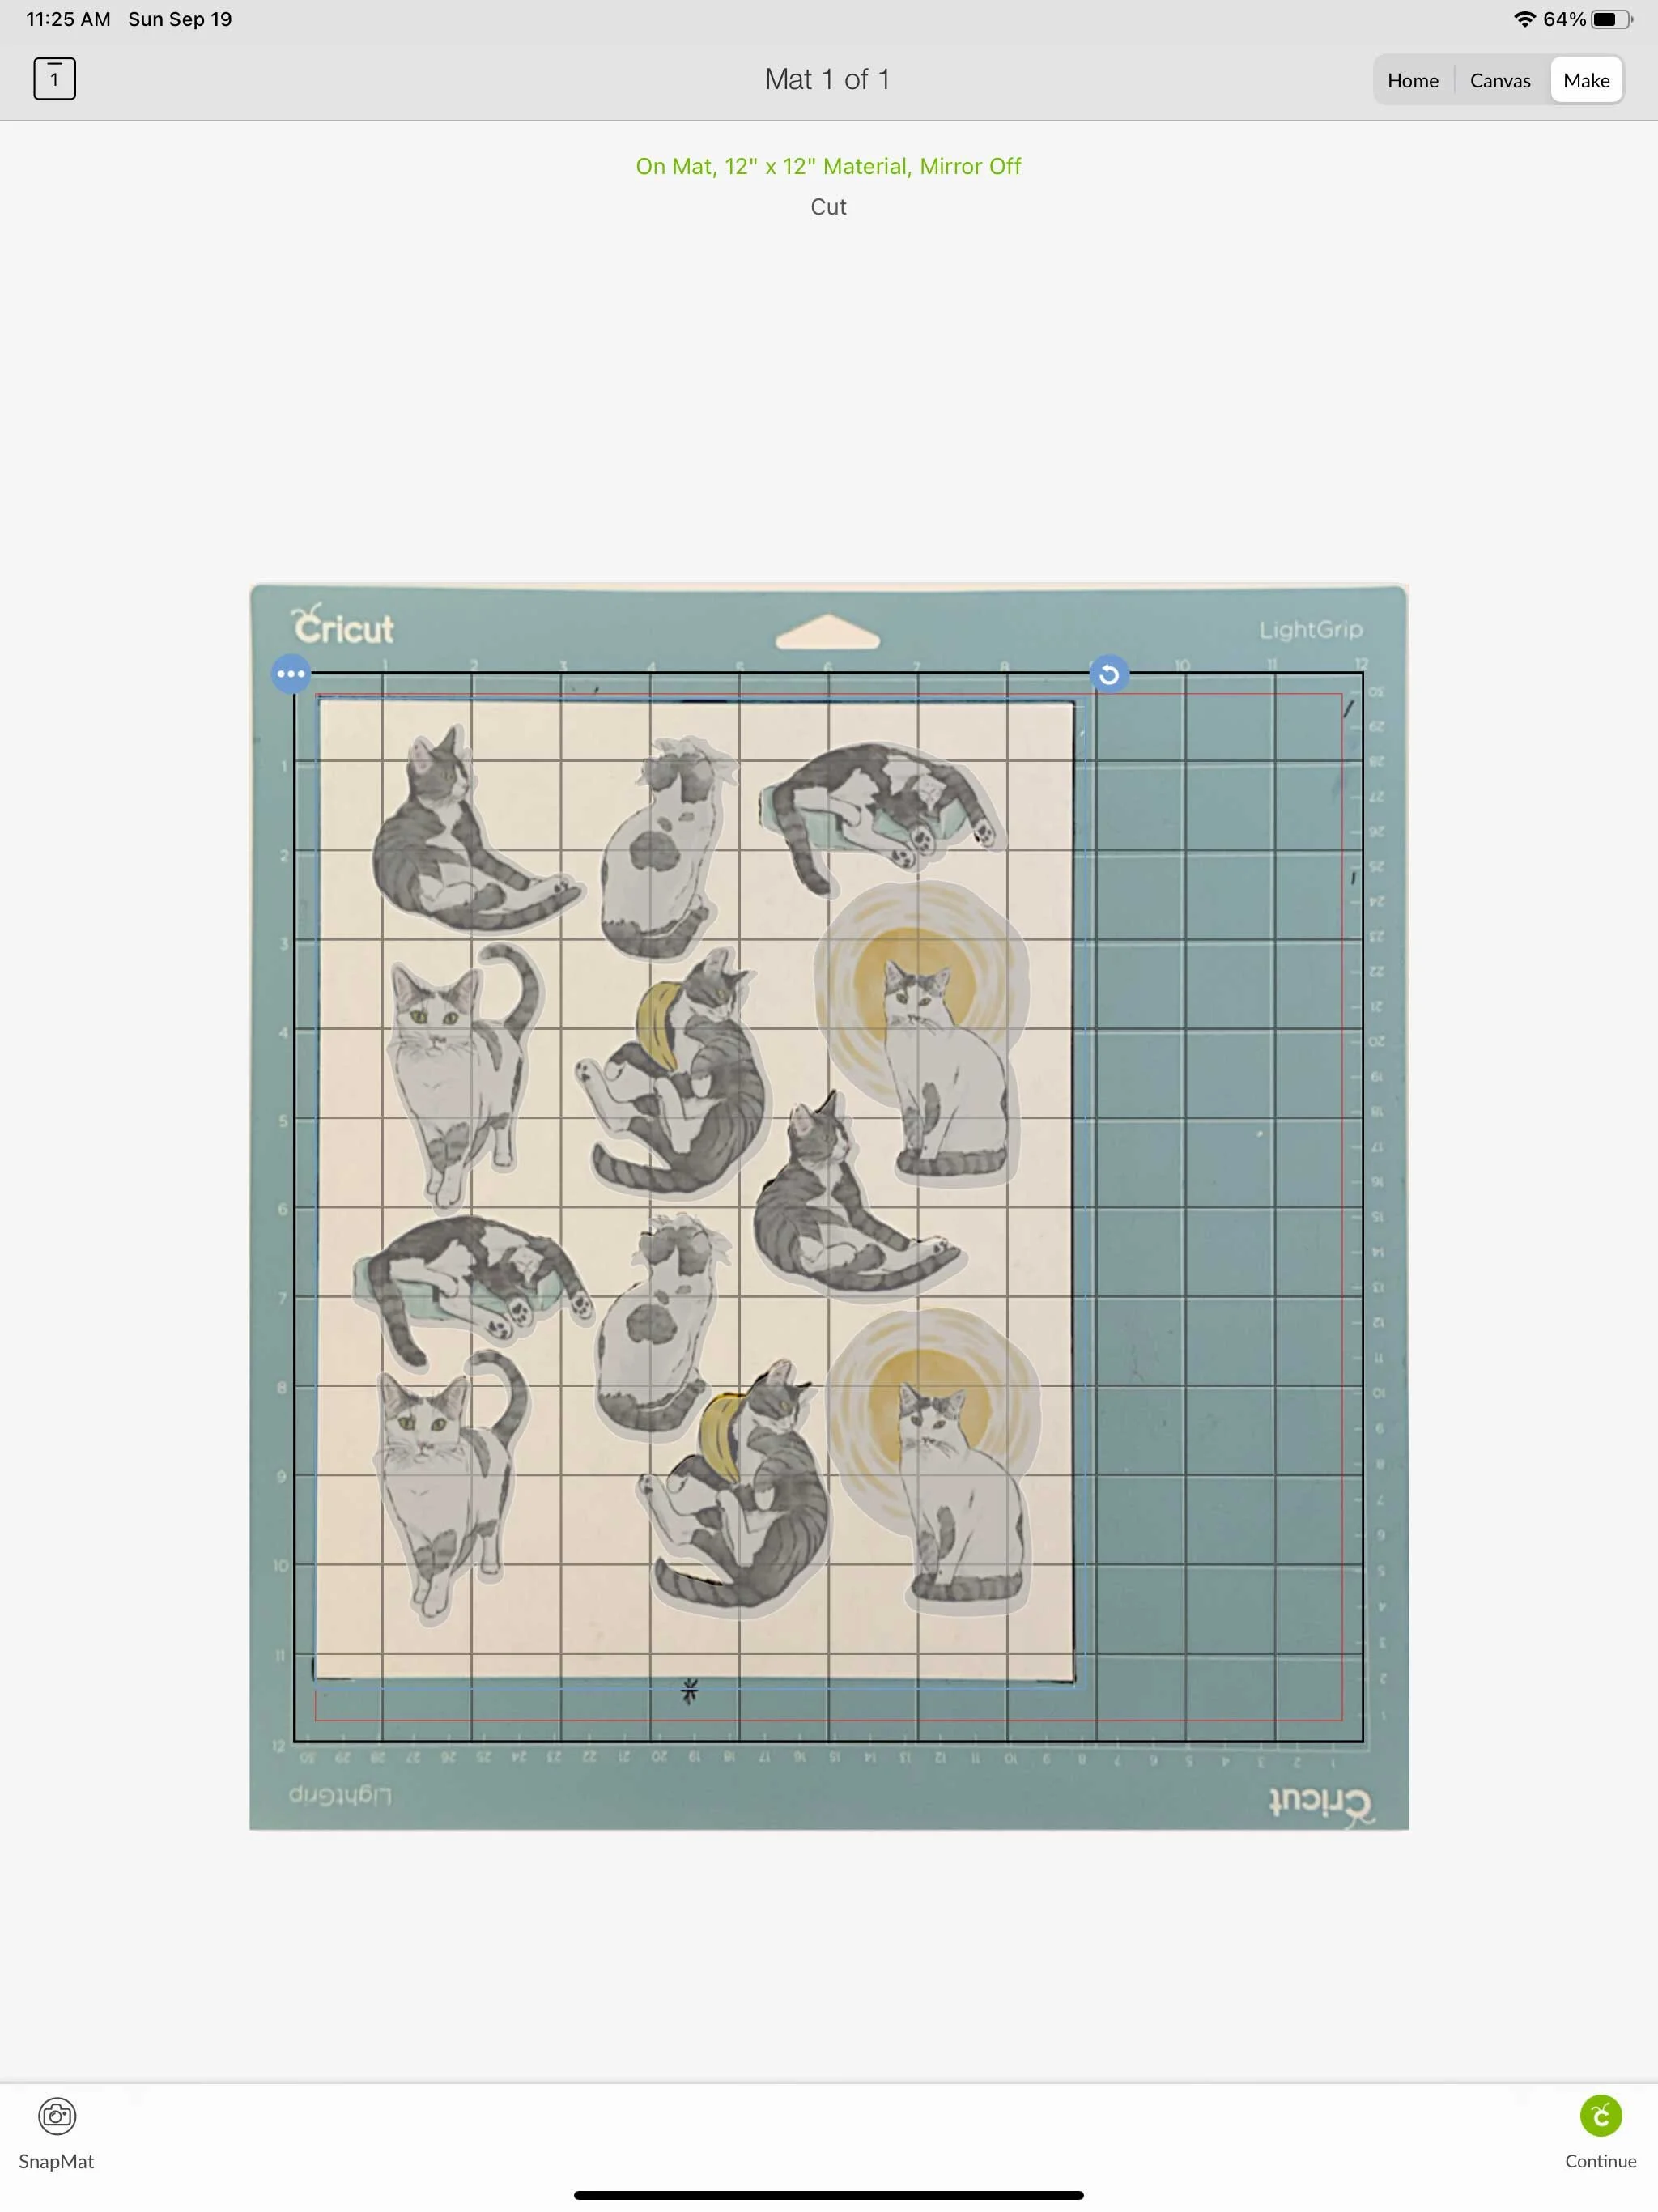
I’ve got my mat with my print out already placed. I am holding my iPad above the mat and trying to get the entire mat within the frame. (It can be little difficult to do if you just finished your morning coffee, like me). It need up being easier to put my mat on the floor and stand over it with my iPad.

Cutting Stickers Cricut Snap Mat

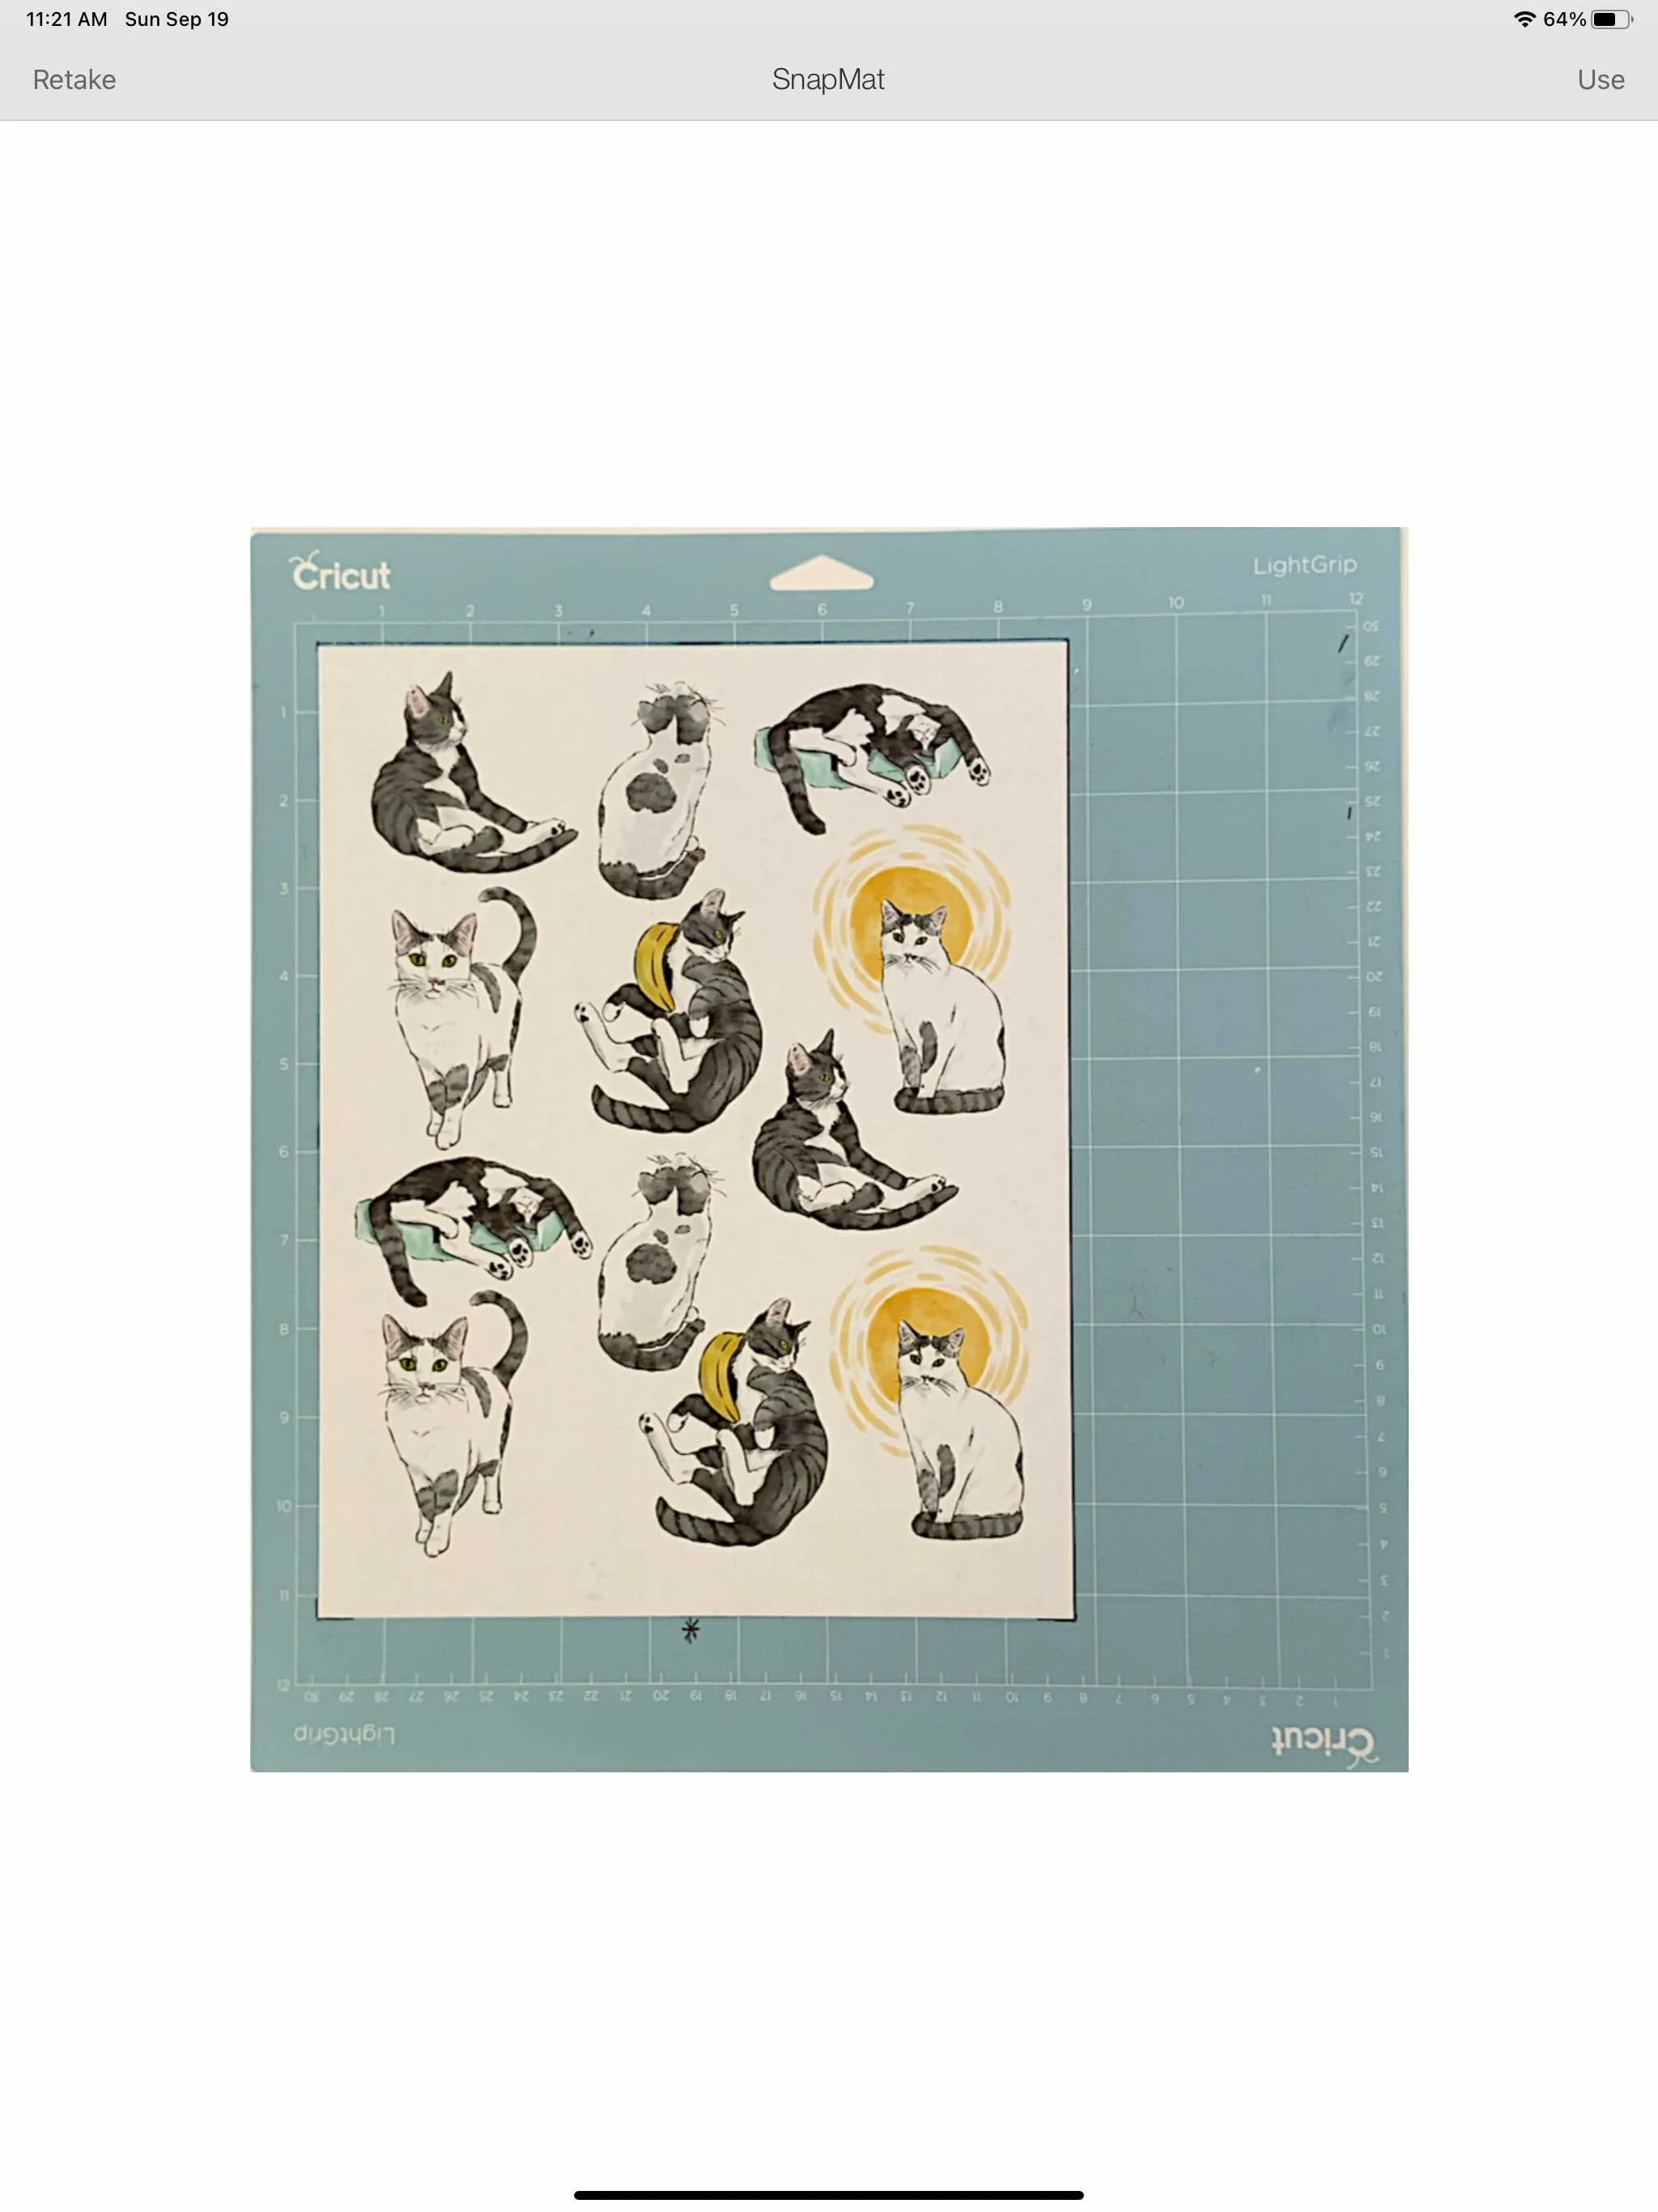
Once the mat is in a position the program thinks will be acceptable it will take a photo and bring it up on your screen. You can decide if you want to use the photo it just took or retake it. I try to make sure my mat is pretty straight and there’s not a lot of “non-mat” area around the edges pf my photo.

Once I get one that I think will work ok, I select Use.

Cutting Stickers Cricut Snap Mat

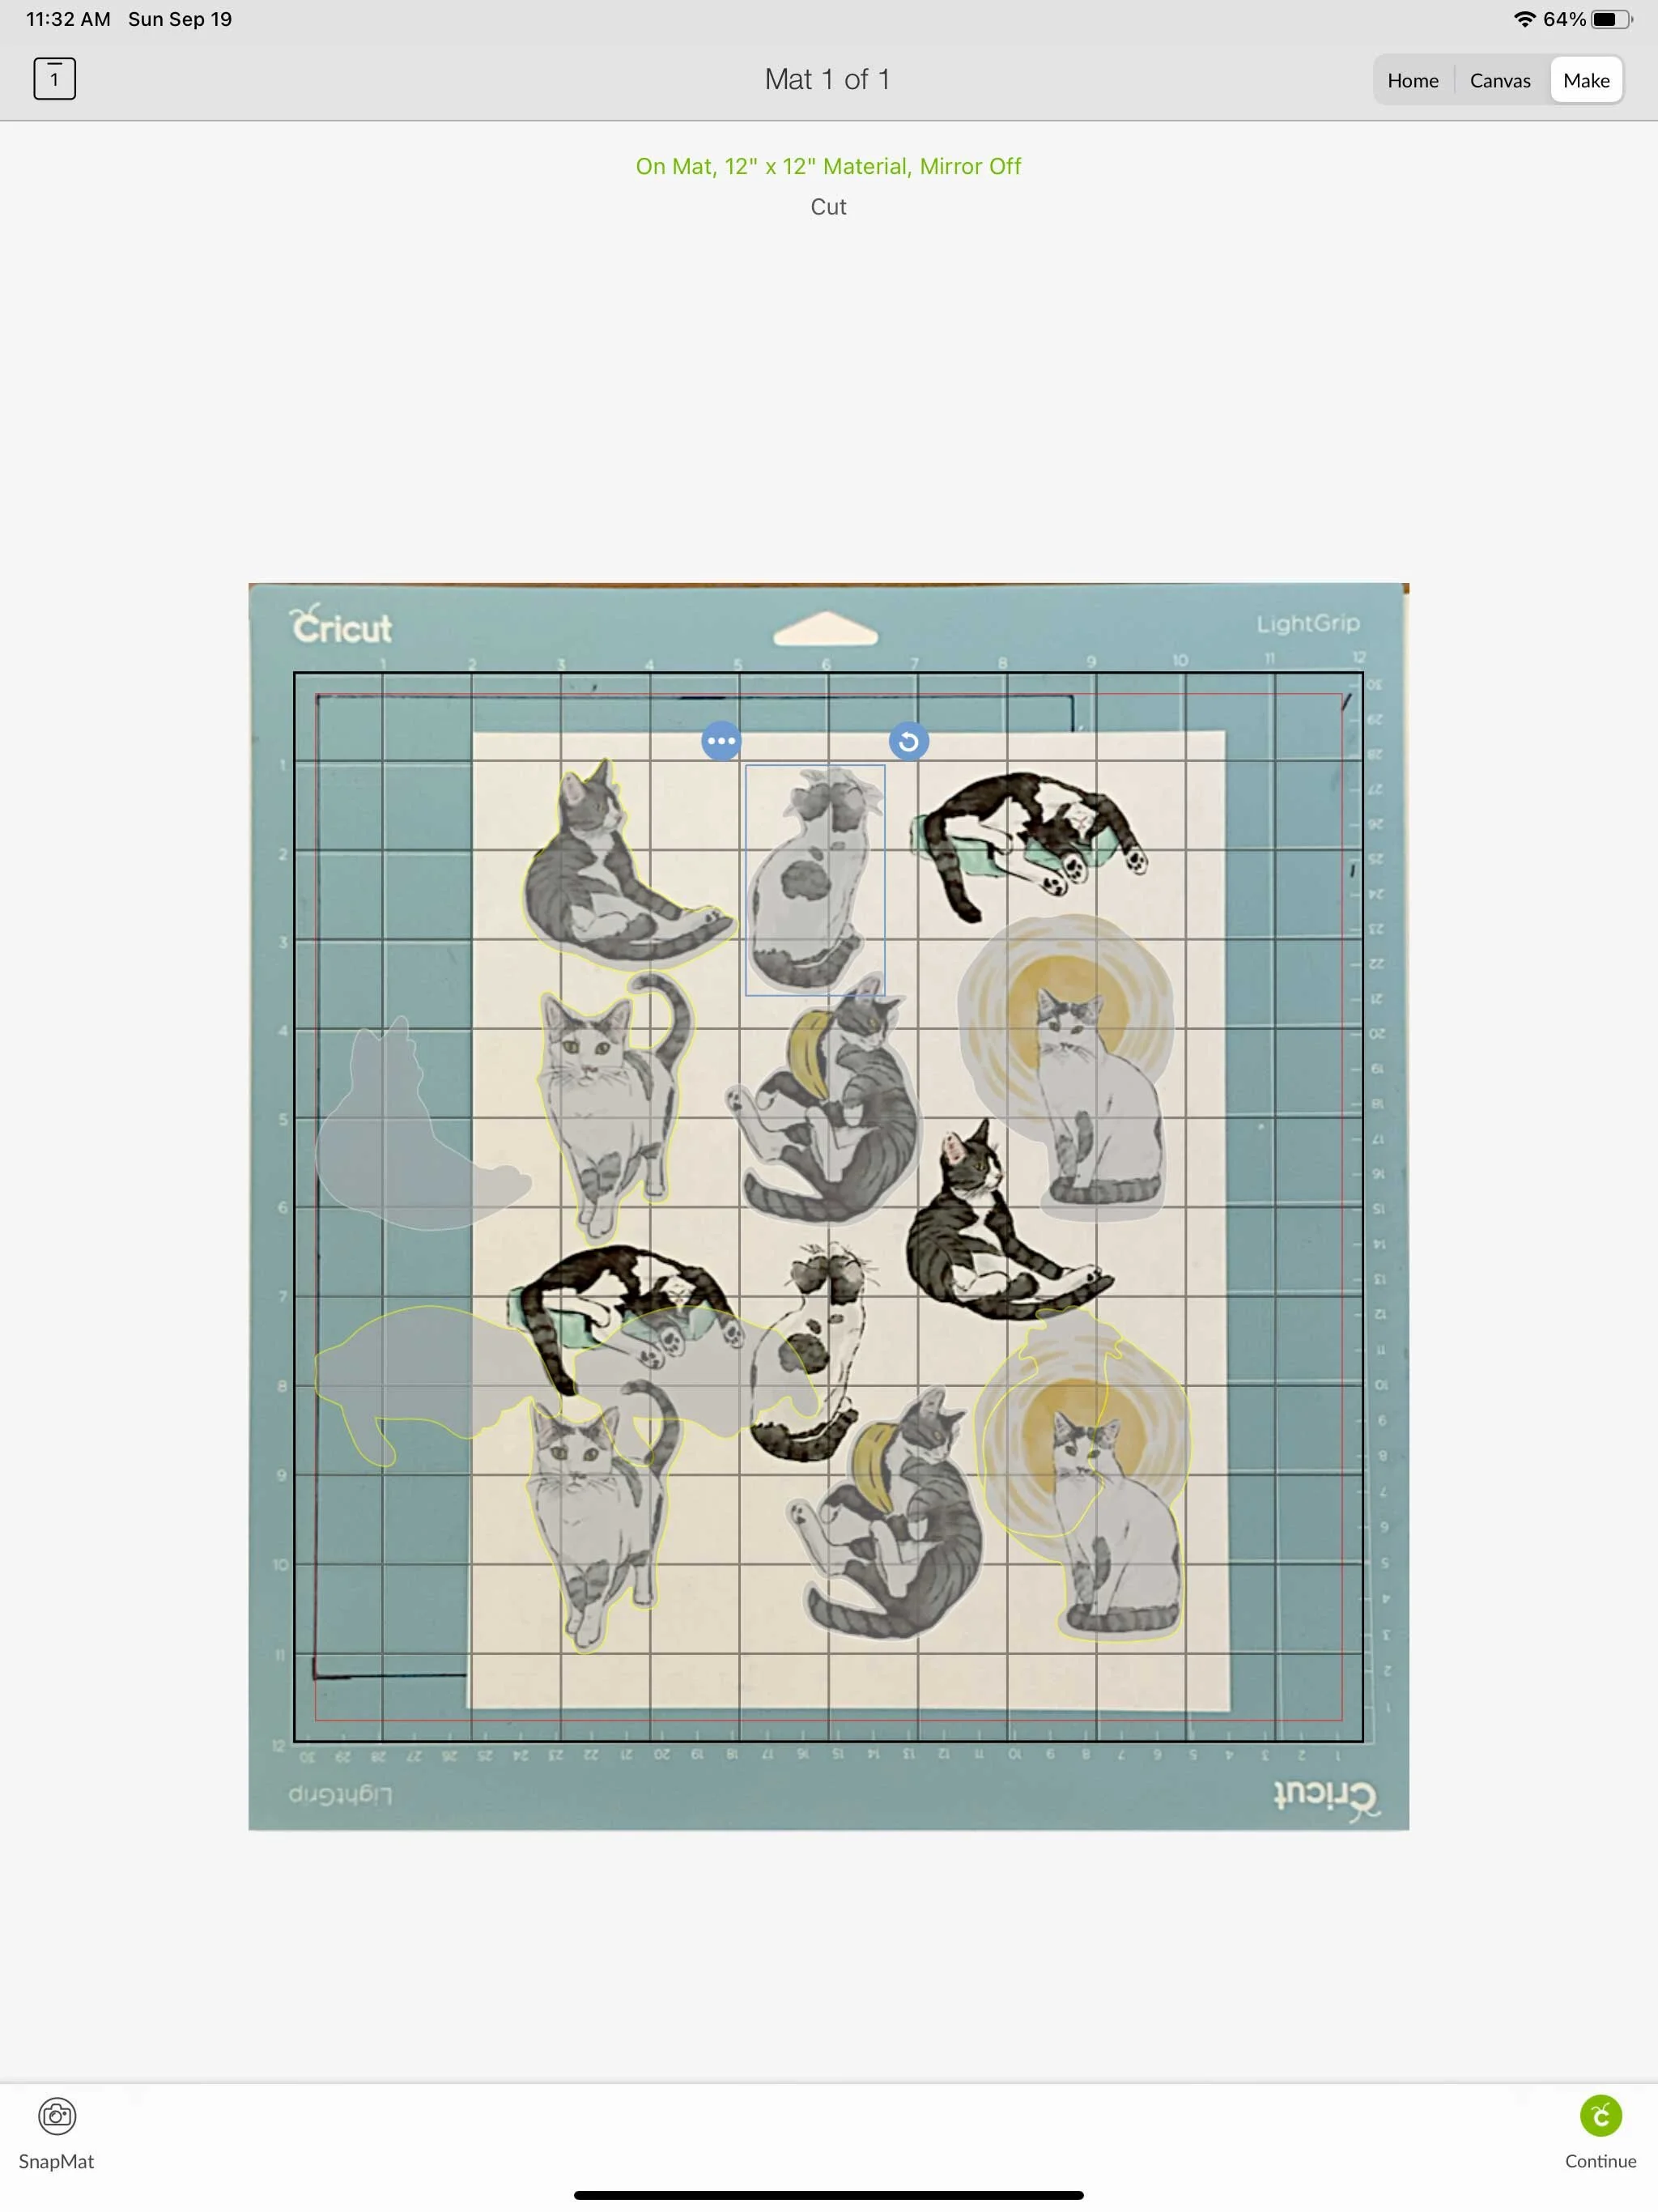
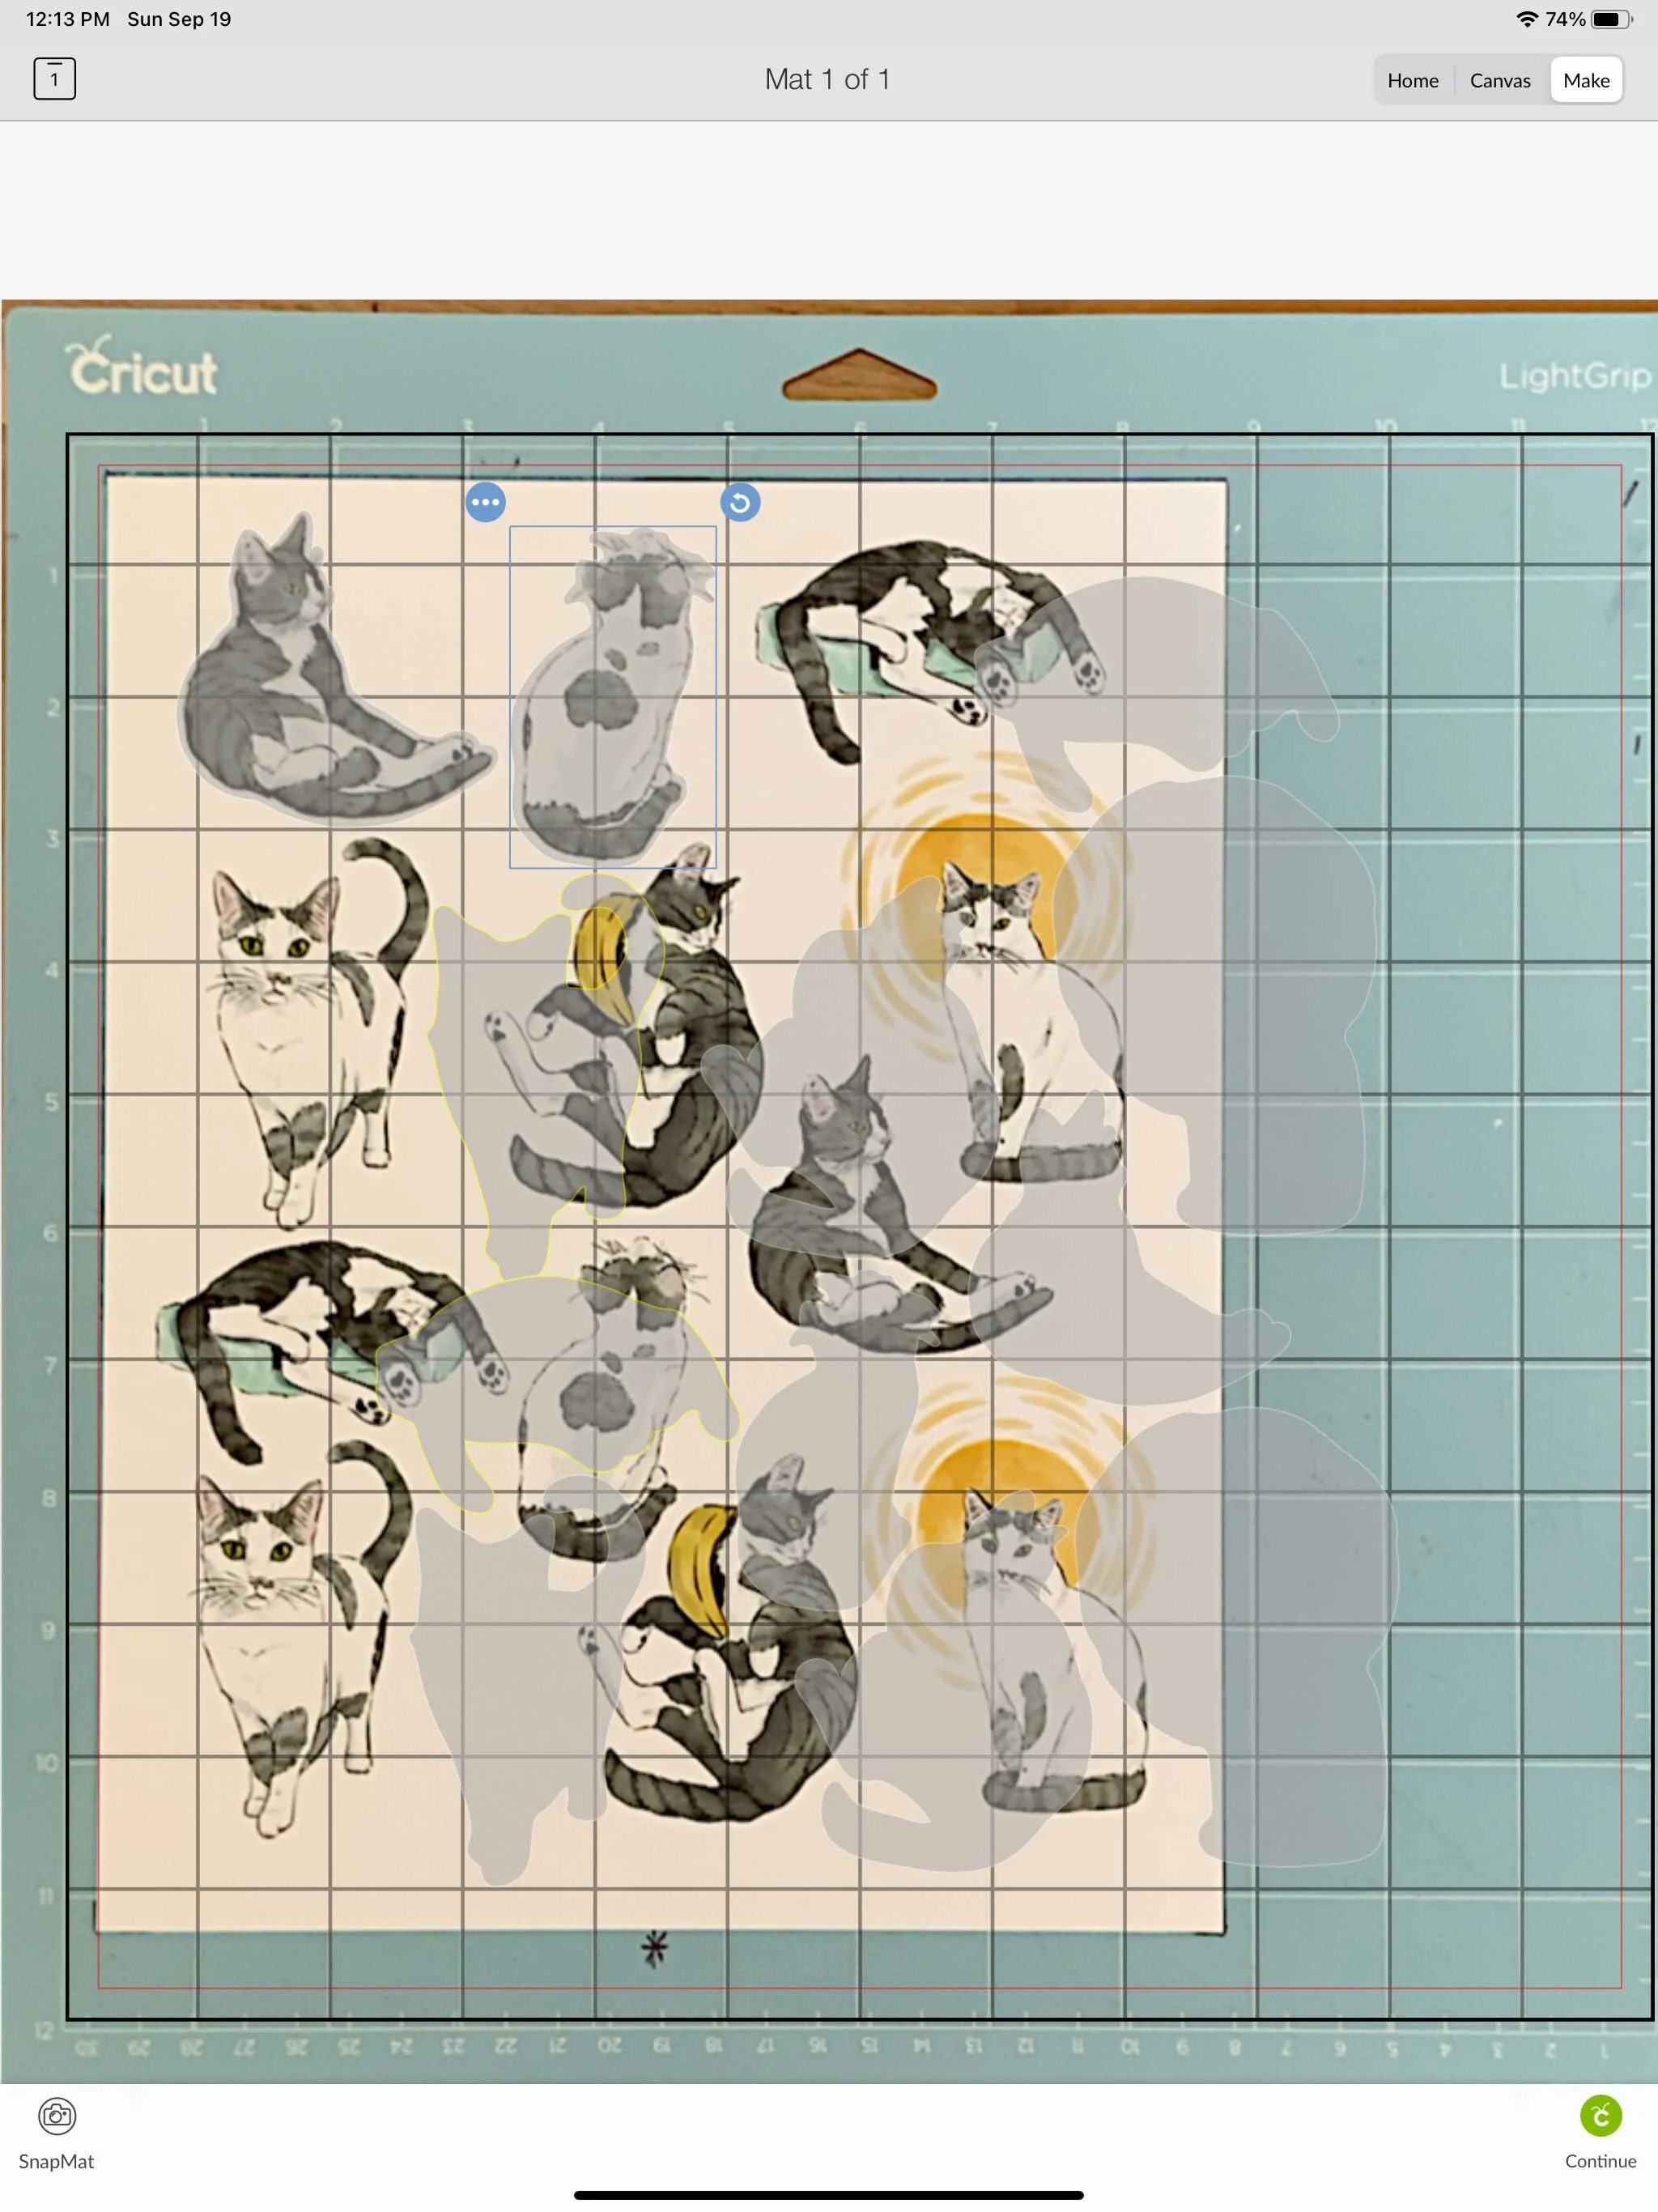
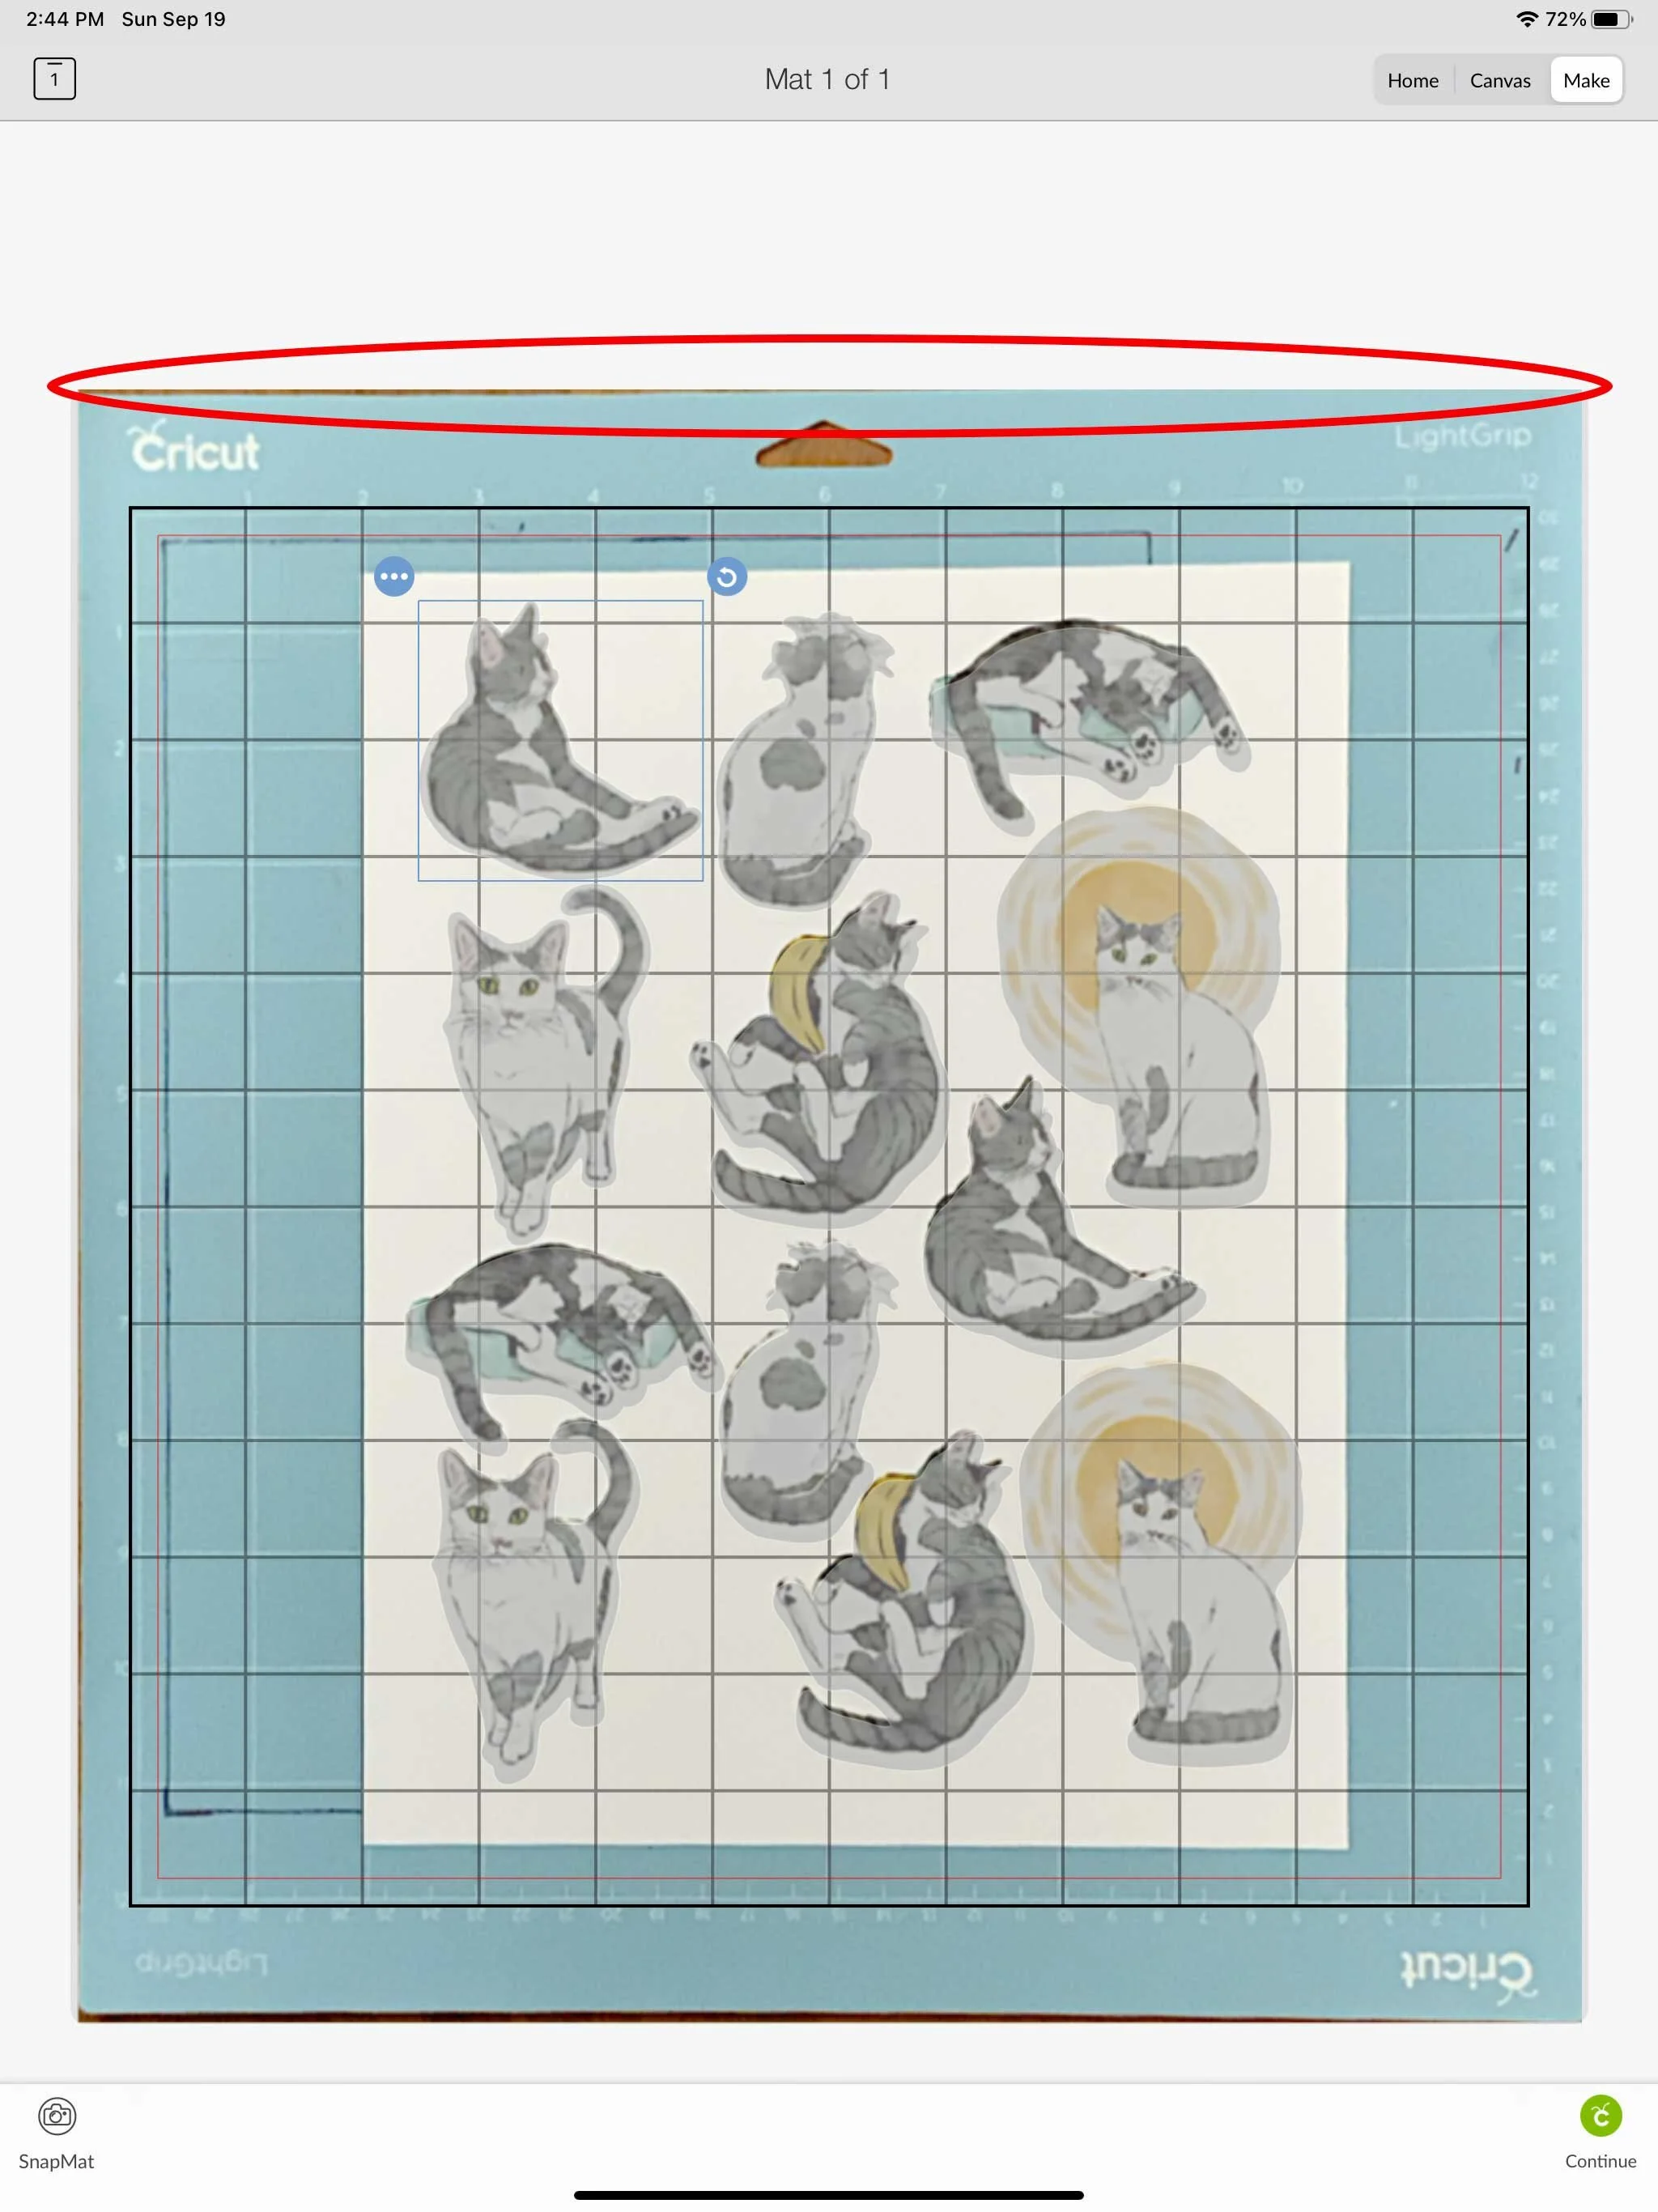
It brings me back to the Make It screen and now I need to position my cut lines. Originally I had all of my cut lines attached so it was all one big group that I could move around. I could get the lines pretty well aligned in some areas, but not in others.

Cutting Stickers Cricut Snap Mat

So I ended up going back to my canvas and unattaching all of the sticker outlines. Now I can move them around individually on the Make It screen. (Slightly tedious). I also moved my print on my mat so it’s closer to the middle and I have more space to move my cut lines around

Cutting Stickers Cricut Snap Mat

Once I get my cut lines all positioned, I press make it and send to my machine.

Cutting Stickers Cricut Snap Mat

I am loading my mat how I showed you in Part One of cutting full sticker sheets - mat all the way against the left bracket, and push up against the black rubber rollers. I don’t know if it really affects this method, but I try to always load my mat this way, just out of habit.

I press go, and once the machine is done cutting I check my cut. Not super perfect, but it still looks pretty good. Much better than the last time I tried to use this feature.

Cutting Stickers Cricut Snap Mat

Now, I’m going to try with my sticker paper. I place my sticker sheet on my mat.

I have to use the Snap Mat button take another photo of my mat because my placement is most likely not the same as my test cut.

Cutting Stickers Cricut Snap Mat

I need to move my cut lines around to match the new photo. Once they’re in place, I press Continue.

I’m going to do these as a kiss cut, so I select Washi Sheet as my Material. I load my mat into my machine and I press GO!

Uh Oh! Something’s not right and my cut lines are shifted too far down from my artwork.

Cutting Stickers Cricut Snap Mat

I’m going to try another sticker sheet to see if I can get better results. I load another sticker sheet onto my mat. Go through all the Snap Mat steps again. Load my machine and press go.

My cut is still too far down. I’m thinking I have too much of my floor showing at the top of the mat when I am taking the photo of my mat. I’m going try again, but I’m going to leave the same sticker sheet on my mat for now.

Cutting Stickers Cricut Snap Mat

I do another photo of my mat with the snap mat feature, I’m trying to get as little floor showing at the top of the mat as possible. It’s a little tricky to do since the program automatically takes the photo, so I have to retake it several times before I get one that I want to try to use.

Cutting Stickers Cricut Snap Mat

I load my mat into my machine and cut the sticker sheet again. The results were better this time, but still not super great.

Overall, I would not use this method if you are trying to mass produce stickers. It can be pretty tedious, and it’s not a super accurate or consistent method. I would only potentially use the Snap Mat feature if I was trying to use up scraps of materials and I don’t need super precise alignment. It’s also very time consuming to have to reposition the cut lines for every sticker sheet you want to cut

Cutting Full Sticker Sheets with Your Cricut - Part 3 - Final Cutting

Hi Everyone!

This week we’re going to take everything we’ve practiced so far and cut our final sticker sheets!

I’m using matte sticker paper from Online Labels. I’m printing them on the same Epson SureColor P600 printer that I used for my test prints.

I’m going to print one sheet initially to compare with one of my test prints from last week. I’m checking to make sure my stickers are printed in the same place on my sticker paper as the plain paper.

I am printing directly from Illustrator, but this time I’m hiding the cut lines layer, so the grey offset will not print on my actual stickers.

Printing stickers from Illustrator

Remember, make sure your print dialog box says DO NOT SCALE the artwork.

Printing stickers from Illustrator

My sticker paper is just a hair longer than my plain paper, the excess length is at the bottom of my print. So I have to keep that in mind when I’m placing the sticker sheet on the mat.

Printing stickers from Illustrator

I’m going to carefully place my sticker sheet within the black lines on my mat, the longer bottom edge will slightly overlap the bottom black line.

Cutting stickers with Cricut machine

I’m using the same cut lines that I already uploaded to Design Space for my test cut.

Cutting stickers with Cricut machine

For this sticker sheet I’m going to do a Kiss Cut. So far I have found the Washi Sheet material setting works best for kiss cuts for this particular brand of sticker paper. I have to click on Browse All Materials to find the Washi Sheet material, unfortunately I keep getting an error when I try to save it to my favorites, so I have to search for it every time.

Cutting stickers with Cricut machine

I load my mat like we practiced in Part 1 and press the Go button.

I check my cuts, everything looks good. So now I’m going to print and cut a few more! If you want die-cut stickers, try the regular sticker paper setting or the light cardstock setting. You may need to do 2 passes to cut all the way through the backing paper.

Cutting stickers with Cricut machine

This process is very tedious when you’re first starting, so don’t expect perfect results right away. But once you learn all the little nuances of your Cricut machine and your printer you won’t need to rely on the Print & Cut feature and you can cut full sheets of stickers!

Cutting Full Sticker Sheets with Your Cricut - Part 2 - Test Printing

Hi Everyone!

This week is another important step when creating full sticker sheets to cut on your Cricut Machine.

I always print a few test sheets on plain paper before I cut the actual sticker paper. Once you learn all the little nuances of your machine, you will probably be able to skip this step. But when you are just beginning to using this method, it’s best to practice, practice, practice before jumping into using your expensive sticker paper.

I already set up my artwork in Adobe Illustrator with my offset cutlines. If you need some guidance on creating offsets in Illustrator, you can check out my previous posts here and here.

Kitty Sticker artwork in illustrator

When I set up my art files in Illustrator I have 2 separate layers. First, the ARTWORK layer that we will use to print our stickers directly from Illustrator. Second, the CUTLINE layer that we will export as an SVG and import into Cricut Design Space.

Layers in Illustrator

Very Important: My cut layer contains a bracket in each corner of the 8.5” x 11” artboard. This is going to help us line up the cut lines in Design Space. Make sure you include these brackets when you set up your file!

Kitty Sticker artwork in Illustrator

For my test print, I’m actually going to print the grey cutlines with the artwork so I can really see how far off my machine cuts and make the appropriate adjustments.

I’m using an Epson SureColor P600 printer, but you can use any inkjet printer for this method. I do not recommend using a laser printer for this method. Since laser printers use heat, you will run into shrinkage issues with your paper and your cuts will be off unless you calculate the proper shrinkage. The shrinkage is very minimal, but it is noticeable.

I’m going to print 3 copies of my artwork on plain paper so I have a couple of extra to practice.

Your print dialog box will probably look different , but make sure the image is NOT SCALED when printing.

Print settings

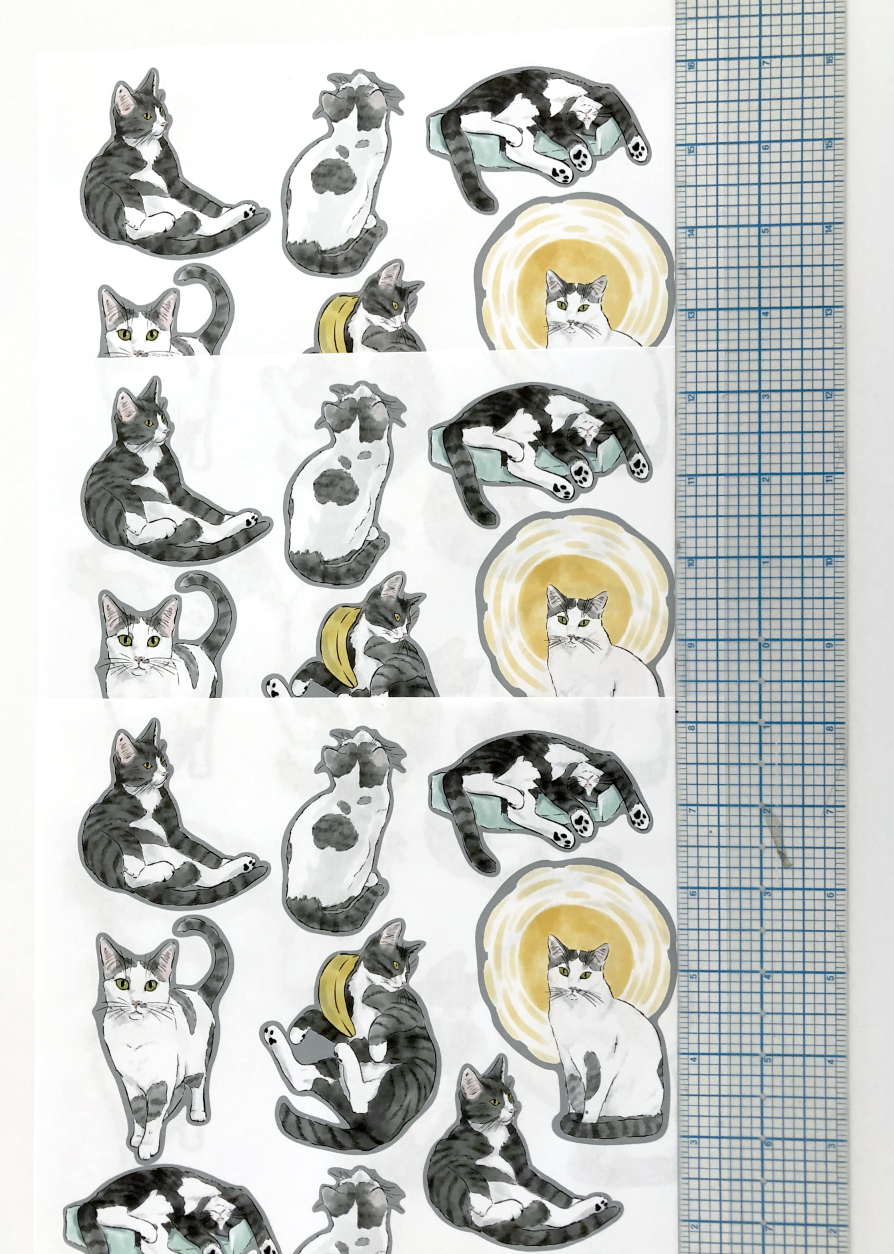
Check your printouts carefully to make sure they are straight and the artwork is is the same position on all 3 printouts. If the artwork is shifted, at all, in any of the printouts you will need to test and/ or adjust your printer to make sure you are getting the same print placement everytime.

Checking print placement

After checking your print outs, carefully place one of the printouts inside the rectangle on the mat that we prepped in last weeks post. Take your time when doing this to make sure your paper is properly aligned within the rectangle.

Test Print placed on mat

Now we’re going to open our cut lines only in Design Space. I exported that layer as a separate SVG from Illustrator and imported it into Design Space.

Check that the dimension of the imported artwork are 8.5” x 11” like our file in Illustrator. Those very important brackets that you put in the corners on the artboard in Illustrator help ensure that the dimensions remain 8.5” x 11.

Cut Lines in Design Space

ATTACH all of your elements, and the press MAKE IT.

Those very important corner brackets are also going to help keep your artwork in the proper place in the upper left corner of the mat, but not beyond those red border lines in Design Space.

Cut lines in Design Space

I select Copy Paper and Default pressure for my material settings.

Now I carefully load my mat into the machine like we practiced last week, and press GO!!

After the machine is done cutting, load your mat and let’s check the results!

So on my first attempt, my paper is placed just a hair too high up on the mat. So for my next try I’m going to try to do a better job aligning the bottom edge of my paper to the bottom line that’s drawn on the mat.

First Cut Attempt

My 2nd attempt is much better! Remember it’s never going to be absolutely perfect, there are so many variables that go into this process and there will always be some level of human error. But it’s up to you how much time and effort you want to spend trying to perfect your cuts. Also, the more you do it, the better you’re going to become.

2nd Cut Attempt

Since the offset on my actual stickers will be white, I’m ok with my second attempt. I’m really going to focus on lining up my paper along the bottom line on my mat for my future cuts.

2nd cut attempt

If you are doing a colored offset, make sure you add some bleed around the edges so if it cuts slightly off there won’t be any white showing. Also, a wider offset will make a slightly off cut less noticeable.

Next week we’ll print on the actual sticker paper and cut some stickers!

Cutting Full Sticker Sheets with Your Cricut - Part 1 - Prepping your mat

Hi Everyone!

This week I wanted to start sharing how I cut full sticker sheets with my Cricut. I’m going to demo on my Cricut Maker, but you should be able to do this method on any of Explore or Explore Air machines as well.

I’m going to break this up into a few posts since it is a bit of a tedious process in the beginning. But once you get everything set up it should be pretty easy.

Today we’re going to start with prepping your mat. You don’t need to use a brand new mat, but it needs to be sticky enough that the paper staying in place while the machine is cutting. I will be using a blue mat since it’s not as sticky as the others, but you could also use an older green mat that’s not as sticky anymore.

Before we even print anything to cut, we need to practice loading our mat the SAME WAY EVERYTIME. This is probably the most important part of getting your stickers to cut in the right place eveytime. It’s best to practice, practice, practice before we waste any of our precious sticker paper.

I have a scrap piece of cardstock on my mat the upper left corner. For now, we’re just practicing loading and unloading our mat consistently, so you can also use just a plain piece of paper.

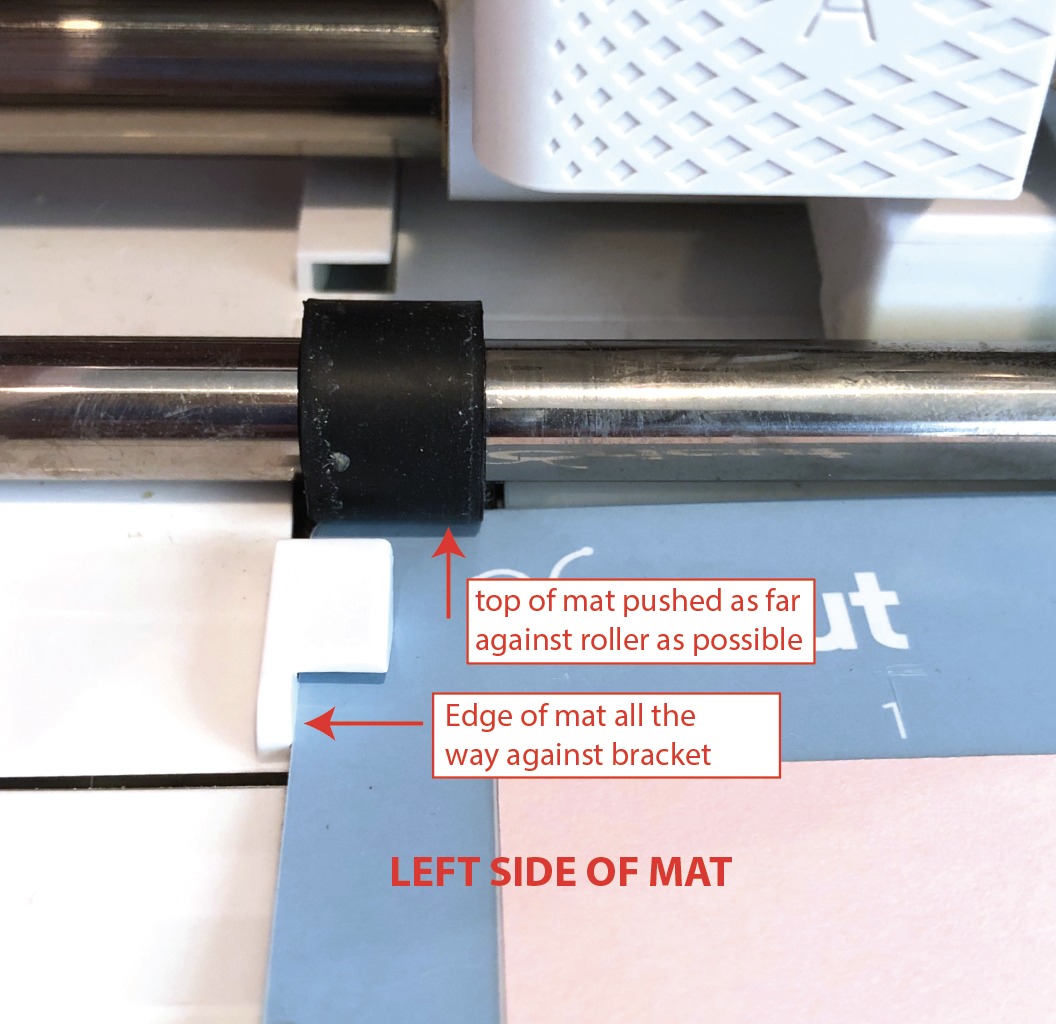
The easiest, most consistent method that works for me is having my mat pushed all the way against the left little bracket and up against the black roller as far as it will go, without forcing it. The right side will have a small gap where it doesn’t touch the bracket, but the mat will still need to be pushed as far against the black roller as it will go, without forcing it.

Screen Shot 2021-08-29 at 8.30.04 PM.png

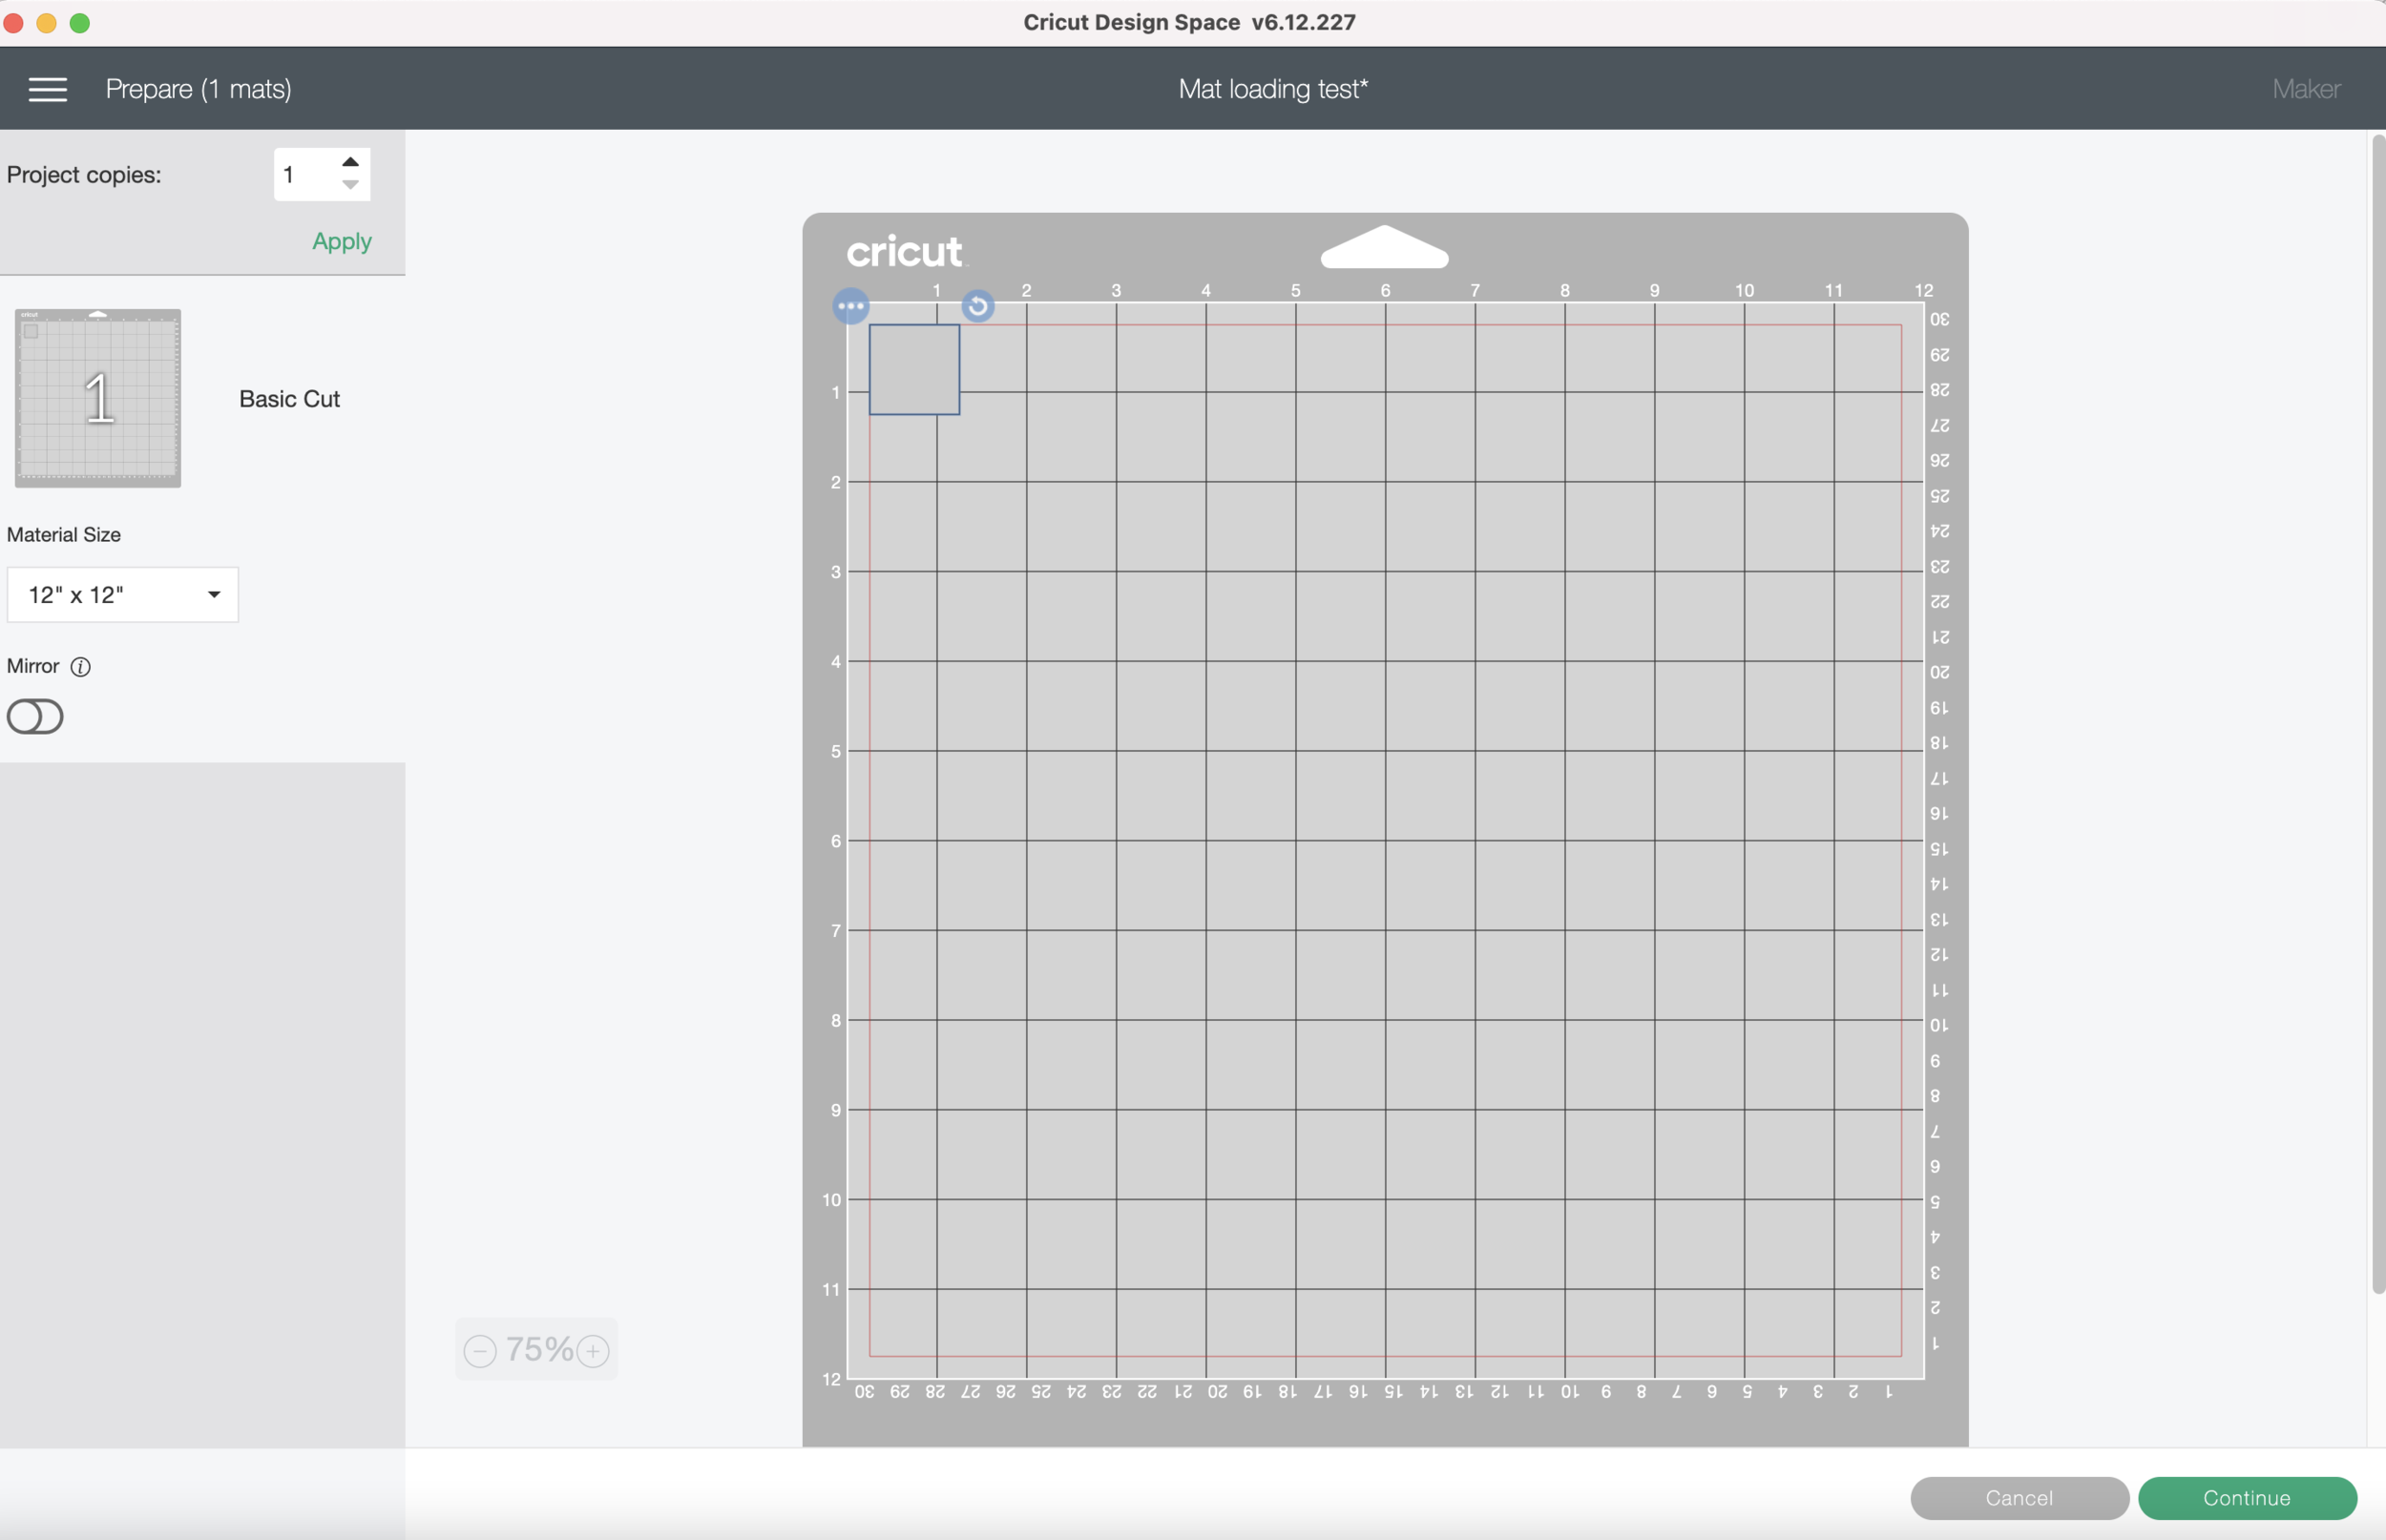
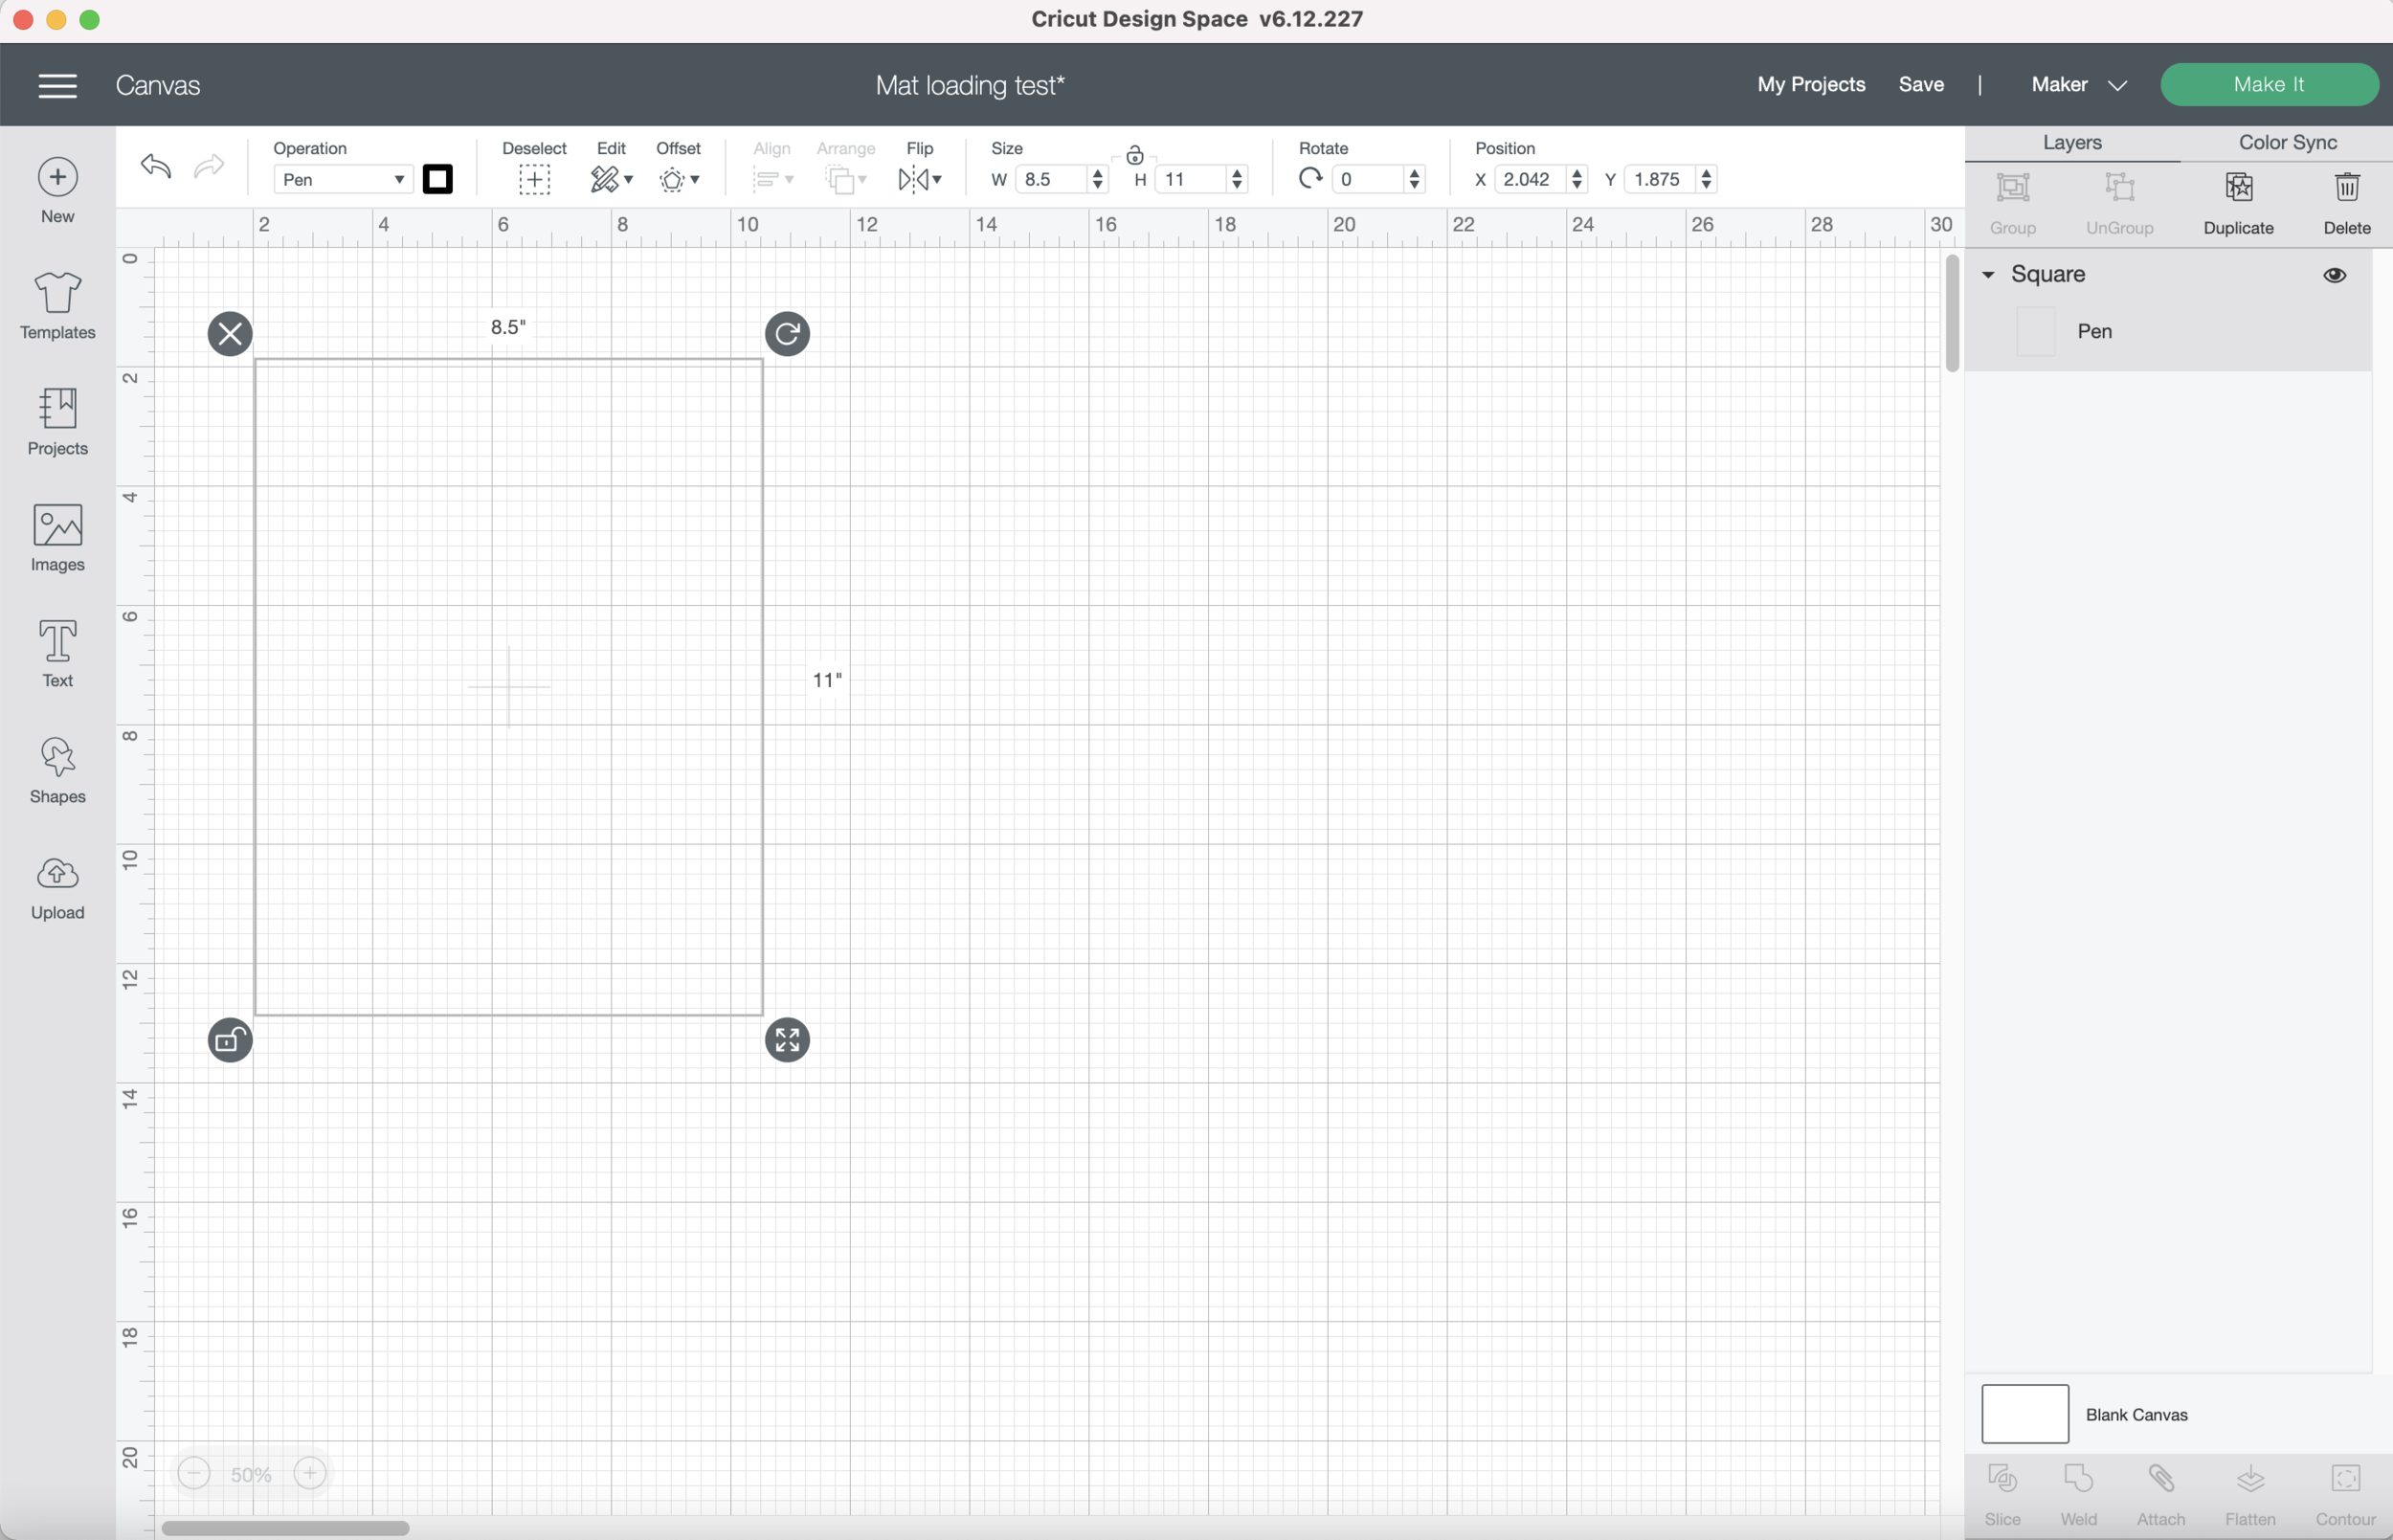
In Cricut Design Space, I made a simple 1” x 1” square to cut from my scrap cardstock. You can use whatever shape you want, this is just to test that I am loading my mat the same way every time.

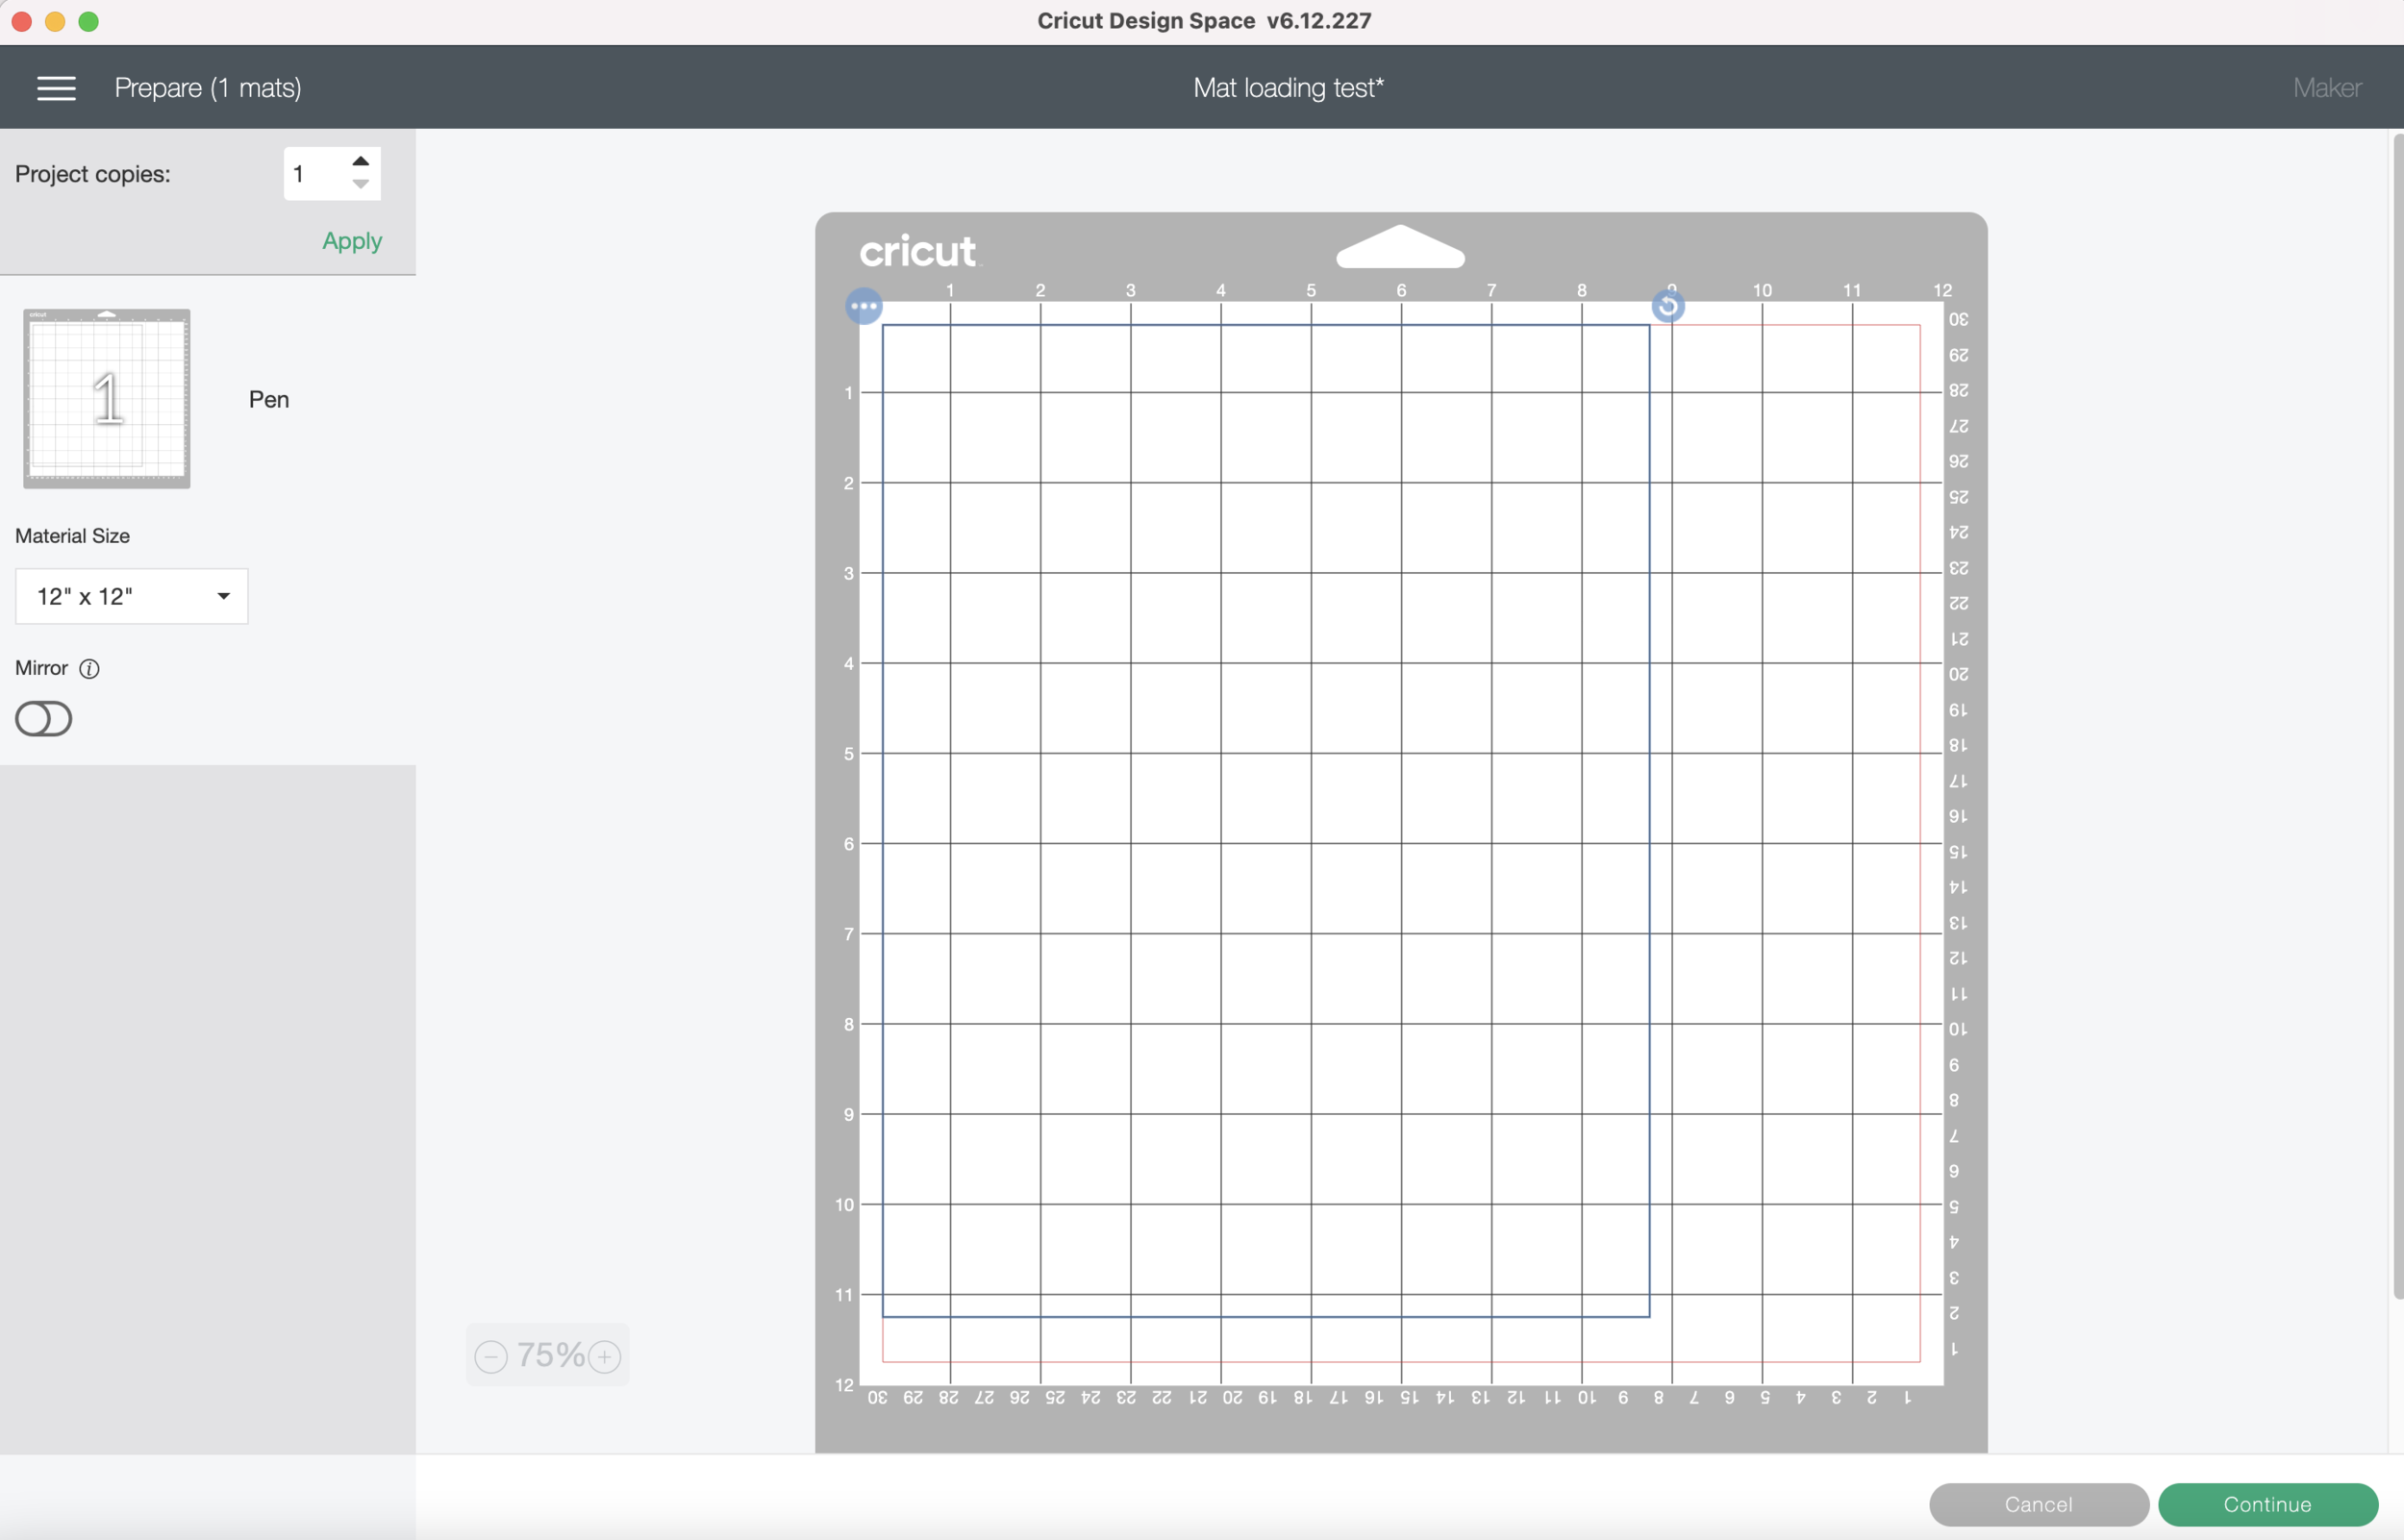
I click “Make it” and Design Space automatically puts my square in the upper left corner. But notice that it’s not completely in the left corner, there’s a red bounding box about a 1/4” inch inside the edges of the grid that I cannot move any elements outside of the red lines. This will be important later when we are setting up our sticker sheets for cutting.

Screen Shot 2021-08-28 at 12.33.18 PM.png

Now I’m going to practice loading my mat - all the way against the left little bracket and up against the black rollers as far as it will go, without forcing it. (See photos above)

I press Go on my machine and let it cut out the square. After it’s done cutting, I’m going to unload my mat.

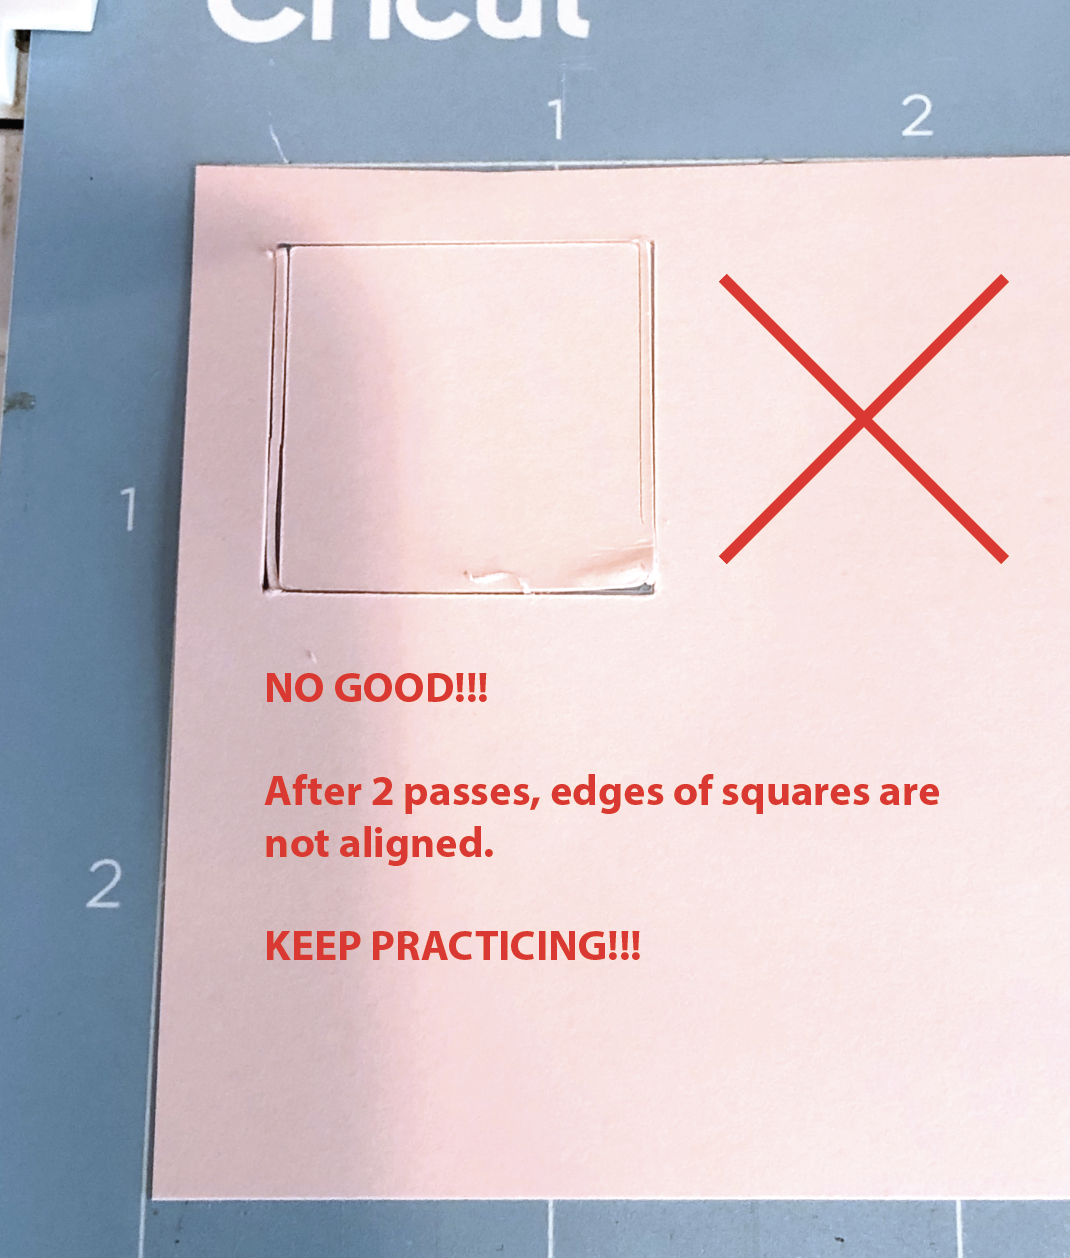
I’m going to leave the already cut cardstock on my mat and send it through my machine again, loading it the EXACT same way I did for the first cut.

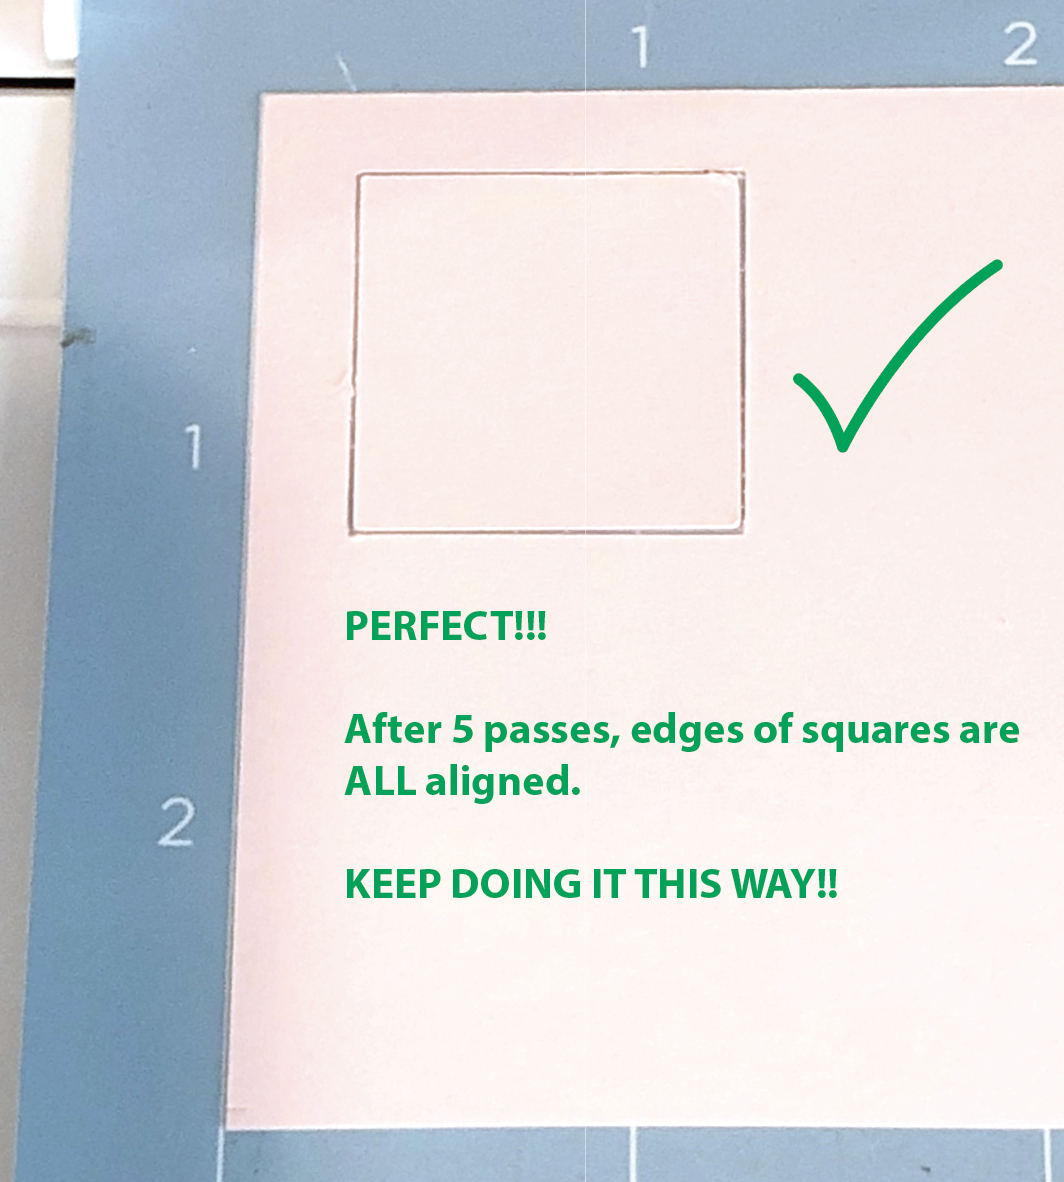
If you are loading your machine exactly the same way, the cut lines should be directly on top of the first set of cut lines. If you shifted the placement of your mat, the 2nd set of cut lines will be off.

Keep practicing loading & unloading your mat so all of the cut lines are aligned.

Screen Shot 2021-08-29 at 8.41.58 PM.png

Once you’ve mastered loading your mat, we’re going to mark our mat so we know where to place the sticker paper. You’ve probably seen people use tape or cardstock to mark their mats, I’m not going to use either of those. I’m going to use a fine tip pen to draw directly on my mat, so I will still be able use my full mat for other projects.

The sticker paper I use is 8.5” x 11”. If you are using A4 your paper size will be 210mm x 297mm (8.27” x 11.69”) so you can sub those measurements for the 8.5”x11” measurements.

In Design Space, I’m going to create an 8.5” x 11” rectangle (8.27” x 11.69” or 210mm x 297mm if you are using A4 paper). I’m going to change the operation from “Cut” to “Draw” so I can use my fine tip pen.

Screen Shot 2021-08-29 at 3.19.56 PM.png

I’m going to press “Make it” and again, Design Space automatically puts my rectangle in the upper left corner, but there’s still that roughly 1/4” border around my mat. I’m going to keep the placement of the rectangle as it is.

My machine draws an 8.5” x 11” rectangle directly on my mat, and now we have a guide for where to place our sticker paper on the mat. Let the pen dry for a few hours or overnight, especially if you are using the Cricut brand fine tip pen, it smudges pretty easily.

Screen Shot 2021-08-29 at 8.50.04 PM.png

Next week, I’m going to do a test print to check the placement of my cut lines before I actually cut the sticker paper.

Embossing with Glue Pens and Silhouette Portrait 3

Hi Everyone!

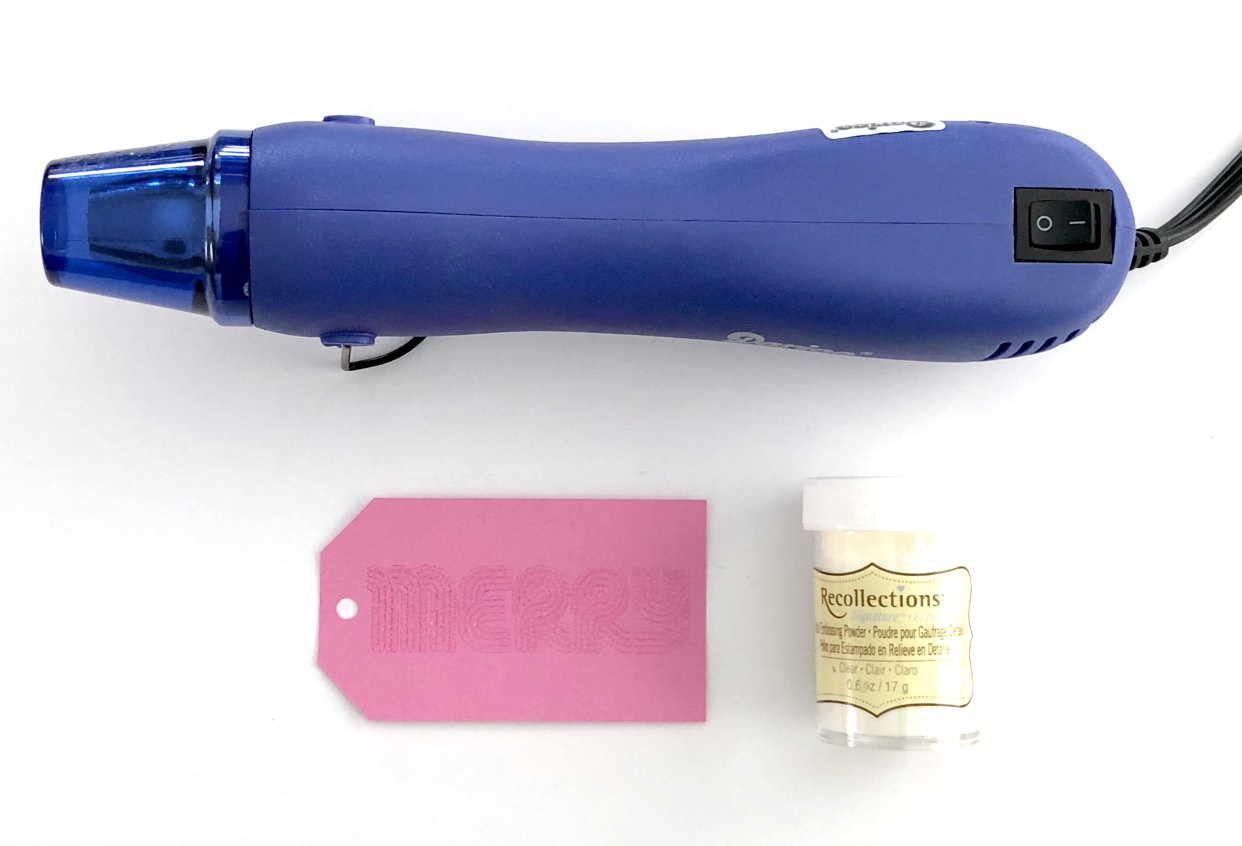
This week I want to share another technique I like to use to embellish gift tags and cards. I will be using the WRMK glue quill with embossing powder. If you buy the glue quill set, it comes with 2 small jars of embossing powder. Or if you already have some embossing powder on hand, you can use that too.

I’m going to do this technique with a clear embossing powder that I already have and the gold powder that came with the glue quill set. I will also need my heat gun.

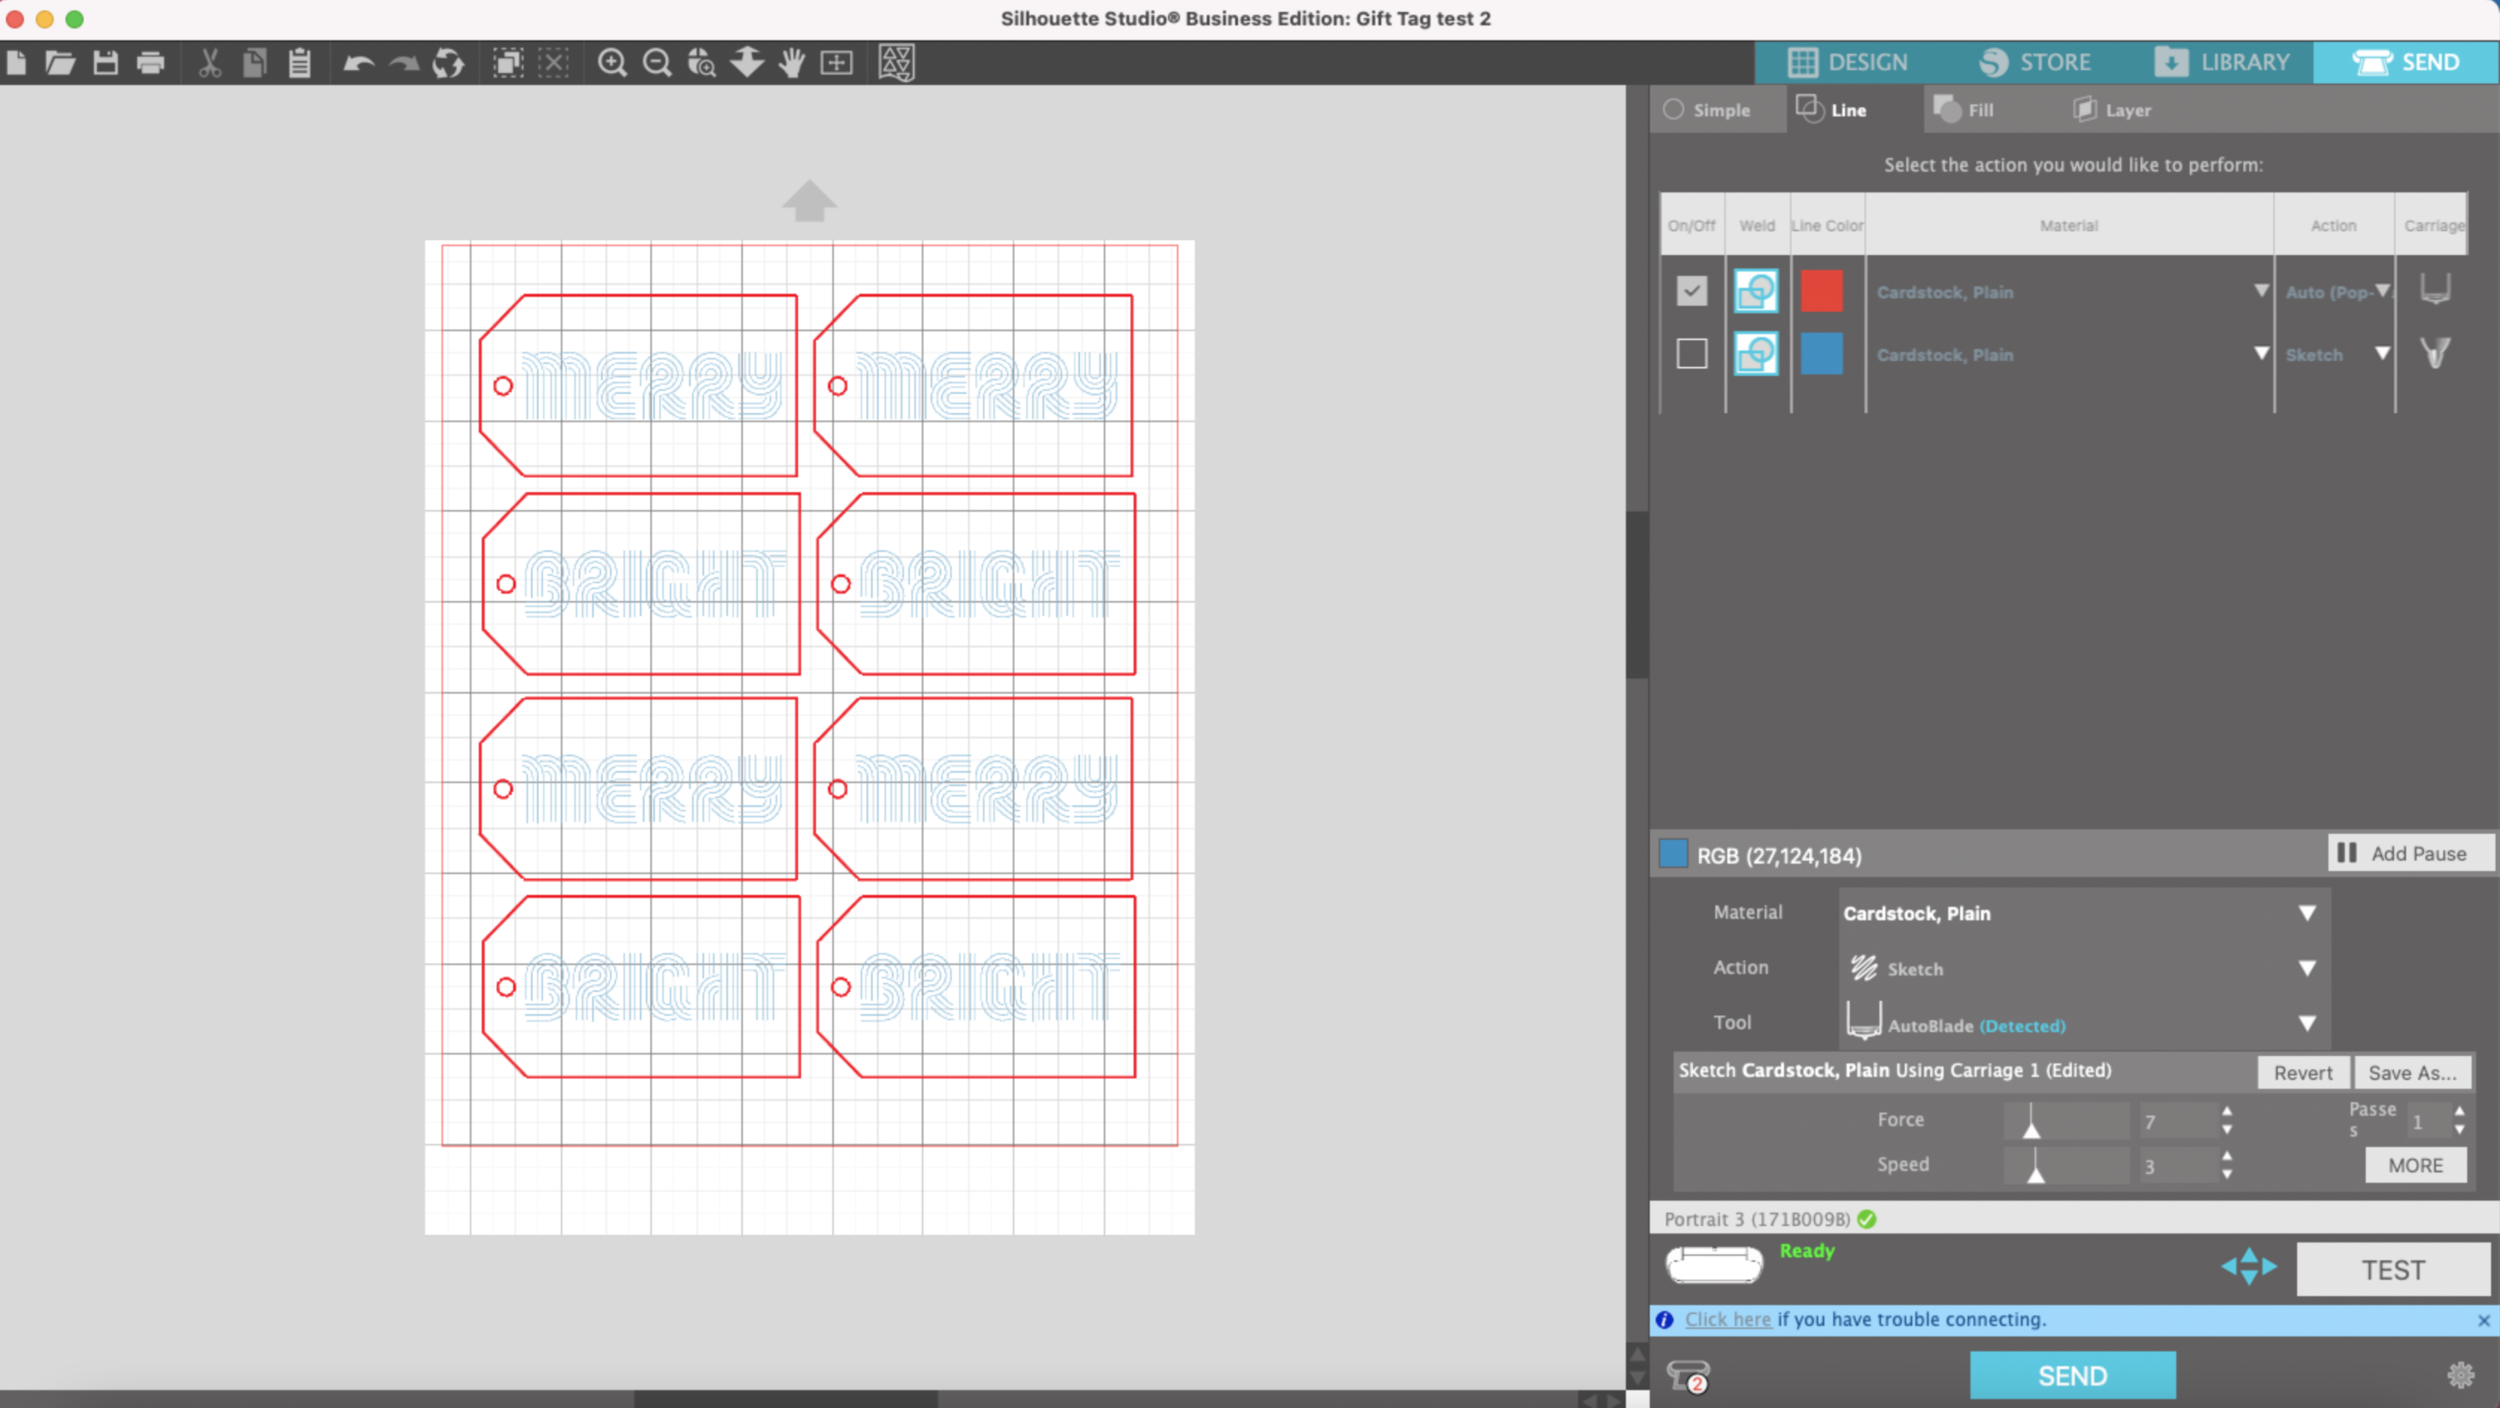
I already set up my file in Silhouette Studio, my blue lines will be drawn with the glue pen & the red lines will be cut. I’m using 65lb Recollections cardstock, and I will be drawing and cutting all of this matless, yay!!

Portrait 3 embossing with glue pen

First, I will draw all the lettering with the glue quill and the Silhouette pen adapter. When I open the send tab I select “Line" and check the box next to the blue square.

Portrait 3 embossing with glue pen

After it’s done drawing, I uncheck the blue box & select the red box to cut. I choose auto-pop out since I’m doing a matless cut.

Portrait 3 embossing with glue pen

I did need to send my cut through twice, it wasn’t quite deep enough to pop out the tags nicely after the first cut.

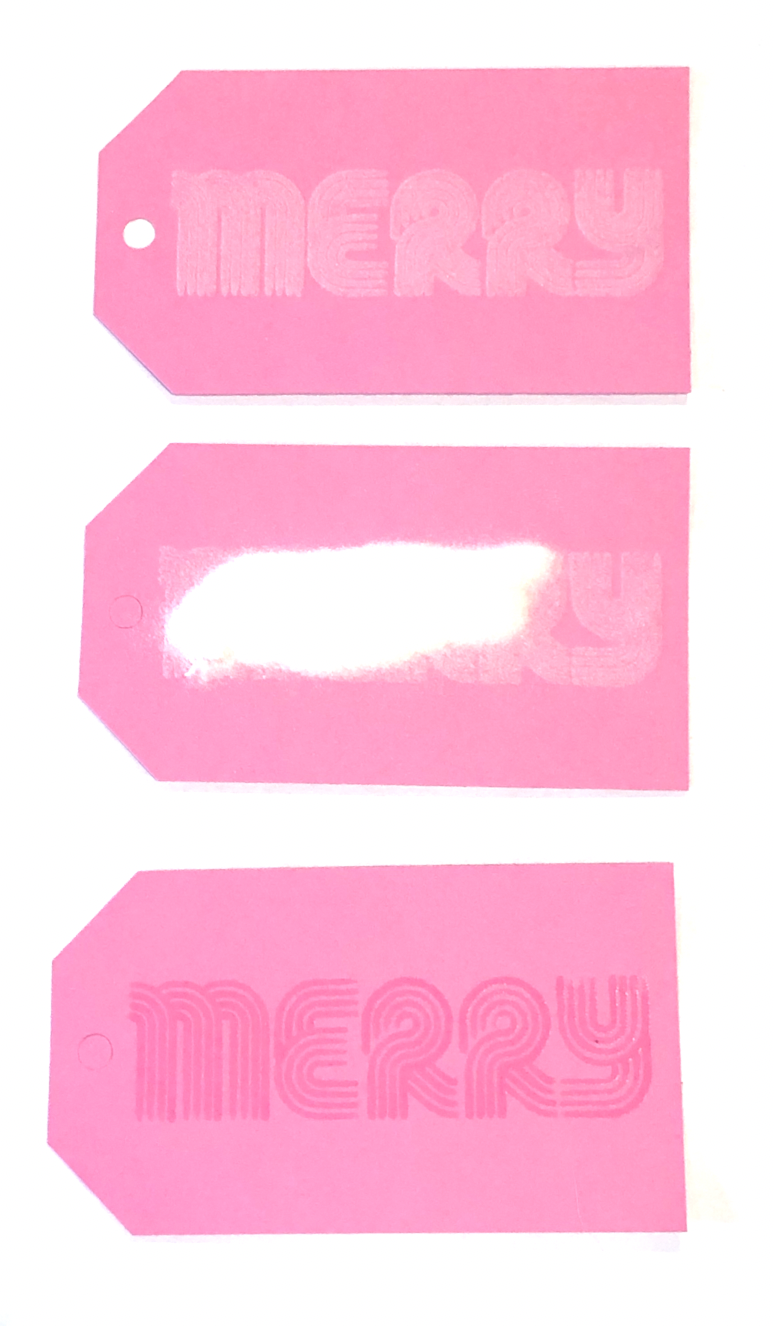
I remove my tags from the cardstock & now i’m going to apply the embossing powder. The glue from these pens stays tacky for a little while, so don’t worry if the glue looks dry, the powder will still stick.

I’m using an old jar of Recollections clear embossing powder, I’ve had it for a few years and it still works! I apply the powder pretty thick and move it around so all of the glue gets covered. I dump the excess powder back in the jar once I’m done applying it to all the tags.

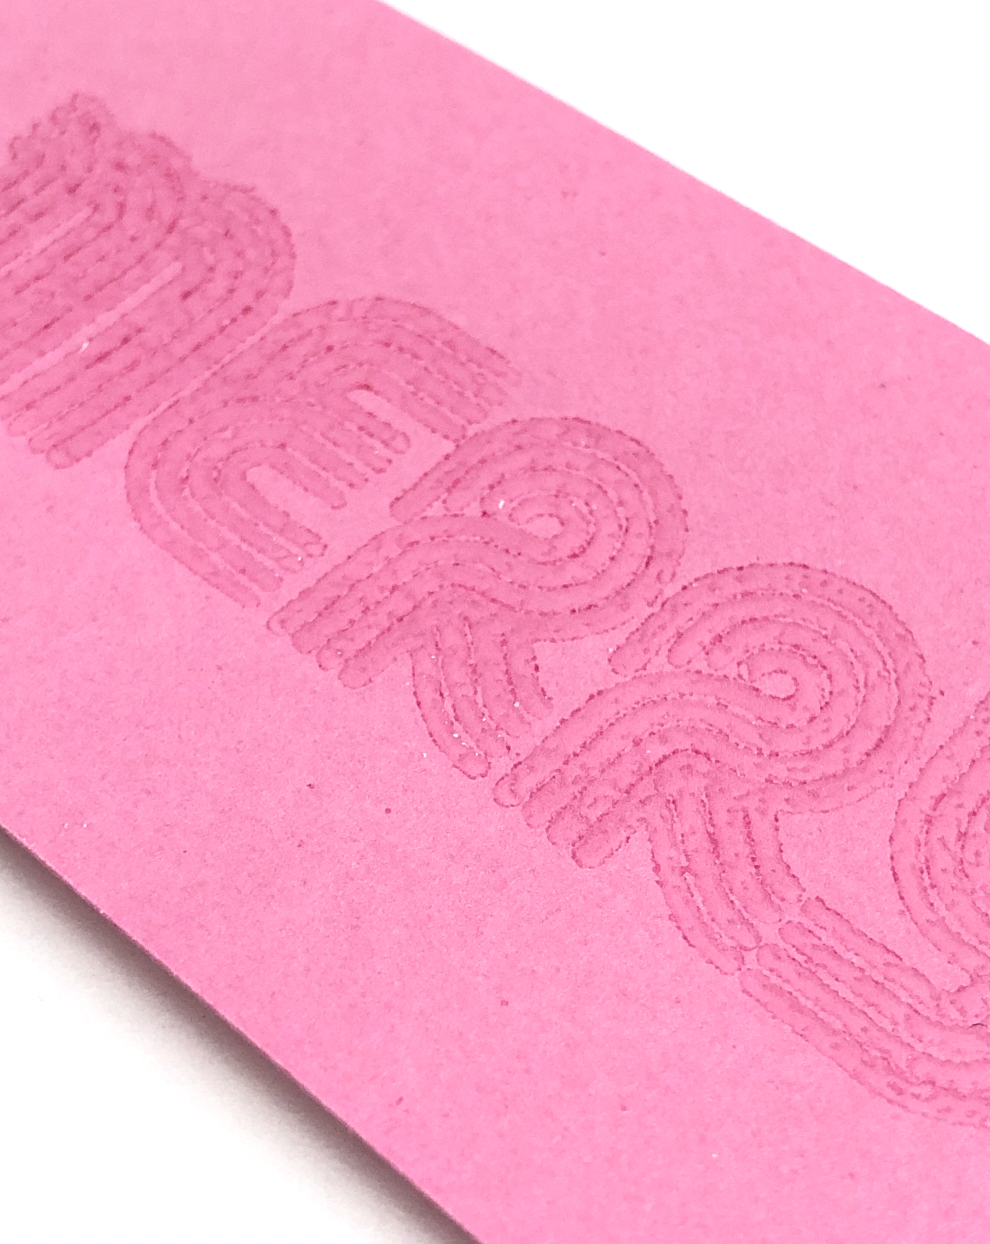
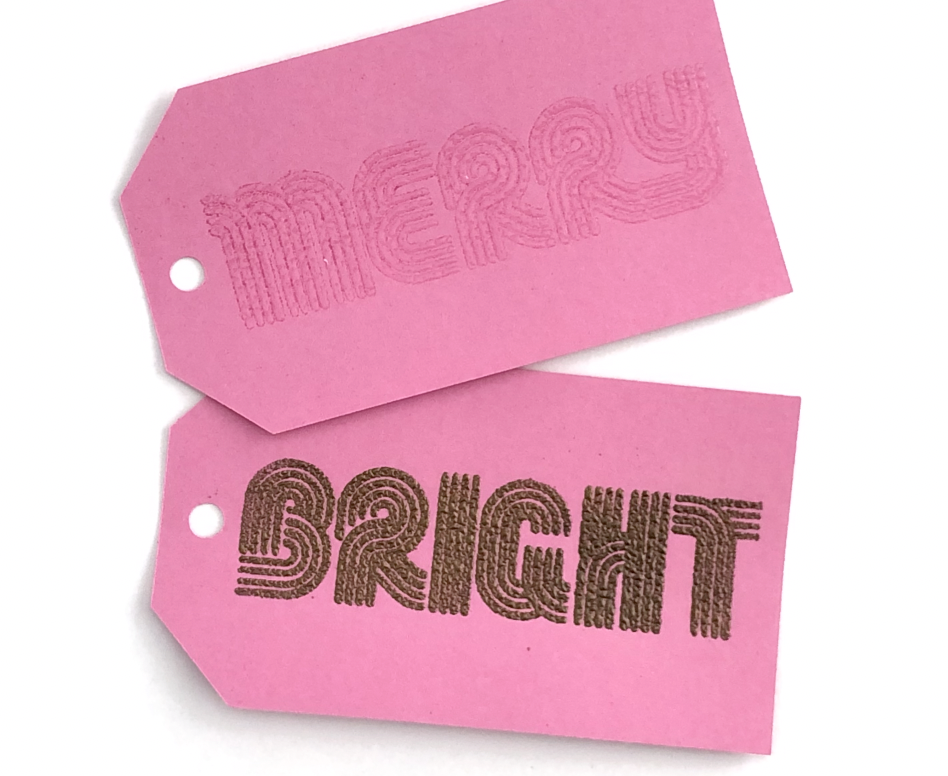
(Top) Clear Powder applied, (Middle) Clear Powder being applied, (Bottom) No powder applied, only glue

(Top) Clear Powder applied, (Middle) Clear Powder being applied, (Bottom) No powder applied, only glue

I apply some heat to it with my heat gun. The powder melts and I’m left with almost like a clear gel-like finish. It’s raised and also very shiny.

Portrait 3 embossing with glue pen

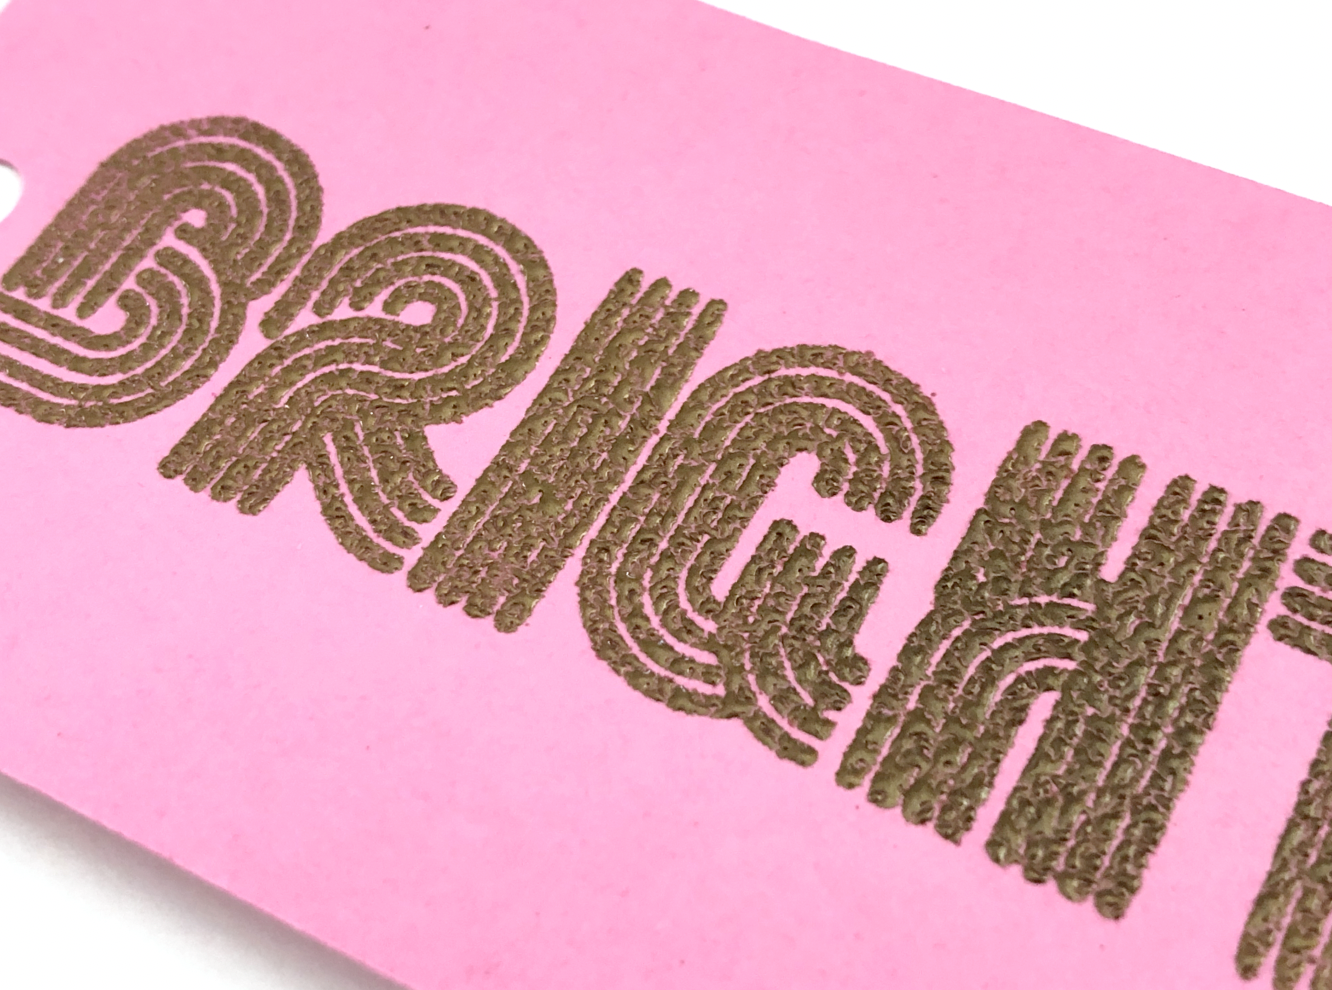
Next I tried the gold powder that came with the Glue Quill set. I applied it the same way as the clear powder. This one is kind of disappointing. I was expecting a pretty metallic gold, but this one is very drab and not metallic at all. I will be on the look out for a better gold embossing powder.

Portrait 3 embossing with glue pen

But this is another way to add some texture and dimension to gift tags or cards using your Silhouette machine!

Portrait 3 embossing with glue pen

Foiling with Glue Pens

Hi Everyone!

This week I want to share a little foiling technique that doesn’t require any heat or a cutting mat! I will be using my Silhouette Portrait 3, a glue pen, and some reactive foil (I’ll be using a Minc brand roll of foil that I already have).

I’ve been working on some holiday single line SVG files for gift tags and cards, so I want to test them out using this technique.

I already set up my design to be drawn and cut matless. Each operation will be done according to line color - the blue lines will be drawn with the glue pen, the red lines will be cut. Make sure your design is set up so it is between the rollers on your machine, you don’t want to get glue all over the rollers!

First, I’m going to start with the WRMK Glue Quill. (there are other brands of glue pens you can try, but this is the one I have on hand.) Before loading you pen into the machine, be sure to scribble your pen on a little piece of scrap paper to make sure the glue is flowing. I am using the pen adapter that is made for the Silhouette machines.

I’m going to do the drawing with the glue pen first (the blue lines). I select the heavy coverstock as my material. I’m going to slow down the speed from 5 to a 3, so the glue flows from the pen evenly.

Screen Shot 2021-08-15 at 12.19.28 PM.png

After the machine is done drawing, DO NOT remove the cardstock. I’m going to let the glue dry for a few minutes. It dries pretty quickly and still remains a little tacky, which is exactly what we need to apply the foil.

Screen Shot 2021-08-15 at 12.17.44 PM.png

After the glue is dry, I’m going to cut out my gift tags. I check the box for the red lines & use the Pop out cut.
Screen Shot 2021-08-15 at 10.45.28 AM.png

I cut some small pieces of foil to fit the gift tags. I lay the foil over the gift tag, making sure all of the glue areas are covered by the foil.
Screen Shot 2021-08-15 at 12.23.05 PM.png

I use an old credit card as a scraper, but you can also use a small squeegee. I smooth the foil down in all directions, vertical, horizontal, etc.

Once I see the letters starting to appear, I lift the foil to check my progress. If there are a few spots missing the foil, you can continue to go over it with the squeegee, you can even reposition to foil if needed and continue to squeegee.

Screen Shot 2021-08-15 at 12.24.16 PM.png

Once it’s done, I carefully brush off any foil dust and you have a foiled gift tag! This technique gives the lines kind of a vintage, distressed look.

Screen Shot 2021-08-15 at 12.28.34 PM.png

Silhouette Portrait 3 Matless Drawing & Cutting

Hi Everyone! This week I’m going to combine two of my favorite functions on my Silhouette Portrait 3, matless drawing and matless cutting. I’m going to be using some heavy cardstock and my gold Sakura Gelly Roll Pen to make some little Thank You tags.

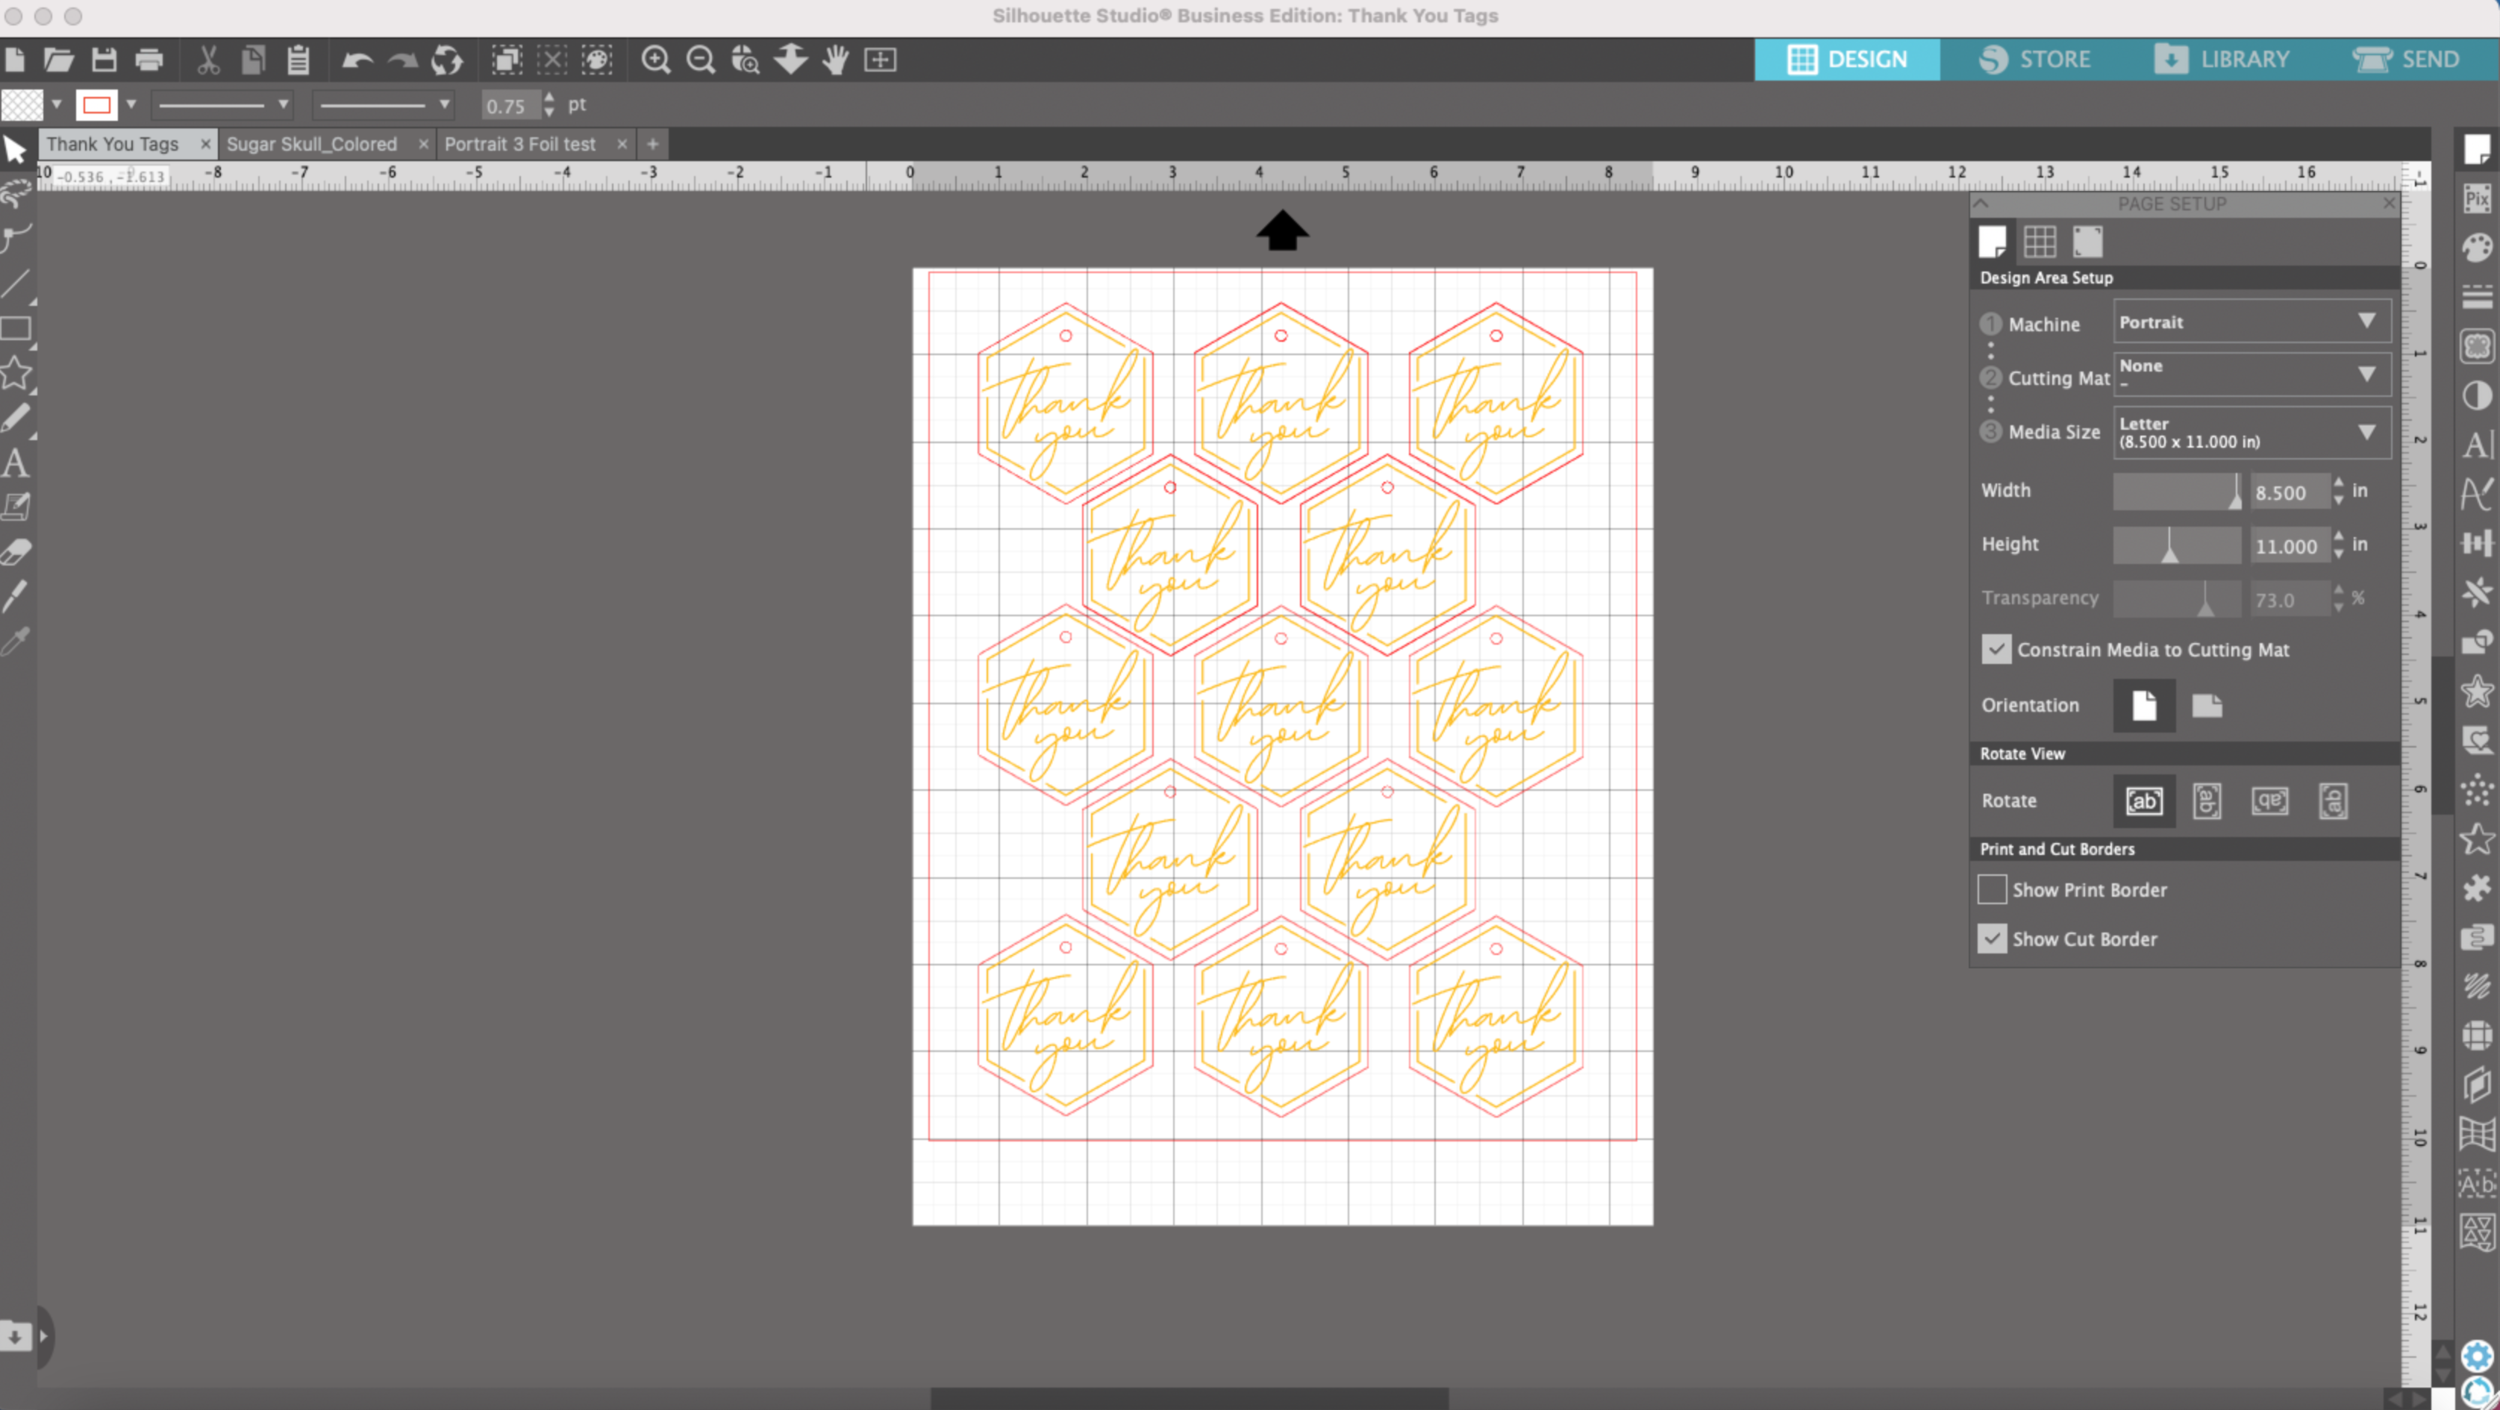
I already set up my file to be matless and made sure all of my artwork is within the red boundary. I made the little tag shapes in Silhouette Studio and I am using my Thank You script that you may have seen me use before in some of my foil tests. The Thank You and the border will be drawn with my gold pen and then the tags will be cut out after the drawing portion.

Portrait 3 matless drawing and cutting

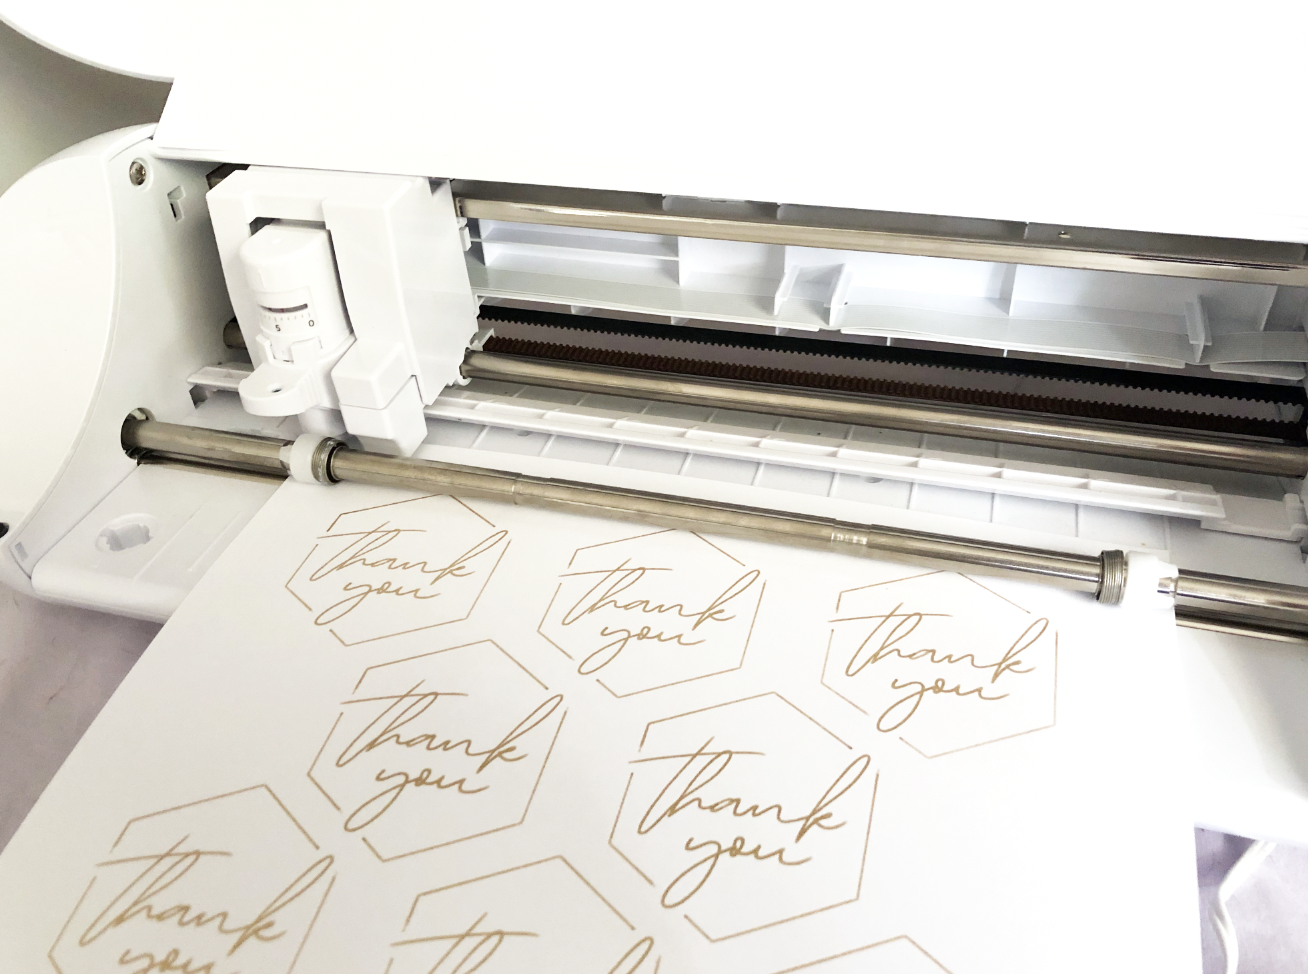
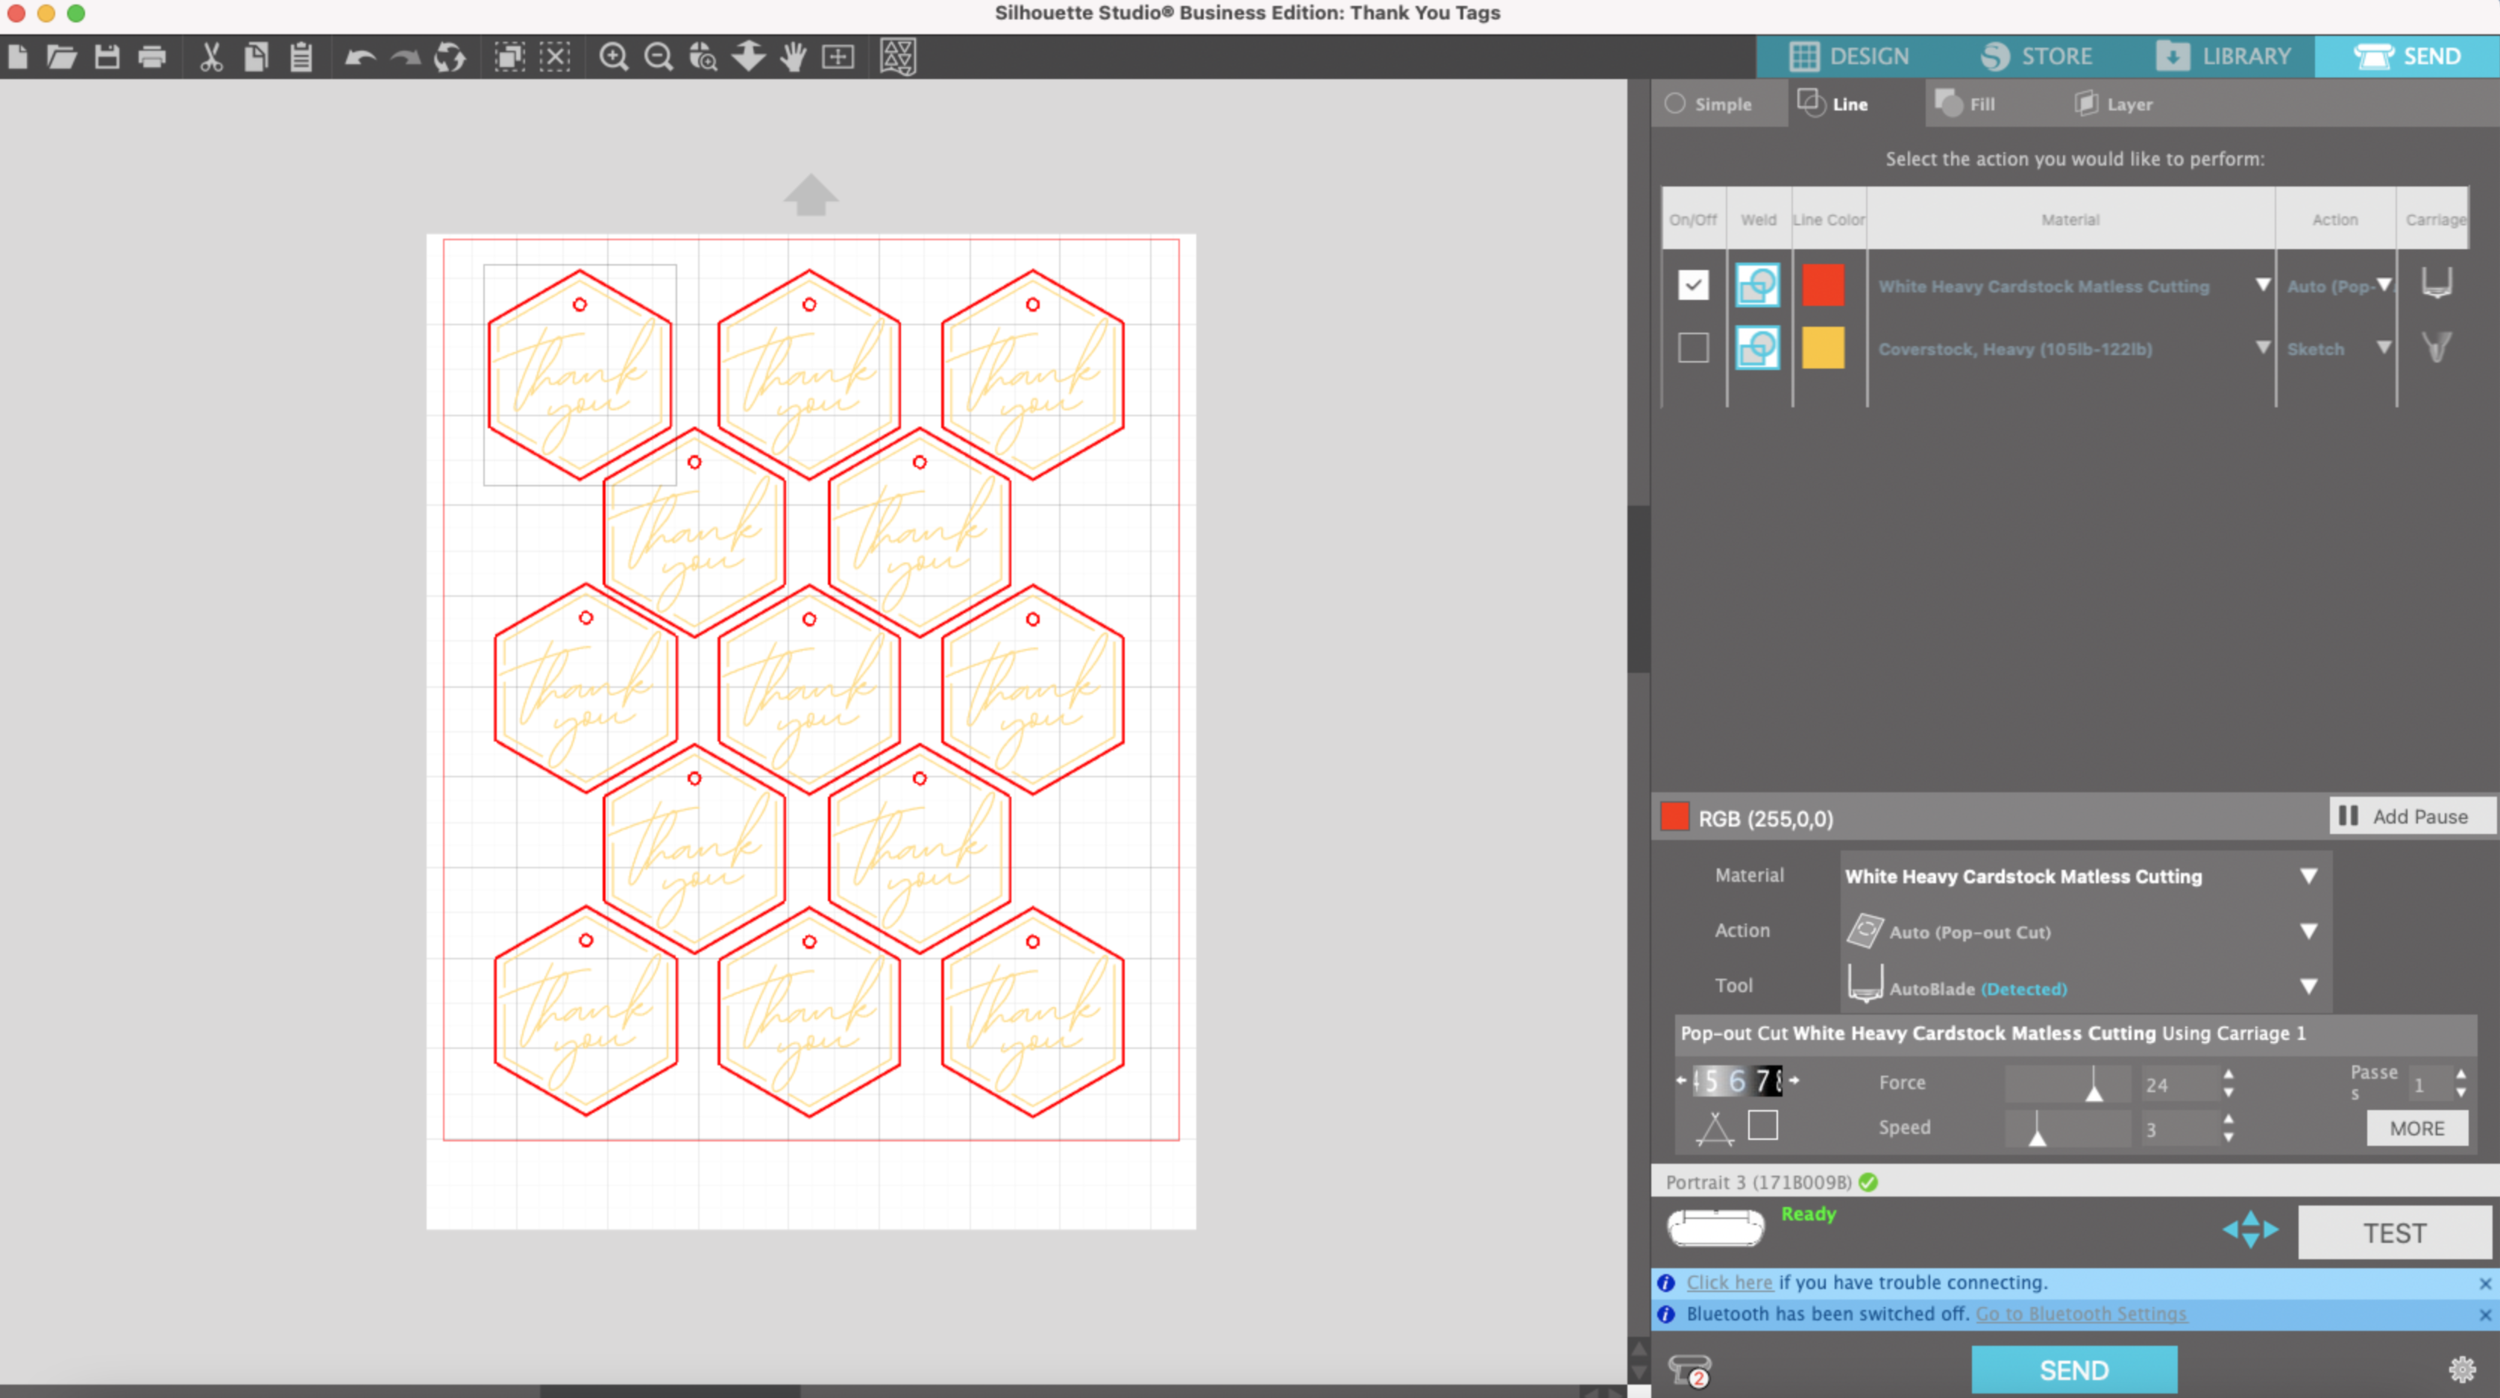
I press SEND and I’m going to draw and cut by Line color, instead of simple I’m going to select LINE at the top of the send panel. I’m using Heavy Cardstock so I select Heavy Coverstock for my material for both line colors.

I’m going to draw with the gold pen first, so for the yellow lines I select SKETCH as my action. I’m going to leave the settings as the default, they work pretty well as is. I load my cardstock without a mat and gold pen with the pen adapter and I press SEND at the bottom of the screen.

Portrait 3 matless drawing and cutting

When the machine is done drawing, DO NOT unload the mat. I swap out the pen adapter for my auto-blade.

Portrait 3 matless drawing and cutting

My machine recognizes the auto-blade and I select the Pop-Out Cut Action.

Portrait 3 matless drawing and cutting

The default pop out cut settings weren’t working great for this cardstock. After a little trial and error, I figured out the settings that worked well and I saved the material setting so I can use them again in the future.

Portrait 3 matless drawing and cutting

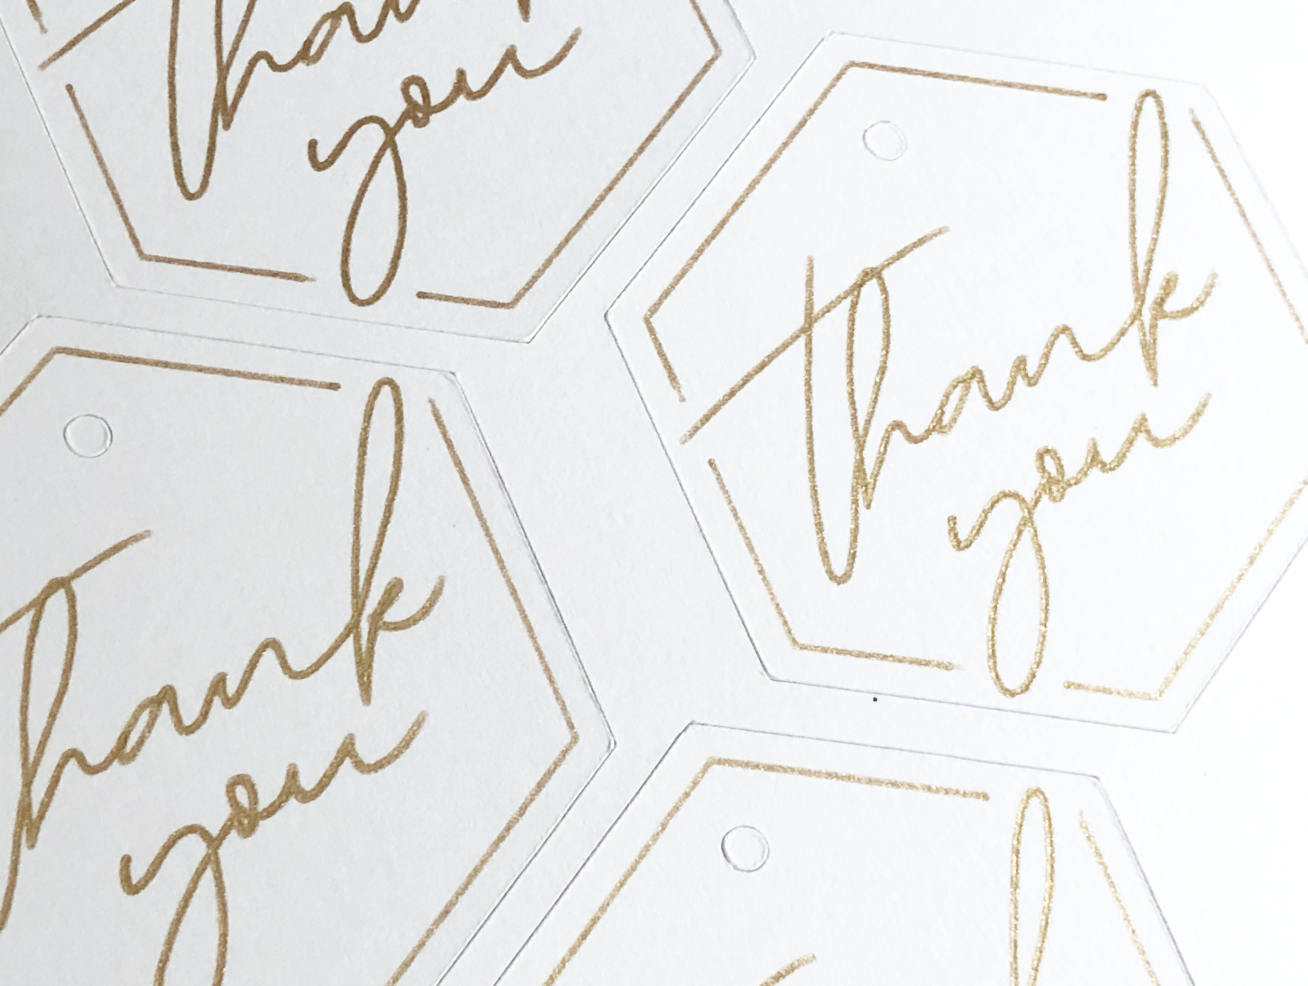
When the machine is done cutting, the tags will still be slightly attached to cardstock. I carefully pop them out and I use the tip of a pen to pop out the little holes in the tags.
Portrait 3 matless drawing and cutting

And now you have a bunch of little tags you can tie to favors for birthdays, weddings, bridal showers, baby showers, etc.

Portrait 3 matless drawing and cutting

Silhouette Portrait 3 Drawing by Line Color

Hi Everyone! This week I’m going to share another favorite feature of my Silhouette Portrait 3, being able to draw by line color. Yes, I can do this with my Cricut Maker, but with my Portrait 3 I can essentially choose the order of the colors that I want my machine to draw. It’s not as simple to do with my Maker.

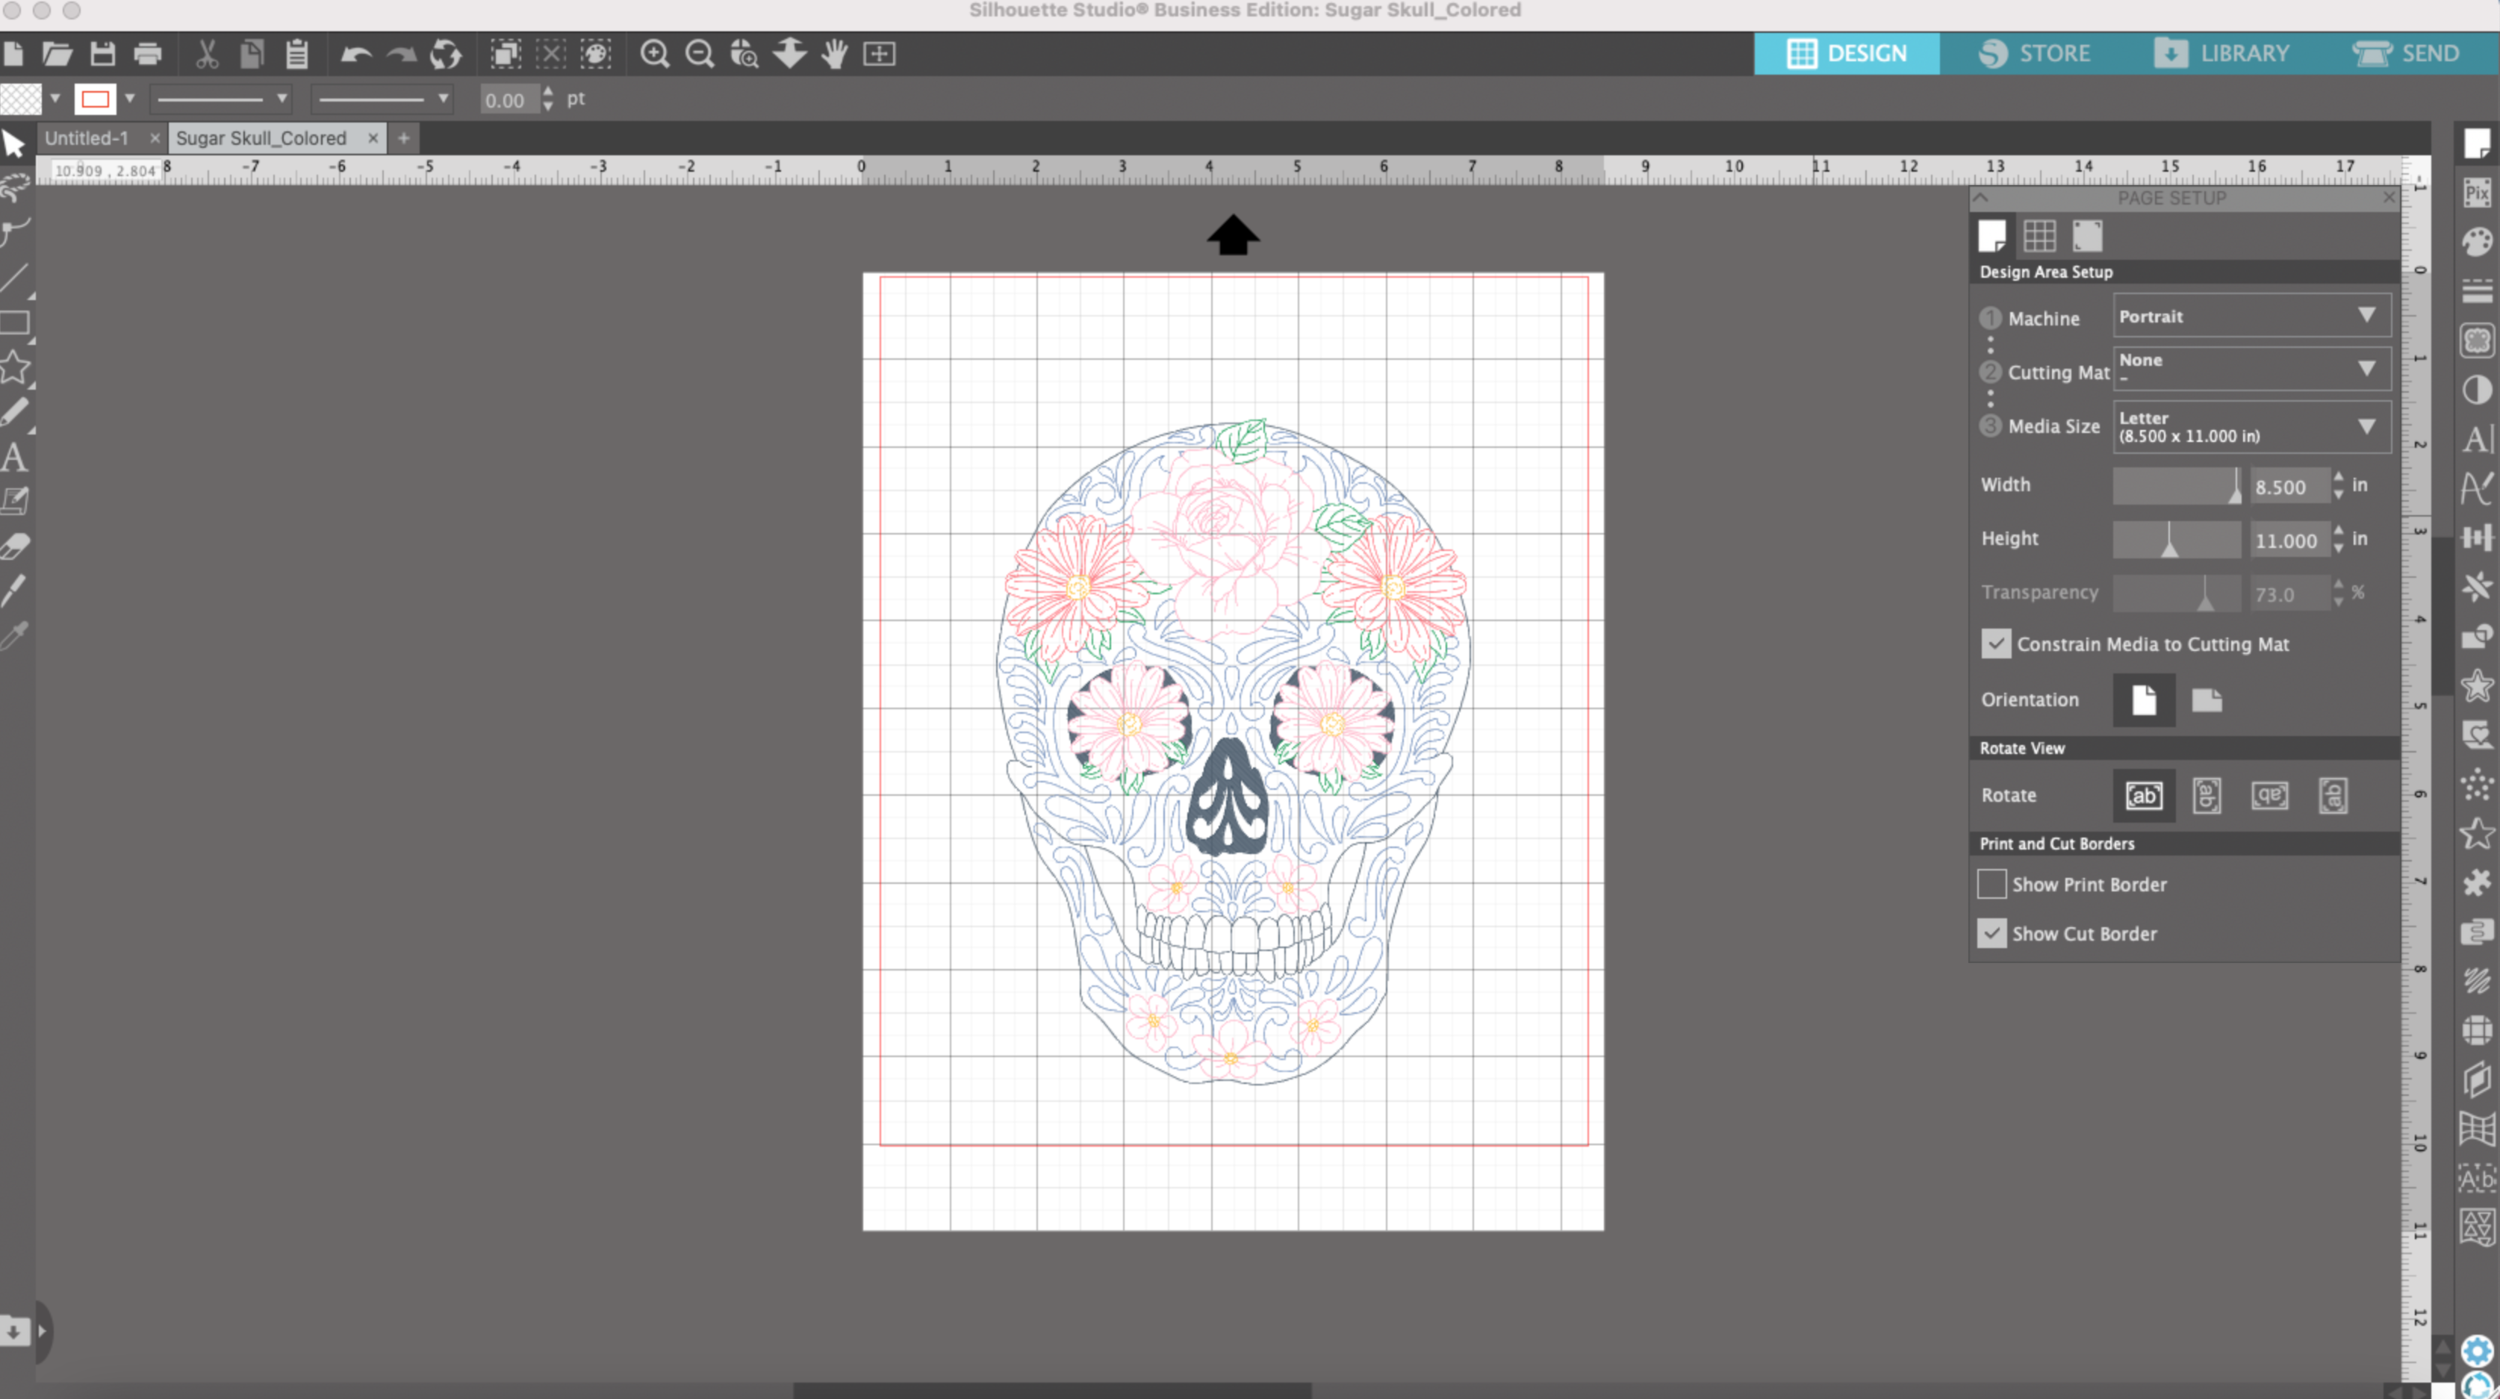
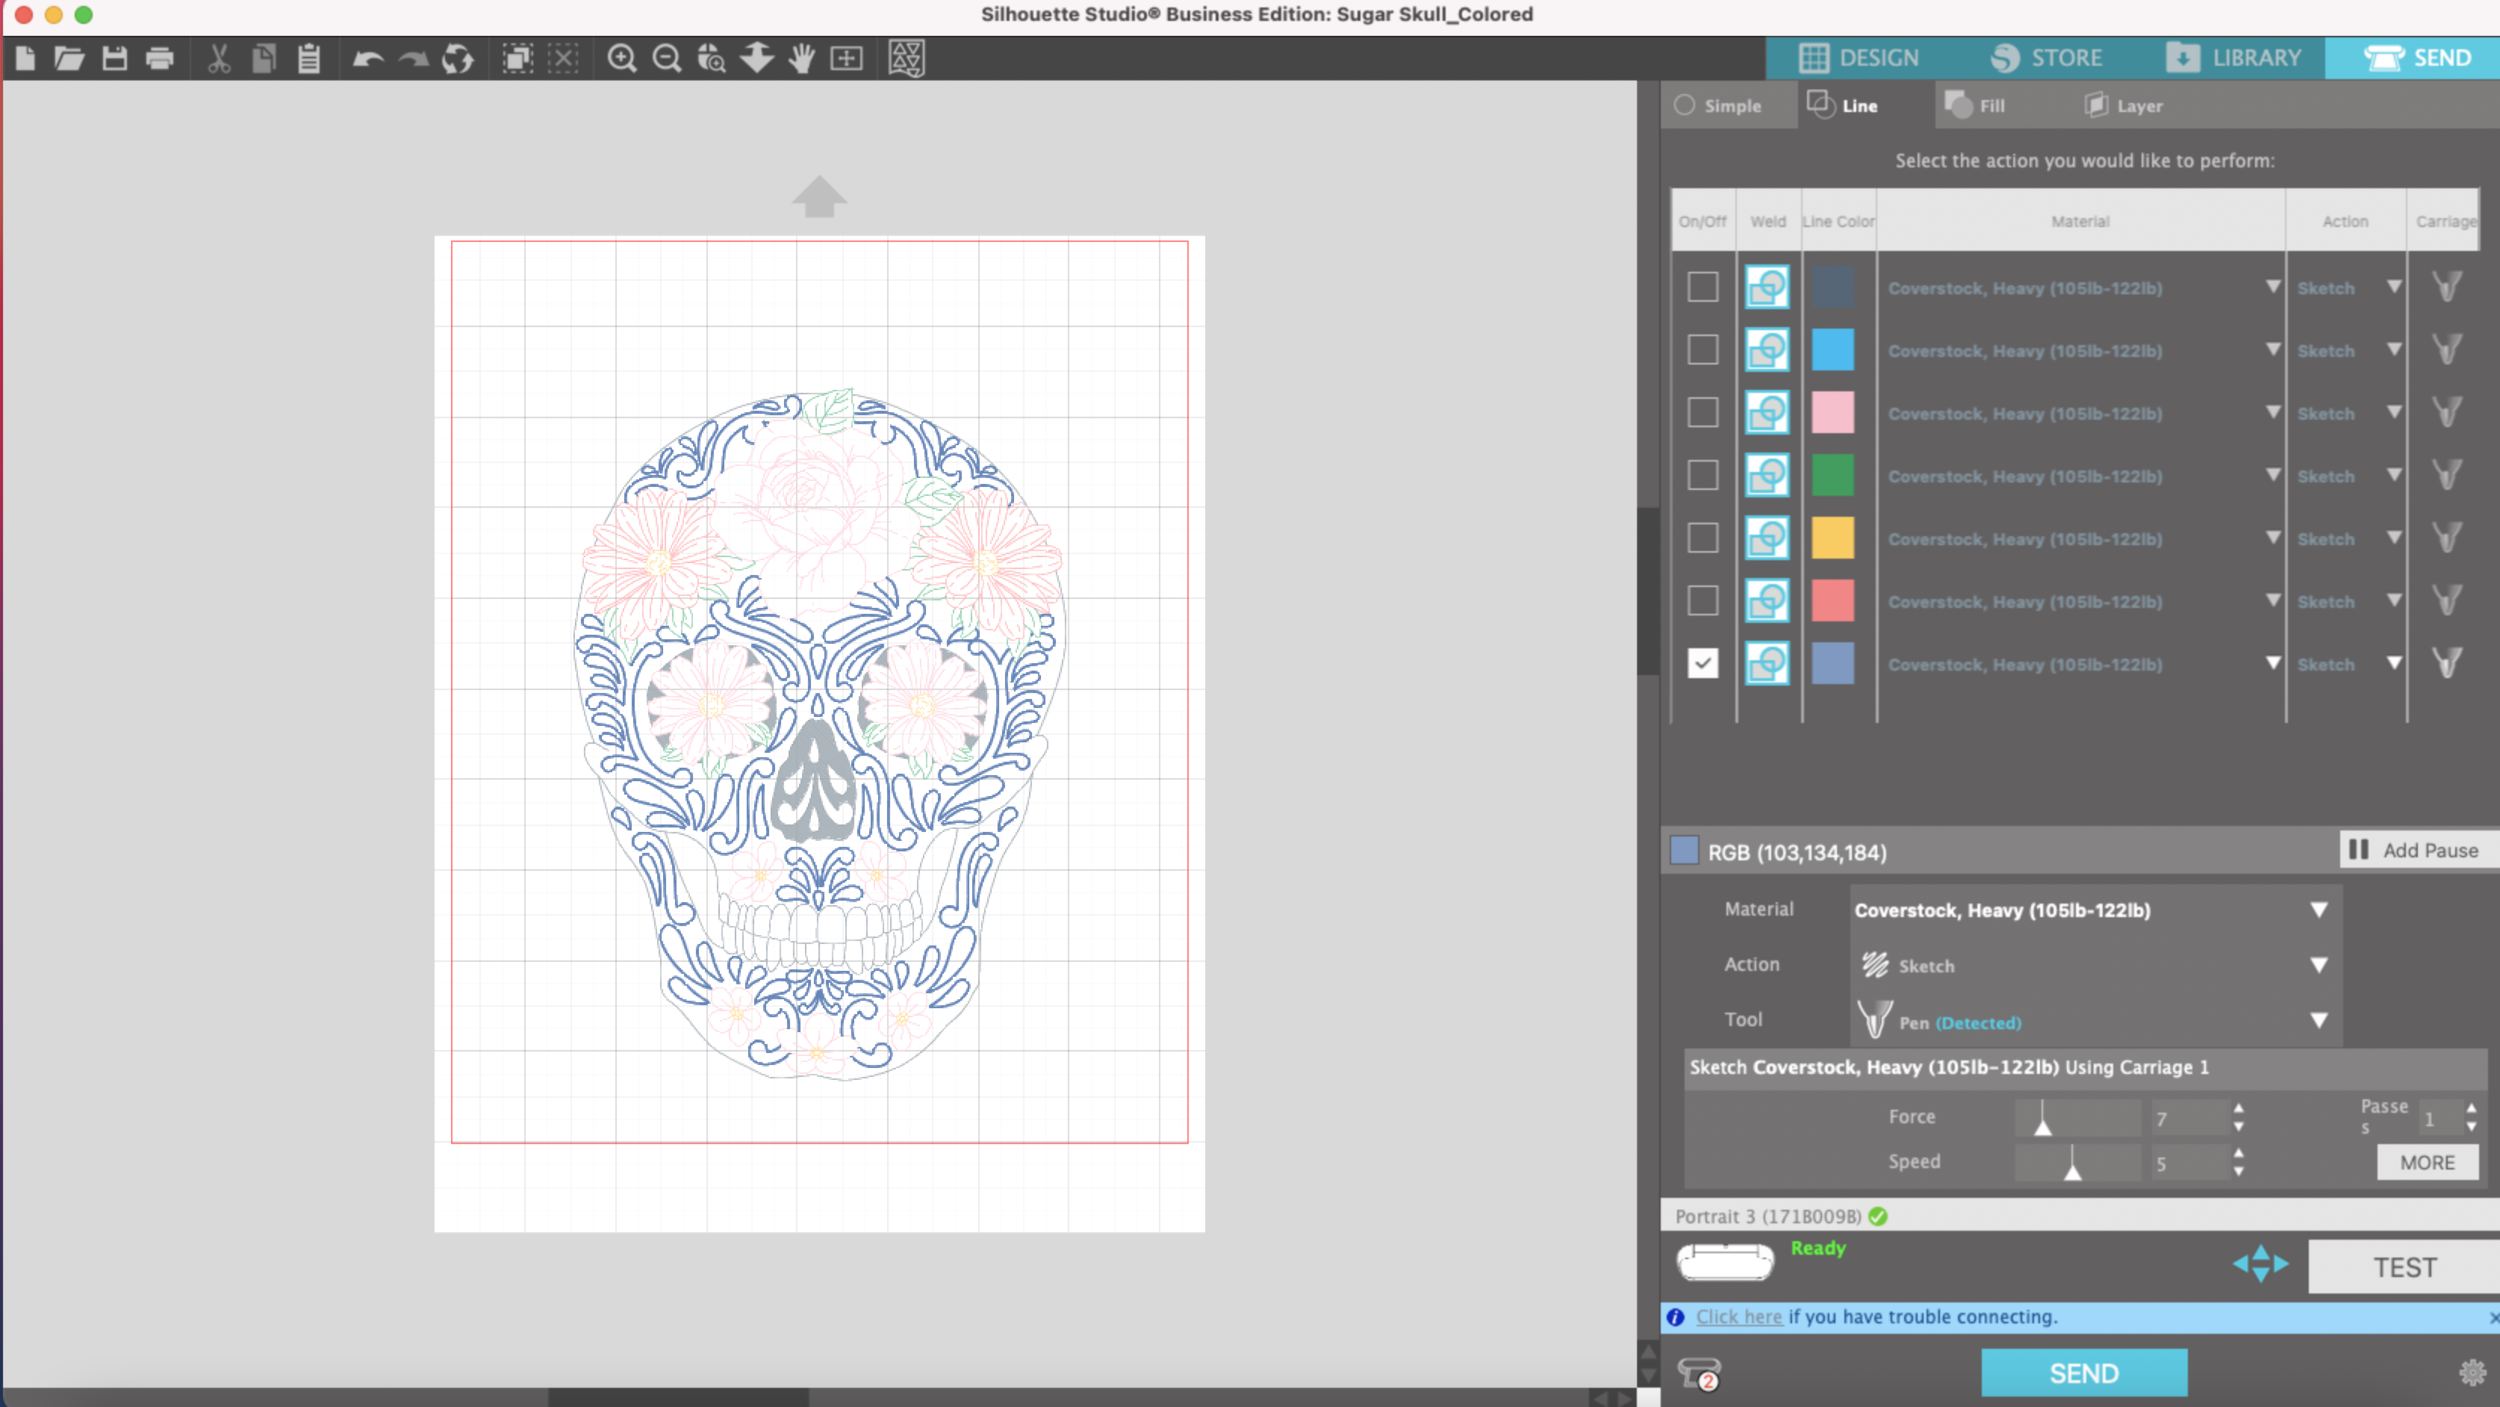
I’m going to test another skull SVG that I created in Illustrator. In Illustrator, I already applied different colors to the lines I’m going to draw and saved my file as an SVG. Note: I am using the Business Edition of Silhouette Studio so I can import and export SVG files.

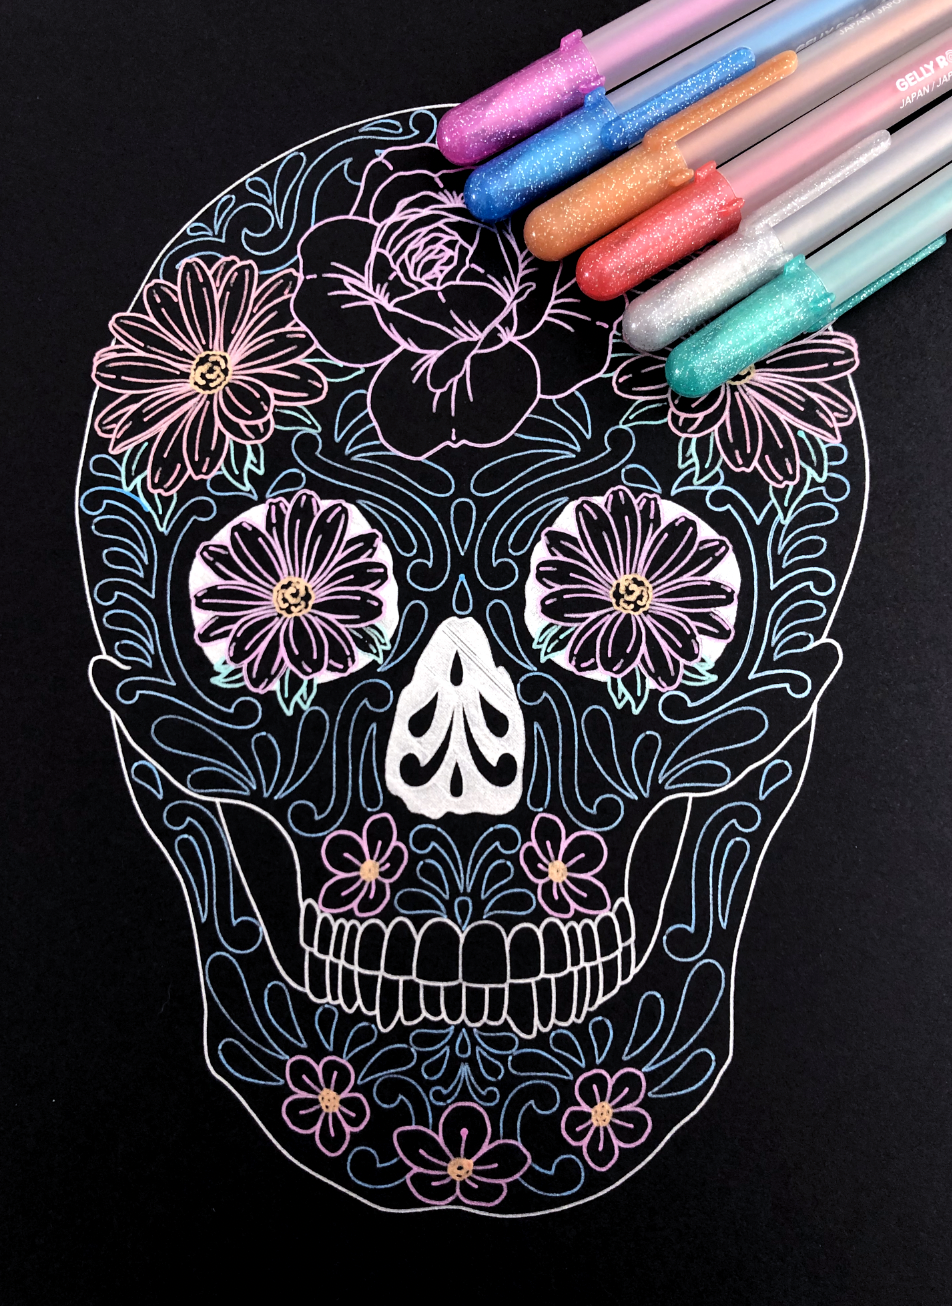
I’m going to use the matless feature again and draw this floral skull on some black cardstock using my metallic Sakura Gelly Roll pens.

Silhouette Portrait 3 Draw by Line Color

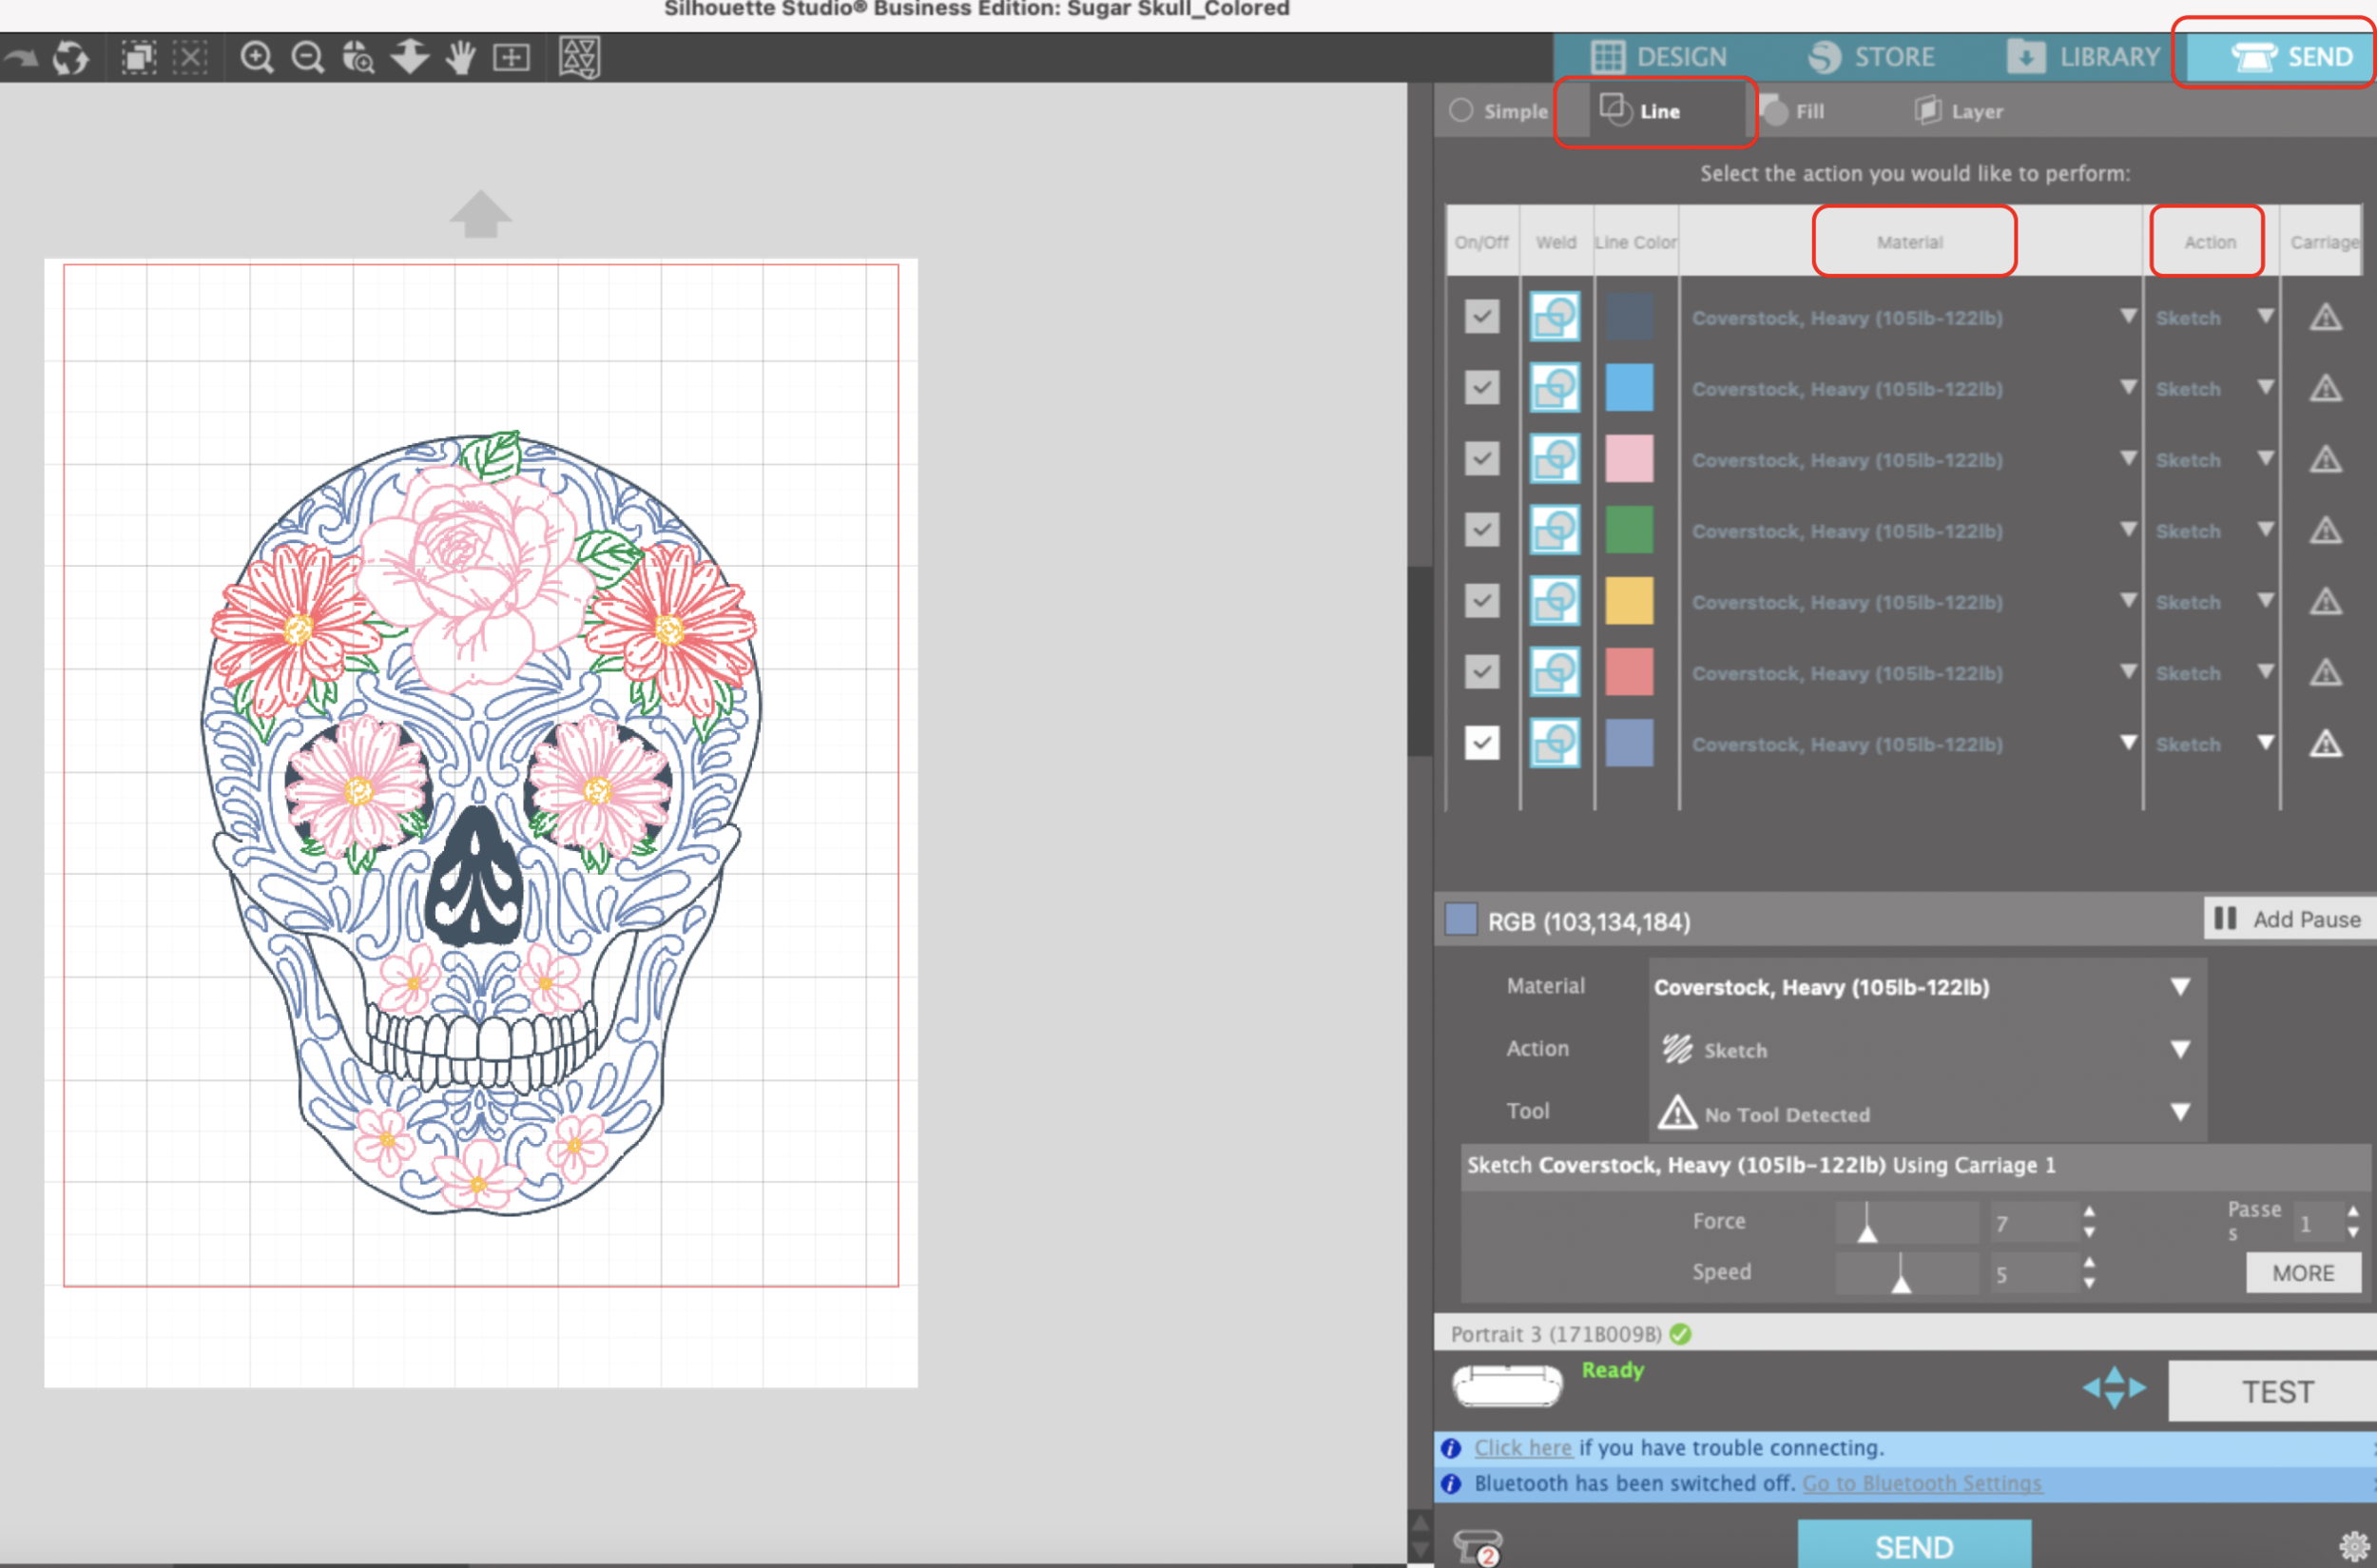
I select SEND in Silhouette Studio. Instead of simple, I’m going to choose LINE. As you an see all of the colors are selected. I’m going to pick Heavy Coverstock for my material and Sketch for my Action.

Silhouette Portrait 3 Draw by Line Color

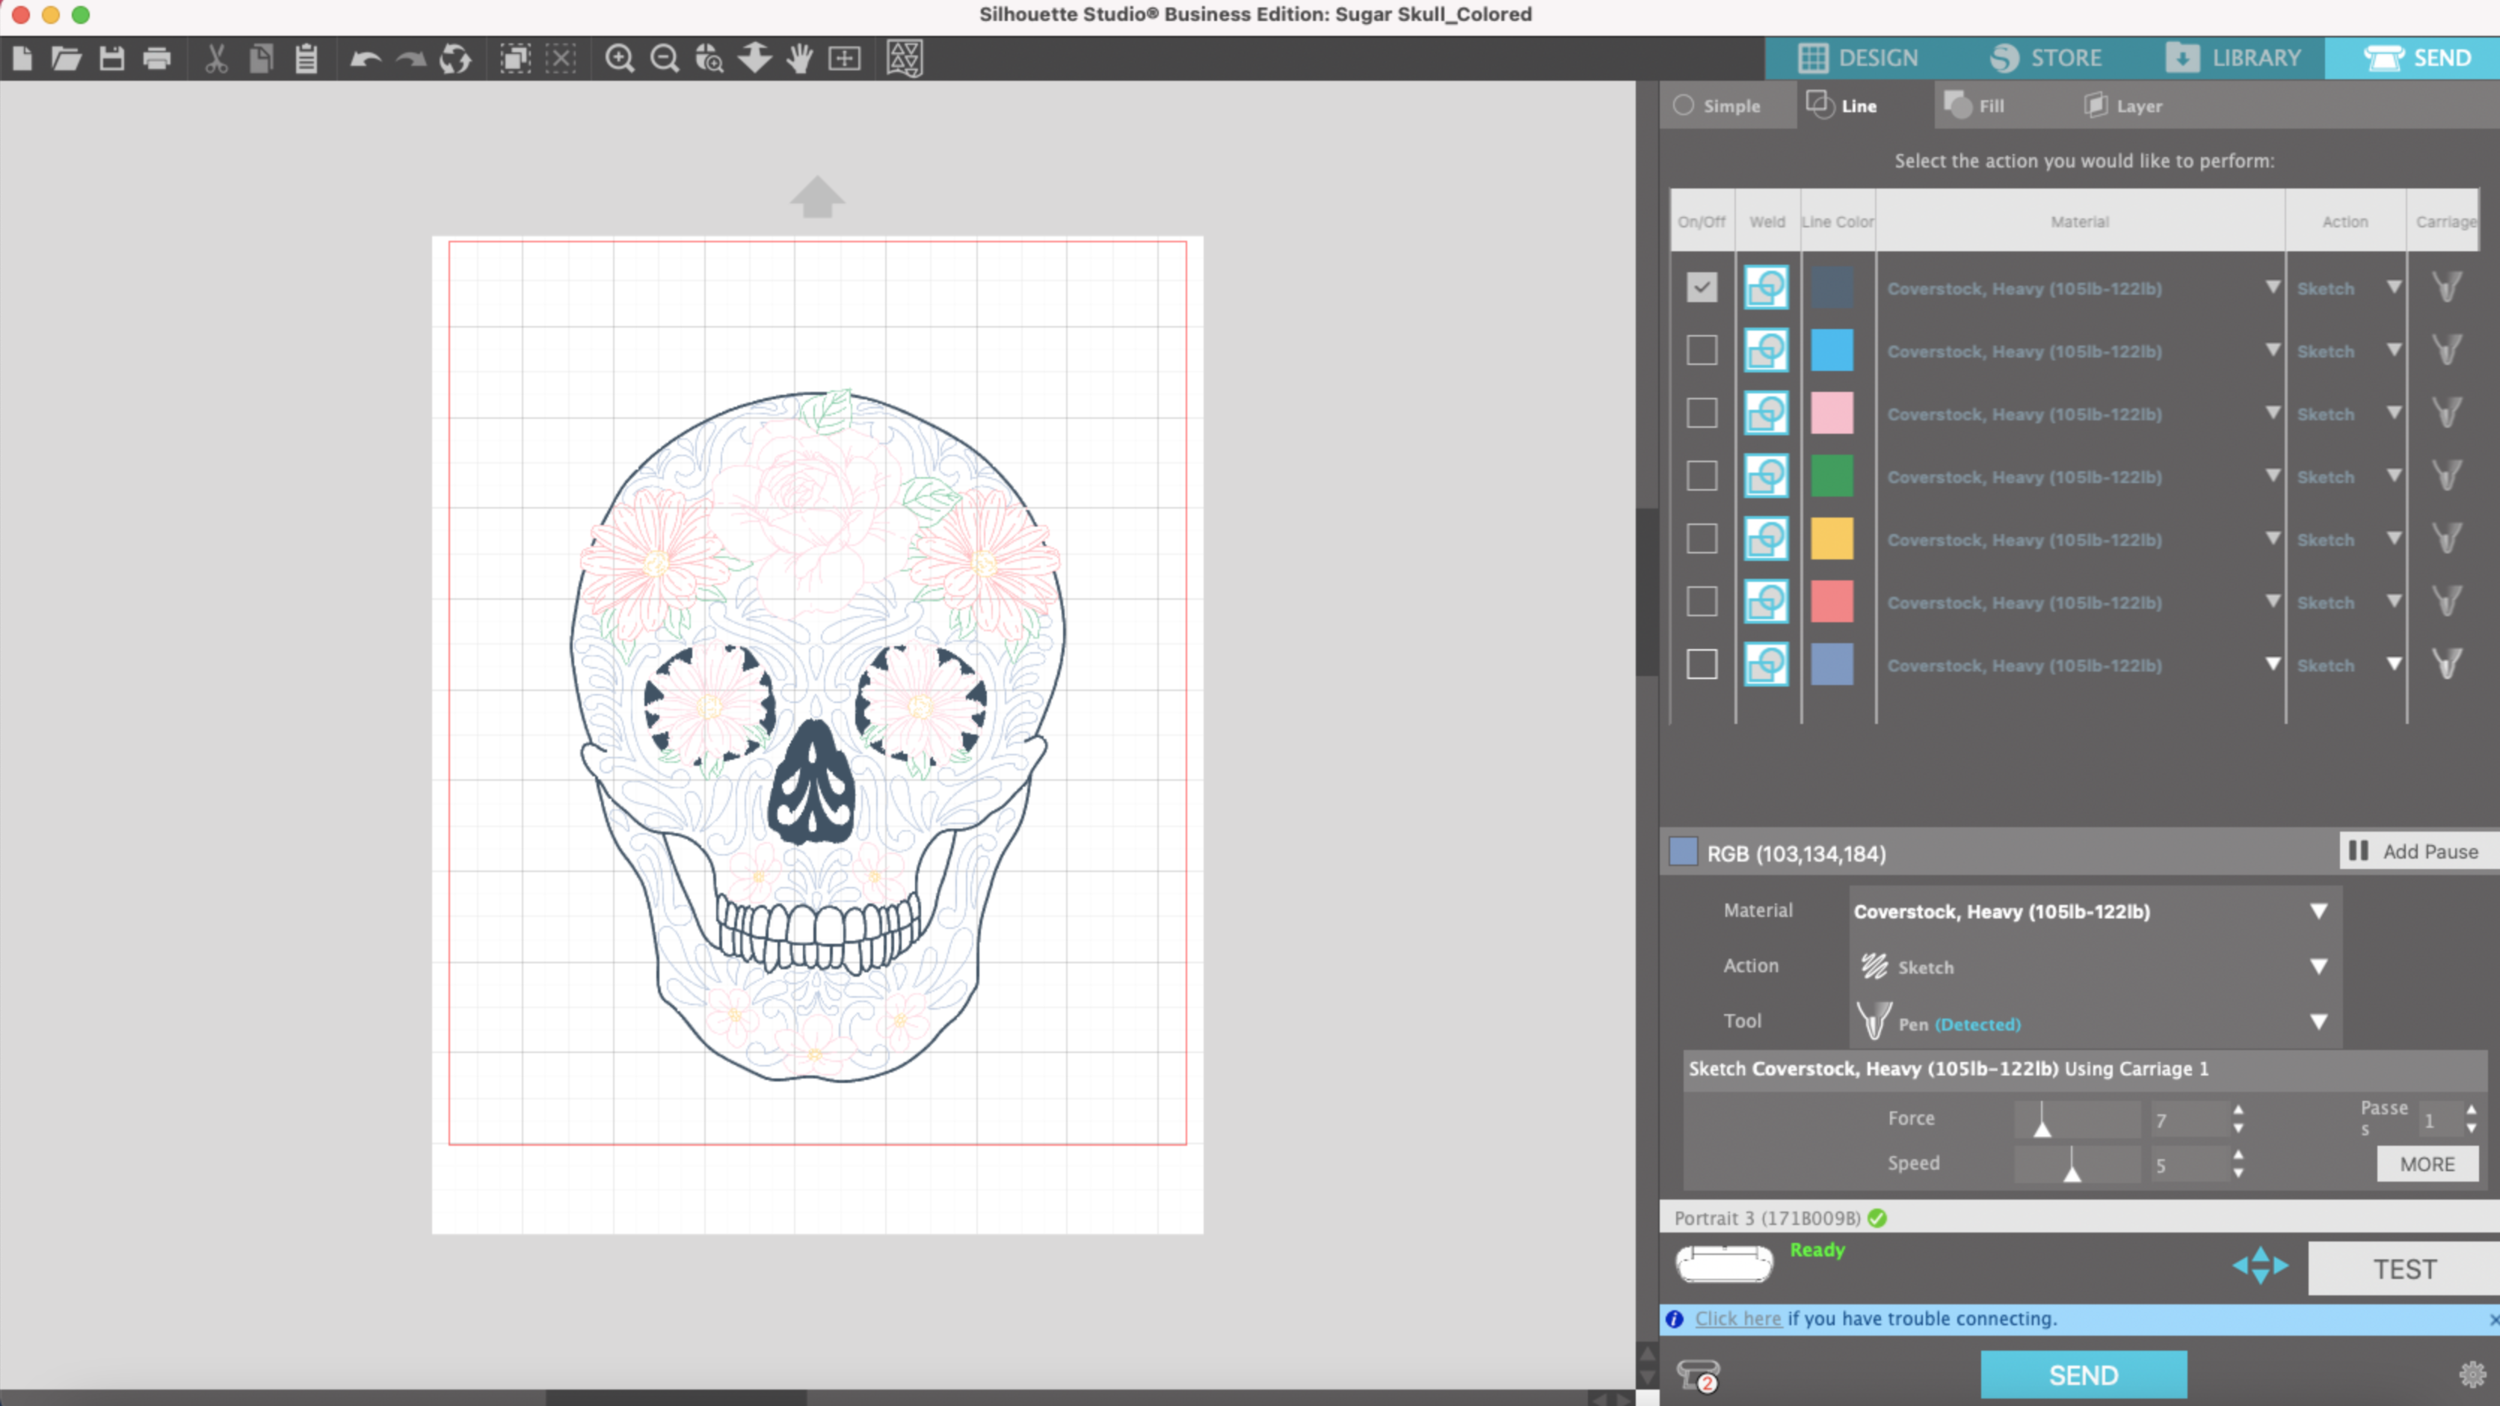
Then, I’m going to uncheck all of the colors except for the color I will be drawing with first.

Silhouette Portrait 3 Draw by Line Color

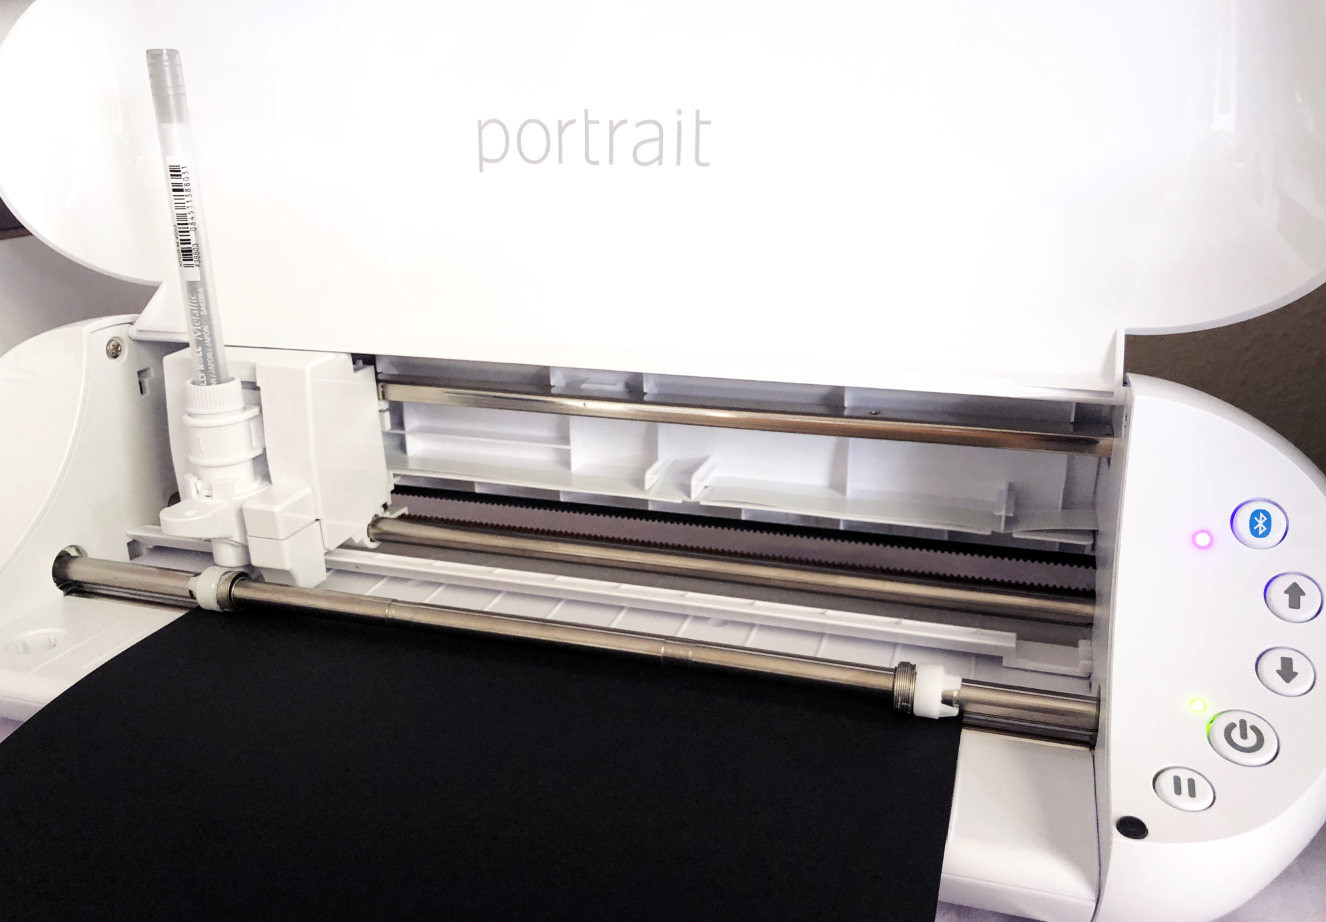
Next I will load my pen adapter with the first color I will be drawing with and load my cardstock into my machine.

Silhouette Portrait 3 Draw by Line Color

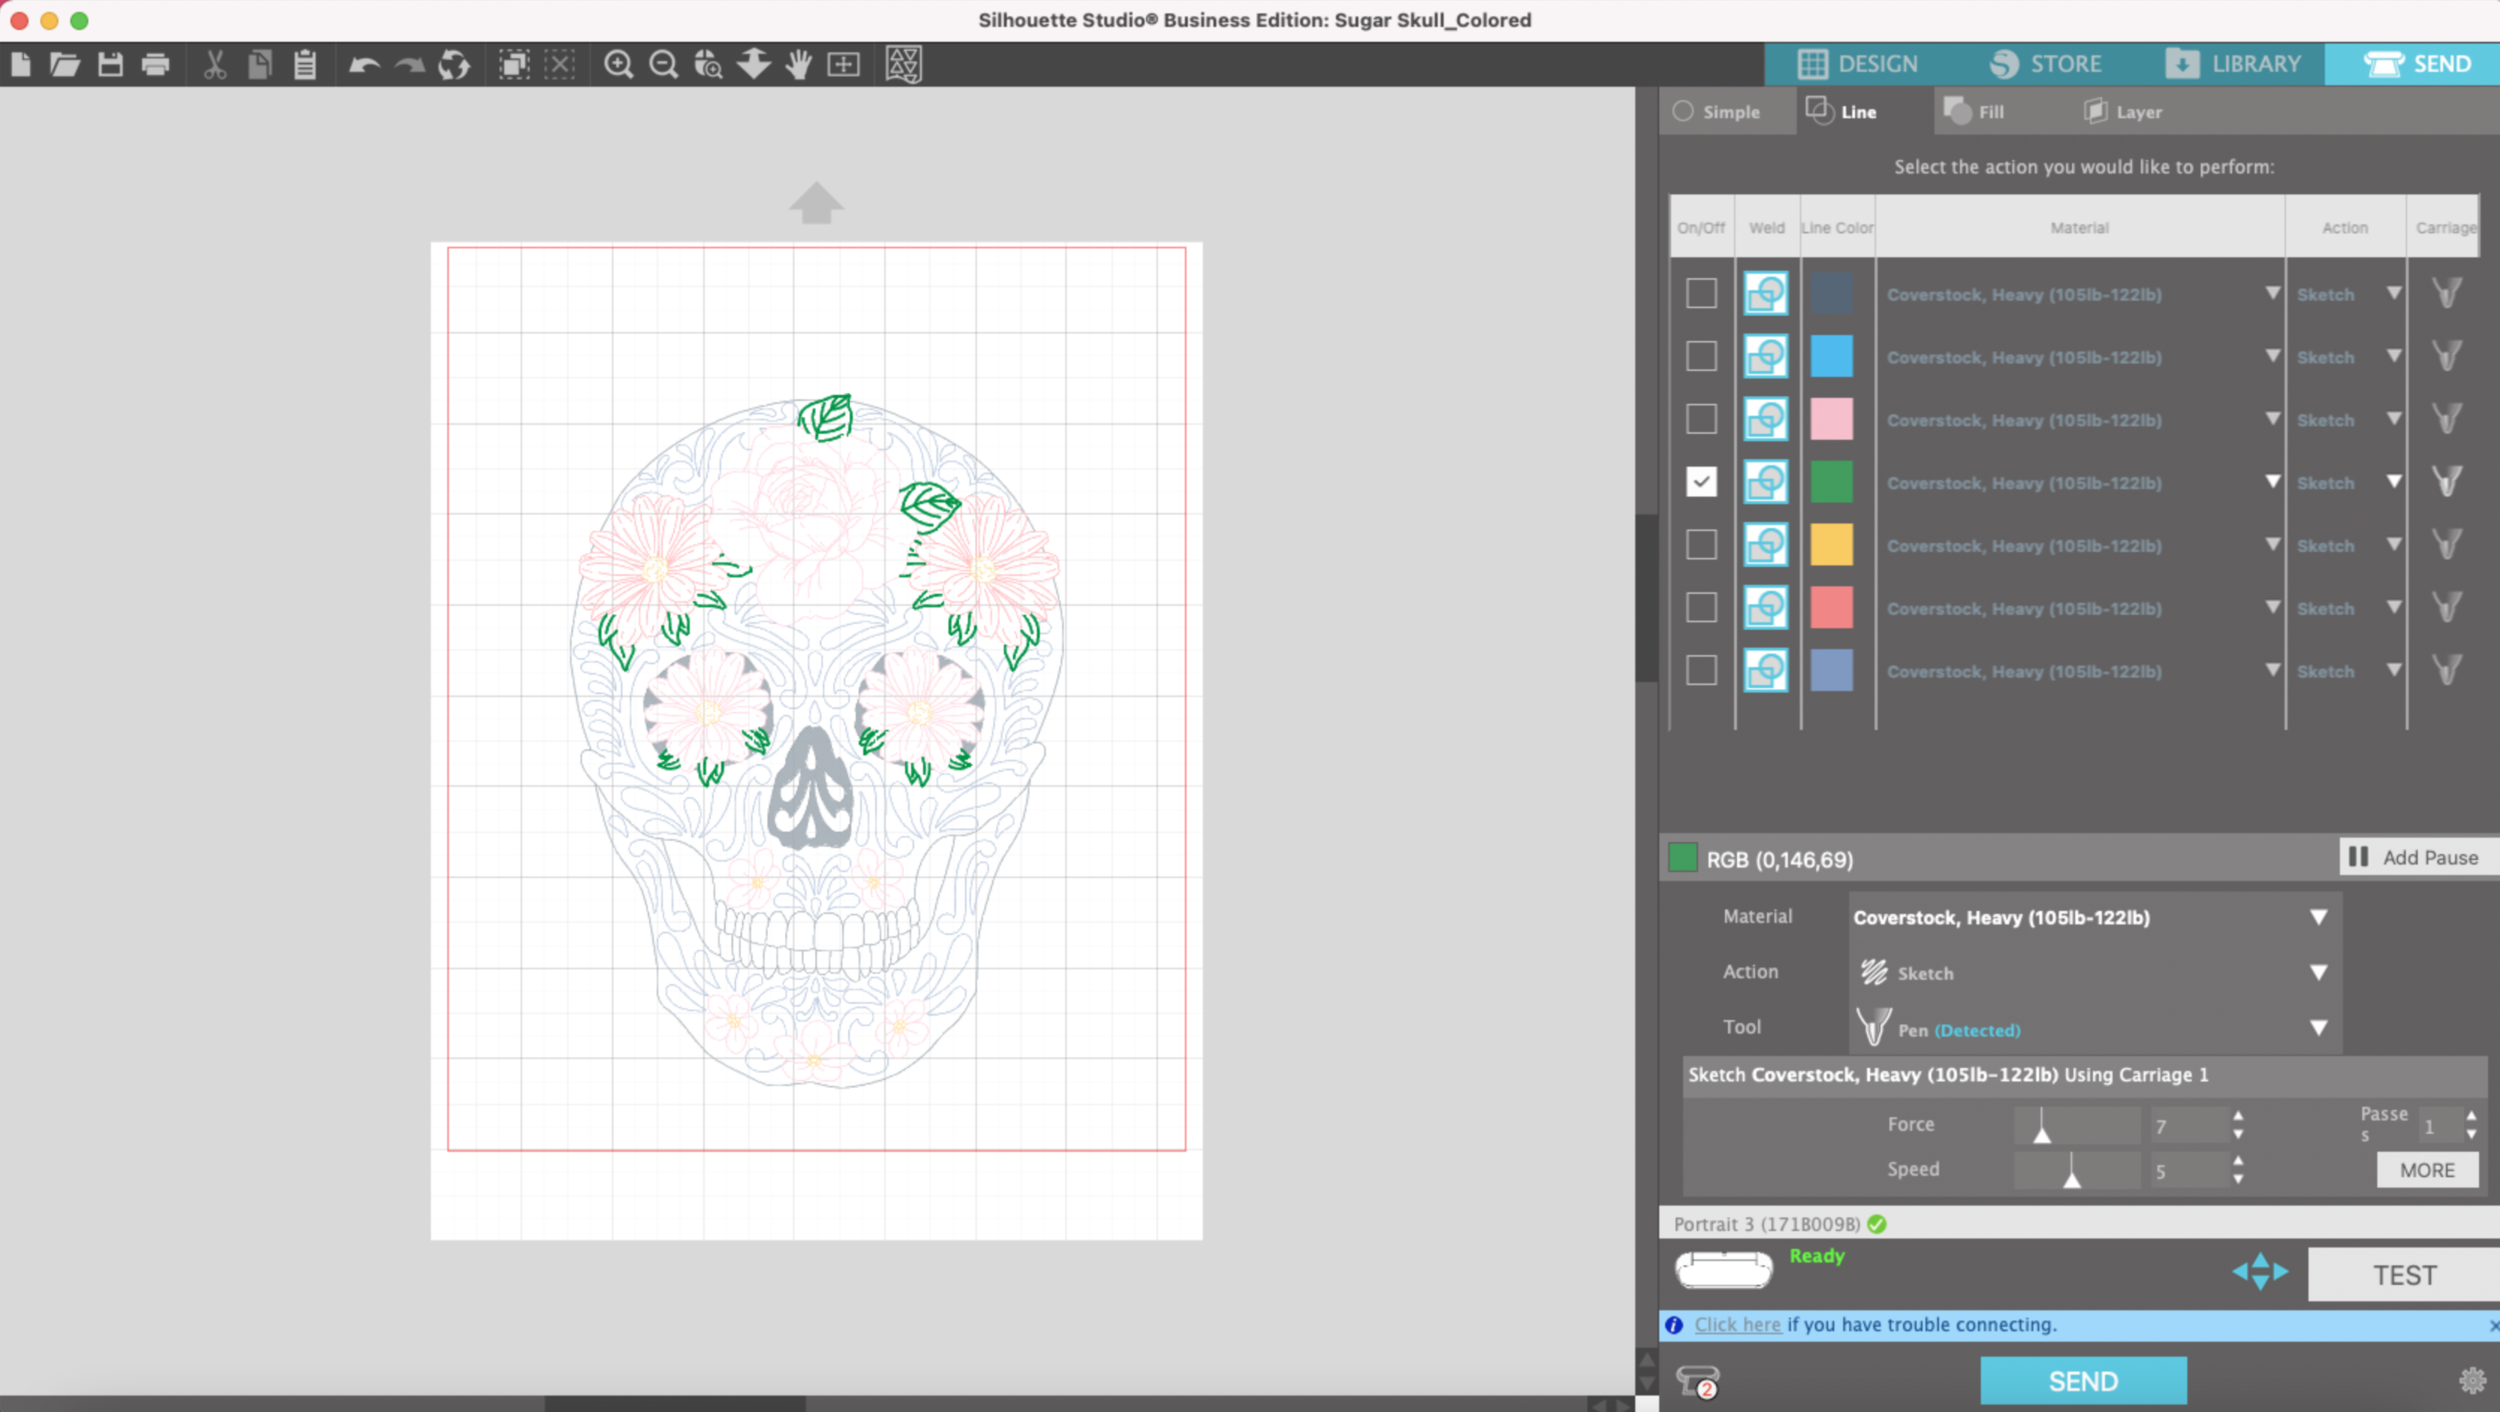
My first layer is done, next I want to draw the blue scroll work. All I have to do is uncheck the line color I just drew, and check the box for the blue lines for the scroll work. I load my blue pen and press SEND.

Silhouette Portrait 3 Draw by Line Color

Hint: Don’t forget to uncheck the colors you have completed, otherwise it will draw over that same area with the next color you have loaded!

After the blue lines are done I want to draw the little green leaves. So I uncheck the blue lines & select the green for leaves. Load my green pen and press SEND.

Silhouette Portrait 3 Draw by Line Color

I go through the same process until I have completed all the colors. I love that I don’t have to go in the order of colors dictated by the machine!

Silhouette Portrait 3 Draw by Line Color

The most tedious part of the process is swapping out the pen every time I switch a color, but I really enjoy the end result and being able to select the order of the colors that my machine will use to draw.

Silhouette Portrait 3 Matless Drawing

Hi Everyone! For little side income I sell my SVG files in my Etsy shop. But before I list my files for sale, I test them on on my Silhouette Portrait 3 machine and my Cricut Maker. I typically start my testing with my Portrait 3 because I can actually edit and save my file as an SVG from Silhouette Studio (I have the Business Edition).

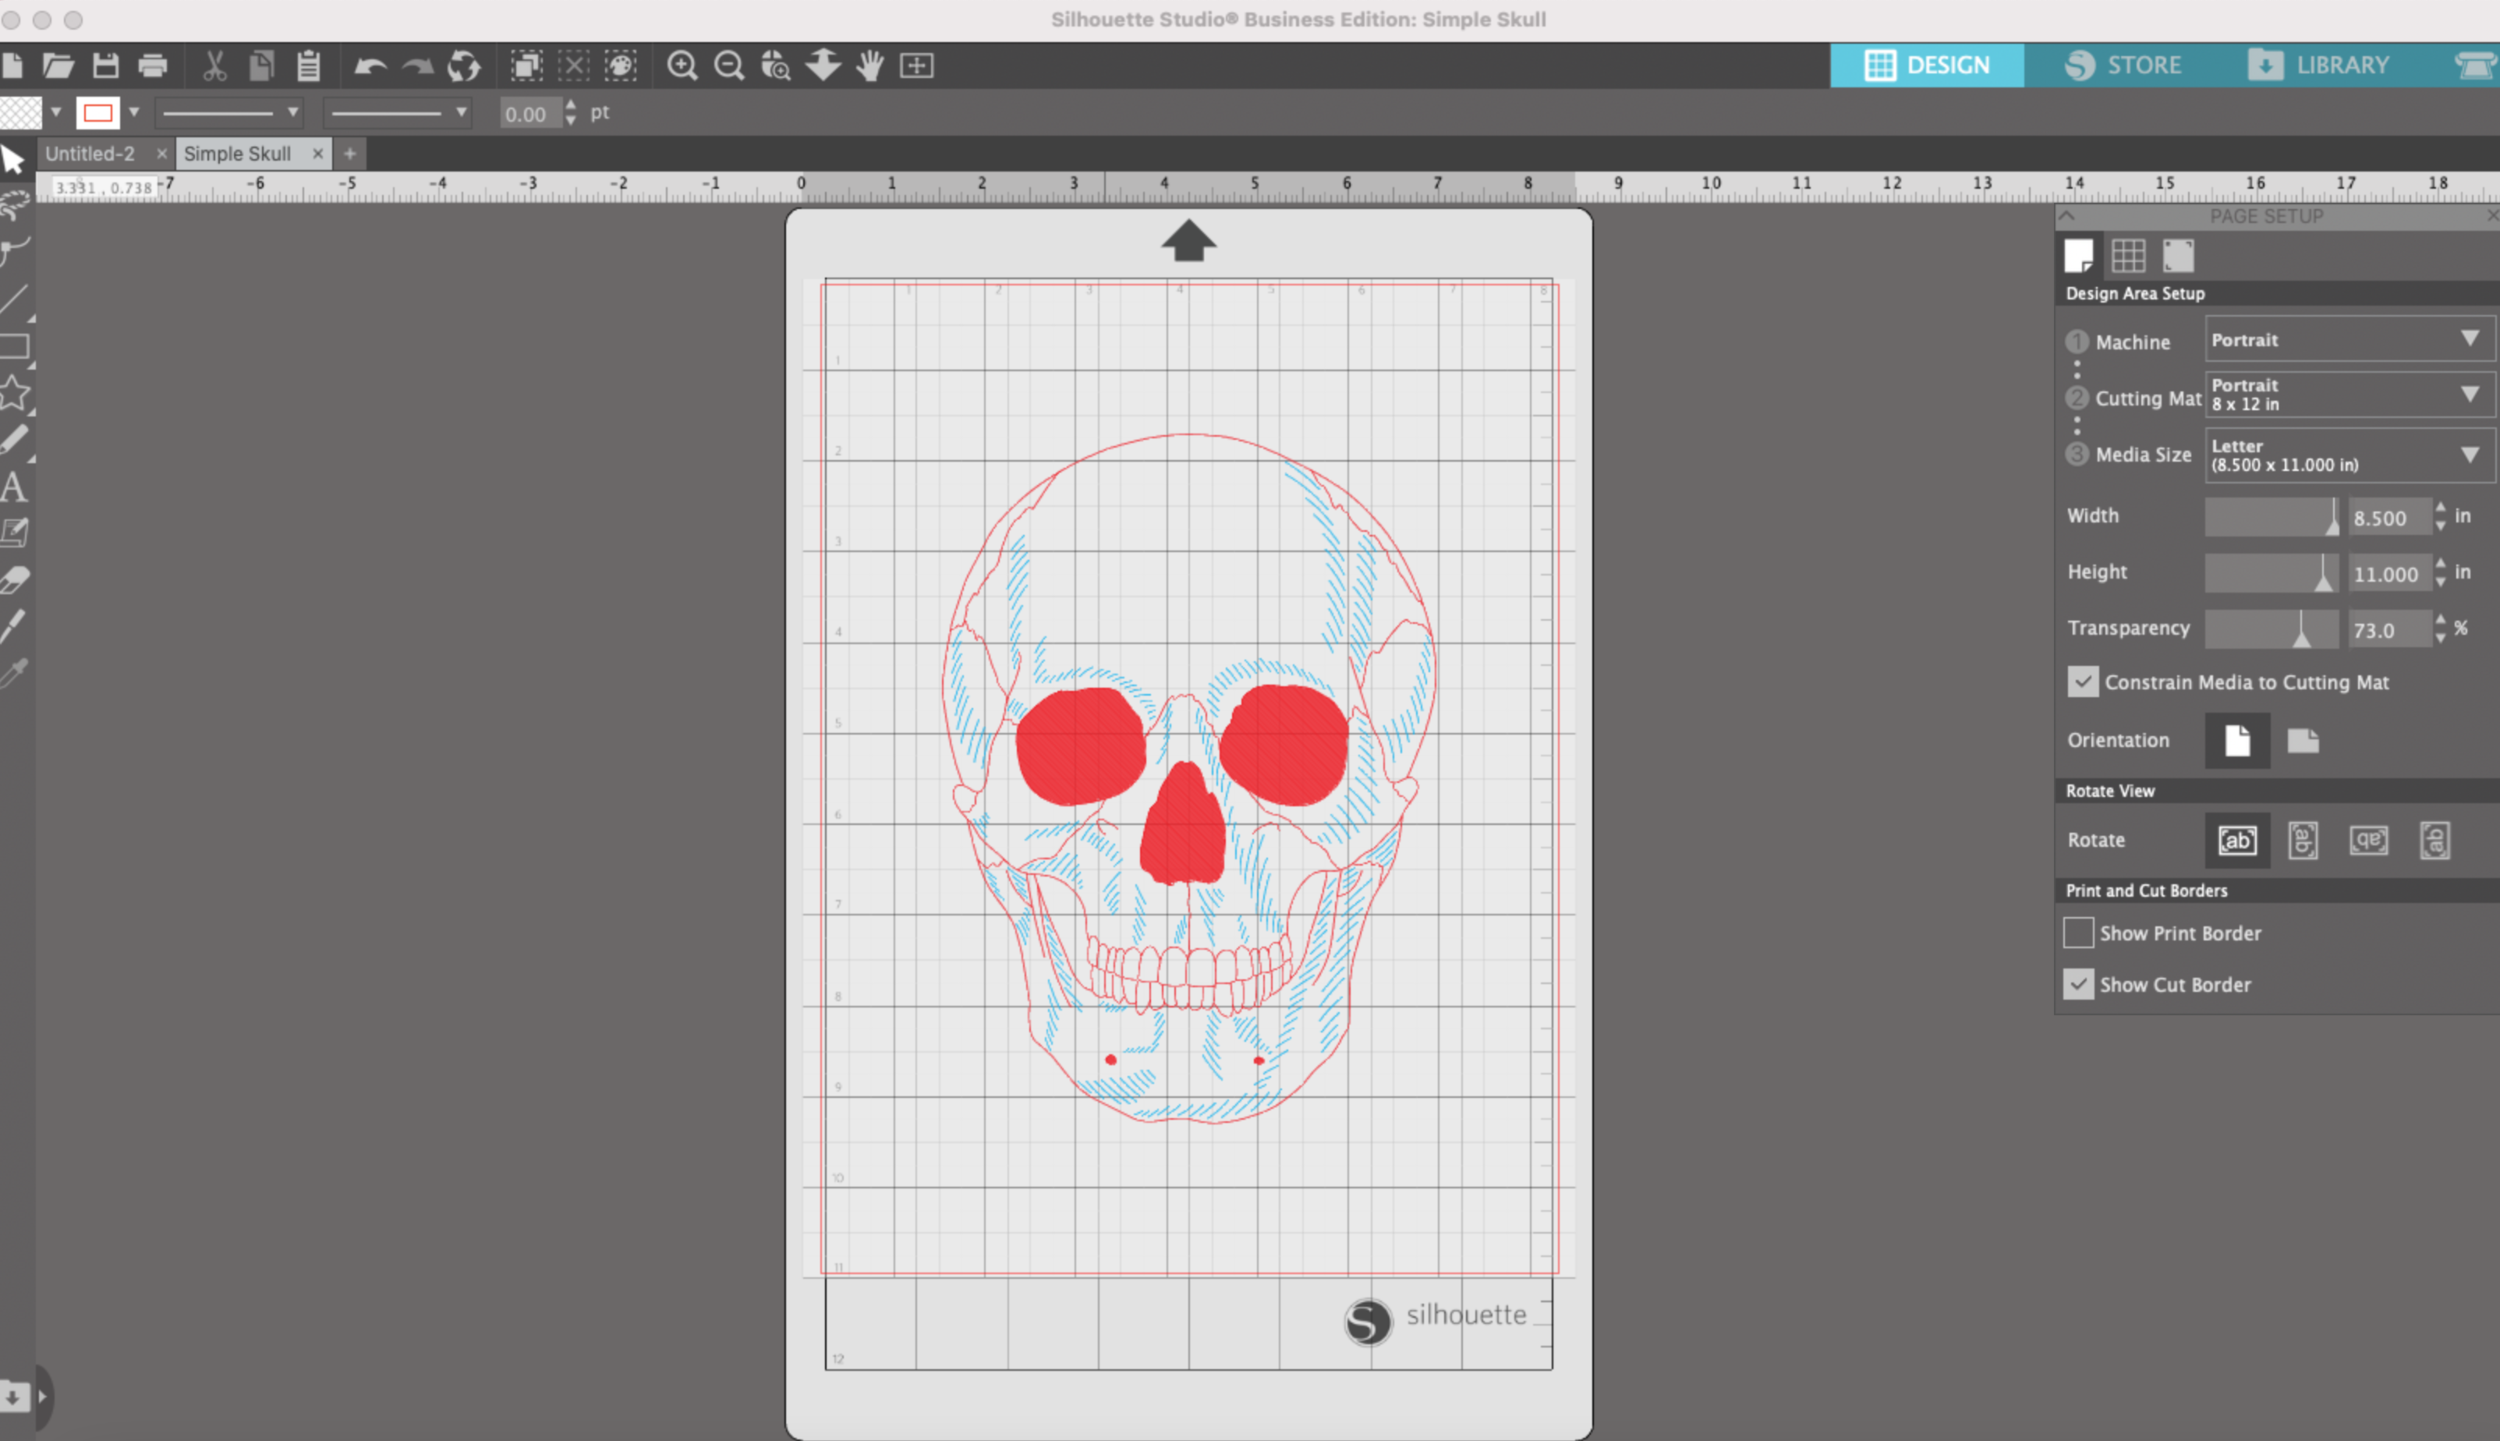
This week I’m working on some single line skull designs that can be used to draw, foil, engrave, or anything else that needs a single line file. I originally drew my artwork in Adobe Illustrator, then I uploaded it as an SVG into Silhouette Studio.

To test my file, I’m going to use what is quickly becoming one of my favorite features, matless drawing. Yes, not only can you cut matless with the silhouette machines, you can also draw matless. This wasn't even a selling feature for me and my Portrait 3 machine, but I’m loving it!

When I first open my illustration in Silhouette Studio, it shows up placed on the cutting mat.

Silhouette Portrait 3 Matless Drawing

To change to matless, click on the white sheet of paper at the top to the tool bar on the right. Under cutting mat, select “None”. My cardstock size is 8.5 x11 inches, so I will leave that as is. Keep in mind that the usable area of the cardstock becomes a little smaller with the matless feature. I need to keep all of my artwork within the red bounding box.

Silhouette Portrait 3 Matless Drawing

Disregard the two different colors in my drawing. For now, I’m going to test it with only a black pen.

In the upper right corner, I click “Send”. There’s no need to attach all of my elements and my drawing stays centered on the canvas (no shifting to the upper left corner like my Cricut machine).

In the send screen I’m going to stay with “Simple” since I’m only doing a single color drawing. Notice, now all of my lines are red. The cardstock I’m using is 100lb, so for my material I select “Coverstock, Heavy.” For my action I select “Sketch.” For my tool I select “Pen.”

Silhouette Portrait 3 Matless Drawing

I load my piece cardstock into my machine without a mat, yay!! Then I load the Silhouette pen adapter with a Sharpie Pen.

Silhouette Portrait 3 Matless Drawing

I press send and my machine starts drawing away!

Screen Shot 2021-07-23 at 10.42.37 AM.png

After a few minutes it’s done, and there’s no stickiness left on the back of my cardstock from the mat!

Silhouette Portrait 3 Matless Drawing

My Top 5 Tips for Using the Cricut Foil Transfer Tool

Links in the article below may be affiliate links.

Hi Everyone! I know it can be difficult getting the results you want with the Cricut Foil Transfer tool. I still struggle with it sometimes, especially on new projects. Here are some of my top tips for working with the foil transfer tool…

Choose a cardstock that is smooth, but not super smooth

Not all cardstocks are created equal. I have my favorite black cardstock, that after some testing, takes the foil beautifully and another black cardstock that ends up very patchy and the foil rubs off.

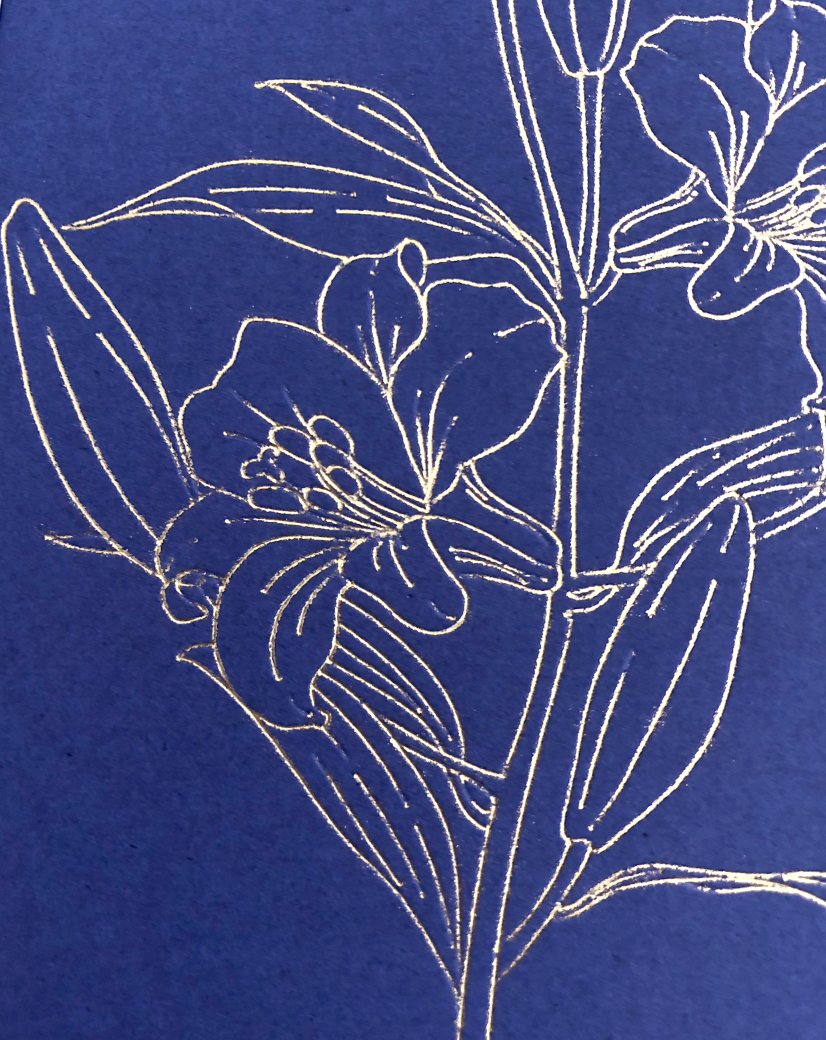
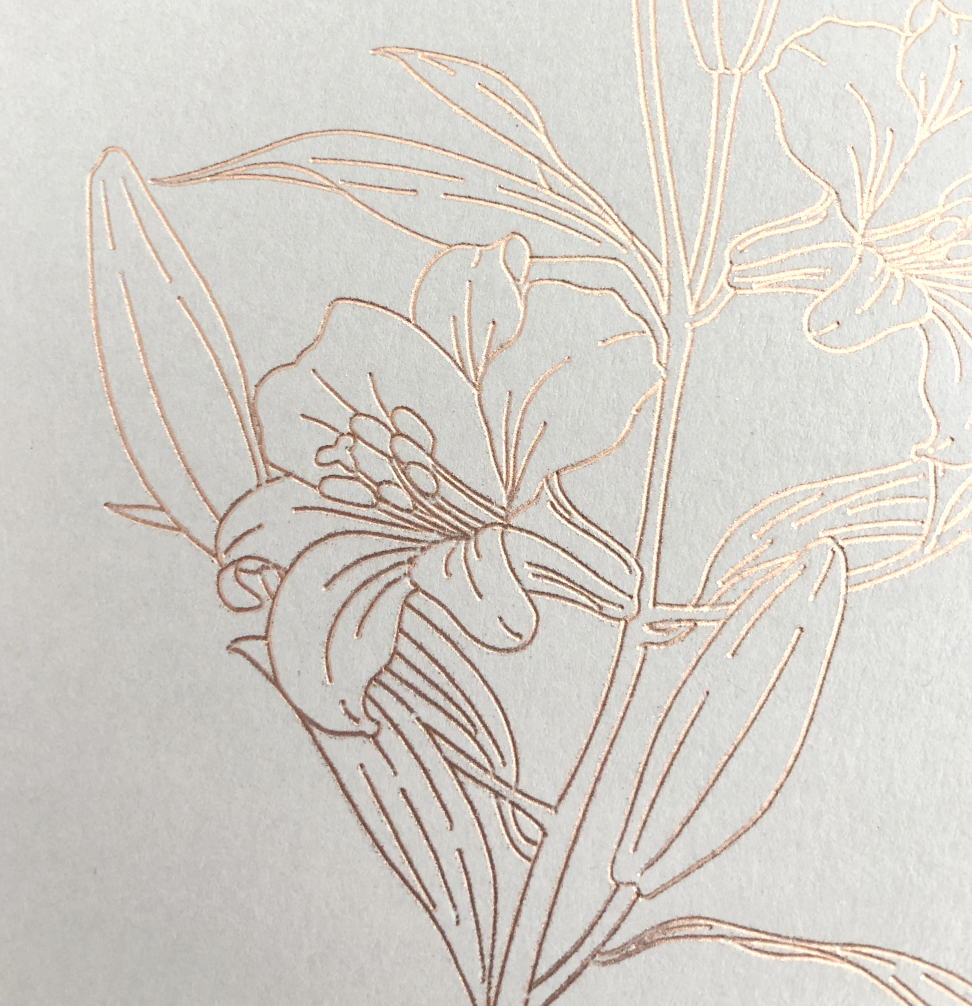
I also have a multi color pack of 65lb Recollections cardstock that I purchased from Michael’s. Although the cardstocks should all the the same quality, I’ve noticed that the surfaces of some of the colors are slightly smoother than the others. The darker colors especially seem to be smoother and the foil doesn’t always stick well (see photo of blue cardstock below). The foil sticks great to some of the lighter colors that aren’t quite as smooth (see photo of light grey cardstock below).

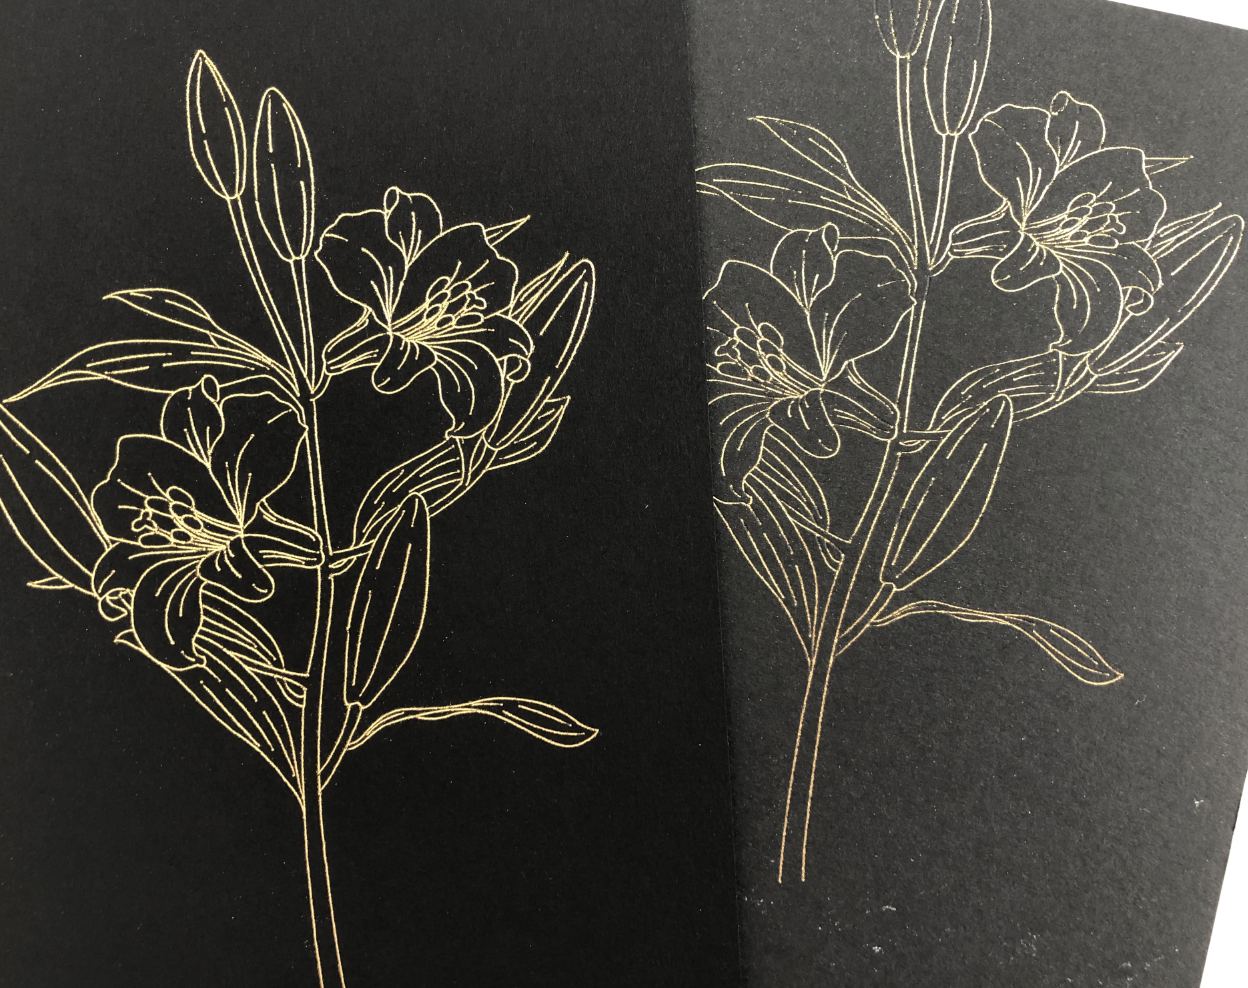
(L) My favorite black cardstock that foils beautifully, (R) Black cardstock that is smoother, but the foil does NOT transfer well.

(L) My favorite black cardstock that foils beautifully, (R) Black cardstock that is smoother, but the foil does NOT transfer well.

65lb blue cardstock from Recollections multicolor pack, Medium Foil transfer tip, Settings: Light cardstock & less pressure

65lb blue cardstock from Recollections multicolor pack, Medium Foil transfer tip, Settings: Light cardstock & less pressure

65lb light grey cardstock from the same Recollections multicolor pack, Medium Foil transfer tip, Settings: Light cardstock & less pressure

65lb light grey cardstock from the same Recollections multicolor pack, Medium Foil transfer tip, Settings: Light cardstock & less pressure

Use Masking Tape, Blue Painters Tape or Washi Tape

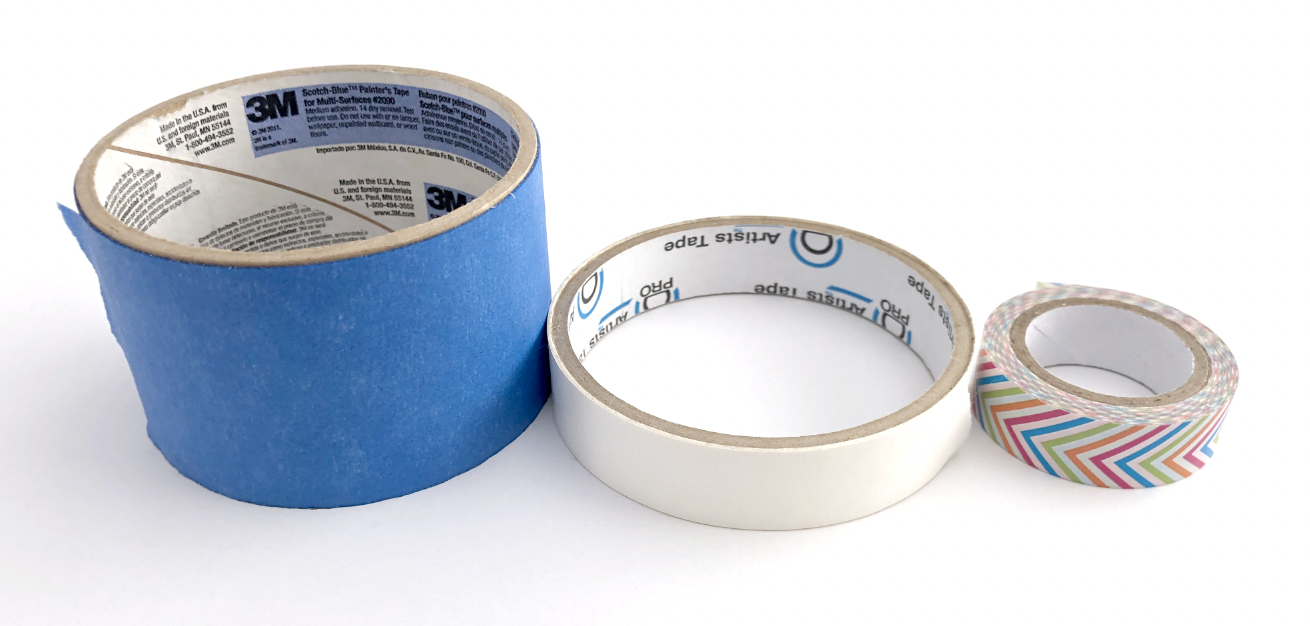
The tape that comes with the foil transfer sheets is designed to NOT stick to the mat. Depending on my design, sometimes my foil sheet goes right to the edge of my cardstock and I need my tape to stick to the mat. I prefer to use masking tape, blue painter’s tape or Washi tape. These tapes all stick well to the mat, and I can usually reuse them a few times.

(L) Blue painter’s tape, (C) masking tape, (R) Washi tape

(L) Blue painter’s tape, (C) masking tape, (R) Washi tape

Tape the foil sheet as flat and tight as possible

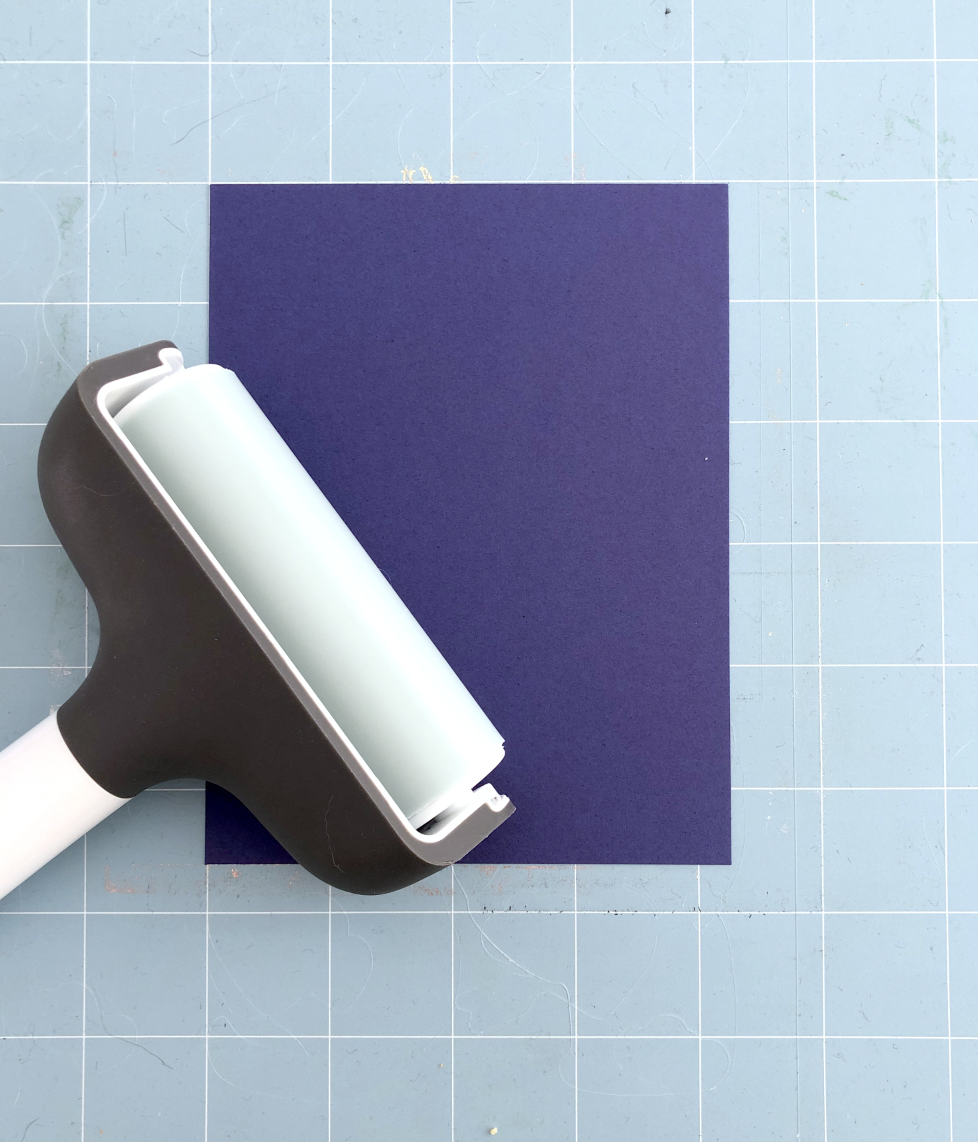
Before taping down your foil, use a brayer to fully adhere your cardstock or whatever material you are using to the mat.

Cricut Foil Transfer tool tips

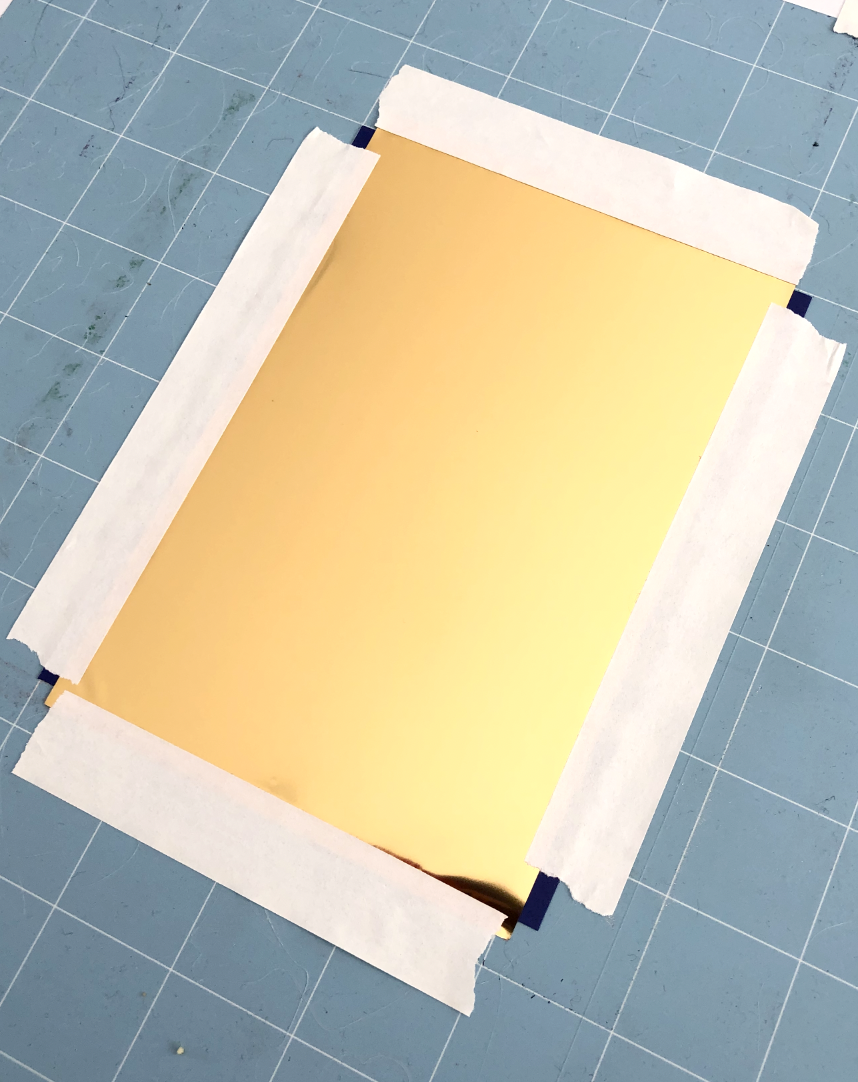
Then lay the foil over the cardstock and tape it on all four sides as tight and flat as possible. As the transfer tool moves around it stretches the foil transfer sheet, so it’s best to start out with no wrinkles and get it as tight as possible in the beginning.

Tape all four sides so the foil is flat and taut.

Tape all four sides so the foil is flat and taut.

Always test your materials that you will be foiling

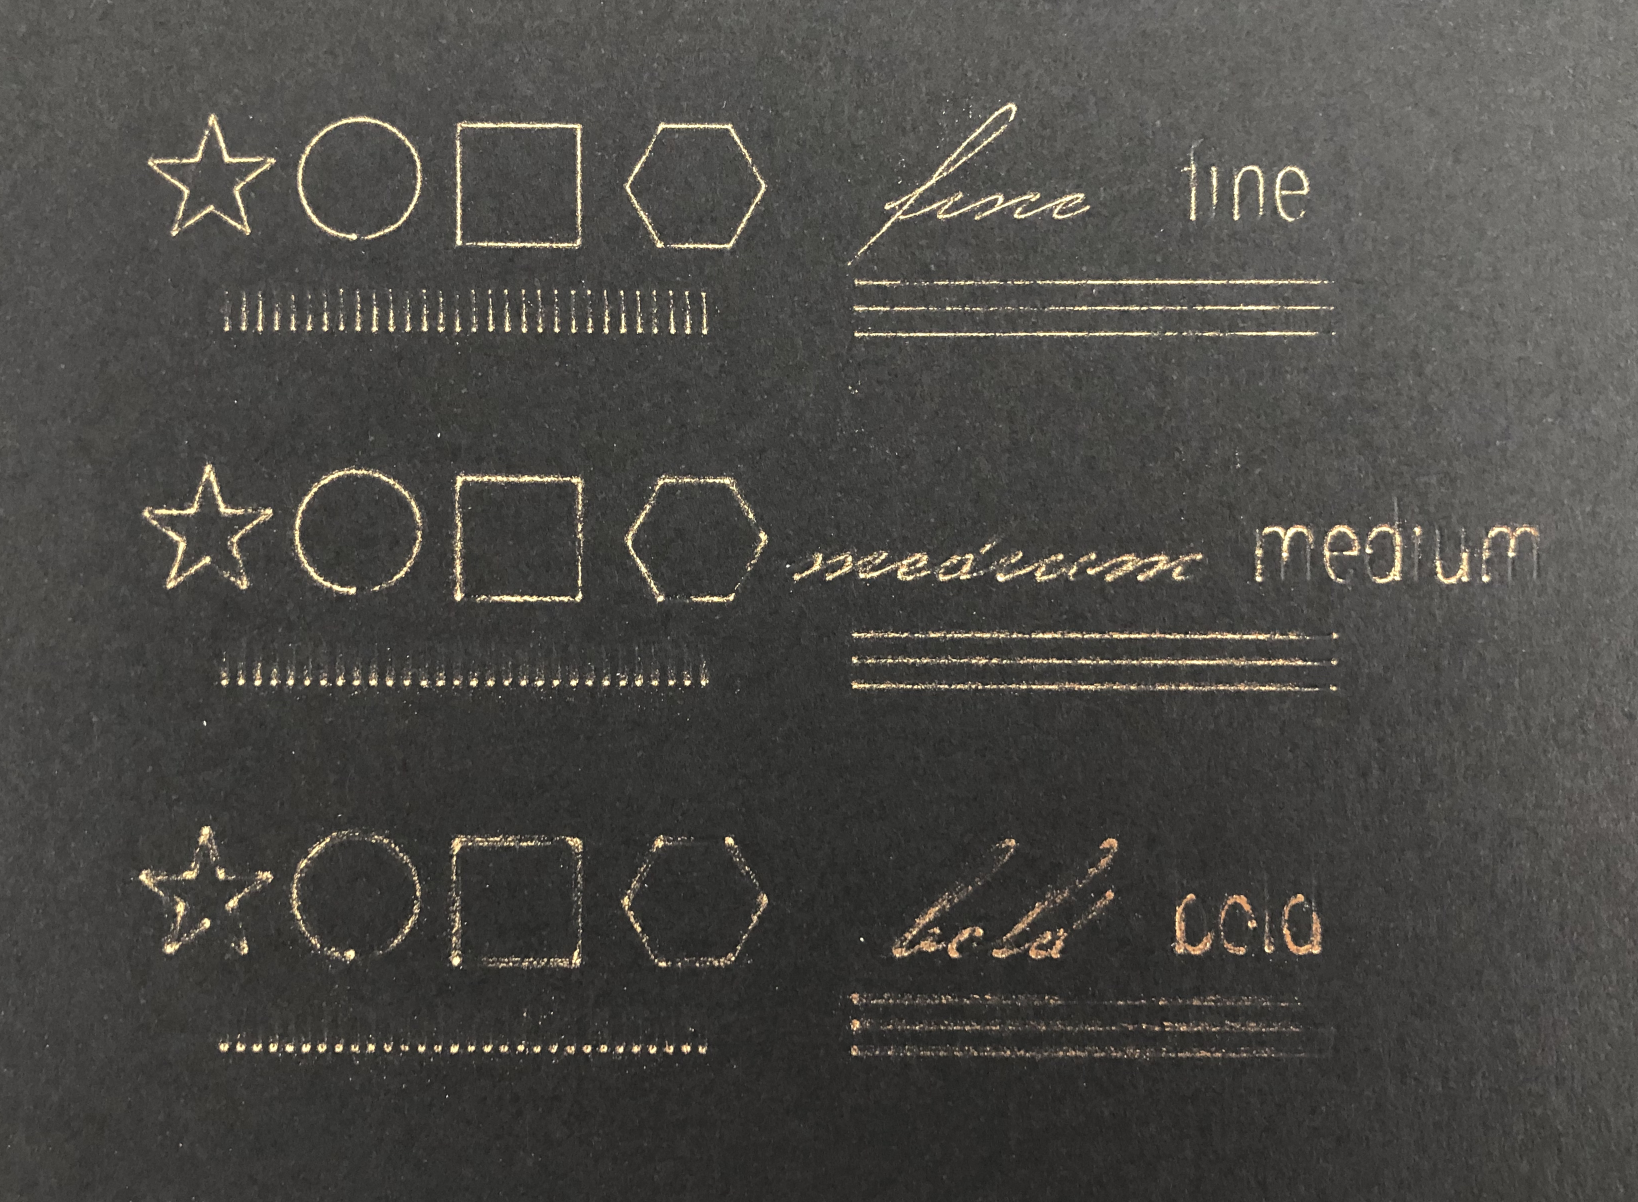
If you’re not sure the foil will stick to the materials you plan to use for your project, do a small test first. Also, you may need to do a small test to figure out the optimal pressure settings for your material. The default material settings can give you a jumping off point, but they don’t always produce the best results. I find I usually get the best results with the fine or medium tips. I haven’t been satisfied with any results from the bold tip.

Testing different tip sizes and pressure settings on black cardstock, no good results on this test.

Testing different tip sizes and pressure settings on black cardstock, no good results on this test.

Use Less Pressure

It kind of sounds counterintuitive, but I typically have better success when I select “Less Pressure” when I’m foiling. If it’s too much pressure, the foil does not stick completely, I’m usually left with an empty thin line from the tip of the transfer tool, or it just doesn’t stick in certain parts of the design.

For my heavier cardstocks (100lb-110lb) I’ve been getting good results with 20lb Copy Paper, Default Pressure settings.
For my 65lb Recollections cardstock I typically use the 65lb Lightweight Cardstock, Less Pressure settings, or the 20lb Copy Paper, Default Pressure settings.
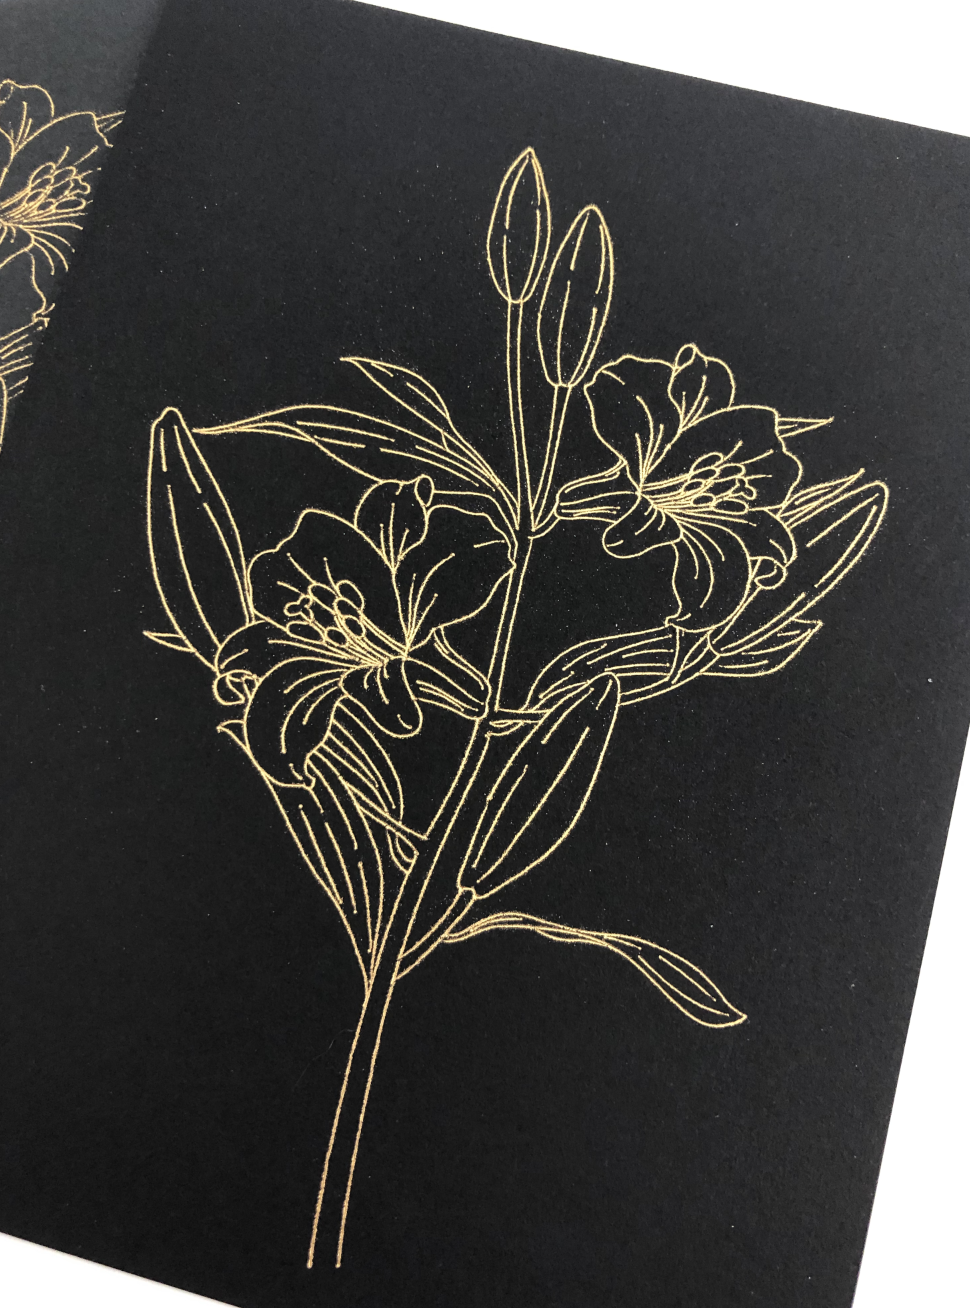
Beautiful results on black heavy cardstock using settings: 20lb copy paper, default pressure.
Beautiful results on black heavy cardstock using settings: 20lb copy paper, default pressure.

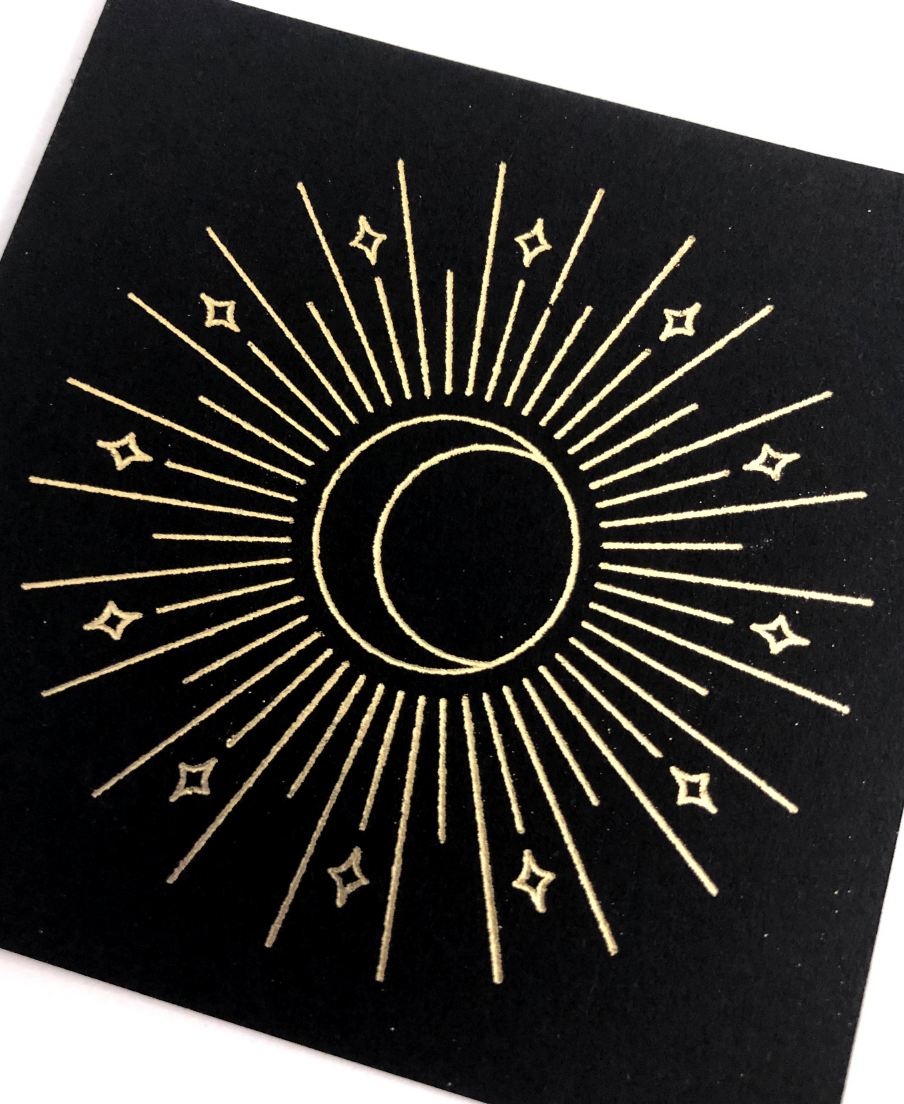
WRMK Foil Quill & Recollections Foil Transfer Sheets

Links in the article below may be affiliate links.

Hi Everyone! Last week I tested the Recollections brand foil transfer sheets with the Cricut Foil Transfer tool. This week I tried out the foil transfer sheets with the WRMK Foil Quill on my Silhouette Portrait 3 machine.

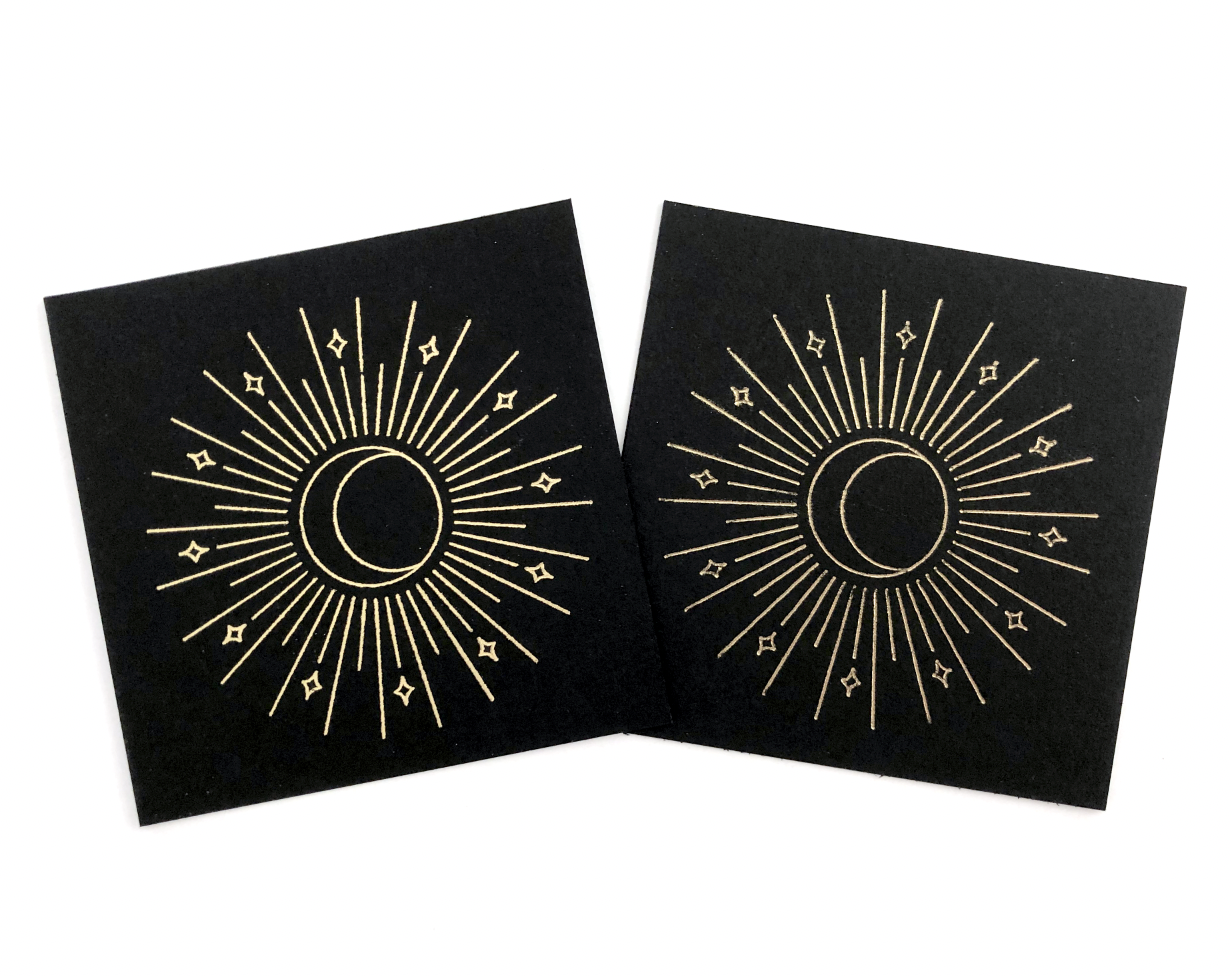
First I tried the gold foil. I used my celestial artwork from last week and the foil quill medium tip on my favorite black cardstock. On my Portrait 3 my speed is set to 2 and force is 22, I typically get good results foiling with these settings. And I got really great results with this foil!

WRMK Foil Quill, Recollections Gold Foil Transfer Sheets

WRMK Foil Quill, Recollections Gold Foil Transfer Sheets

Here it is next to the Cricut Foil Transfer tool version from last week.

(L) WRMK Foil Quill Medium Tip, (R) Cricut Foil TRansfer Tool Medium Tip

(L) WRMK Foil Quill Medium Tip, (R) Cricut Foil TRansfer Tool Medium Tip

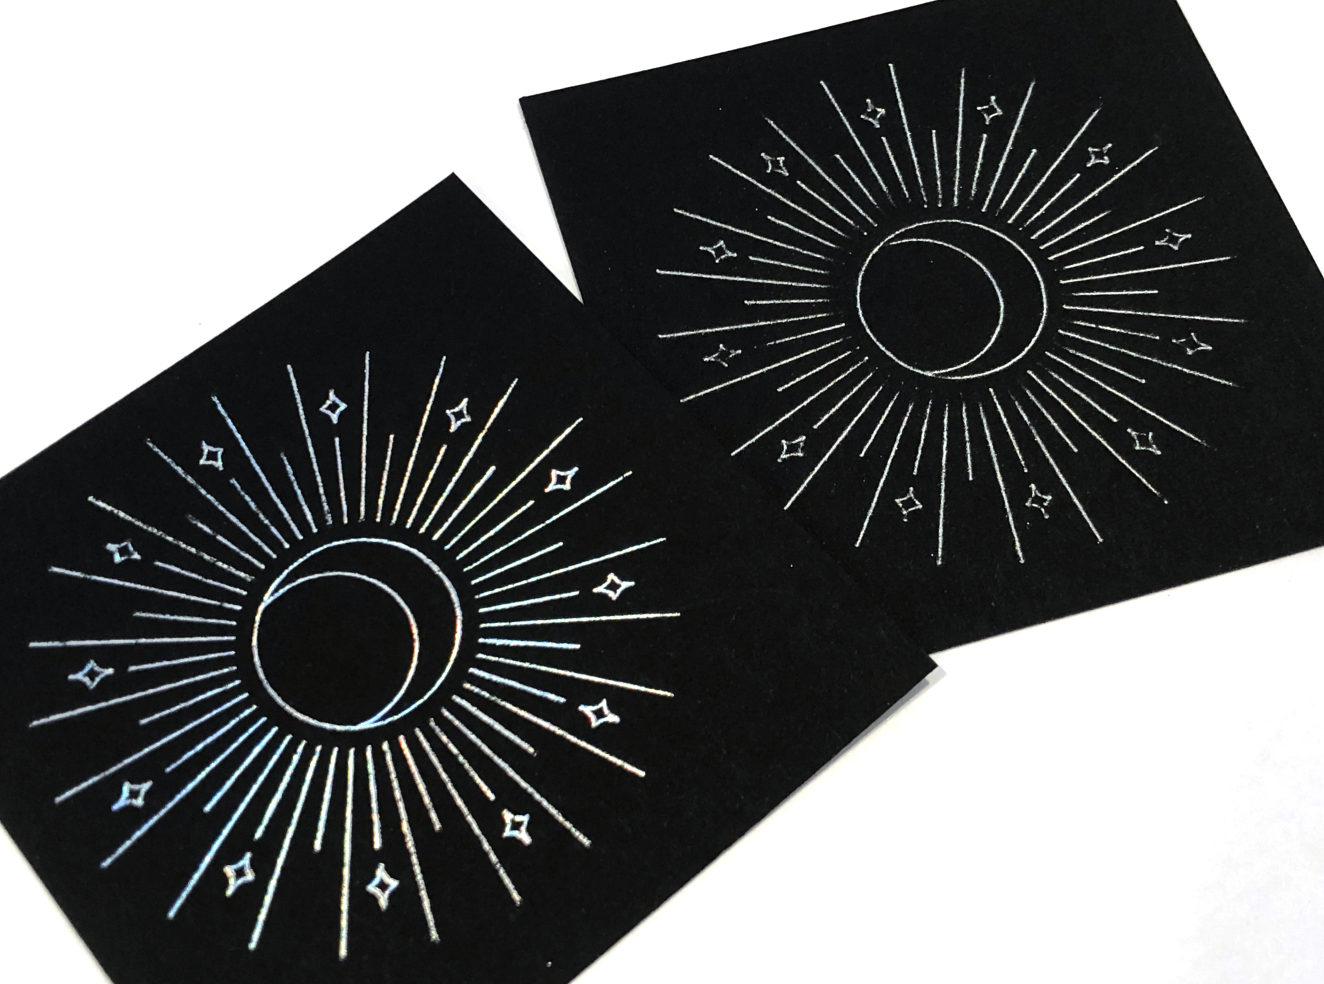
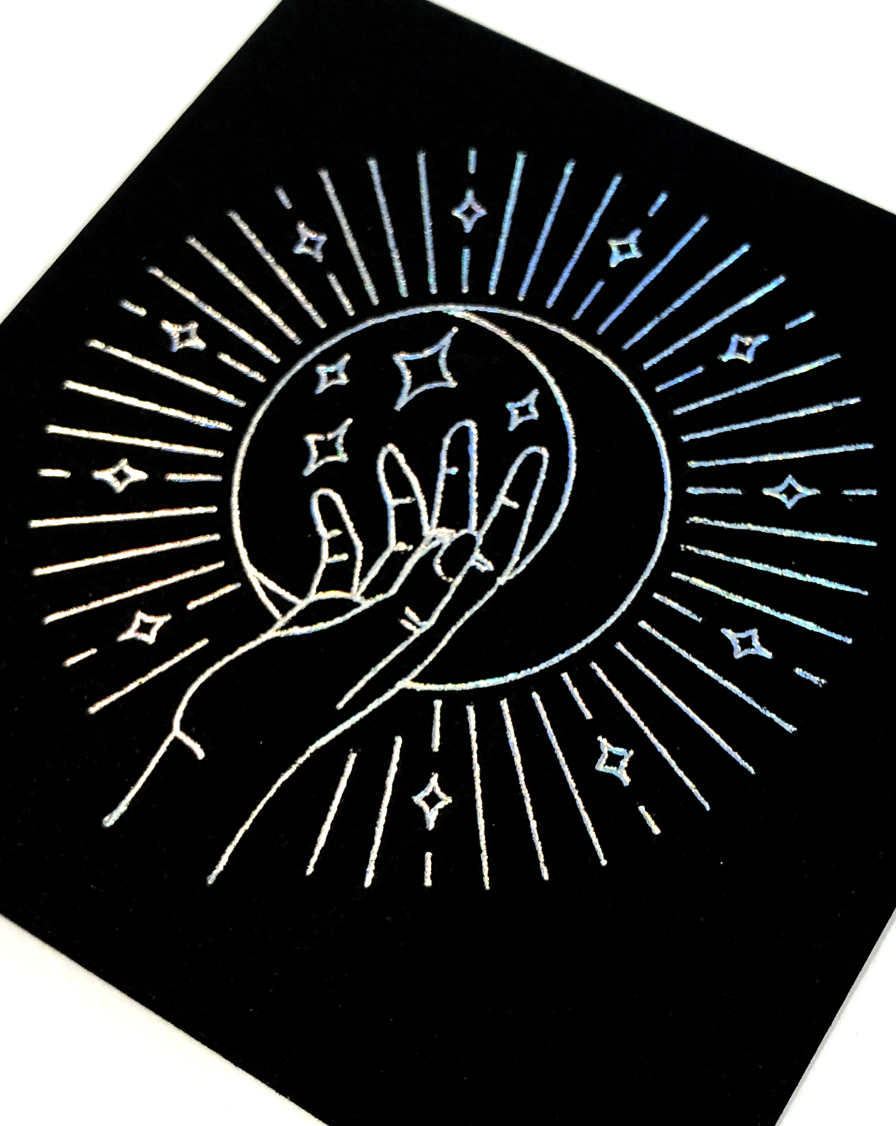
Next I tried the holographic foil. The results with the Cricut foil transfer tool were disappointing. But the results with the Foil Quill are beautiful! You can actually see the holographic effect on the on the cardstock.

Here’s a side by side of the holographic foil using Cricut Foil Transfer tool versus the Foil Quill. The Foil Quill version is stunning!

(L) WRMK Foil Quill Medium Tip, (R) Cricut Foil TRansfer Tool Medium Tip

(L) WRMK Foil Quill Medium Tip, (R) Cricut Foil TRansfer Tool Medium Tip

This foil is not labeled as being heat sensitive, but it works perfectly! It’s a really great option if you only need a small amount of foil and don’t want to buy an entire roll.

WRMK Foil Quill, Recollections Holographic Foil Transfer Sheet

WRMK Foil Quill, Recollections Holographic Foil Transfer Sheet

Another Cricut Foil Transfer Sheet Alternative

Links in the article below may be affiliate links.

Hi Everyone! I was browsing the Michael’s website for more foil colors for the Cricut Foil Transfer tool and I came across some foil transfer sheets from Recollections. The foil transfer sheets are described as no heat or tools needed. The packaging instructions instructions recommend using a double sided sticker or adhesive with the foil. There is no mention of them being pressure sensitive, but one of the reviewers mentioned that they work with her Cricut Maker. So I found some at my local store and decided to give them a try.
I bought the gold sheets and the holographic sheets to try initially. You get 5 sheets that are 5.5” x 5.5” squares, so slightly different dimensions than the smaller Cricut sheets and really great if you plan to make square cards. Another bonus, you can use your Michael’s coupons!

I tried one of my new celestial designs with the gold foil on my favorite black cardstock.

I tested all three tips for the foil transfer tool, and they all worked pretty well with this foil. There are still the little spots where it didn’t stick to the cardstock all way. It’s also a little dusty when you remove the foil sheet, but you can carefully lift the foil dust away with some Washi tape or blue painters tape. Overall, the results were pretty similar to the Cricut brand foil.

Recollections Gold Foil Transfer Sheet (L) Bold Tip, (C) Medium Tip, (R) Fine Tip

Recollections Gold Foil Transfer Sheet (L) Bold Tip, (C) Medium Tip, (R) Fine Tip

Next, I tried the holographic foil. It did not transfer as well as the gold foil and it just looks silver, not holographic. Overall, this one was a bit disappointing.

Recollections Holographic Foil Transfer Sheet (L) Medium Tip, (R) Fine Tip

Recollections Holographic Foil Transfer Sheet (L) Medium Tip, (R) Fine Tip

Since the gold worked pretty well, I’m interested to try some of the other colors like rose gold and the multicolor pack. I also plan to test this foil with the WRMK foil quill and my Silhouette Portrait 3 machine.

Screen Shot 2021-07-05 at 5.18.55 PM.png


Foiling with the Silhouette Portrait 3 and WRMK Bevel Quill

Links in the article below may be affiliate links.

Hi Everyone!

Last week I did some foiling with my Portrait 3 and the WRMK foil quill. This week I wanted to share another technique you can use to foil with your Silhouette Portrait 3 or Cameo.

I found the WRMK Bevel Quill a few weeks ago in the clearance section at my local JoAnn’s, and I’m a sucker for all the little attachments for Cricut and Silhouette machines. Another bonus, I can use this tip in either my Cricut Maker or my Portrait 3.

The bevel tip has a small ball point and is intended to deboss on the “bevel board" materials that are included with the tip , but I wanted to try it with the Spellbinders Glimmer Foil since the foil is also pressure sensitive.

WRMK Bevel Quill

WRMK Bevel Quill

The A adapter included in the kit is intended for the Silhouette machines, but it doesn’t fit the Portrait 3 or Cameo 4.

First, I tried it with the D adapter that also came in the kit, but it doesn’t fit very snugly in the Portrait 3 and pops up out of the tool holder every so slightly when the machine presses down on the tip and there’s no longer any pressure for the tip to apply the foil.

So I grabbed the D adapter from my foil quill set, it’s just a hair wider than the other D adapter. It makes such a big difference, and it stays nice and snug in the tool holder.

D adapter from Foil Quill set

D adapter from Foil Quill set

Once again, I used my favorite black cardstock and the Standard grip mat with the regular copper and gold Spellbinder foils. I tried out a few different settings. I ended up getting pretty decent results with my Force between 20-25, Speed 2, and 2 passes.

Copper foil and gold foil on black cardstock

Copper foil and gold foil on black cardstock

The results are pretty close to what I get with my Cricut Foil Transfer tool and my Maker. The foil doesn’t always stick in some places and it can be a little dusty when you remove the foil sheet after transferring. The WRMK Foil Quill is still my favorite tool for foiling, but this is definitely a good option if you don’t want to be bothered heating up the WRMK Foil Quill.

Foiling with WRMK Bevel Quill