WRMK Foil Quill

Silhouette Cameo 4 Fine Tip Foil Quill Adapter

Hi Everyone!

Links in this article may be affiliate links.

It’s been a few weeks since my last post, but during that time I got a Cameo 4 and I’ve been playing around with it a little bit.

As you probably already know, the We R Memory Keepers Foil Quill is one of my favorite tools to use with my cutting machines. I see a lot of people having trouble using the Fine Tip Foil Quill in particular with the Cameo 4 and Portrait machines. I got my fine tip to work pretty well with my Portrait 3, and I tried it out with the same settings on my Cameo 4. Those settings didn’t work with my Cameo 4 and I actually broke the tip off my foil quill. Oops!!

I ended up buying a new Fine Tip foil quill and I finally figured out a better way to keep it from ripping my foil and breaking the tip. It’s so simple and, I can’t believe I didn’t think of this sooner!

All you need is some cardstock. I’m using a 100lb cardstock, so it’s a little thicker. But you can use whatever you have on hand.

Cameo 4 Fine Tip Foil Quill Adapter

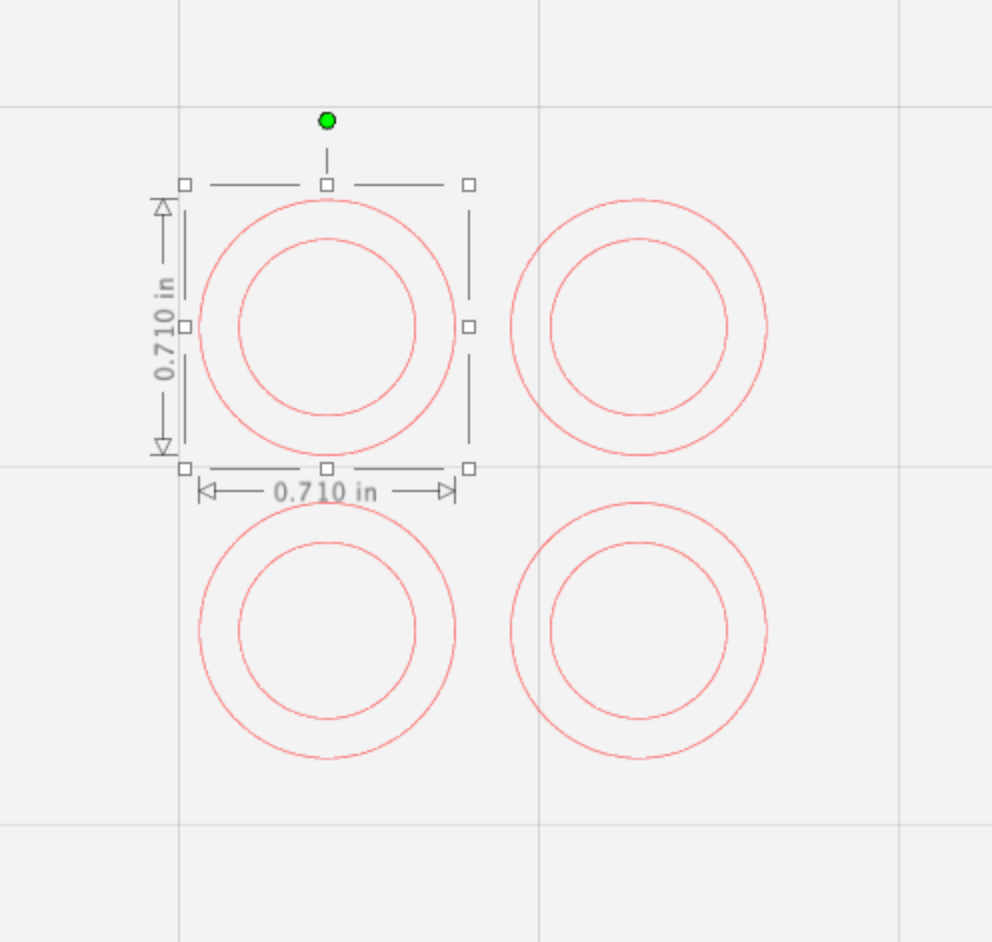
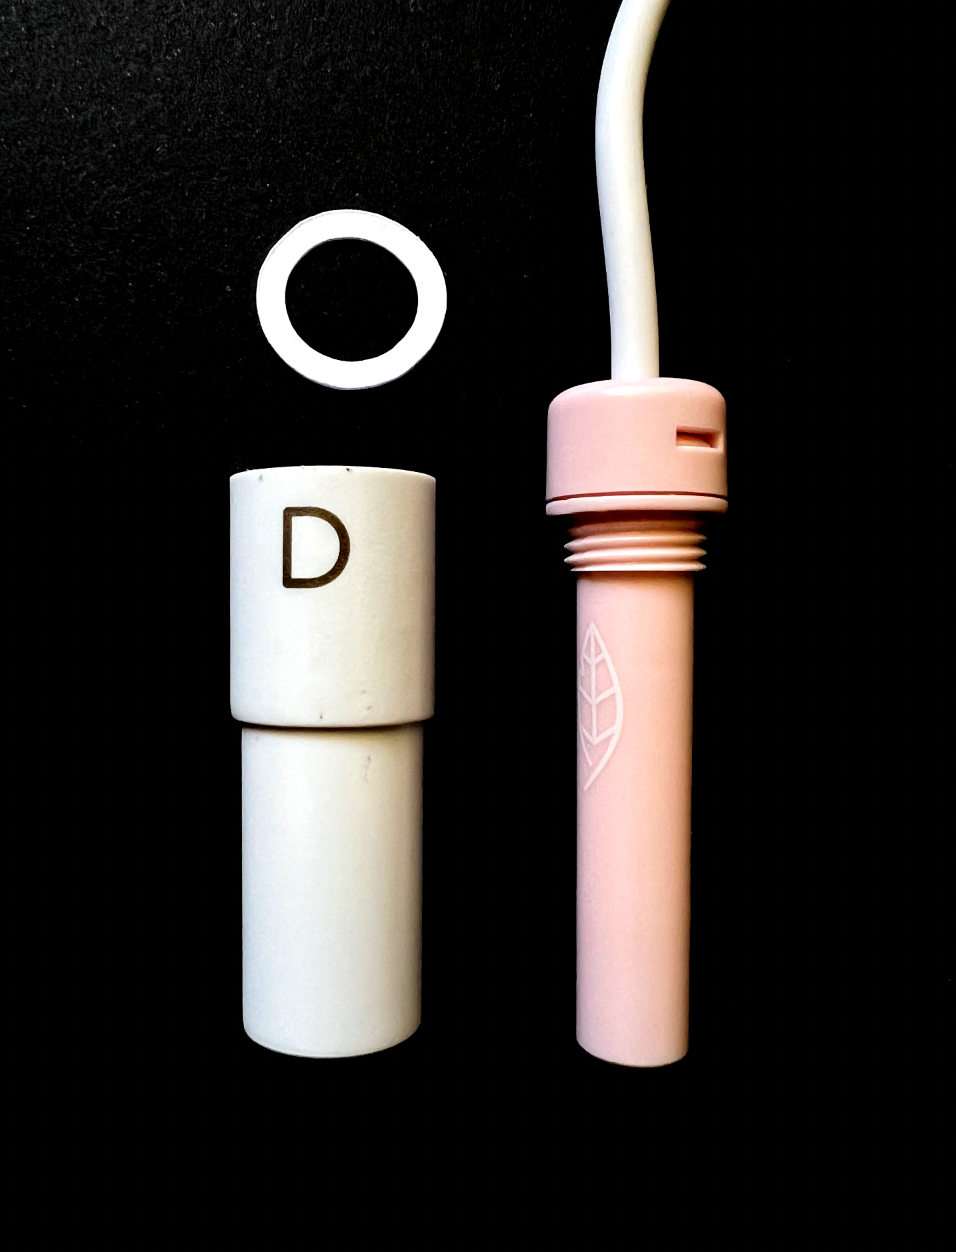
I created an 18mm (0.71in) circle in Silhouette Studio with a 12.5mm (0.49in) circle inside. So now I have basic ring. I duplicated it a few times, depending on the thickness of your cardstock, you may need more than one, you can stack them on top of each other.

Cameo 4 Foil Quill Adapter

I cut the rings with my Cameo machine using the Heavy Coverstock setting and the Autoblade.

Cameo 4 Foil Quill Adapter

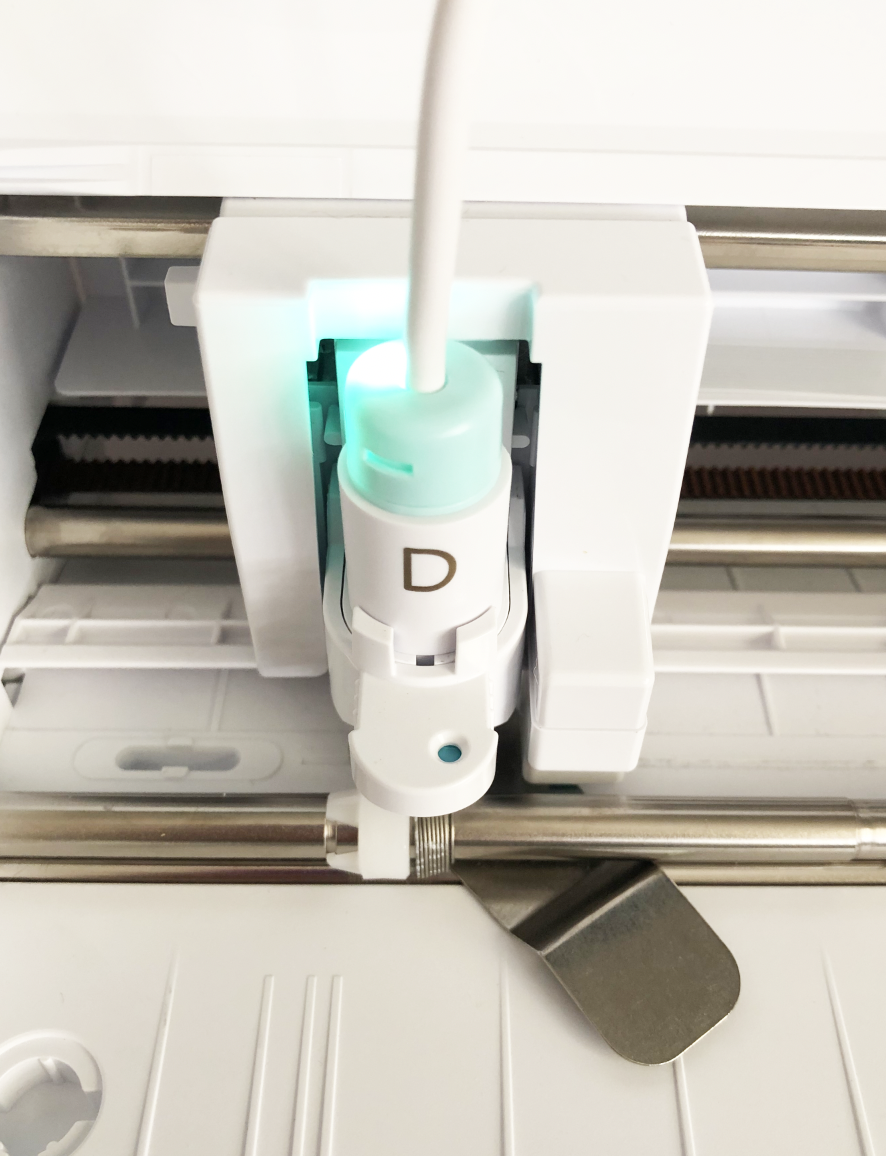
I placed the ring on top of the D adapter. I know the Foil quill says the A adapter is for Silhouette machines, but that’s for the Cameo 3 and previous models. For the Portrait 3 and Cameo 4 you need the D adapter, which is really supposed to be for a Sissix machine.

Cameo 4 Foil Quill Adapter

Then I screw my Fine Tip foil quill into the adapter. The cardstock ring keeps it just slightly above the top edge of the adapter, and it also helps keep the tip from wiggling around in the adapter. I already tried not screwing the tip all the way into the adapter and it wobbles around to much when you are trying to draw with it.

If you are using a thinner cardstock, you might need to use 2 or 3 rings stacked on top of each other.

Cameo 4 Foil Quill Adapter

Next, I’m going to test it without being plugged in or with any foil. I’m checking to make sure the tip actually reaches the cardstock I’m going to be foiling. My foil quill is loaded into slot 1 on the carriage.

I have a scrap piece of cardstock on my mat and I’m going to test with the Coverstock, Heavy material setting, force of 5, speed of 2, action is sketch, tool is pen.

Cameo 4 Foil Quill Adapter

I run it though my machine without the quill plugged in and no foil. I can see that the tip leaves a slight indent in the cardstock. You want to make sure the tip isn’t digging in too deep, or it will rip your foil. This looks like a good depth, so next I’m going to test it with some foil.

Cameo 4 Foil Quill Adapter

I plug in my foil quill and cover my piece of cardstock with foil. I’m using the We R Memory Keepers brand of foil.

Cameo 4 Foil Quill Adapter

I run it through my machine with the same settings Heavy Coverstock, Force 5, speed 2.

It makes it through without tearing the foil.

Cameo 4 Foil Quill Adapter

It looks great after removing the foil!

Cameo 4 Foil Quill Adapter

Depending on the materials you use, your settings may be different from mine. If you want to try using the Fine Tip Foil Quill on thicker materials, you can try adding some more rings to help raise the tip higher up and away from the mat.

Shrink Plastic Pins with the Cricut Maker

Hi Everyone!

St. Patrick’s day is this week, I wanted to try making a little four leaf clover pin using shrink plastic and gold foil for good luck!

Since my Portrait 3 doesn’t quite cut all the way through my shrink plastic sheets, I thought I would give my Cricut Maker a try. It’s got more cutting force than my Portrait 3, but I was also quickly reminded how much I HATE Cricut Design Space. I really wish instead of releasing ridiculously priced heat presses they would invest in better software. I really love Silhouette Studio (it works how I’ve always dreamed Design Space should work) and I think I see a Silhouette Cameo 4 replacing my Cricut Maker in the near future!

Ok, rant over. Here’s how I did it on my Cricut (Note: this DOES NOT work with the Cricut Foil Transfer tool):

Supplies:

Four leaf clover single line SVG from my Good Luck Charm bundle

Cricut Maker

Deep Cut Blade (the black one)

Light Grip mat (the blue one)

WRMK Foil Quill Medium Tip with C adapter

Gold heat reactive foil

Shrink plastic sheets

Green Sharpie

Glue

Pin back

Heat Gun on Toaster Oven

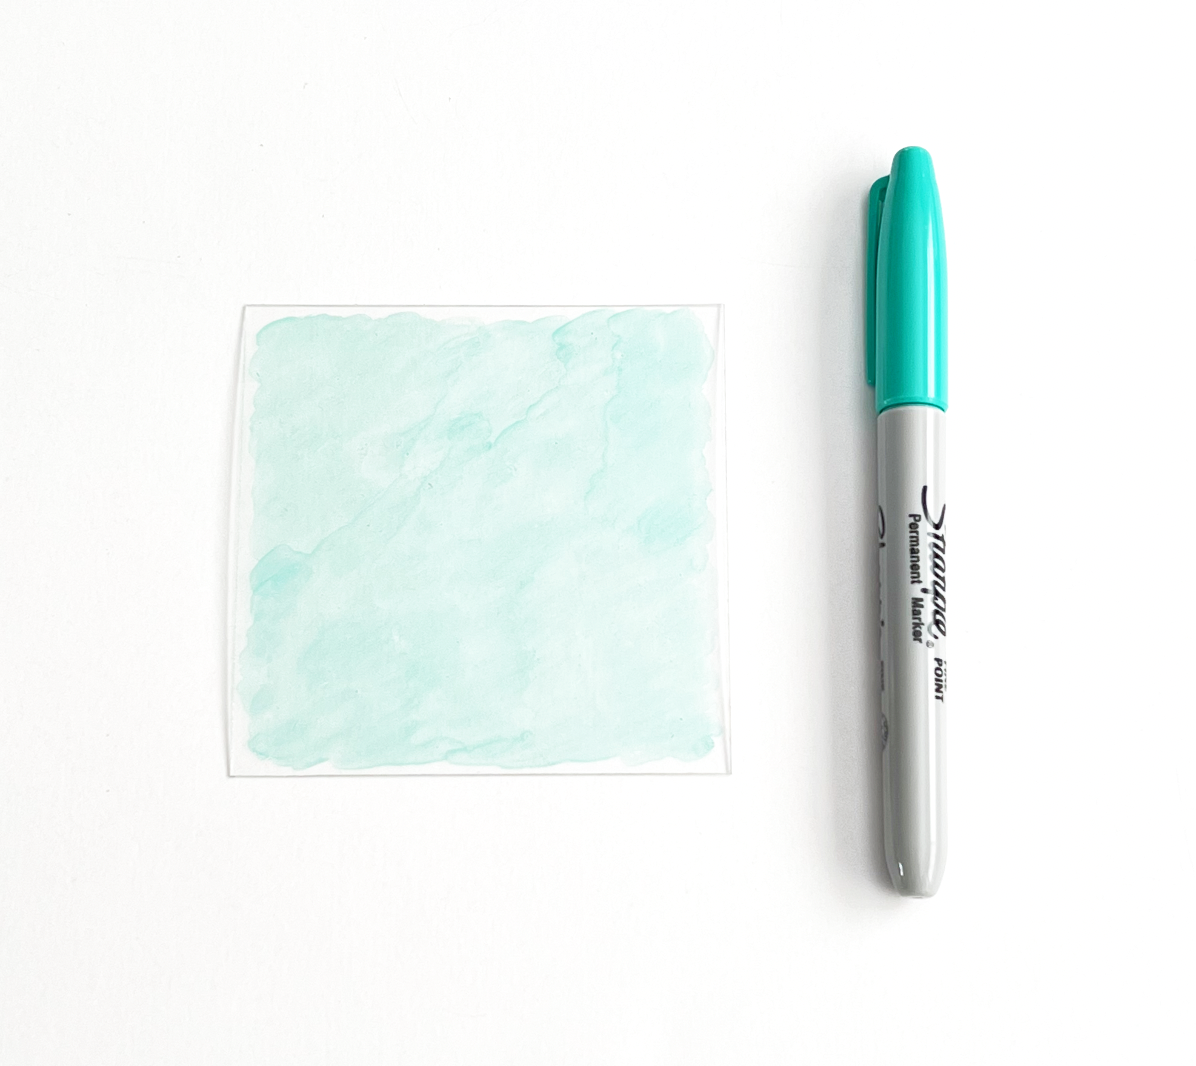
First I cut down my shrink plastic sheet into smaller squares, mine are about 3.5 x 3.5 inches. Then I colored the squares with the green Sharpie.

Tip: The Sharpie blended better when I used small circular strokes.

Cutting Shrink Plastic with Cricut Maker

I set my green squares aside to dry for a little bit. Now I’m going to set up my project in Cricut Design Space.

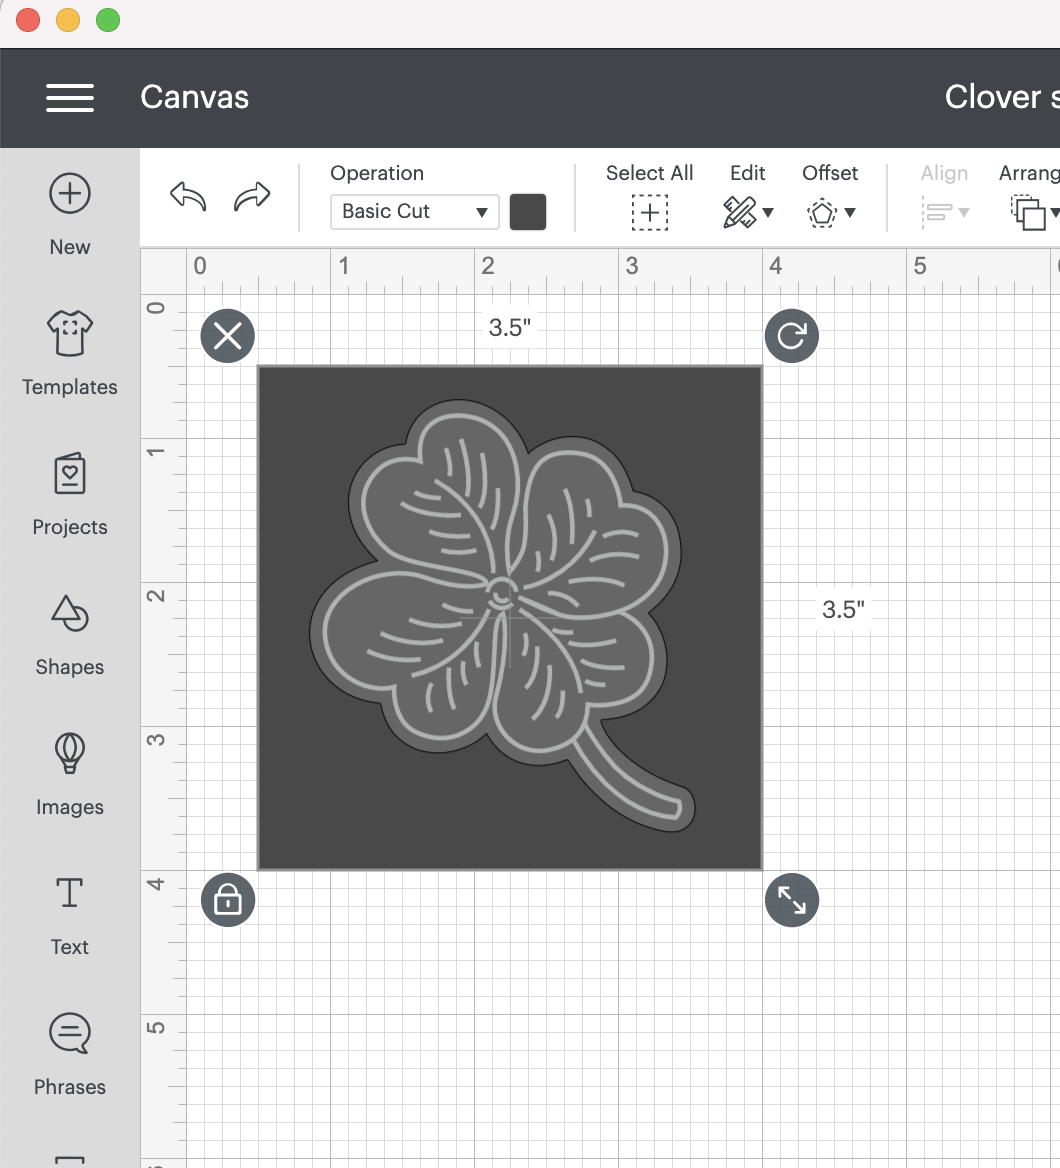
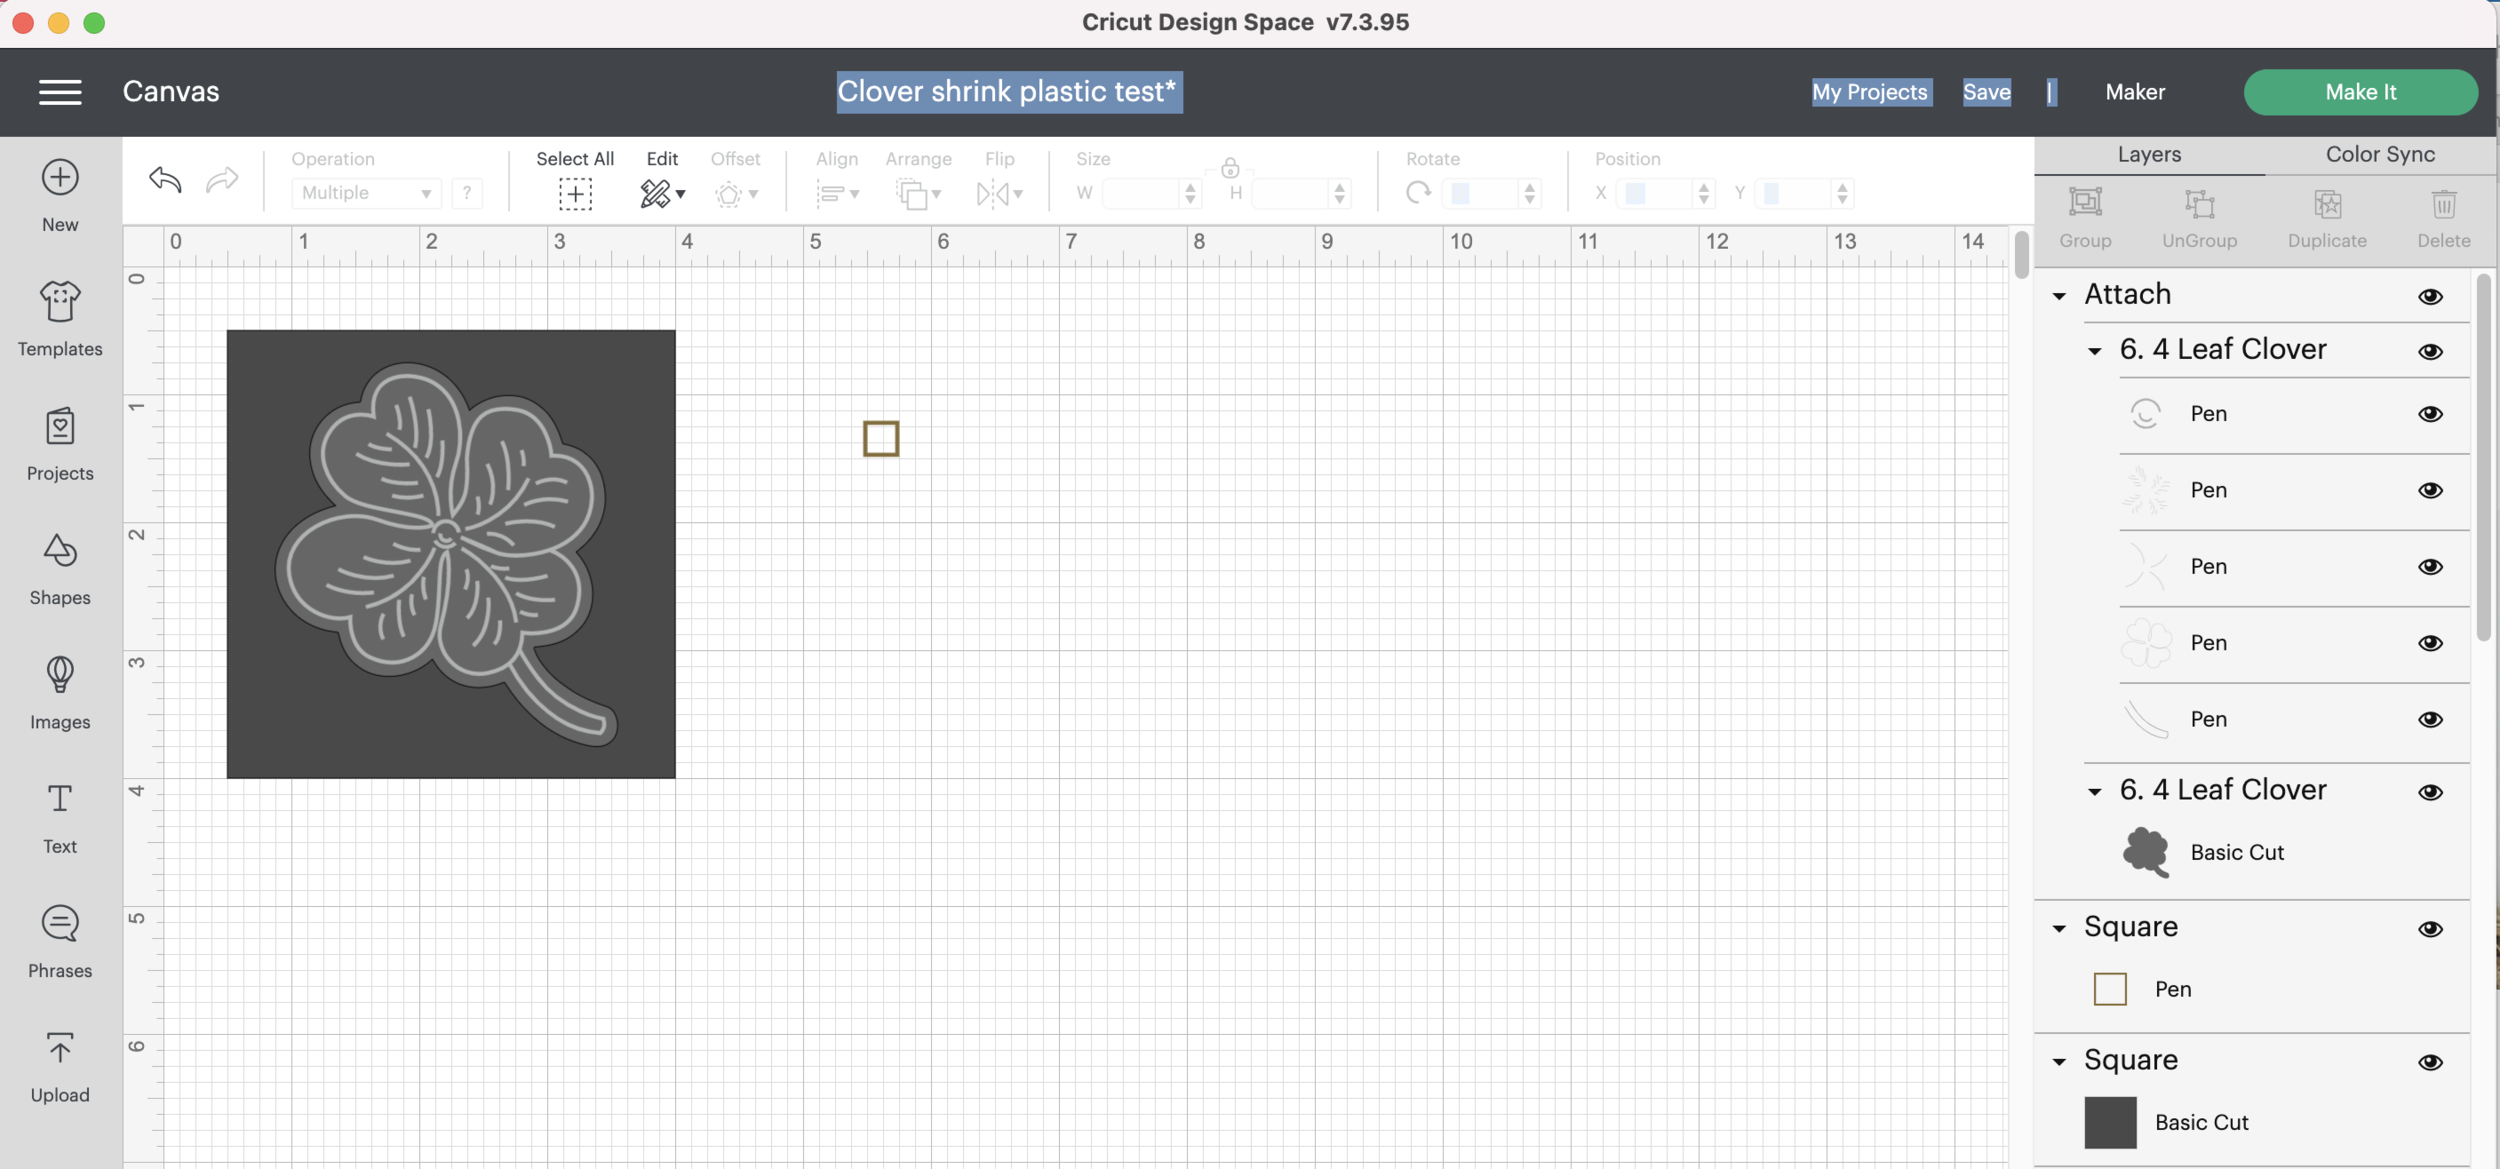
I’ve got my four leaf clover single line SVG uploaded into design space. I made a 3.5 x 3.5 inch square (the same size as my shrink plastic squares) and I scaled my four leaf clover to fit inside the square. I left a little border around the edges since I will be taping my shrink plastic to my mat.

Setting up foil quill file in Cricut Design Space

I’m also going to add a random little square to my file so I will be able to pause and remove the foil before cutting.

You’re probably saying “Just use the Pause button on your machine!” Well, unless my machine is faulty, my machine won’t pause until it has already started to cut with the blade.

I’m also doing this because Cricut has eliminated the ability to just skip unloading the mat and continuing with your cut. If you don’t eject your mat, don’t worry, your machine will do it for you! So I’ve gotta keep coming up with new ways to outsmart the Cricut!

Once I have my Cameo 4, I will make a version of this project using it so you can see why I like the Silhouette software so much better!

Make sure the operation for the foil portion of the four leaf clover is set to Draw/ Pen. The operation for the offset line around the clover should be set to Basic Cut.

I set the operation for my random square to Draw/ Pen. Make sure you select a different color from the clover drawing. Fingers crossed that my machine will request the gold pen after the silver pen!

Now, I’m going to attach all of my clover pieces together, DO NOT attach the squares.

Foiling and Cutting Cricut Design Space

Don’t forget to Save your project. Then click Make It.

It’s set up for 3 separate mats at the moment. In mat number 2, I’m going to move my square down and over so it’s toward the bottom of my mat.

Foiling and Cutting Cricut Design Space

Next, I’m going to select mat number 3. Click on the 3 little dots in the corner and select Move Object.

Foiling and Cutting Cricut Design Space

Select the mat with the big square and click Confirm.

Foiling and Cutting Cricut Design Space

Now I’m going to place my clover over the big square.

Foiling and Cutting Cricut Design Space

Then I’m going to select mat 1, click the 3 little dots and move the small square to mat 2 with everything else. But I’m going to keep it in the upper left corner. So now, everything is on mat 2. Isn’t this such a pain?!!

Foiling and Cutting Cricut Design Space

Now I will select the 3 dots and hide the large square. It was only there so I could put my clover in the correct place on the mat

Foiling and Cutting Cricut Design Space

It’s probably a good time to plug in your Foil Quill to get it warmed up!

Now I’m going to tape my shrink plastic square on my mat on all four sides. It’s in the same position on my mat as the 3.5 x 3.5 square was in Design Space.

Foiling and Cutting Cricut Design Space

Then I’m going to tape my foil on top of the shrink plastic on all four sides.

Foiling and Cutting Cricut Design Space

Back in Design Space, I’m going to click Continue. I tested some shrink plastic a while ago and I ended up making my own custom material setting that I named “Shrink Plastic.” (real original, I know). I’m going to search the materials and find my Shrink Plastic setting. (For some reason Cricut Design Space won’t allow me to save it as a favorite, I just get an error.)

Foiling and Cutting Cricut Design Space

Design Space is prompting me to load the silver pen in clamp A. I'm using my foil quill in clamp A instead. I don’t have anything loaded into clamp B. I load my mat into my machine and I press the Go button.

Foiling and Cutting Cricut Design Space

After the machine is done foiling, my design is still under the rollers so I can’t remove the foil. (What a pain! This is why I have the little square up in the corner of my mat).

It’s going to prompt me to load the gold pen into clamp A. I’m actually going to remove the foil quill (Careful, that tip is hot!) and load the Deep Cut blade into Clamp B. Press go on my machine.

Foiling and Cutting Cricut Design Space

My machine is going to move to the top of the mat to “Draw” the little square. I need to QUICKLY press the Pause button on my machine. Now I can easily remove the foil from my design.

Foiling and Cutting Cricut Design Space

Once I press the Pause button again, my machine will continue with the Deep Cut blade.

My cutline and drawing aren’t quite centered, so I may have to calibrate my machine. I’m going to go ahead and use this piece anyway since it won’t be as obvious once I shrink it.

Now it’s time to shrink! I’m using my heat gun, but you can also use a toaster oven and follow the instructions from your shrink plastic manufacturer.

Foiling and Cutting Cricut Design Space

Be careful when it’s shrinking. If it curls up on itself too much the foil might transfer to another part of the design, like the left side of my clover in the photo below.

Foiling and Cutting Cricut Design Space

After it’s done shrinking, I glue a pin back on the back, and it’s ready to wear for St. Patrick’s day! If you don’t like the pin back showing through the shrink plastic you can also use this technique on the white shrink plastic.

Foiling and Cutting Cricut Design Space

Planner Stickers with the WRMK Foil Quill

Happy New Year!

The new year is always a great time to make a fresh start with a new planner. I bought a planner notebook last year, but I didn’t realize it only had pages for 6 months and a bunch of blank pages at the end. After I filled up the 6 months , I kind of stopped using it. So this year, I’m going to make my own calendar/ planner pages and hopefully keep myself on track for this year!

Supplies: (links below may be affiliate links)

My Single line SVG files or another file you may have

Clear Sticker Paper

WRMK Fine Tip Foil Quill (the pink one)

WRMK Gold foil or heat reactive foil of your choice

Silhouette Portrait 3

Light Grip cutting mat

Autoblade

I created some single line SVG files for the months, days and dates. I’m going to test them out with my WRMK Foil Quill and some clear matte sticker paper.

I bought this clear matte sticker paper on Amazon. Unfortunately, when I received it I realized it has a slit down the back carrier paper which is not disclosed in the product description. I should have read more of the reviews! It’s not a problem for this project since I’m trimming the paper down to foil it.

I’m trimming my sticker paper down to 5.5 inches x 4.25 inches. You don’t have to do this, but I have an easier time foiling with smaller pieces.

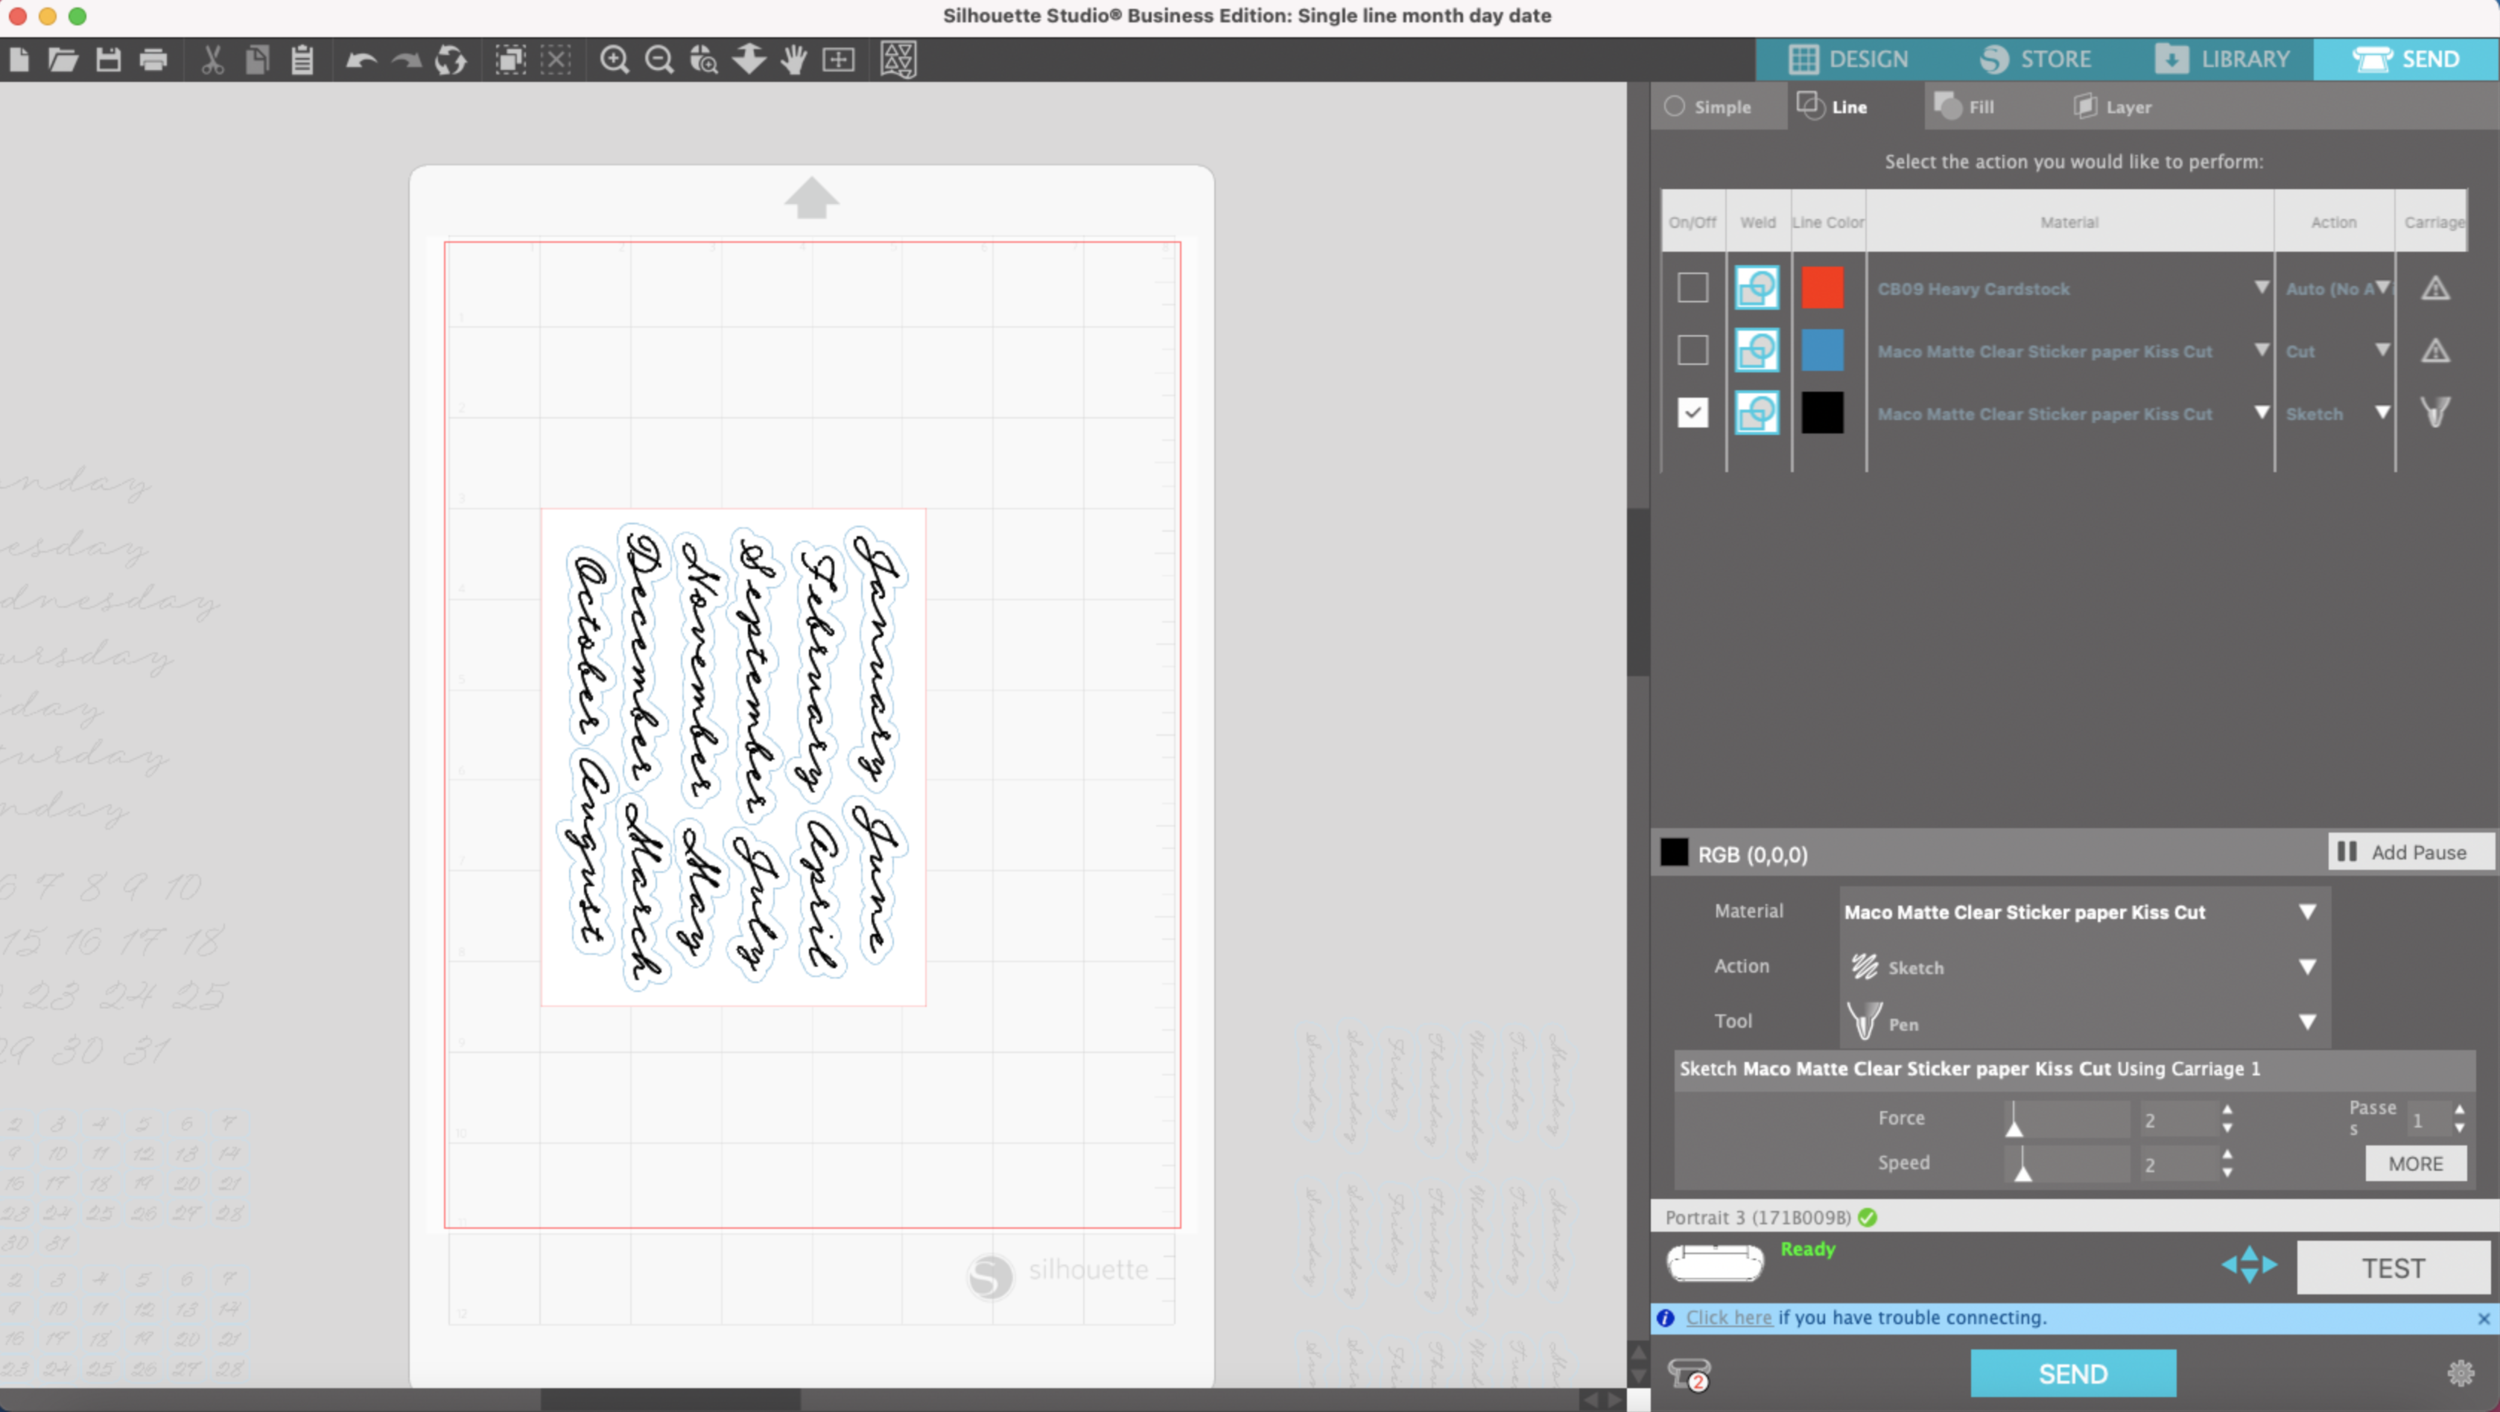
I have all of my months set up to fit on one 5.5 inch x 4.25 sheet in Silhouette Studio and now it’s time to foil!

Foil Quill Planner Stickers

I’m using the fine tip foil quill (the pink one) with the D adapter, since my letters and numbers get pretty small.

Foil Quill Planner Stickers

I’ve got my sticker paper on my light grip mat approximately where it is shown in Silhouette studio and my foil is taped down tightly on all four sides.

Foil Quill Planner Stickers

After some initial testing with this sticker paper I created a custom material setting:

Action: Sketch

Force: 2

Speed: 2

Passes: 1

Foil Quill Planner Stickers

After it’s done foiling, do not remove your mat from the machine! Carefully remove the foil and place the Autoblade in carriage 1.

I want my stickers to be kiss cut, so the blade will not cut through the backing paper on the stickers. I added the following settings to my custom material:

Action: Cut

Force: 25

Speed: 4

Passes: 1

Foil Quill Planner Stickers

I repeat the same process for the days of the week and the dates.

Now my stickers are ready to be added to my calendar template!

Foil Quill Planner Stickers

Foiling on Acrylic with Cricut and WRMK Foil Quill

Hi Everyone!

This week I’m going to make the same acrylic ornaments with foil on my Cricut Maker. It’s not quite as easy as my Portrait 3, but it is doable if you have Cricut instead of a Silhouette machine. I will be using my WRMK Foil Quill, the Cricut Foil Transfer tool does NOT work on acrylic.

Supplies:

(Links below may be affiliate links)

3 inch acrylic disc, 2mm thick

SVG Draw file (you can get my snowflake here)

WRMK Foil quill (medium tip) with C adapter

Gold heat reactive foil or other foil color of your choice

Cricut machine (I will be using my Maker)

Strong Grip Cutting Mat (the purple one)

Cricut pen (any color)

Chipboard template

Blue Painter’s tape or Washi Tape

9-12 inch length ribbon or twine for finished ornament

Let’s get started!

I exported my snowflake design that I made a few weeks ago from Silhouette Studio as an SVG so I can upload it into Cricut Design space.

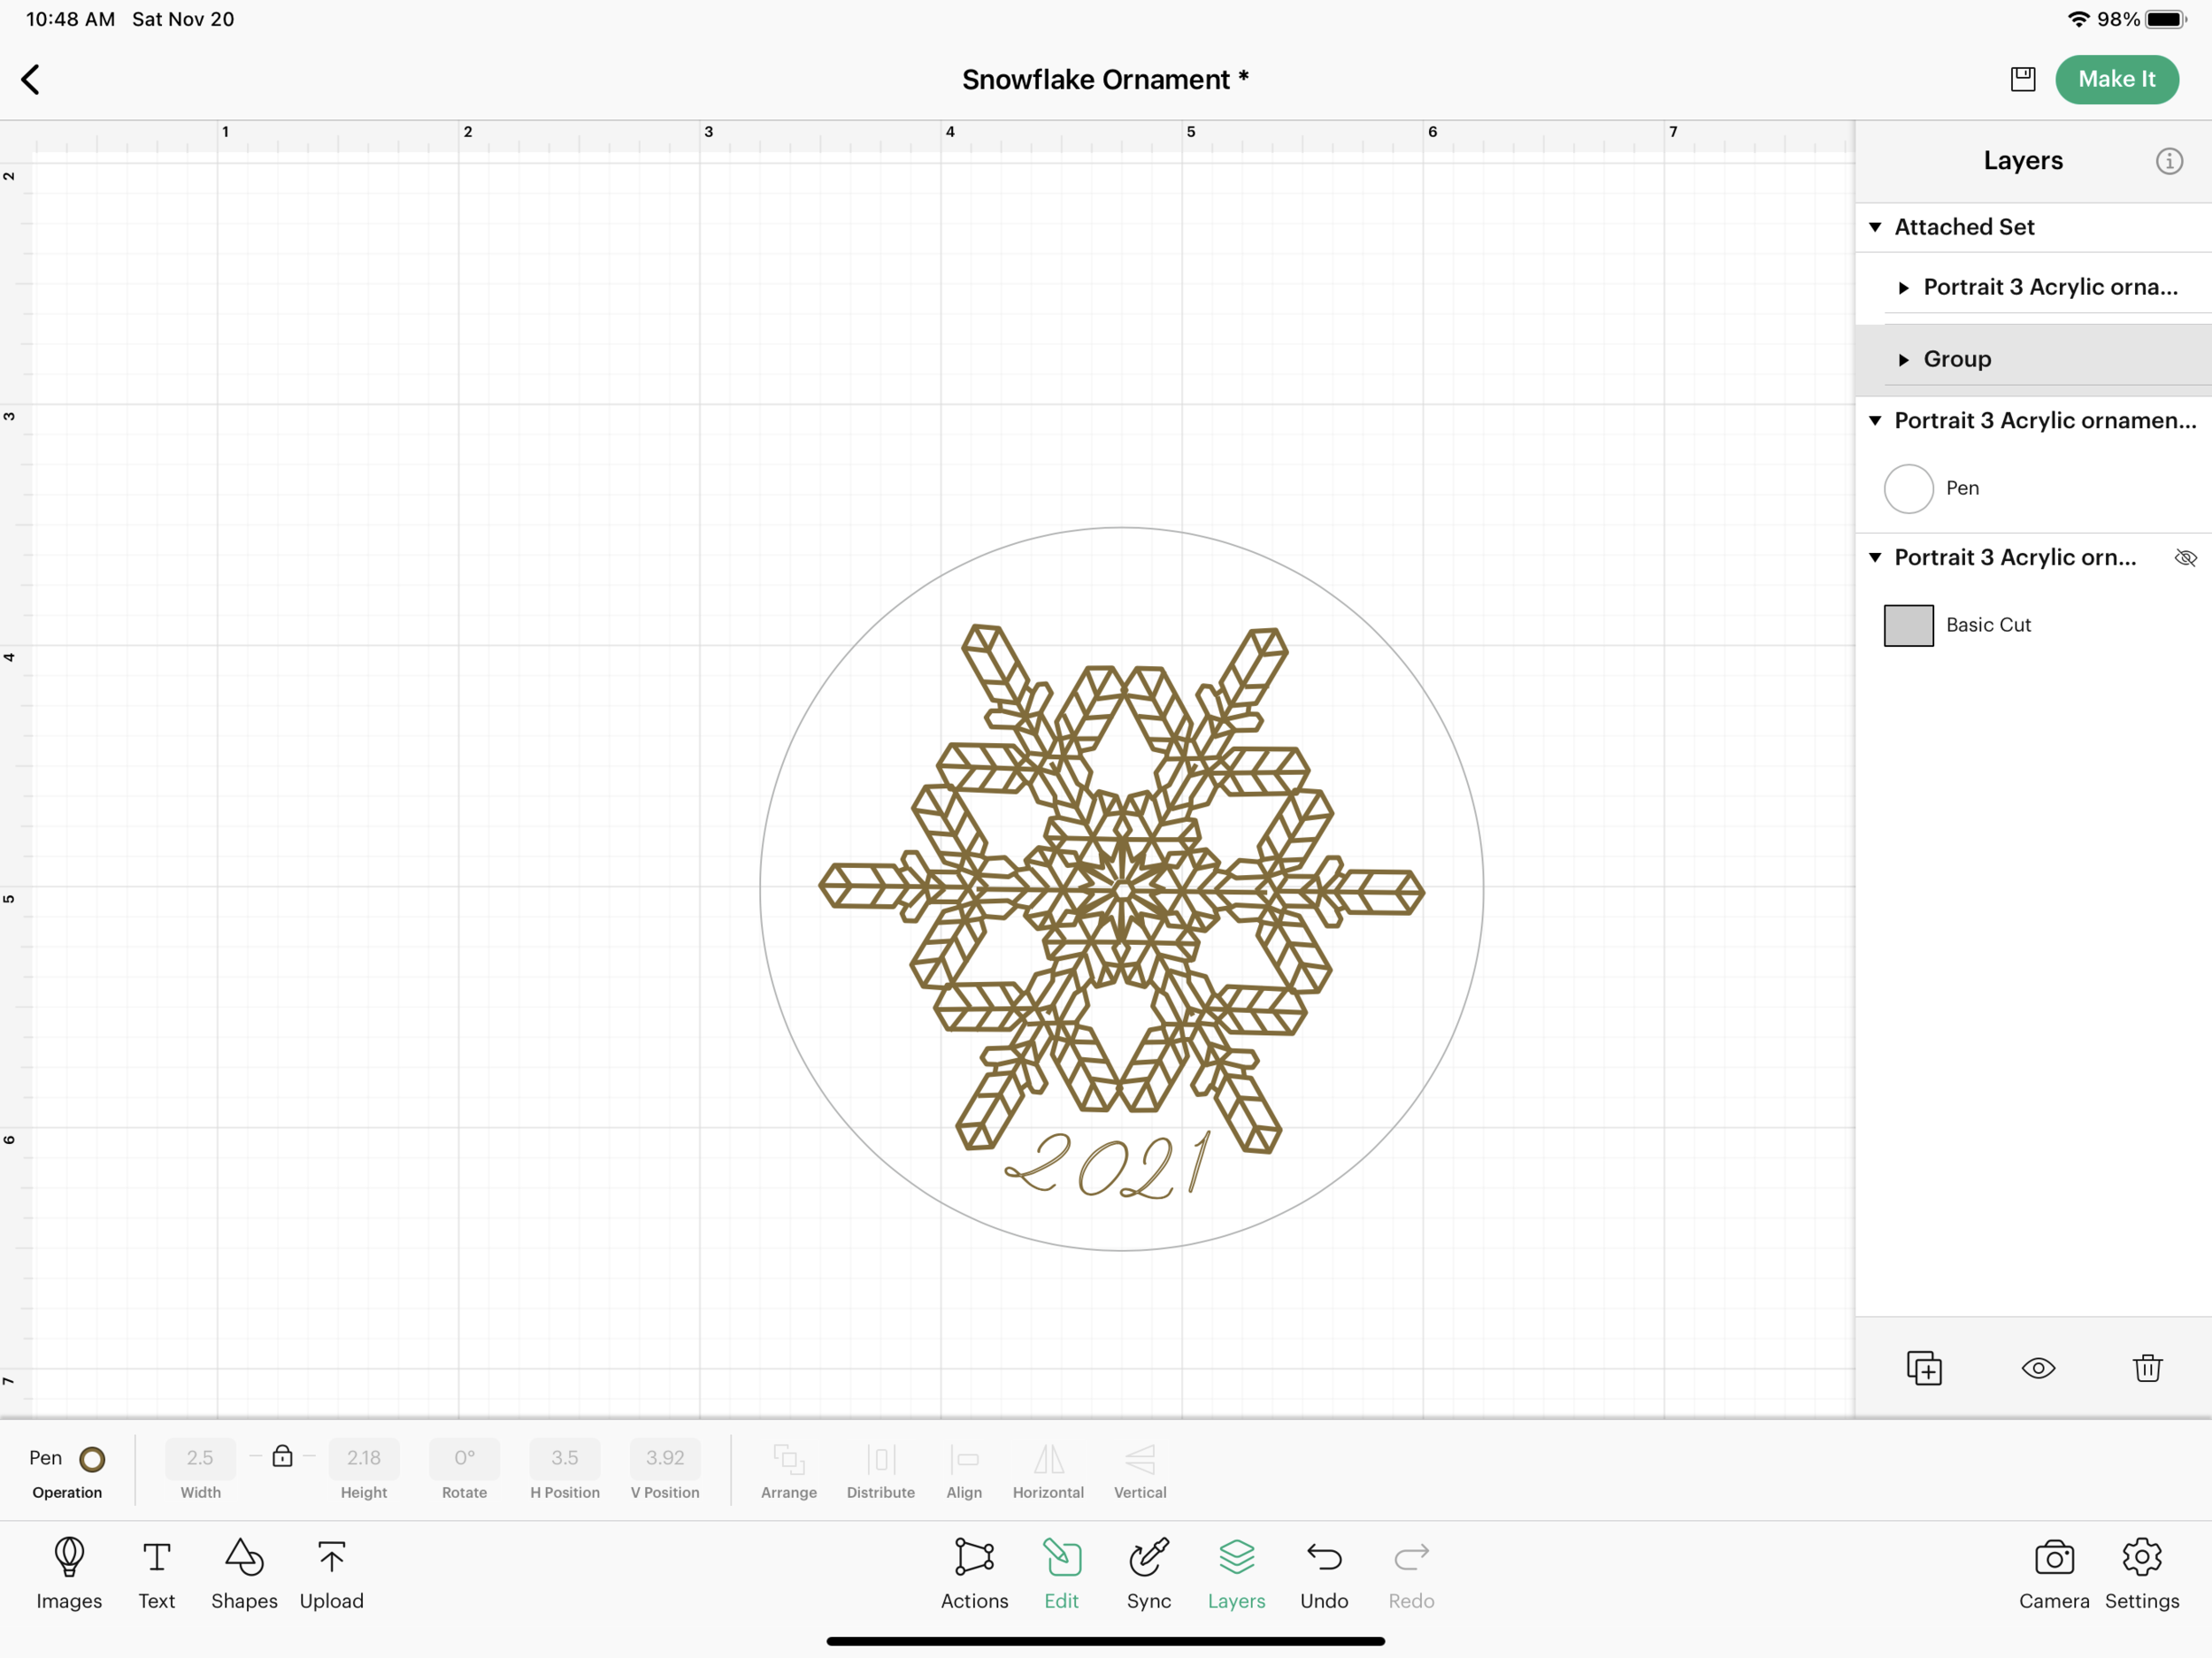
Since I will be using my WRMK Foil Quill and it works as a pen in clamp A, I will be using the Cricut App on my iPad Pro. For some reason the app seems to handle detailed draw files better than the desktop version. I almost always get the “Wow that’s a big project!” yellow bar when I try to use one of my draw files in the desktop version.

After uploading my SVG into Design Space, I change my lines from “Cut” to “Draw.” I’m going to make my snowflake and numbers gold metallic glitter, I’m going to make the circle outline silver glitter. The colors you pick don’t really matter, they just need to be 2 different colors.

Foiling on acrylic with Cricut

I “attach” the gold and silver lines and click on the Make It button in the upper right corner.

As usual, Cricut defaults to placing my artwork in the upper left corner, but I’m going to move it so it’s further down and closer to the middle of my mat. This will help when I need to place the template and foil later.

Foiling on acrylic with Cricut

It’s also a good idea to plug in your foil quill tip while you’re setting up the template on your mat, so it has plenty of time to heat up. I’ve got mine plugged into a small battery pack.

Foiling on acrylic with Cricut

If you plan on making multiples of these all at once, using a template is a good idea. I will be using the same chipboard template from my previous posts to help keep my acrylic disc in place on my cutting mat. So before I start foiling the acrylic discs, I need to align my template on my mat.

To get my template aligned, I’m going to start with a piece of plain paper that’s a little bit smaller than my overall chipboard template. I place it approximately where the artwork is located on my screen.

Foiling on acrylic with Cricut

I’m going to use just the plain black fine tip Cricut pen that cam with my machine. You can you any pen color that you wish, this is just to get the template aligned.

I select “Chipboard 2mm” for my material since this is the closest material thickness to my 2mm acrylic.

Foiling on acrylic with Cricut

I press send and it prompts me to load the Silver pen, which is the circle outline. There doesn’t seem to be any rhyme or reason to which pen color Design Space selects first. I have made this same project previously and it wanted the gold pen first.

Foiling on acrylic with Cricut

I load my mat and press the Go button on my machine. Once it’s finished with the silver pen, it prompts me for the gold pen. My mat is still halfway in the machine (this will be important later when you need to place the foil).

Foiling on acrylic with Cricut

Since I’m just using the black pen, I press the go button and the machine draws the snowflake portion. Once it’s done, DO NOT unload your mat from the machine!!!

Foiling on acrylic with Cricut

Now it’s time to actually place the chipboard template on you mat. Take your template and place it on top of the plain piece of paper, lining up the circle cut out with the circle drawn on the plain piece of paper. Place a piece of tape along the top edge of the template to make a hinge.

Foiling on acrylic with Cricut

Carefully lift up the template and remove the the plain paper from your mat.

Foiling on acrylic with Cricut

Place the template back down on your mat and tape down the other 3 sides. Now you can place the acrylic disc inside the cut out in the template. Don’t forget to remove the plastic film from the side of the acrylic that you will be foiling!!

Foiling on acrylic with Cricut

Now, I’m going to go ahead and tape my foil down over the acrylic since my machine wants to make the circle outline first and once it’s done with the circle, my mat will be stuck in the middle of my machine and I won’t be able to tape my foil down at that point. I’m not going to load my foil quill into clamp A just yet since I don’t want the circle to be foiled..

Foiling on acrylic with Cricut

I press the “Go” button on my machine and let the empty carriage go through the motions of drawing the circle. My machine stops with the mat still in the middle of the machine and prompts me to load the gold pen. This is why I placed the foil on my mat earlier.

Foiling on acrylic with Cricut

I place my foil quill in clamp A. Be careful not to touch the little metal tip, it’s hot!

Foiling on acrylic with Cricut

I press “Go” on my machine again and the foil quill draws the snowflake and the date. Once it’s finished, a little box will pop up in Design Space saying the action is complete, you can click OK.

Foiling on acrylic with Cricut

If you want to make another ornament, DO NOT unload your mat and do not exit Design Space. Just leave this screen showing.

Foiling on acrylic with Cricut

Remove the Foil Quill from clamp A and carefully remove the tape from the foil and remove the acrylic disc from the template. You can also remove the protective film from the back of the acrylic disc.

Foiling on acrylic with Cricut

Now you can place a new acrylic disc in the template, cover it with the foil. Press the “Go” button on the machine and it will start with the circle shape again.

A couple of tips:

  1. Remove the foil quill from Clamp A when your machine wants to draw the circle portion of the artwork.

  2. Don’t unload your mat from the machine! Otherwise you will need to do the whole template alignment again.

  3. You can use a piece of tape to carefully clean up the edges of the foil.

Foiling on acrylic with Cricut

Foil Quill on Acrylic with the Portrait 3

Hi Everyone!

It’s hard to believe it’s already November! This month I’m going to be focusing on projects for the holidays. Today’s project will be acrylic ornaments decorated by using the WRMK foil quill. Let’s get started!

Supplies:

(Links below may be affiliate links)

Silhouette Portrait 3

Standard Grip Mat

Chipboard with 3” circle cutout (optional)

3 inch round 2mm thick acrylic ornament blanks

Medium Tip Foil Quill

Gold Foil heat reactive foil or any foil color of your choice

9-12 inch length of ribbon or twine


Project:

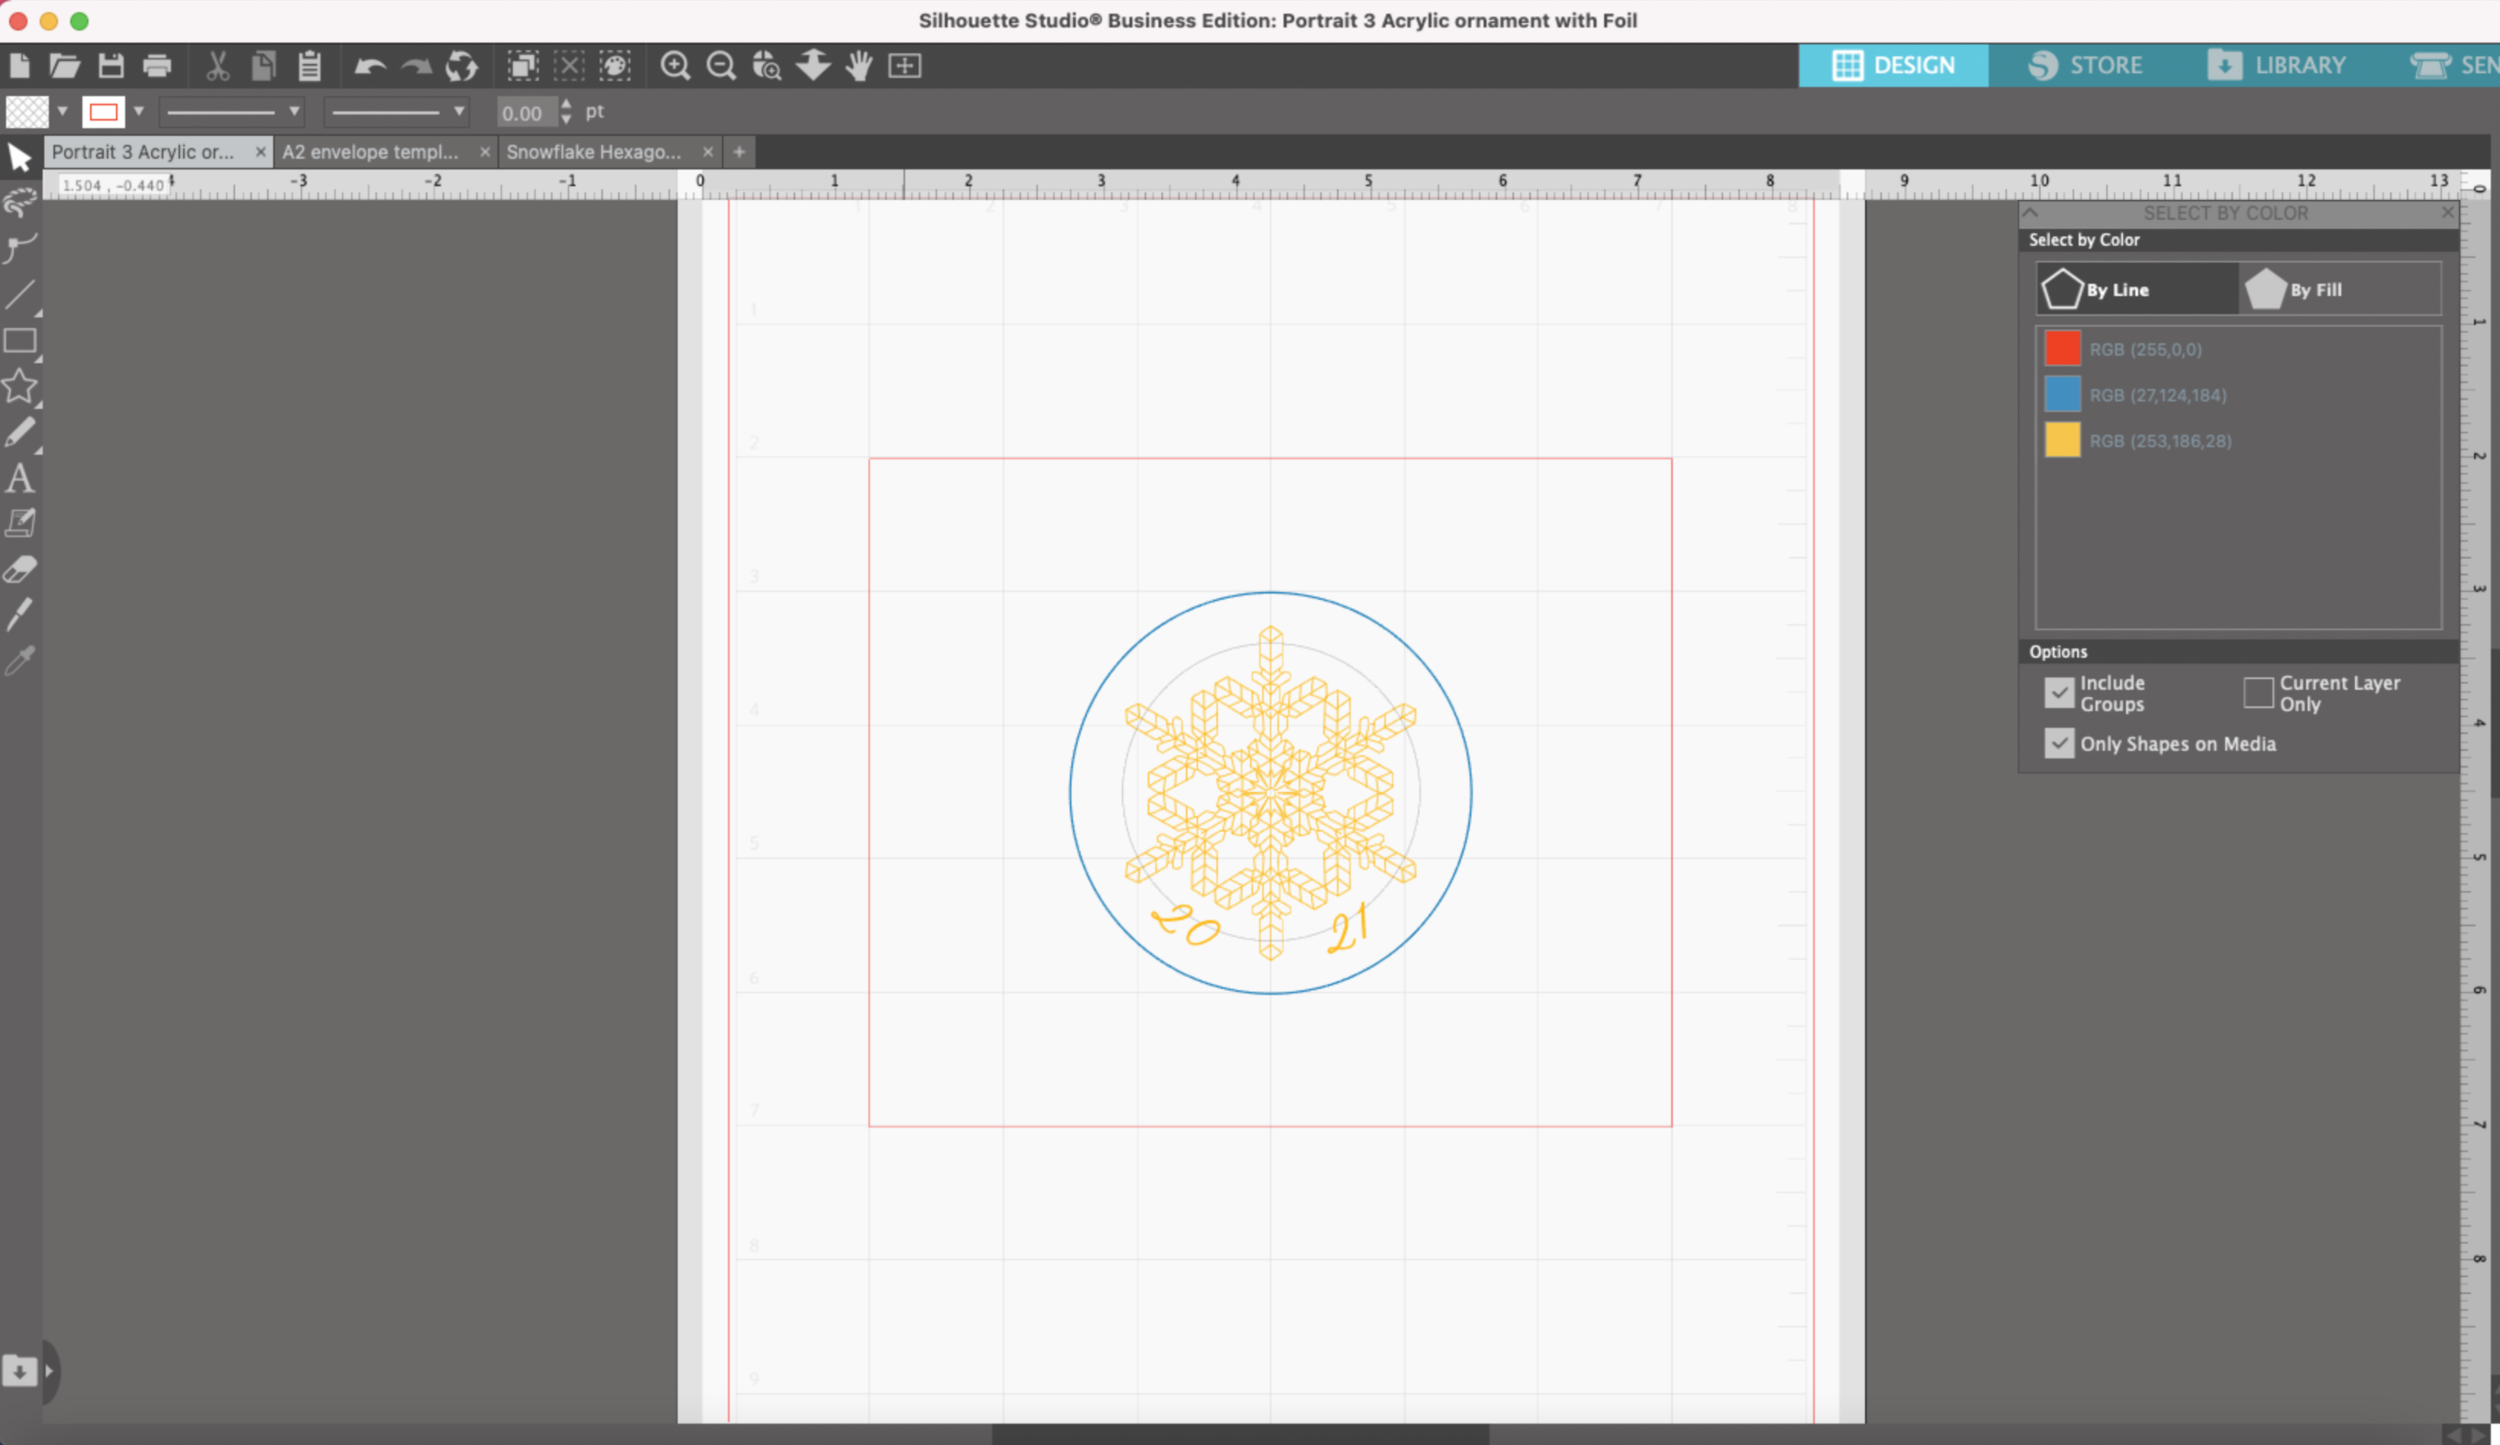
I created a 3 inch circle in Silhouette Studio and I centered one of the snowflakes from my Snowflake Single Line SVGs

I added 2021 at the bottom using the font La Bohemienne.

Artwork set up in Silhouette Studio

I am going to send this to my machine by line color. Everything in Yellow will foiled.

My acrylic blanks are already cut into 3 inch circles, so I won’t need to actually cut them.

I already had a piece of chip board with a 3 inch circle cut out so I will be using that to help align my acrylic pieces on the cutting mat. I have it placed pretty far down on my mat so I can easily remove the foil and the ornament without removing the mat from the machine. (I will create a post later showing you how to make a chip board pattern and how to realign it to use it if over and over again.)

Mat prep for foil quill on acrylic

Plug in your Medium Foil Quill tip so it has time to heat up. I’m using the D adapter that came with the foil quill.

Medium tip foil quill using D adapter

Remove only one side of the clear plastic coating from the acrylic blank - this is the side you will have face up to foil on.

Remove plastic coating from acrylic blank

Place the acrylic blank inside the circle in the chipboard with the side that still has the plastic coating is face down against the mat.

Acrylic blank inside chipboard template

Tape down your foil over the acrylic round, make sure it’s nice and tight. My foil piece is about 4 inches x 4 inches

Tape foil over acrylic blank

In Silhouette Studio, I have just the Yellow line selected. For my material I chose Craft Foam since that’s a thicker material. My Action is Sketch, Tool is Pen, Force of 5, speed 2.

machine settings for foil on acrylic

I load my mat and press send.

After the machine is done, if you plan to make multiples, DO NOT unload the mat.
Carefully remove the foil and ornament from the mat, without taking the mat out of the machine.

I put a piece of metallic twine through the top hole and now you have pretty ornament to give as a gift or use it to jazz up your gift wrapping!

Finished ornament with gold foil on acrylic

The metallic foil sticks really well to the acrylic, the heat from the foil quill kind of melts it into the ornament. It’s so pretty, I can’t wait to try this out with different artwork on different foil colors!

Detail of gold foil on acrylic
Finished ornament gold foil on clear acrylic

Tips for Using the WRMK Fine Tip Foil Quill with the Silhouette Portrait 3

(Links in article below may be affiliate link)

Hi Everyone!

This week I was fulfilling an Etsy order for my snowflake gift tags, I typically make these on my Cricut Maker, but I wanted to try making them on my Silhouette Portrait 3 to see how they turn out.

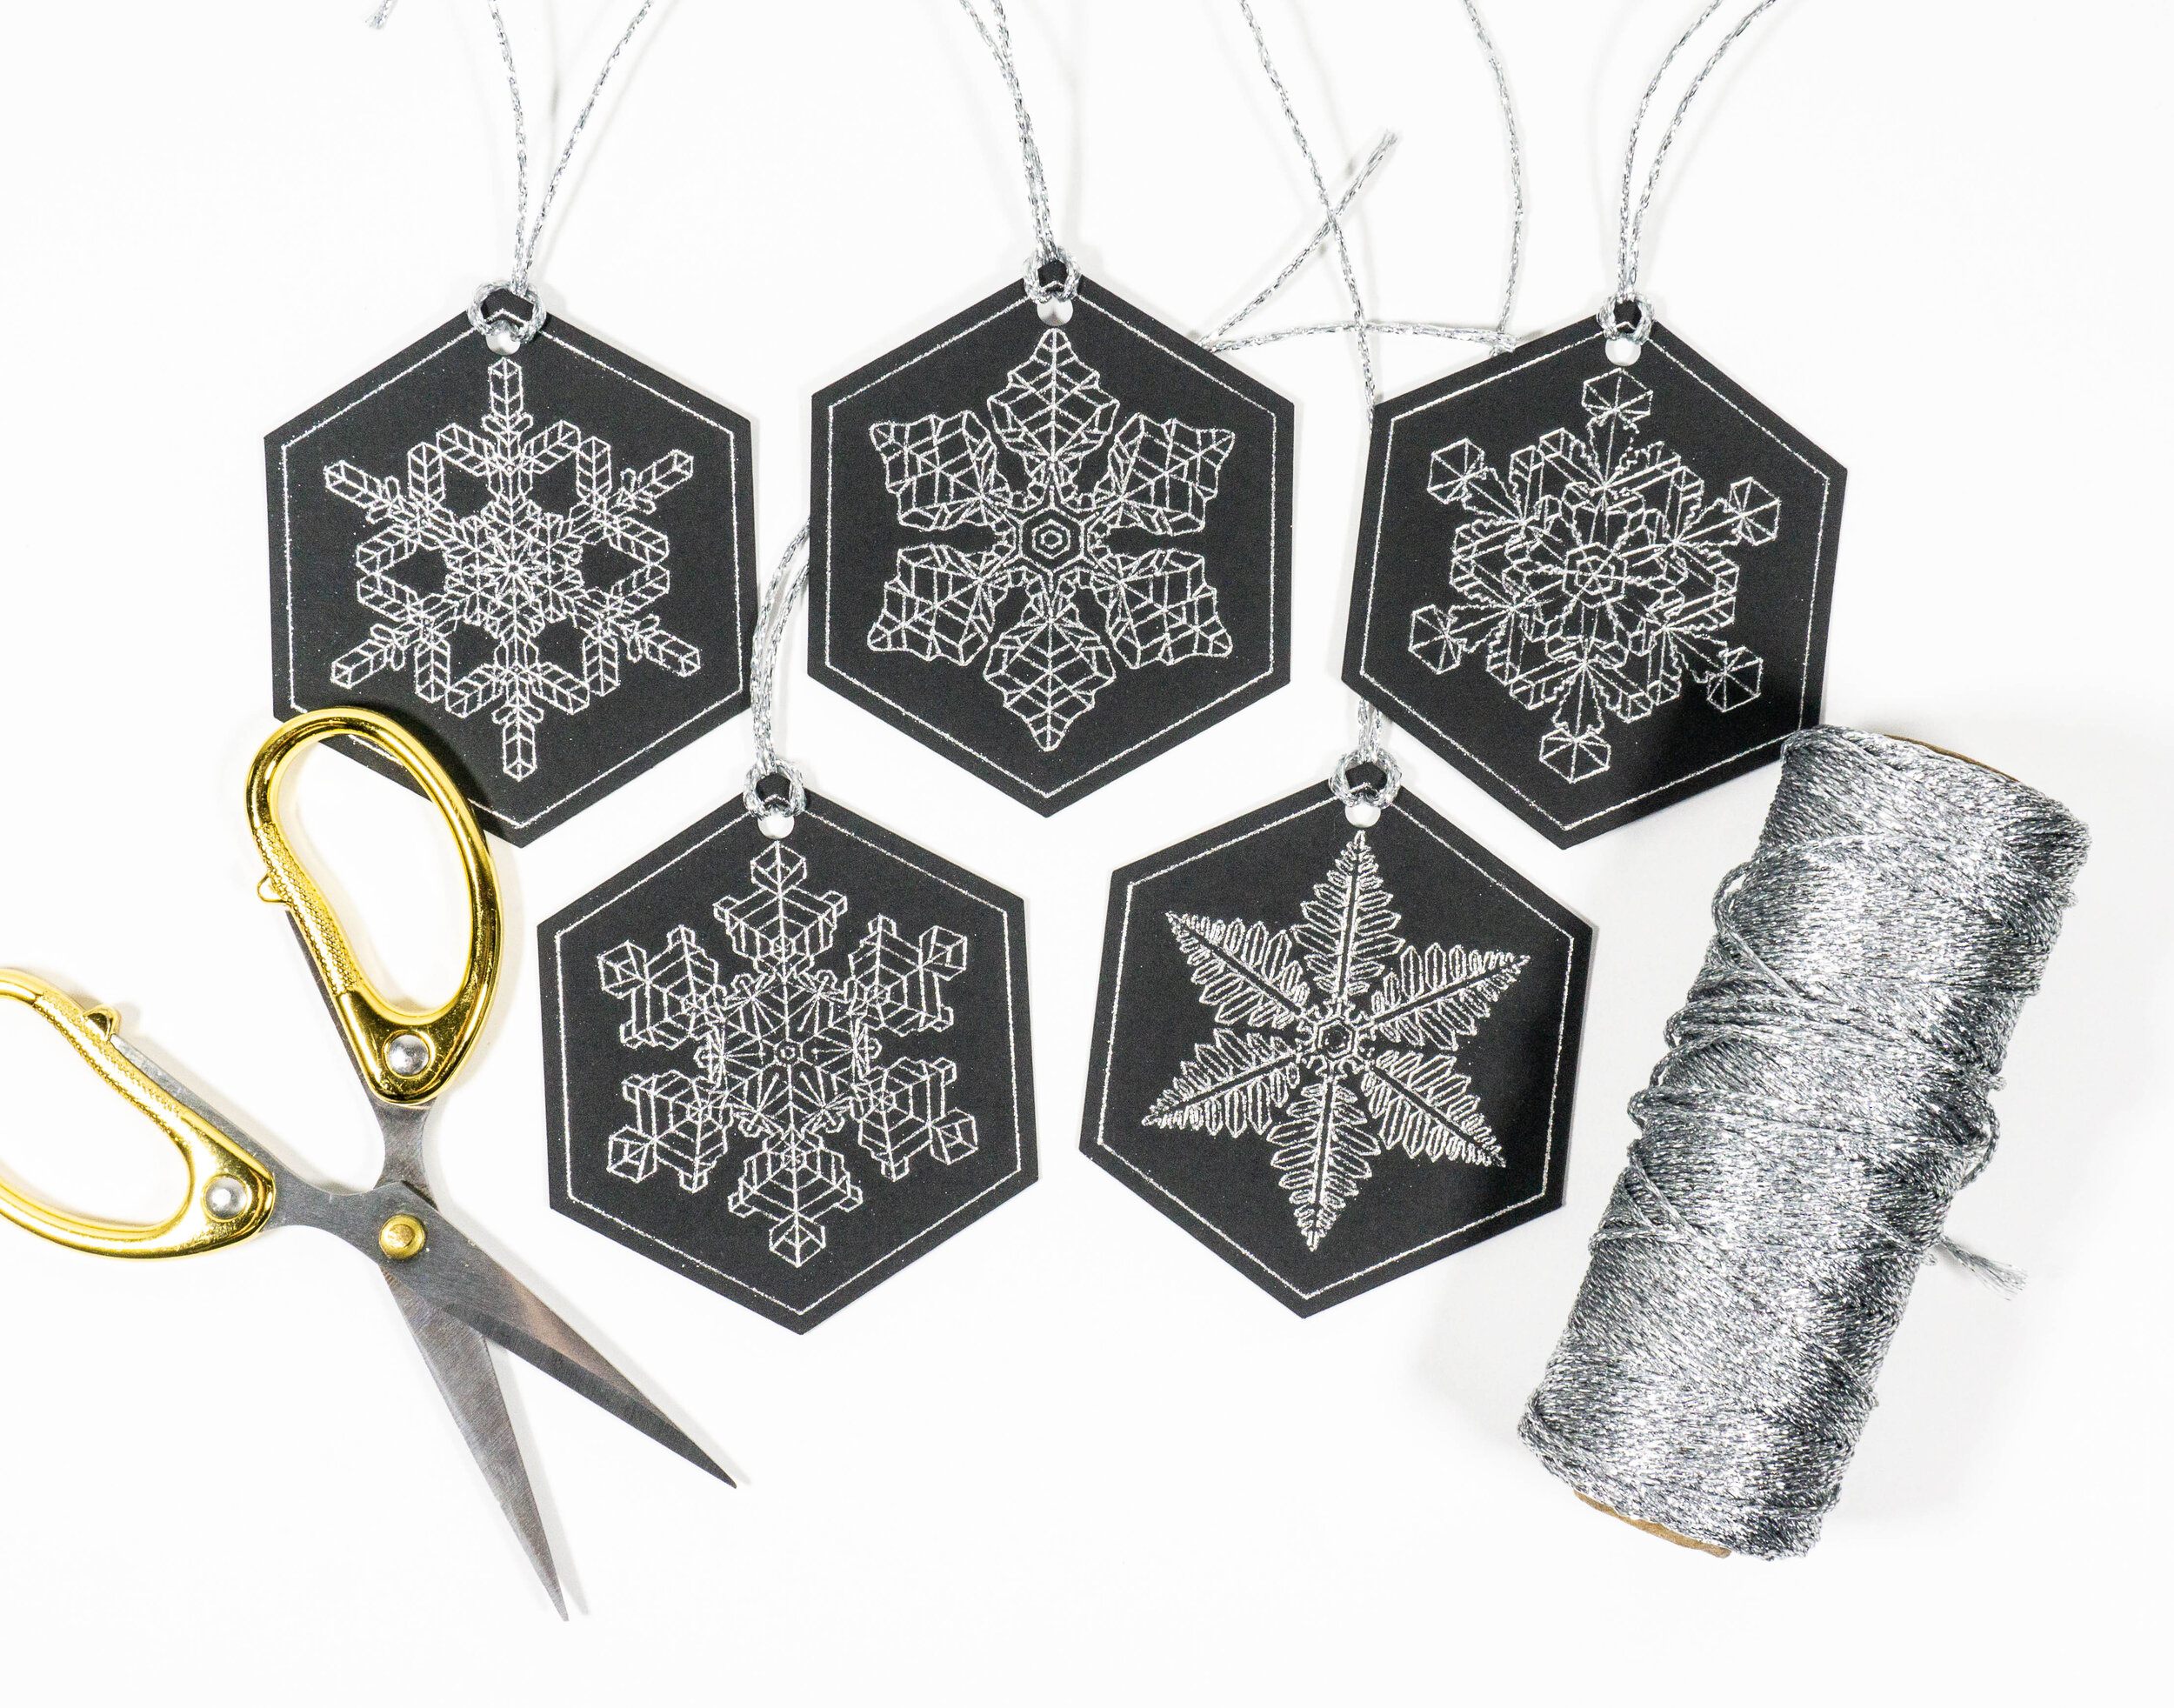
I make these gift tags using my snowflake single line SVGs, heavy 100lb cardstock, the fine tip WRMK Foil Quill, and WRMK foil in gold for the white cardstock and silver for the black cardstock.

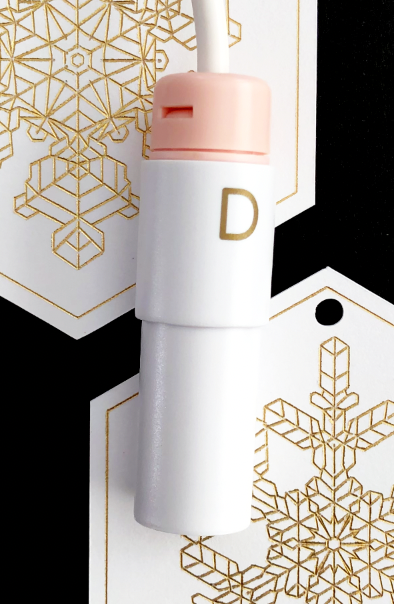
For the Portrait 3 and Cameo 4, the adapter A for the Silhouette machines doesn’t work. So I use the adapter D that came with my foil quill set.

Fine Tip Foil Quill Silhouette Portrait 3

In the Send screen set my Portrait 3 to sketch, Coverstock, Heavy (105-122lb), Force 2, Speed 2.

Fine Tip Foil Quill Silhouette Portrait 3

Initially I started out using an off brand mat with my Portrait 3, they’re a little thicker and stiffer than the Standard Portrait 3 mat.

I load my mat and press Send from the Silhouette software.

Almost immediately my foil starts ripping!!!!

Fine Tip Foil Quill Silhouette Portrait 3

I switch to my Silhouette brand Standard grip mat, it’s thinner and floppier that my off brand mat. I also switch my material to Chipboard, Force 2, Speed 2.

Fine Tip Foil Quill Silhouette Portrait 3

Reload my mat and press Send. This time the foil didn’t rip and the results are beautiful!

Fine Tip Foil Quill Silhouette Portrait 3

So here are my top 6 tips for using the WRMK Fine Tip Foil Quill:

  1. Use the D adapter that comes with the Foil Quill set

  2. Use the Silhouette brand Standard grip mat

  3. Place something like a book or a small box in front of your machine to help keep the mat level while it’s foiling. You want something that is roughly the same thickness as the front of the machine.

  4. Select a material that is thicker than the material you are foiling. For example, I was using heavy cardstock (overstock) so I selected chipboard.

  5. Select a lower force and speed. The default settings for Chipboard were Force 7, Speed 5. I got the best results with Force 2, Speed 2. Your settings will differ depending on the materials you’re using.

  6. Don’t try to foil everything at once. I can typically get 8 gift tags out of one piece of cardstock, but I cut the cardstock down into smaller pieces and foil the smaller pieces instead of one giant piece at once. That way, if something happens while foiling, I’m not wasting an entire piece of cardstock and a big piece of foil.

WRMK Foil Quill & Recollections Foil Transfer Sheets

Links in the article below may be affiliate links.

Hi Everyone! Last week I tested the Recollections brand foil transfer sheets with the Cricut Foil Transfer tool. This week I tried out the foil transfer sheets with the WRMK Foil Quill on my Silhouette Portrait 3 machine.

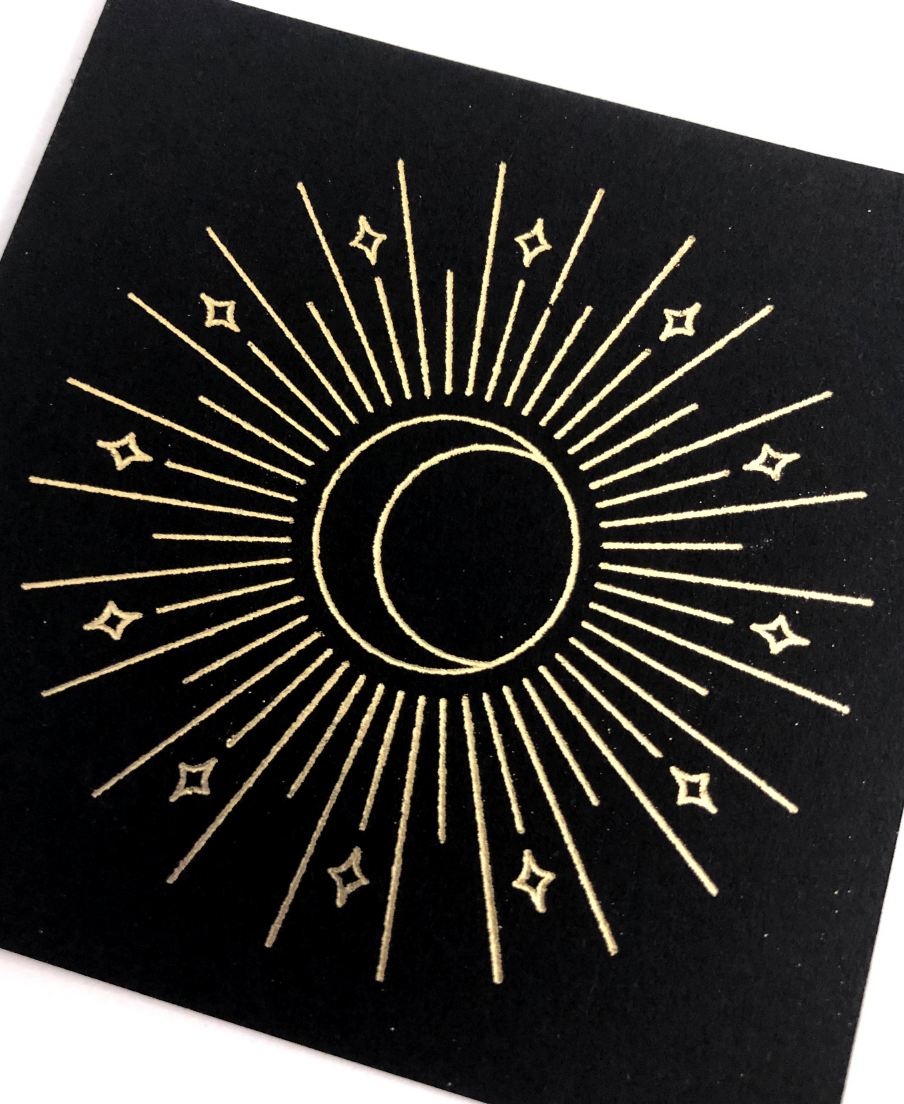
First I tried the gold foil. I used my celestial artwork from last week and the foil quill medium tip on my favorite black cardstock. On my Portrait 3 my speed is set to 2 and force is 22, I typically get good results foiling with these settings. And I got really great results with this foil!

WRMK Foil Quill, Recollections Gold Foil Transfer Sheets

WRMK Foil Quill, Recollections Gold Foil Transfer Sheets

Here it is next to the Cricut Foil Transfer tool version from last week.

(L) WRMK Foil Quill Medium Tip, (R) Cricut Foil TRansfer Tool Medium Tip

(L) WRMK Foil Quill Medium Tip, (R) Cricut Foil TRansfer Tool Medium Tip

Next I tried the holographic foil. The results with the Cricut foil transfer tool were disappointing. But the results with the Foil Quill are beautiful! You can actually see the holographic effect on the on the cardstock.

Here’s a side by side of the holographic foil using Cricut Foil Transfer tool versus the Foil Quill. The Foil Quill version is stunning!

(L) WRMK Foil Quill Medium Tip, (R) Cricut Foil TRansfer Tool Medium Tip

(L) WRMK Foil Quill Medium Tip, (R) Cricut Foil TRansfer Tool Medium Tip

This foil is not labeled as being heat sensitive, but it works perfectly! It’s a really great option if you only need a small amount of foil and don’t want to buy an entire roll.

WRMK Foil Quill, Recollections Holographic Foil Transfer Sheet

WRMK Foil Quill, Recollections Holographic Foil Transfer Sheet

Silhouette Portrait 3 and the WRMK Foil Quill

Links in the article below may be affiliate links.

Hi Everyone! A few months ago I finally crossed over and got a Silhouette Portrait 3, and I love it!! It works like I always thought my Cricut should work.

Last week I tried the Spellbinders Glimmer Foil with the WRMK Foil Quill in my Cricut Maker. The results weren’t great on cardstock, but it looked really nice on my clear sticker paper. So this week, I decided to try it on my Portrait 3 because I can adjust the speed and pressure with the Foil Quill, unlike the Cricut.

I have to use the D adapter for the Foil Quill with the Portrait 3, the usual A adapter for Silhouette doesn’t fit the newer machines.

Use Adapter D for the Silhouette Portrait 3.

Use Adapter D for the Silhouette Portrait 3.

First I tried the regular copper metallic foil on my favorite black cardstock. I’m using the Standard Grip mat with a Force of 22 and Speed 2. It looks fantastic!

Copper Foil, Medium Foil Quill Tip

Copper Foil, Medium Foil Quill Tip

Then I tried the regular gold foil, also on black cardstock. It looks pretty nice, there are a few spots where the foil didn’t stick great, but I might not have had my foil taped down tight enough (very important when foiling).

Gold Foil, Medium Foil Quill Tip

Gold Foil, Medium Foil Quill Tip

Next I tried the Silver iridescent foil with the same Force of 22, Speed 2. It looks sooooooo much better than it did on my Cricut Maker! There are a couple fo spots where the foil didn’t stick so I’m going to try a few more settings.

Iridescent Silver, Medium Foil Quill Tip

Iridescent Silver, Medium Foil Quill Tip

I tried a bunch of different pressures and speeds, but none of them are as good as the Force 22, speed 2.

Iridescent Silver, Medium Tip, different pressures and speeds

Iridescent Silver, Medium Tip, different pressures and speeds

I also tried the gold holographic foil, it did much better on the the Portrait 3 than with my Cricut Maker, but there are still a few spots where it didn’t stick to the cardstock.

Gold Holographic Foil, Medium Foil Quill Tip

Gold Holographic Foil, Medium Foil Quill Tip

Then I wanted to try it on some black vinyl for stickers. It came out pretty good, but there are some gaps in the solid hearts.

Gold Holographic Foil, Medium Tip on Black Adhesive Vinyl

Gold Holographic Foil, Medium Tip on Black Adhesive Vinyl

I changed the fill for the solid hearts from just diagonal lines to a crosshatch fill. Which is SUPER EASY to do in Silhouette Studio, and the results are much better!

Silver Iridescent Foil, Medium Tip on Black Adhesive Vinyl

Silver Iridescent Foil, Medium Tip on Black Adhesive Vinyl

I wanted to try using the Light Grip mat since the backing of the vinyl sticks a lot to the Standard Grip mat. The Light Grip mat is slightly thicker than the Standard Grip and it’s just enough difference that no matter what force I use, it’s too much and it even melted my vinyl.

Silver Iridescent Foil, Medium Tip on Black Adhesive Vinyl using Light Grip Mat

Silver Iridescent Foil, Medium Tip on Black Adhesive Vinyl using Light Grip Mat

So I switched back to the Standard Mat and it works much better! There are still some little gaps where the foil didn’t cover, so I decided to do a test with the Bold Tip Quill to see if it gets better coverage with the filled shapes.

Gold Holographic Foil, Medium Tip using crosshatch fill

Gold Holographic Foil, Medium Tip using crosshatch fill

Yes! The Bold Tip does an even better job with the filled shapes!

Gold Holographic Foil, Bold Tip using crosshatch fill

Gold Holographic Foil, Bold Tip using crosshatch fill

Silver Iridescent Foil, Bold Tip using crosshatch fill

Silver Iridescent Foil, Bold Tip using crosshatch fill

One final test with the Bold Tip on cardstock. I ended up having to switch my mat to the Light grip mat, I wasn't getting enough pressure with the Standard mat. The Bold Tip gives a really nice flat fill, but I think I like the Medium tip better for lettering.
Gold Holographic Foil, Medium Tip using crosshatch fill, Light Grip Mat

Gold Holographic Foil, Medium Tip using crosshatch fill, Light Grip Mat

An important lesson learned this week is that the cutting mat can have a really big impact on the outcome of the project!

Silver Iridescent Foil, Bold Tip using crosshatch fill. Top is using the Light Grip Mat. Bottom is using the Standard Grip Mat.

Silver Iridescent Foil, Bold Tip using crosshatch fill. Top is using the Light Grip Mat. Bottom is using the Standard Grip Mat.

Spellbinders Glimmer Foil with the WRMK Foil Quill

Links in the article below may be affiliate links.

Hi Everyone! Last week I tried out the Spellbinders Glimmer foils with the Cricut Foil Transfer tool and my Cricut Maker, and I got some pretty decent results. This week I want to try the foils with my WRMK Foil Quills since they are actually intended to be hot foils. So here we go!

I am most excited to try the holographic foils. They transferred okay with the Cricut Foil Transfer tool, but the holographic effects were kind of lost.

I started out with the gold glittery foil on my heavy white cardstock with the medium foil quill. There are some little spots where the foil didn't transfer completely, especially in my filled shapes. But you can see the glittery effect much more that you could with the foil transfer tool.

Spellbinders Holographic Foil with Foil Quill

I tried it out again on black cardstock with some different single line drawings. Again, some spots where it didn’t completely. The holographic effect was also not as noticeable on the black cardstock. So overall, the gold holographic glitter didn’t do great on cardstock.

Spellbinders Holographic Foil with Foil Quill

Next I tried the silver holographic foil on black cardstock. Also, some spots where it didn’t transfer completely, especially in the filled shapes. But you can see the iridescent effect, especially when you hold the card at an angle. It’s really difficult to capture in a photo, but the iridescence is there!

Spellbinders Holographic Foil with Foil Quill

Then I tried the regular metallics. First, the copper on black cardstock, still with the medium tip. It transferred BEAUTIFULLY!!

Screen Shot 2021-06-13 at 10.54.11 AM.png

After that I tried the gold on my heavy white cardstock. It also worked beautifully!

Screen Shot 2021-06-13 at 10.56.19 AM.png

I decided to give the holographic foils one last shot on some glossy clear sticker paper. First, I tried the gold holographic glitter with the medium tip. It transferred REALLY well to the sticker paper, and you can see sparkly holgraphic effect. (again, super difficult to photograph, but it looks really good in person).

Spellbinders Holographic Foil with Foil Quill

Finally, my personal favorite, the silver holographic foil on the clear sticker paper. It is so pretty and transferred perfectly.

Spellbinders Holographic Foil with Foil Quill

Overall, the holographic foils didn’t work great on cardstock, but they are gorgeous on my clear sticker paper. The regular metallics worked really well on cardstock, I didn’t test them on the sticker paper, but I imagine they would work great on that as well.

I’m really excited to try these foils with my Silhouette Portrait 3 machine where I can actually adjust the speed and pressure for the foil quill. I will post about that next week!