portrait 3 matless cutting

3D Cardstock Snowflakes

Hi Everyone! It’s almost the end of 2021, this year has flown by! I’ve been spending the past couple of weeks planning new projects and files to share on my website and Etsy shop. Christmas may be over, but it’s still winter in some parts of the world, so I thought I would share part of a project I’ve been working on. It’s a pretty simple one you can do on a snowy afternoon!

Supplies:

(links below may be affiliate links)

Cutting machine (I will be using my Portrait 3, but you can also use a Cricut or other cutting machine)

Light Grip cutting mat

Snowflake cut file (You can download the one I’m using here for free)

Lightweight cardstock (I’m using foil cardstock, 2 different colors)

Glue stick or tape runner

Ribbon, twine or fishing line to hang the snowflakes

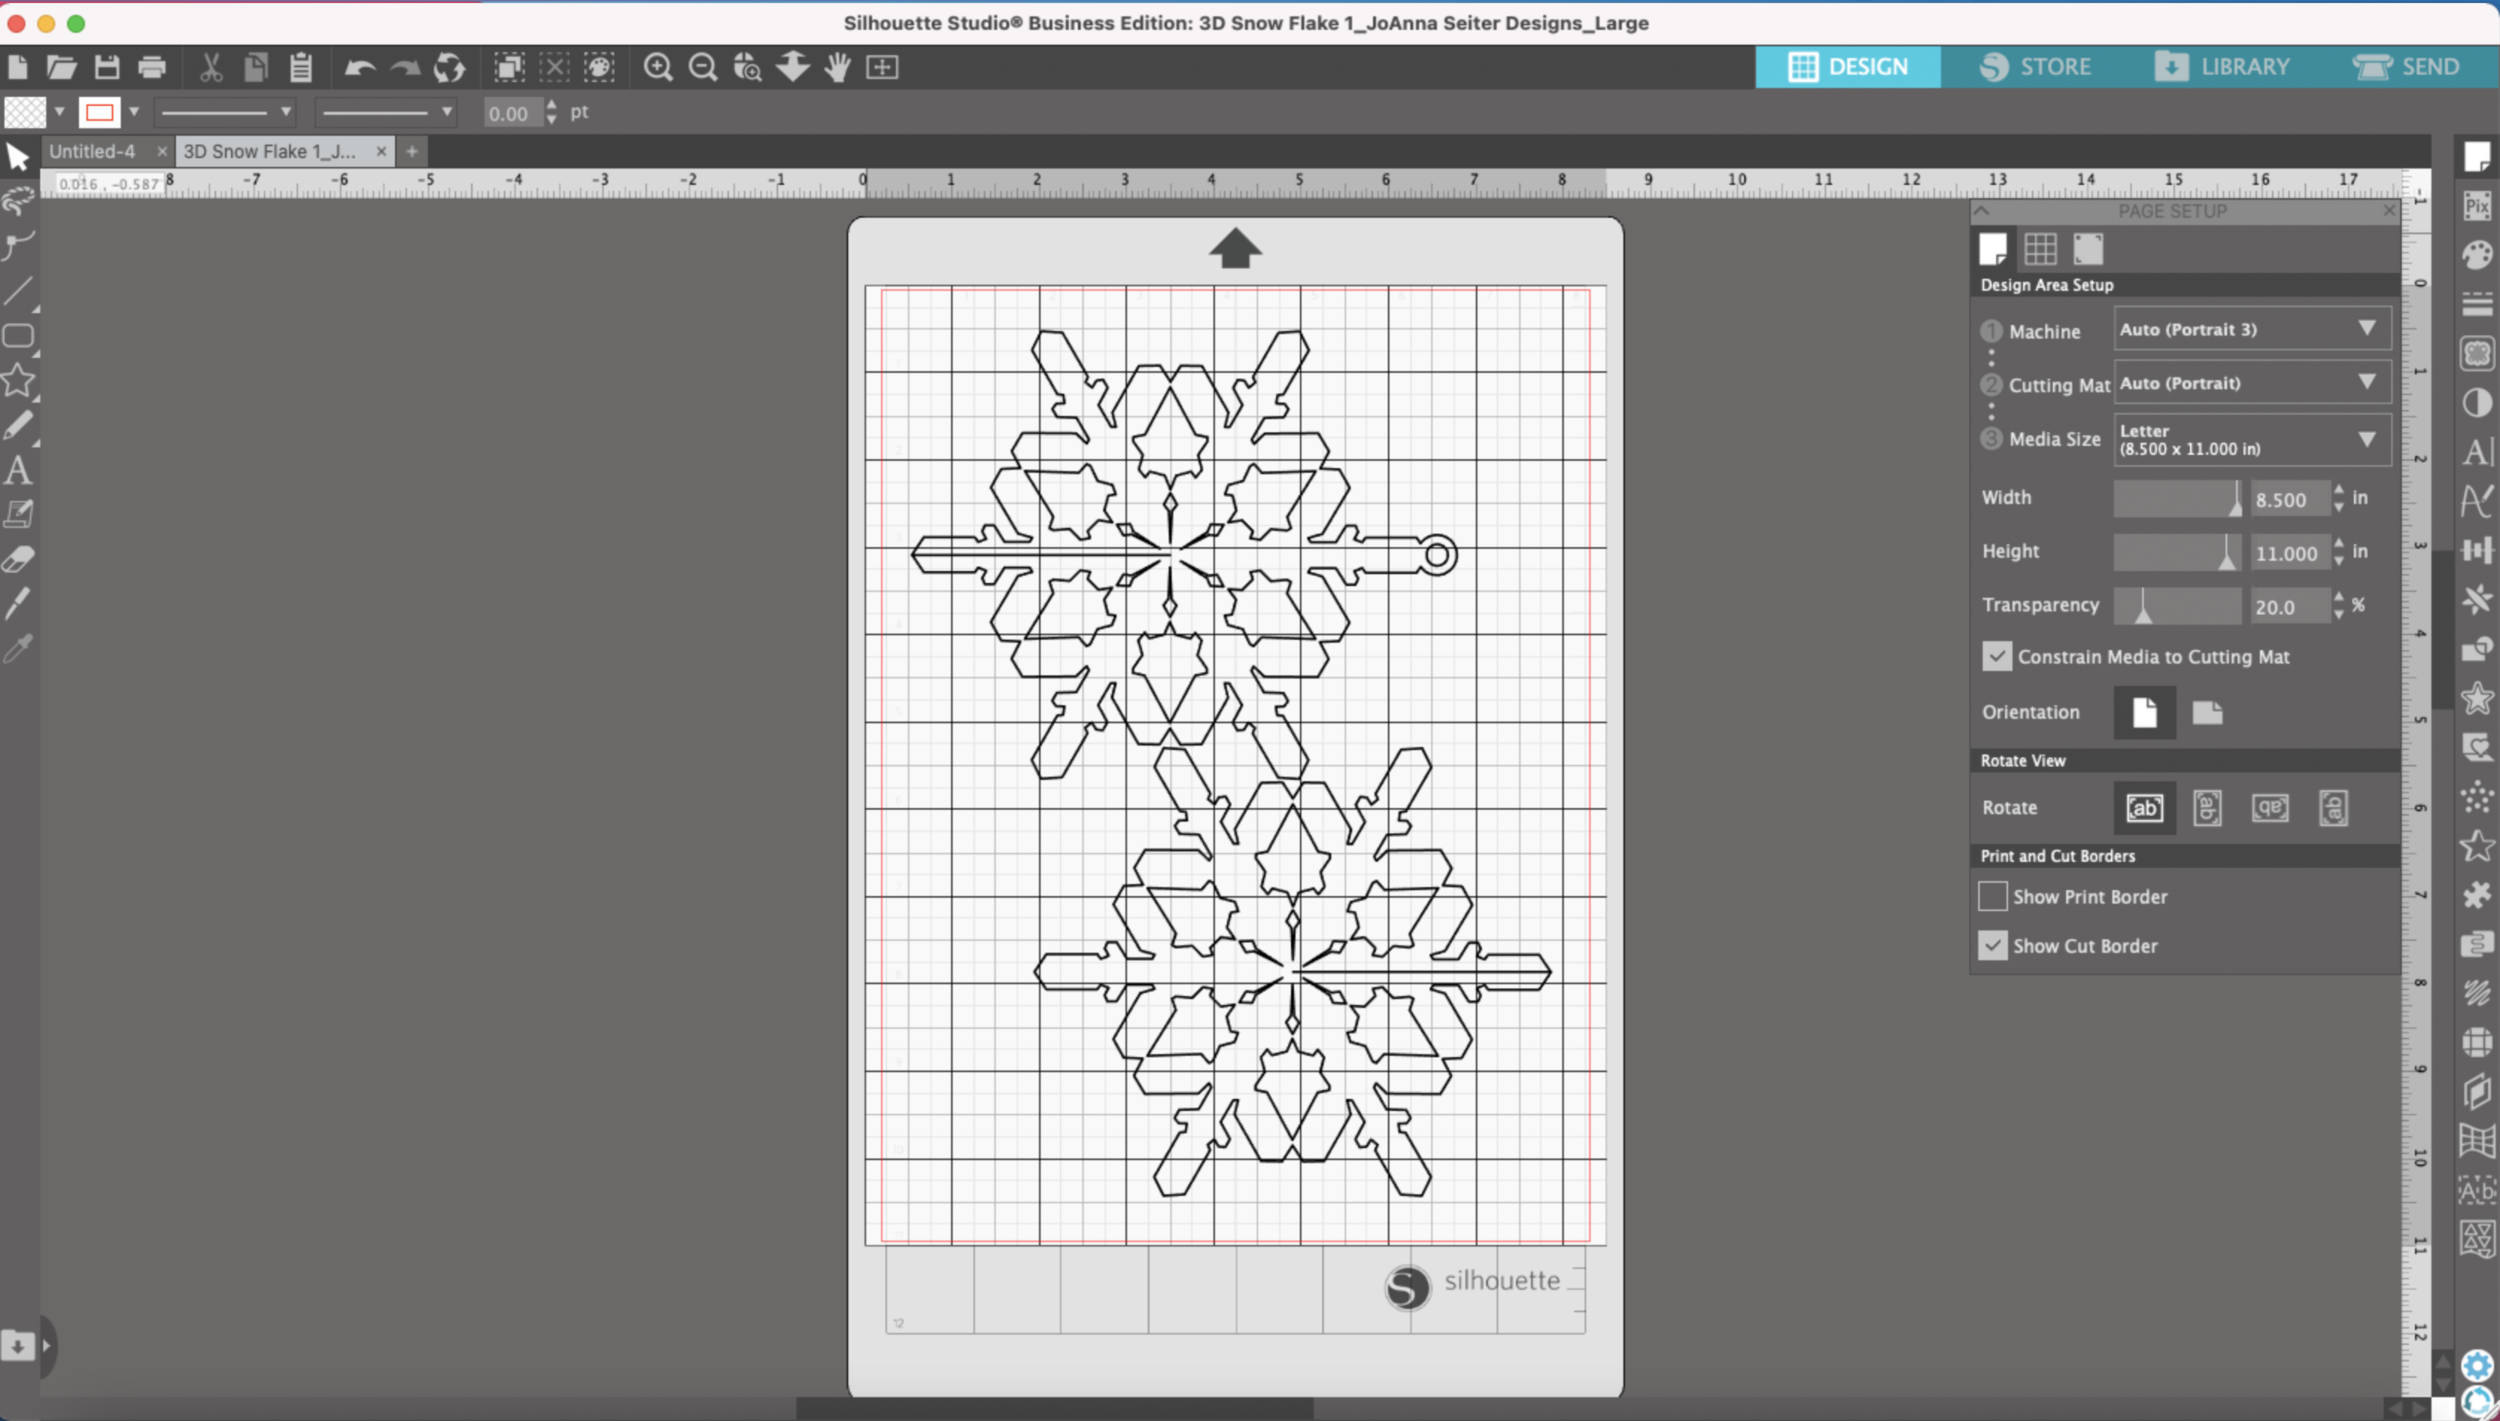
First open the SVG file in Silhouette Studio and adjust the size of the snowflake to your liking and will fit to your materials. Since I’m using two different colors of cardstock, I’m making my snowflakes pretty large.

I have one snowflake with a hole added at the top for hanging and one snowflake without the hole at the top.

3D Snowflake SVG Cut file

I’m using my light grip cutting mat. I initially tried to do the matless, but the angles are a little too tight to get a nice pop out cut.

3D Snowflake SVG Cut file

My foil cardstock feels a little heavier than my regular 65lb cardstock and the lightweight cardstock settings didn’t cut all the way through with my test cut. I got the best cut results using the Heavy Coverstock settings. The settings you see are for my CB09 blade since my auto blade is a little too dull to cut cardstock. You can use the default auto blade settings for Heavy Coverstock if you are using your auto blade.

3D Snowflake SVG Cut file

I cut one color first, then I cut the same shapes from the 2nd color.

3D Snowflake SVG Cut file

Next, I’m going to glue my pieces together, I’m using my tape runner, but you could also use a glue stick. I’m going to glue the two pieces with the hole at the top together. Then I’m going to glue the two pieces without the hole in the top together. Make sure the slit lines match up on the two pieces without the hole in the top.

3D Snowflake SVG Cut file

Then I’m going to slide the two pieces together along the slits until they meet in the middle.

3D Snowflake SVG Cut file

Now you can add ribbon, twine, or fishing line through the hole at the top to hang your snowflake!

3D Snowflake SVG Cut file

Portrait 3 Print and Cut Gift Labels

Hi Everyone! Only a few more days until Christmas and I’ve still got quite a bit of gift wrapping to do! I always seem to run out of the little sticker gift tags very quickly. So this week I’m going to share a quick way to make your own using my Portrait 3 and the Print and Cut feature.

To do this project you will need the following: (links below may be affiliate links)

Some clip art (you can download my snowflake here for free)

Printable Sticker Paper (I’m using this one from Online labels)

Inkjet or laser printer

Silhouette Portrait 3

Autoblade

I’m going to open Silhouette Studio and create a new file. I’m using the business version, yours may look slightly different if you do not have the business version.

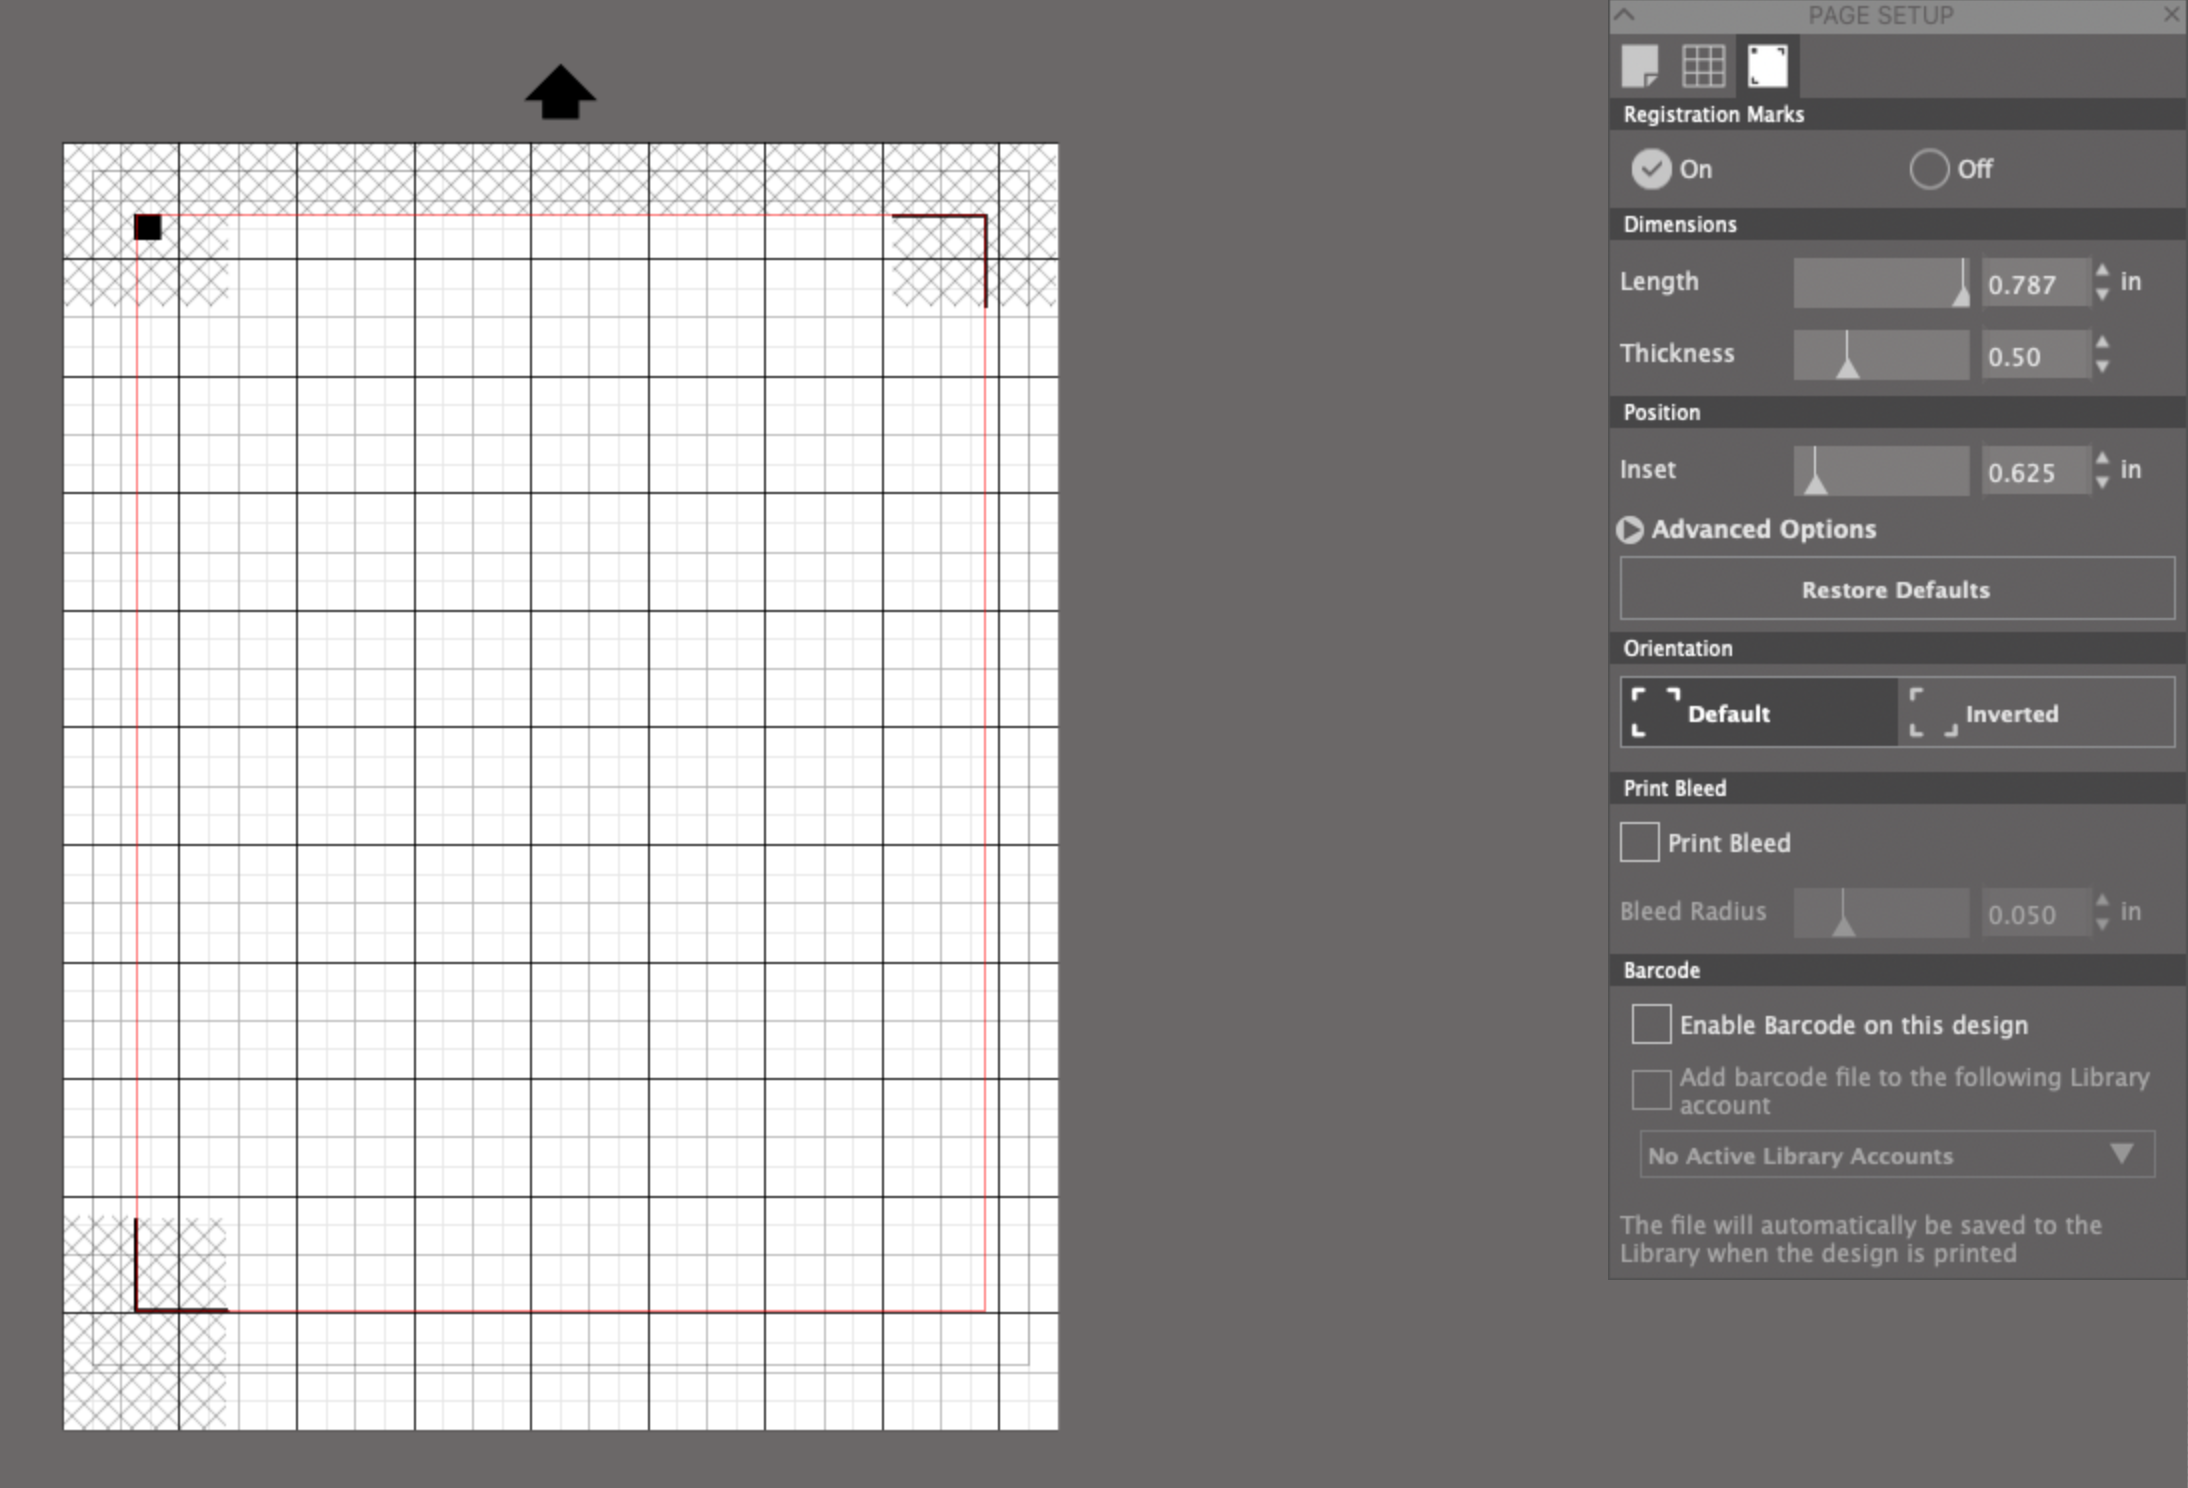
I turn on the registration marks so I know where to place my artwork and these will also be printed to the machine knows where to cut.

Print and Cut stickers portrait 3

I’m going to do these matless (I love being able to cut stickers matless!) So under the Design area menu my Cutting Mat will be set to None. My Media size is Letter 8.5 x 11.

Print and Cut stickers portrait 3

I load my snowflake PNG file (it’s pretty big when I first bring it in) and I scale it down to about 2 inches. You can scale it to whatever size you wish. I’m also going to change the red lines around the snowflake to transparent so they don’t print later.

Print and Cut stickers portrait 3

Then I’m going to create an offset around the outside of the snowflake, this will be my cut line. I make my offset 0.125 inches from the edge of the snowflake.

Print and Cut stickers portrait 3

Next, I’m going to make a rounded rectangle so I can add a To and From area onto my label. I make my rectangle approximately 2 inches wide by 0.75 inches tall.

Print and Cut stickers portrait 3

The I’m going to Weld my rectangle and the offset cutline together so I have one continuous shape to cut.

Print and Cut stickers portrait 3

I add the To and From text in the rectangle area. I’m using the Lucida Grande font at 10pt. You can use whatever font you prefer.

Print and Cut stickers portrait 3

I’m going to group everything together and now my label is ready to be duplicated. I can fit 9 of these labels within the print and cut area. Make sure your artwork is NOT falling into the grey mesh areas too much, it can mess with the machine when it’s trying to scan the registration lines.

Print and Cut stickers portrait 3

Now it’s time to print my labels! First, I tried printing directly from Silhouette Studio and I got some glitchy lines in the To and From letters. So instead of printing directly from Silhouette Studio, I’m going to save my design as a PDF and print from Photoshop.

Print and Cut stickers portrait 3 glitch

To save your file as a PDF from Silhouette Studio, click on the printer icon. Then in the bottom left corner, click on the dropdown menu and select Save as PDF. Name your file and save it to where ever you want on your computer.

Print and Cut stickers portrait 3 save as PDF

Open the PDF that you just saved in Photoshop, or other application the can print PDFs if your don’t have Photoshop. Make sure you DO NOT scale the file when you print it. Now everything looks like it’s supposed to!

Print and Cut stickers portrait 3

Back in Silhouette Studio, I’m going to the Send tab and I always like to cut my files by Line color. My cut lines are red, so I make sure the box is checked next to the red square. I want my stickers to be kiss cut so my setting are as follows - Material is Sticker Paper, White; Blade depth: 2; Force: 14; Speed: 3.

Print and Cut stickers portrait 3

I load my printed sticker paper with out the mat and press Send in Silhouette Studio.

Matless kiss cut stickers Silhouette Portrait 3

My machine scans the registration marks and starts cutting. Once it’s finished I have a set of little snowflake gift labels to help me finish my gift wrapping!

Kiss cut stickers Silhouette Portrait 3

Embossing with Glue Pens and Silhouette Portrait 3

Hi Everyone!

This week I want to share another technique I like to use to embellish gift tags and cards. I will be using the WRMK glue quill with embossing powder. If you buy the glue quill set, it comes with 2 small jars of embossing powder. Or if you already have some embossing powder on hand, you can use that too.

I’m going to do this technique with a clear embossing powder that I already have and the gold powder that came with the glue quill set. I will also need my heat gun.

I already set up my file in Silhouette Studio, my blue lines will be drawn with the glue pen & the red lines will be cut. I’m using 65lb Recollections cardstock, and I will be drawing and cutting all of this matless, yay!!

Portrait 3 embossing with glue pen

First, I will draw all the lettering with the glue quill and the Silhouette pen adapter. When I open the send tab I select “Line" and check the box next to the blue square.

Portrait 3 embossing with glue pen

After it’s done drawing, I uncheck the blue box & select the red box to cut. I choose auto-pop out since I’m doing a matless cut.

Portrait 3 embossing with glue pen

I did need to send my cut through twice, it wasn’t quite deep enough to pop out the tags nicely after the first cut.

I remove my tags from the cardstock & now i’m going to apply the embossing powder. The glue from these pens stays tacky for a little while, so don’t worry if the glue looks dry, the powder will still stick.

I’m using an old jar of Recollections clear embossing powder, I’ve had it for a few years and it still works! I apply the powder pretty thick and move it around so all of the glue gets covered. I dump the excess powder back in the jar once I’m done applying it to all the tags.

(Top) Clear Powder applied, (Middle) Clear Powder being applied, (Bottom) No powder applied, only glue

(Top) Clear Powder applied, (Middle) Clear Powder being applied, (Bottom) No powder applied, only glue

I apply some heat to it with my heat gun. The powder melts and I’m left with almost like a clear gel-like finish. It’s raised and also very shiny.

Portrait 3 embossing with glue pen

Next I tried the gold powder that came with the Glue Quill set. I applied it the same way as the clear powder. This one is kind of disappointing. I was expecting a pretty metallic gold, but this one is very drab and not metallic at all. I will be on the look out for a better gold embossing powder.

Portrait 3 embossing with glue pen

But this is another way to add some texture and dimension to gift tags or cards using your Silhouette machine!

Portrait 3 embossing with glue pen

Silhouette Portrait 3 Matless Drawing & Cutting

Hi Everyone! This week I’m going to combine two of my favorite functions on my Silhouette Portrait 3, matless drawing and matless cutting. I’m going to be using some heavy cardstock and my gold Sakura Gelly Roll Pen to make some little Thank You tags.

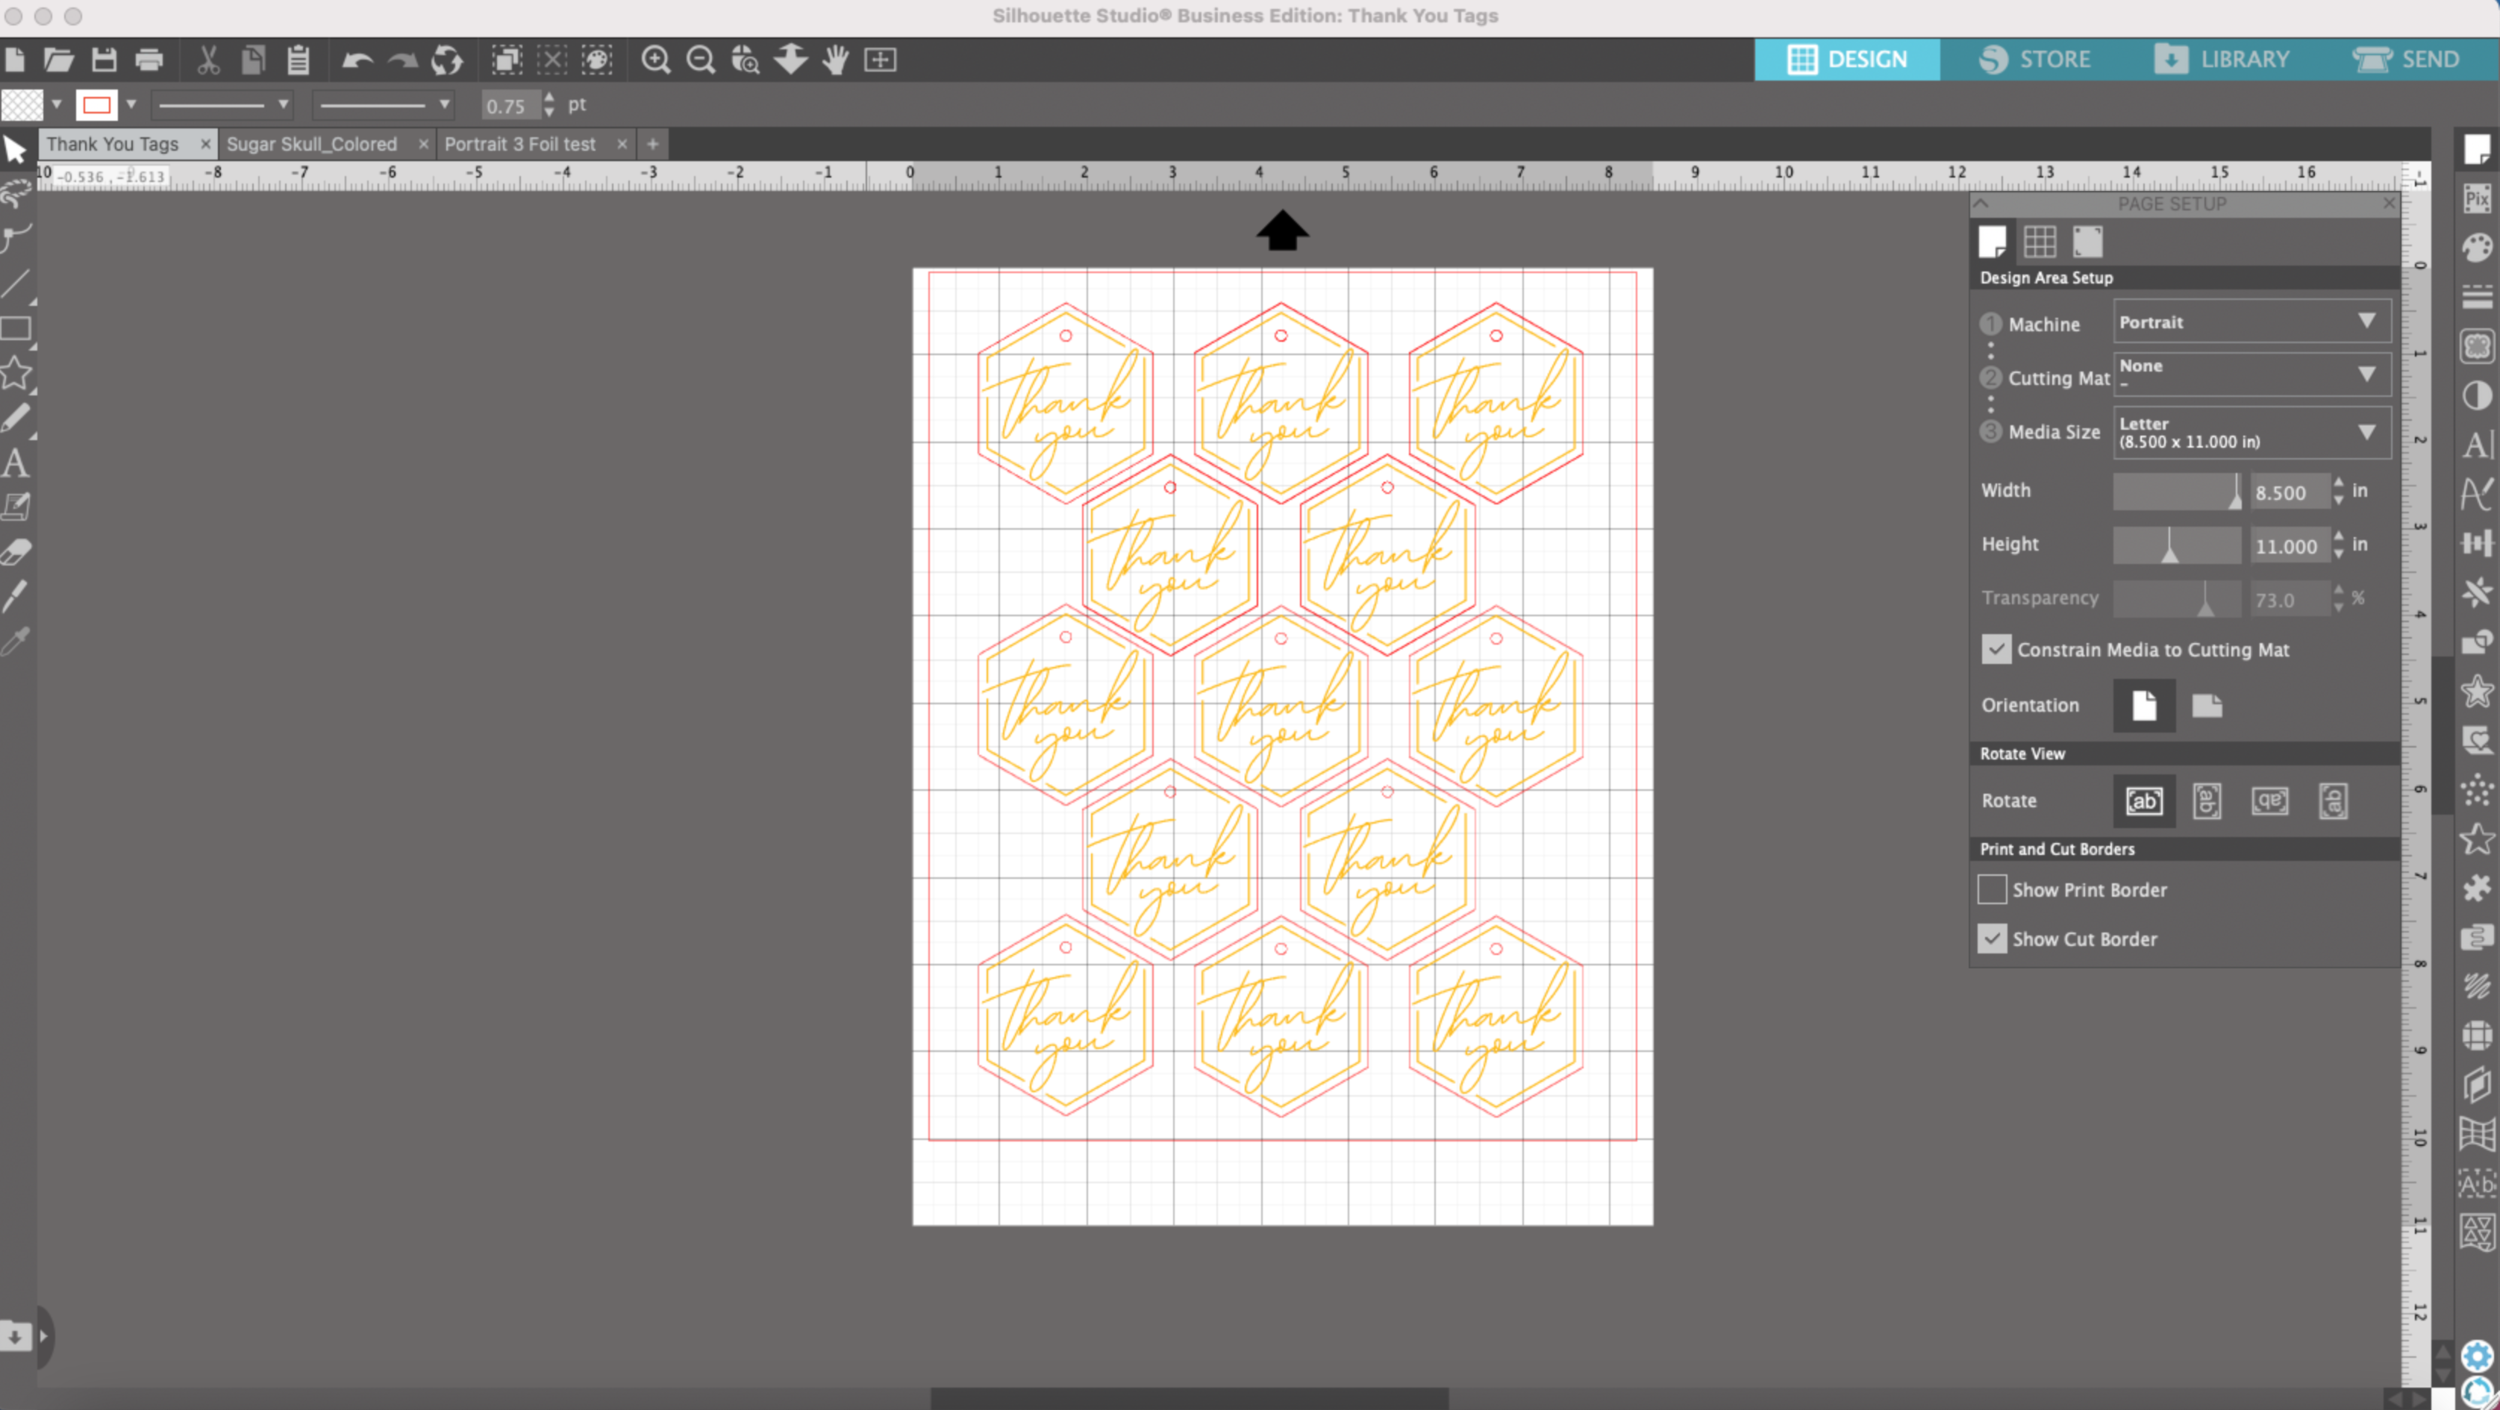
I already set up my file to be matless and made sure all of my artwork is within the red boundary. I made the little tag shapes in Silhouette Studio and I am using my Thank You script that you may have seen me use before in some of my foil tests. The Thank You and the border will be drawn with my gold pen and then the tags will be cut out after the drawing portion.

Portrait 3 matless drawing and cutting

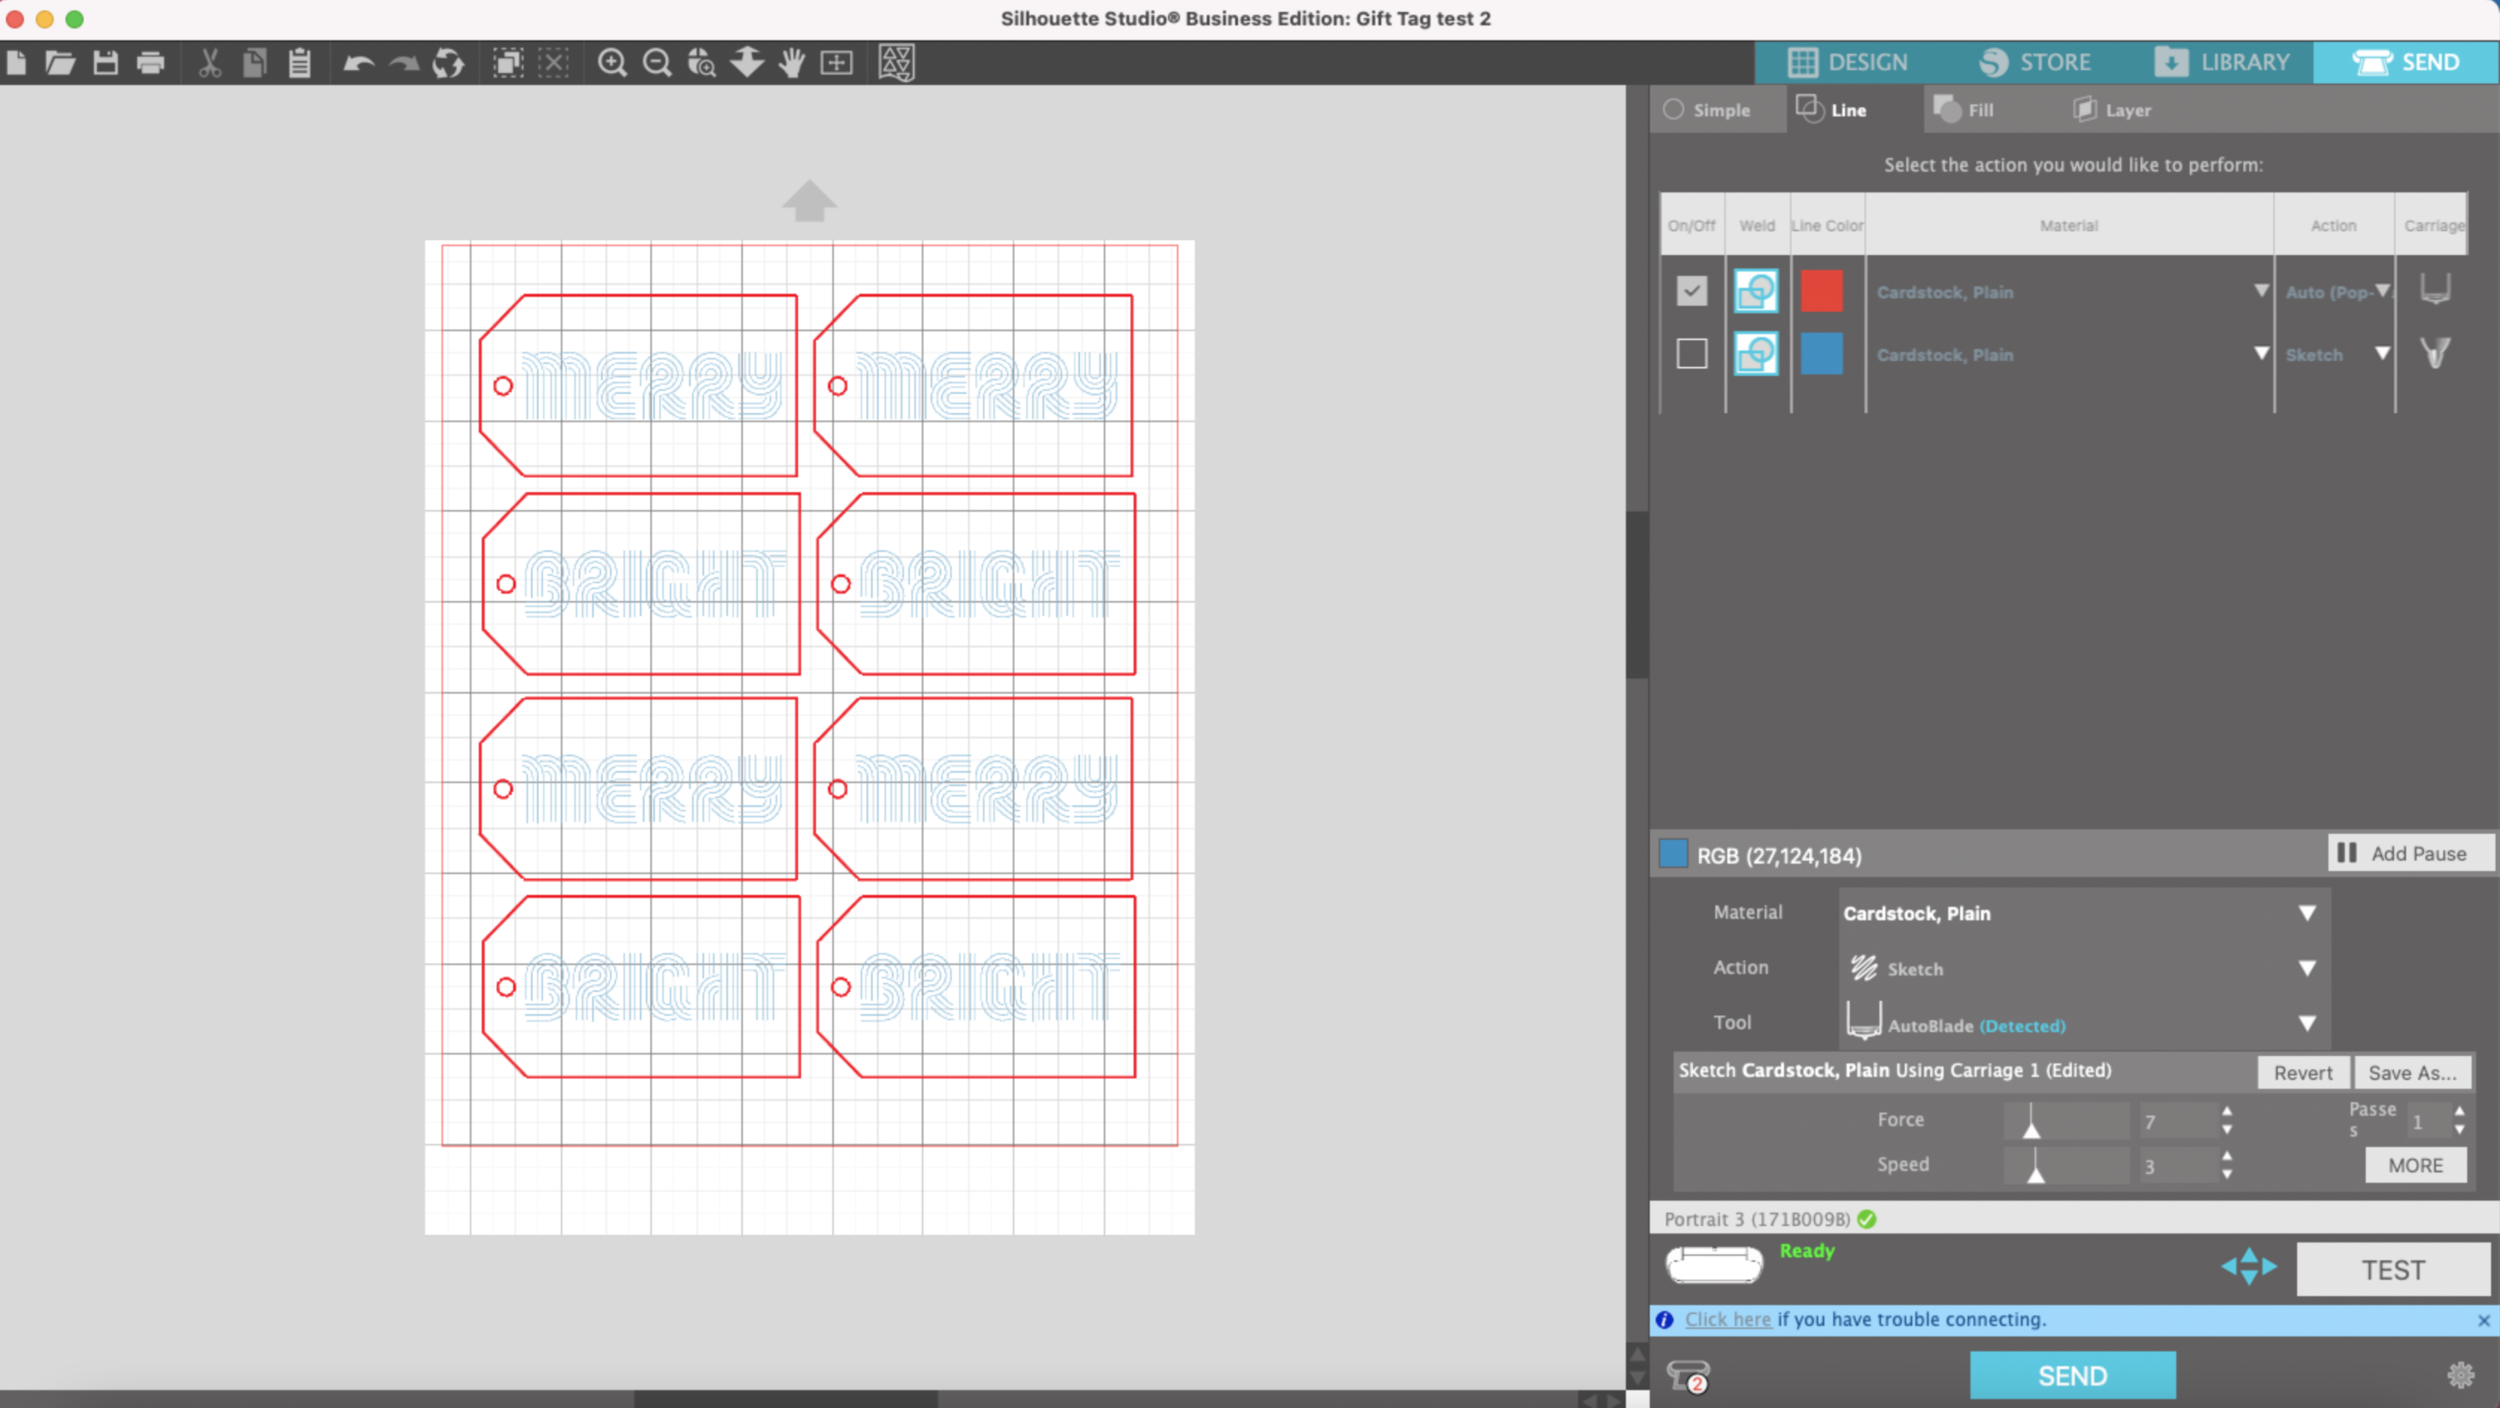
I press SEND and I’m going to draw and cut by Line color, instead of simple I’m going to select LINE at the top of the send panel. I’m using Heavy Cardstock so I select Heavy Coverstock for my material for both line colors.

I’m going to draw with the gold pen first, so for the yellow lines I select SKETCH as my action. I’m going to leave the settings as the default, they work pretty well as is. I load my cardstock without a mat and gold pen with the pen adapter and I press SEND at the bottom of the screen.

Portrait 3 matless drawing and cutting

When the machine is done drawing, DO NOT unload the mat. I swap out the pen adapter for my auto-blade.

Portrait 3 matless drawing and cutting

My machine recognizes the auto-blade and I select the Pop-Out Cut Action.

Portrait 3 matless drawing and cutting

The default pop out cut settings weren’t working great for this cardstock. After a little trial and error, I figured out the settings that worked well and I saved the material setting so I can use them again in the future.

Portrait 3 matless drawing and cutting

When the machine is done cutting, the tags will still be slightly attached to cardstock. I carefully pop them out and I use the tip of a pen to pop out the little holes in the tags.

Portrait 3 matless drawing and cutting

And now you have a bunch of little tags you can tie to favors for birthdays, weddings, bridal showers, baby showers, etc.

Portrait 3 matless drawing and cutting