
Hi Everyone!
This week I wanted to start sharing how I cut full sticker sheets with my Cricut. I’m going to demo on my Cricut Maker, but you should be able to do this method on any of Explore or Explore Air machines as well.
I’m going to break this up into a few posts since it is a bit of a tedious process in the beginning. But once you get everything set up it should be pretty easy.
Today we’re going to start with prepping your mat. You don’t need to use a brand new mat, but it needs to be sticky enough that the paper staying in place while the machine is cutting. I will be using a blue mat since it’s not as sticky as the others, but you could also use an older green mat that’s not as sticky anymore.
Before we even print anything to cut, we need to practice loading our mat the SAME WAY EVERYTIME. This is probably the most important part of getting your stickers to cut in the right place eveytime. It’s best to practice, practice, practice before we waste any of our precious sticker paper.
I have a scrap piece of cardstock on my mat the upper left corner. For now, we’re just practicing loading and unloading our mat consistently, so you can also use just a plain piece of paper.
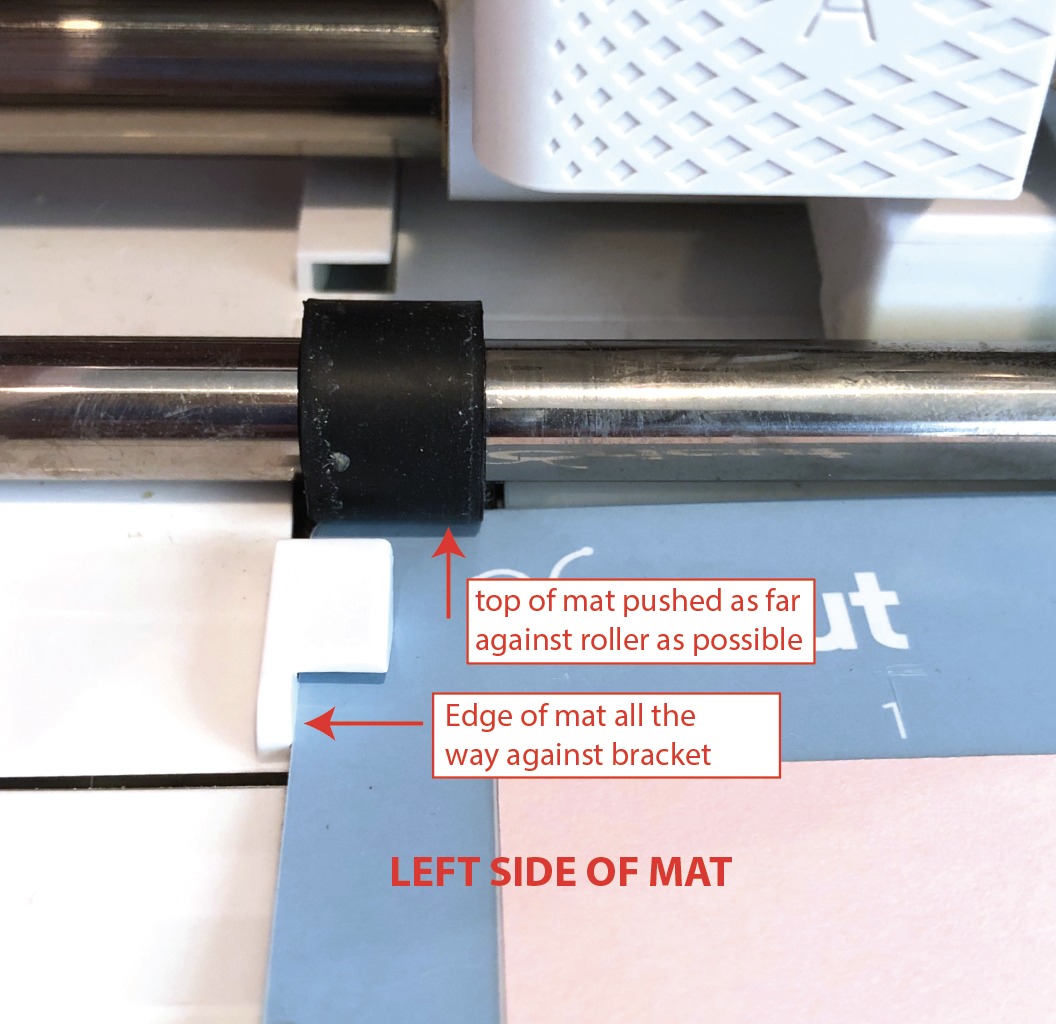
The easiest, most consistent method that works for me is having my mat pushed all the way against the left little bracket and up against the black roller as far as it will go, without forcing it. The right side will have a small gap where it doesn’t touch the bracket, but the mat will still need to be pushed as far against the black roller as it will go, without forcing it.

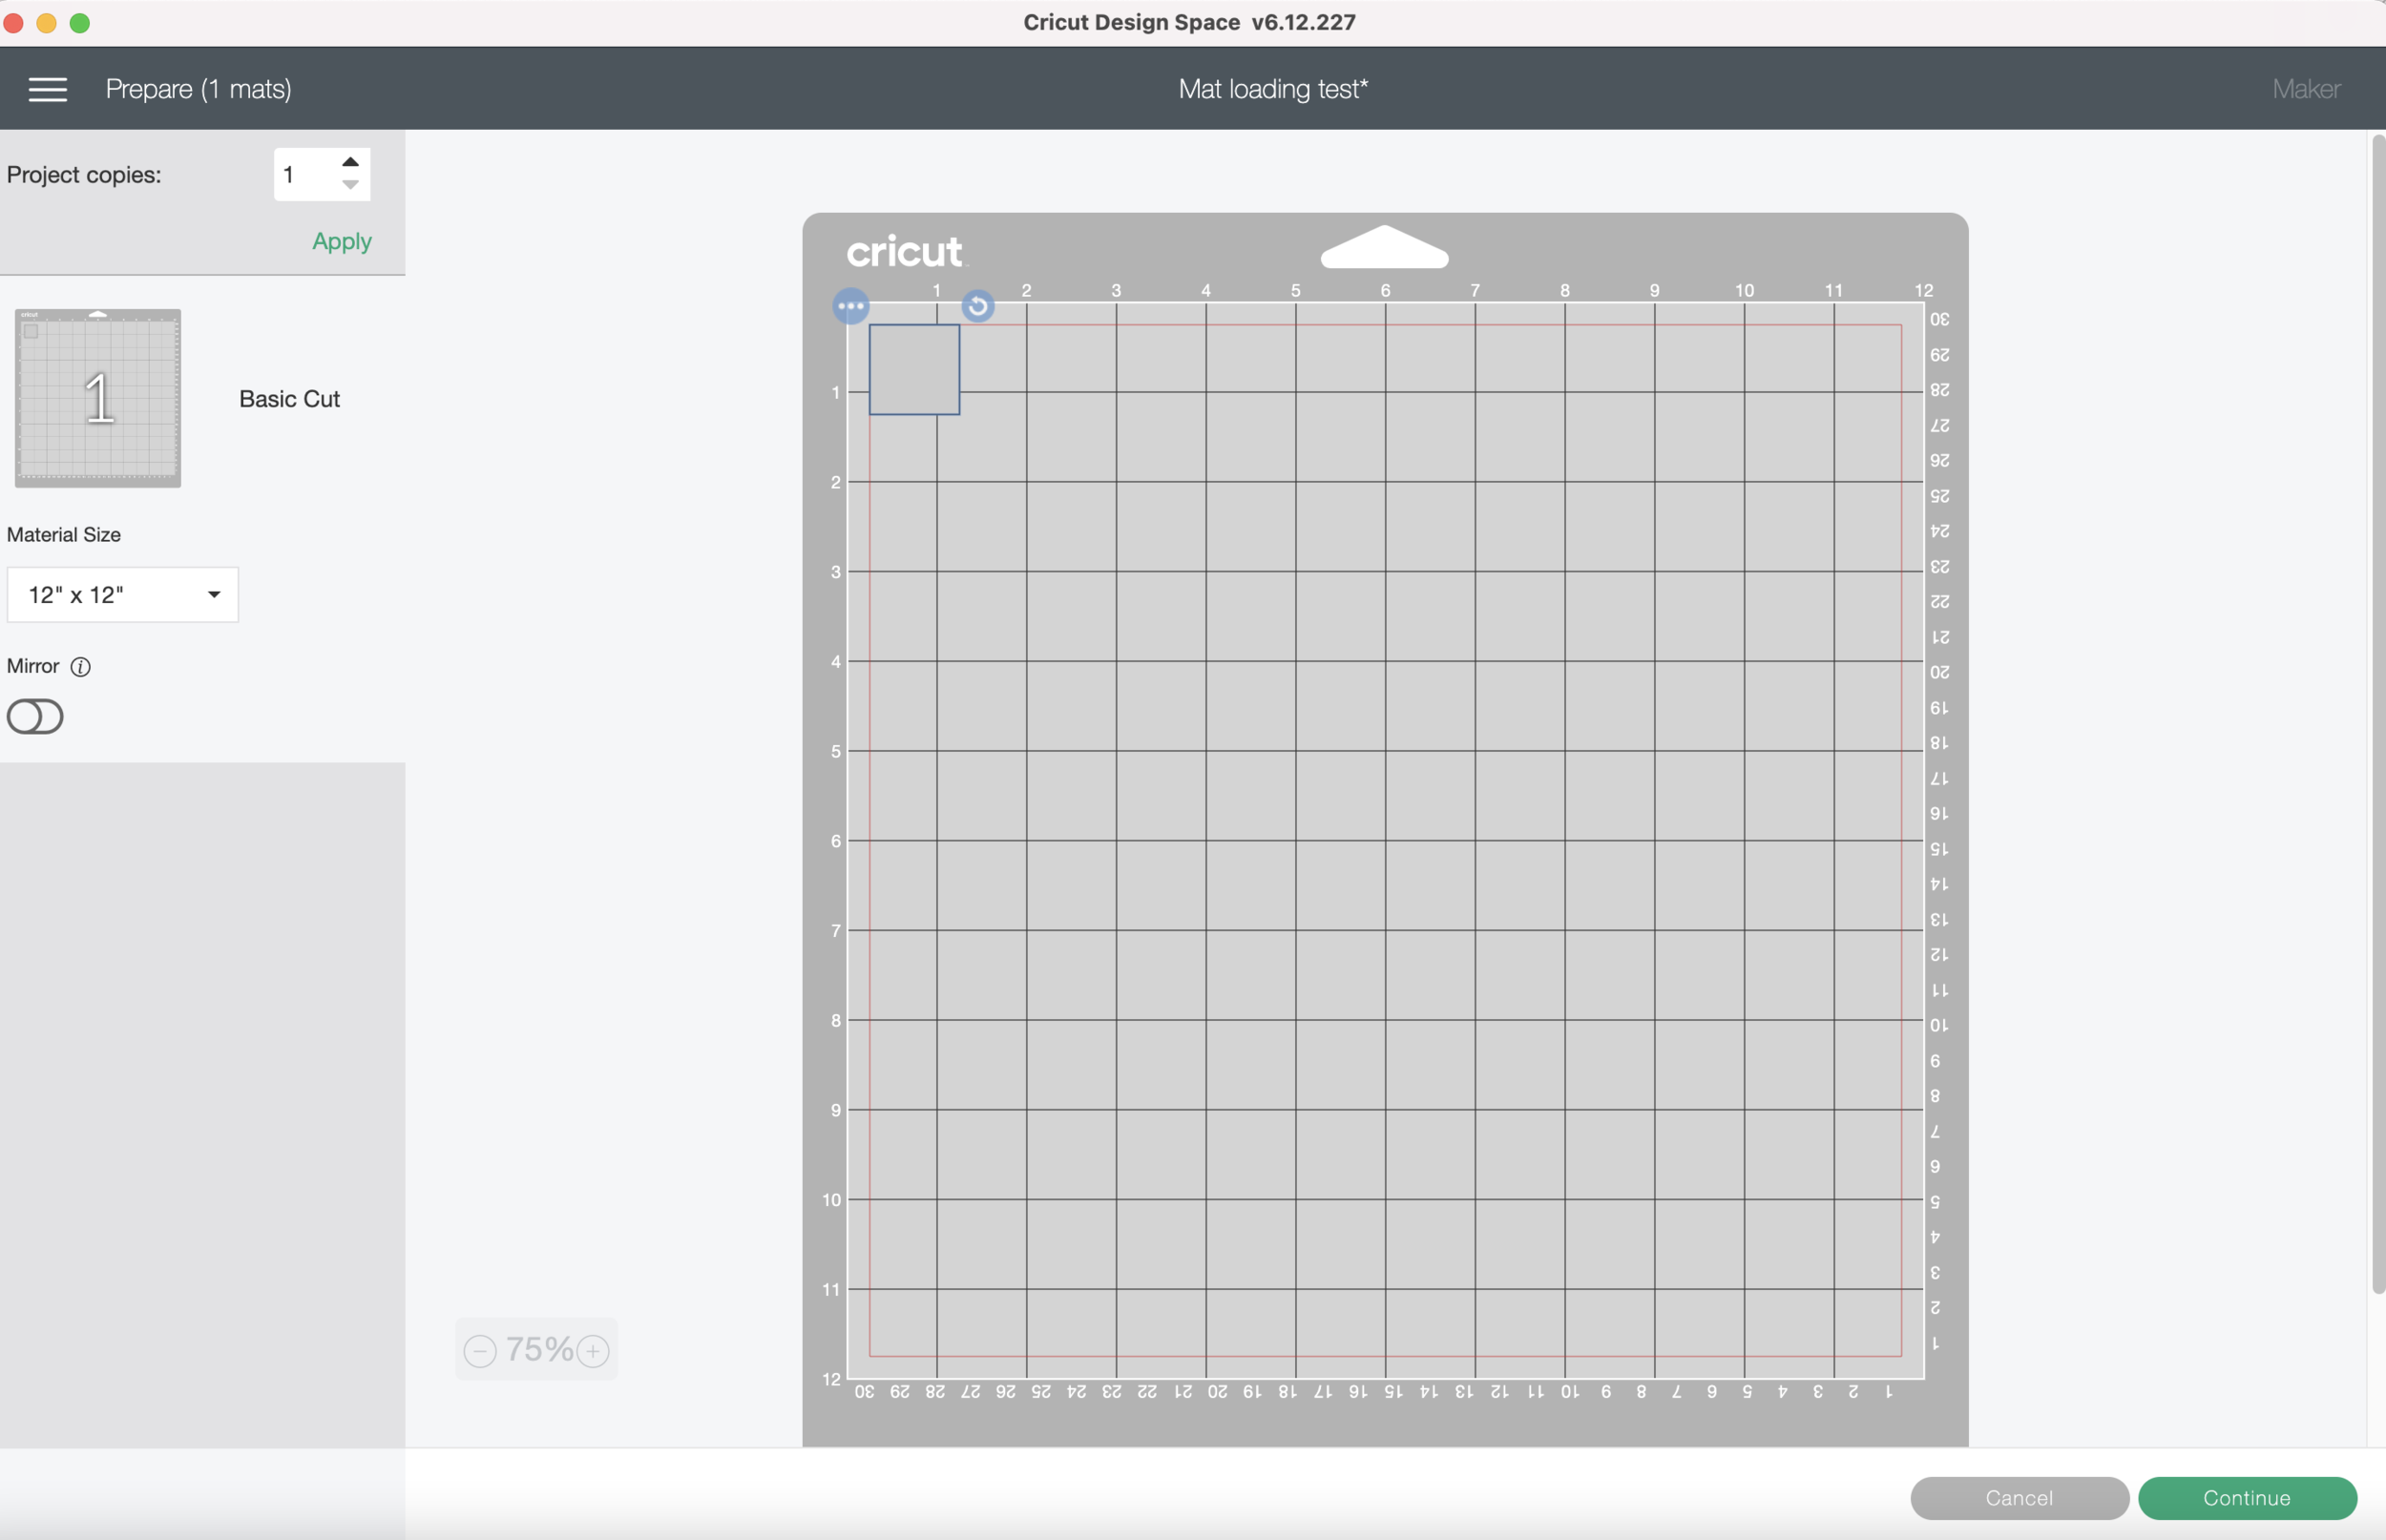
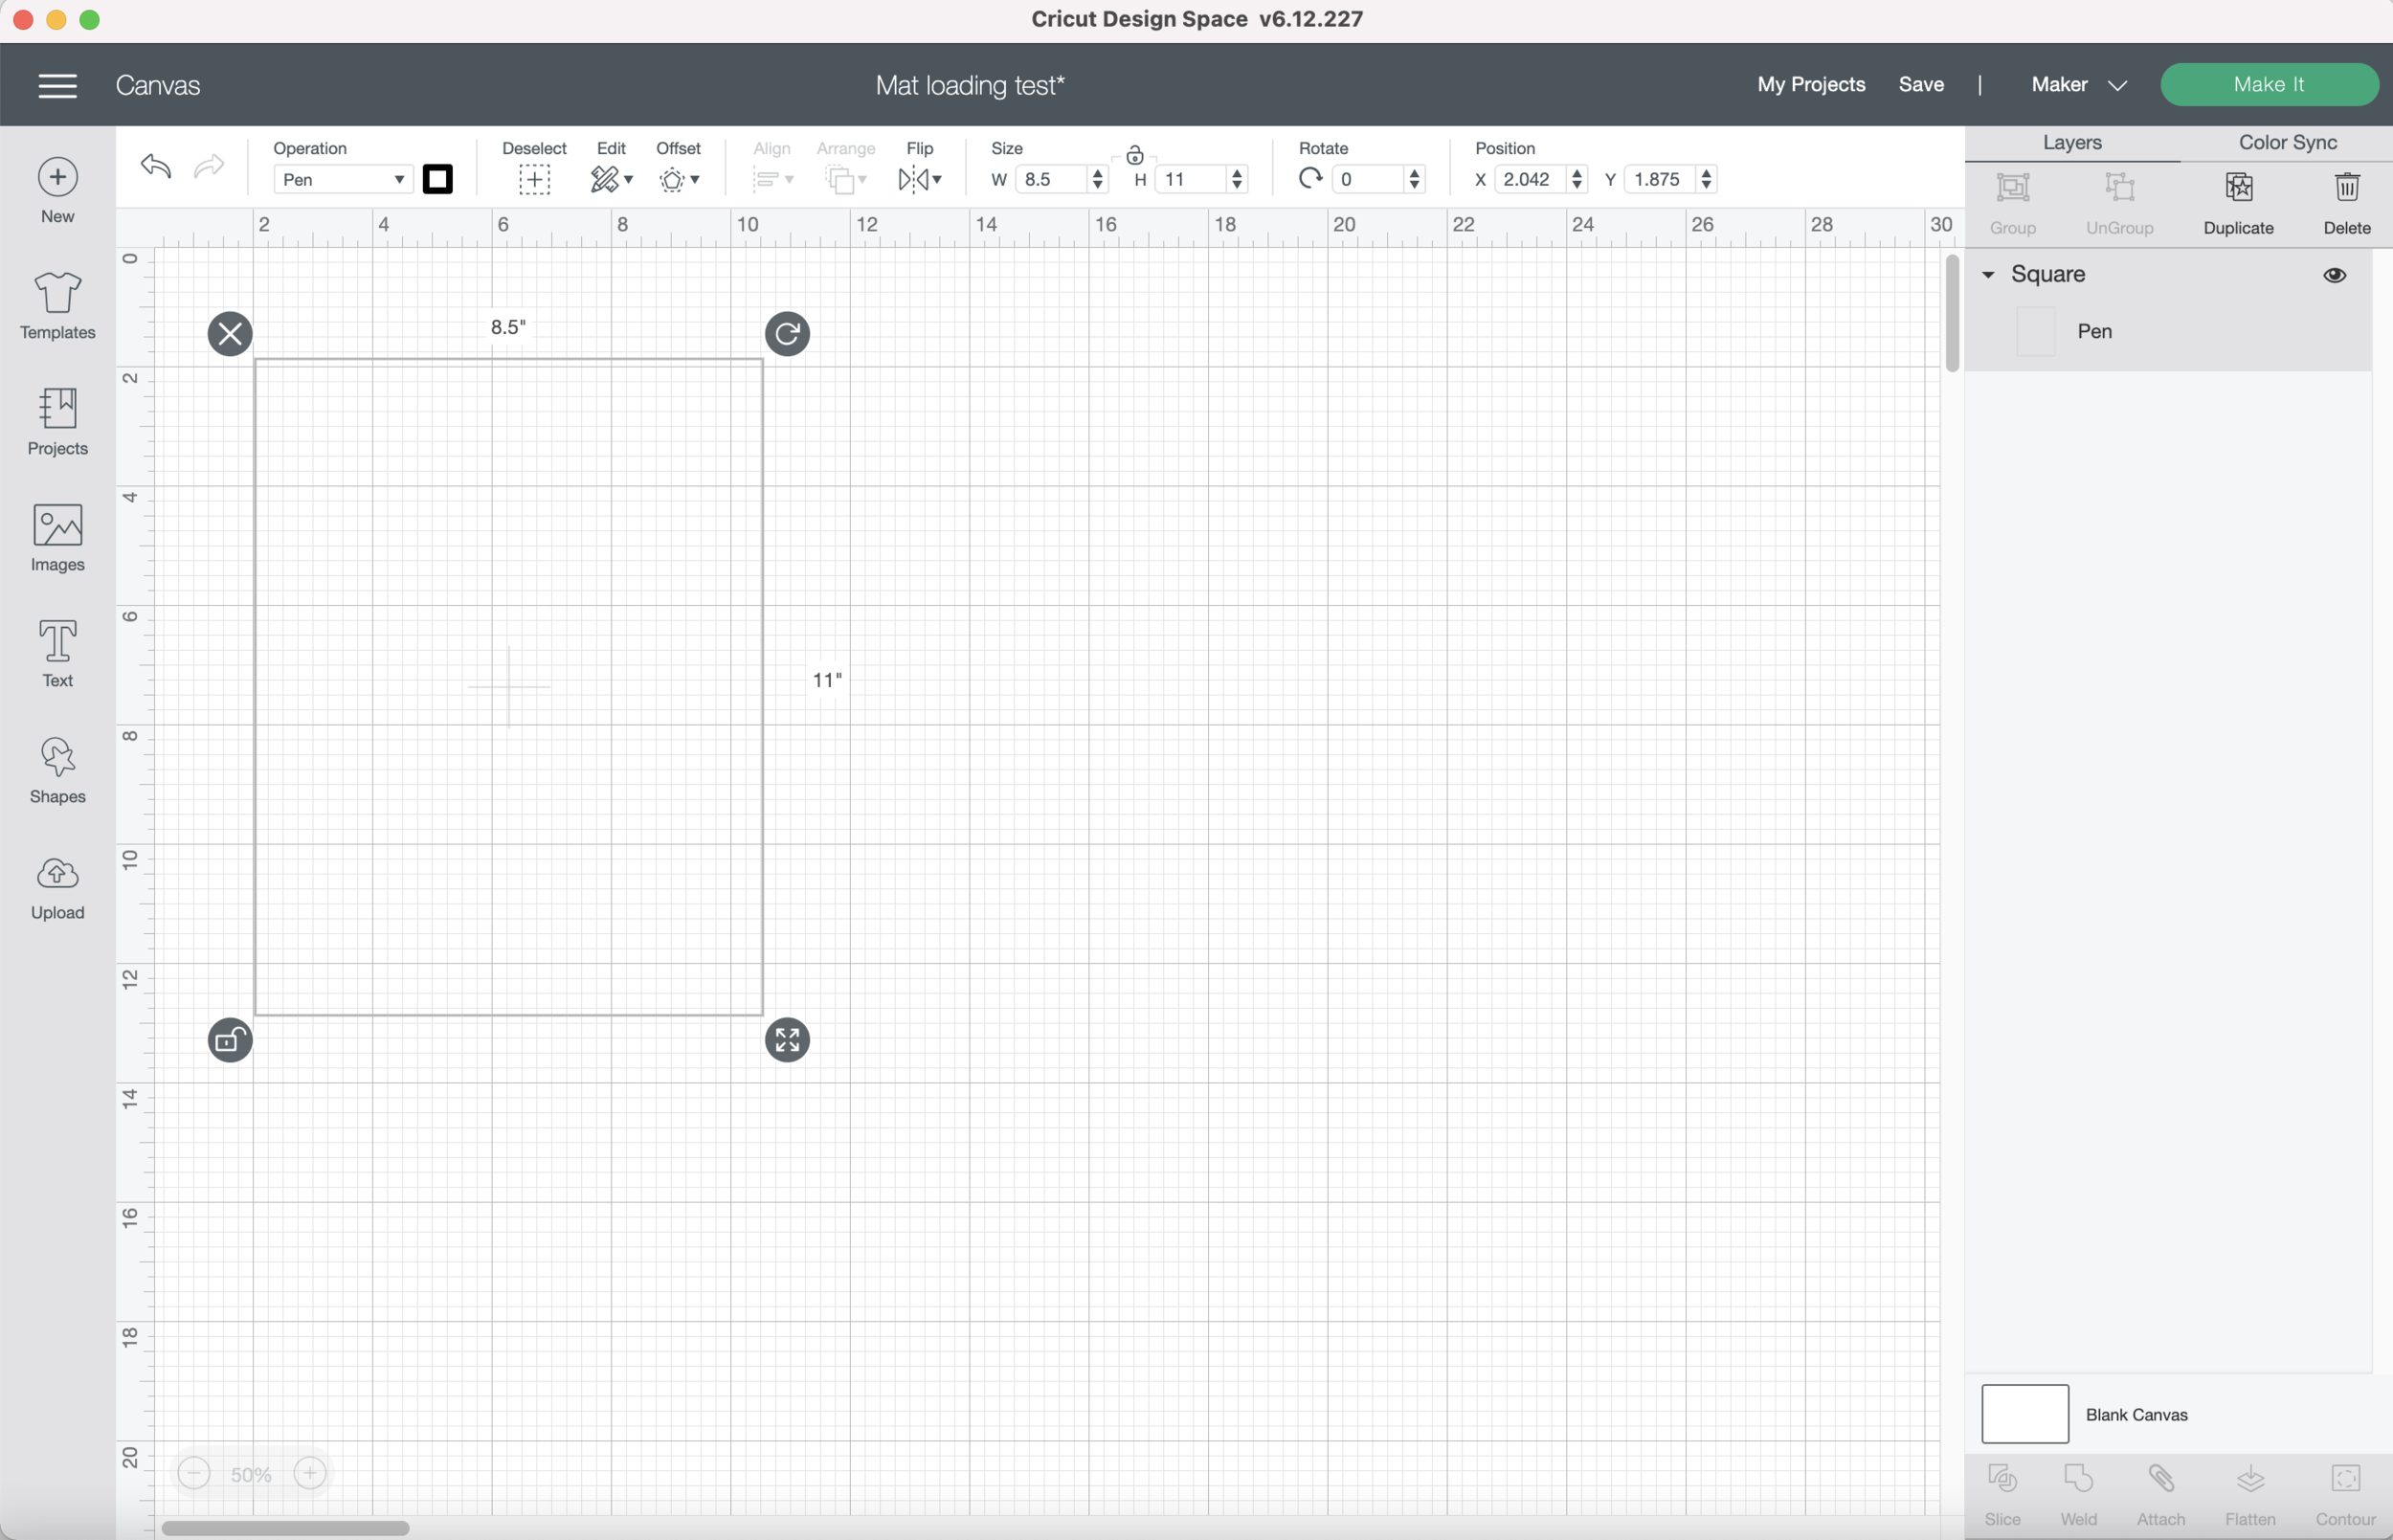
In Cricut Design Space, I made a simple 1” x 1” square to cut from my scrap cardstock. You can use whatever shape you want, this is just to test that I am loading my mat the same way every time.
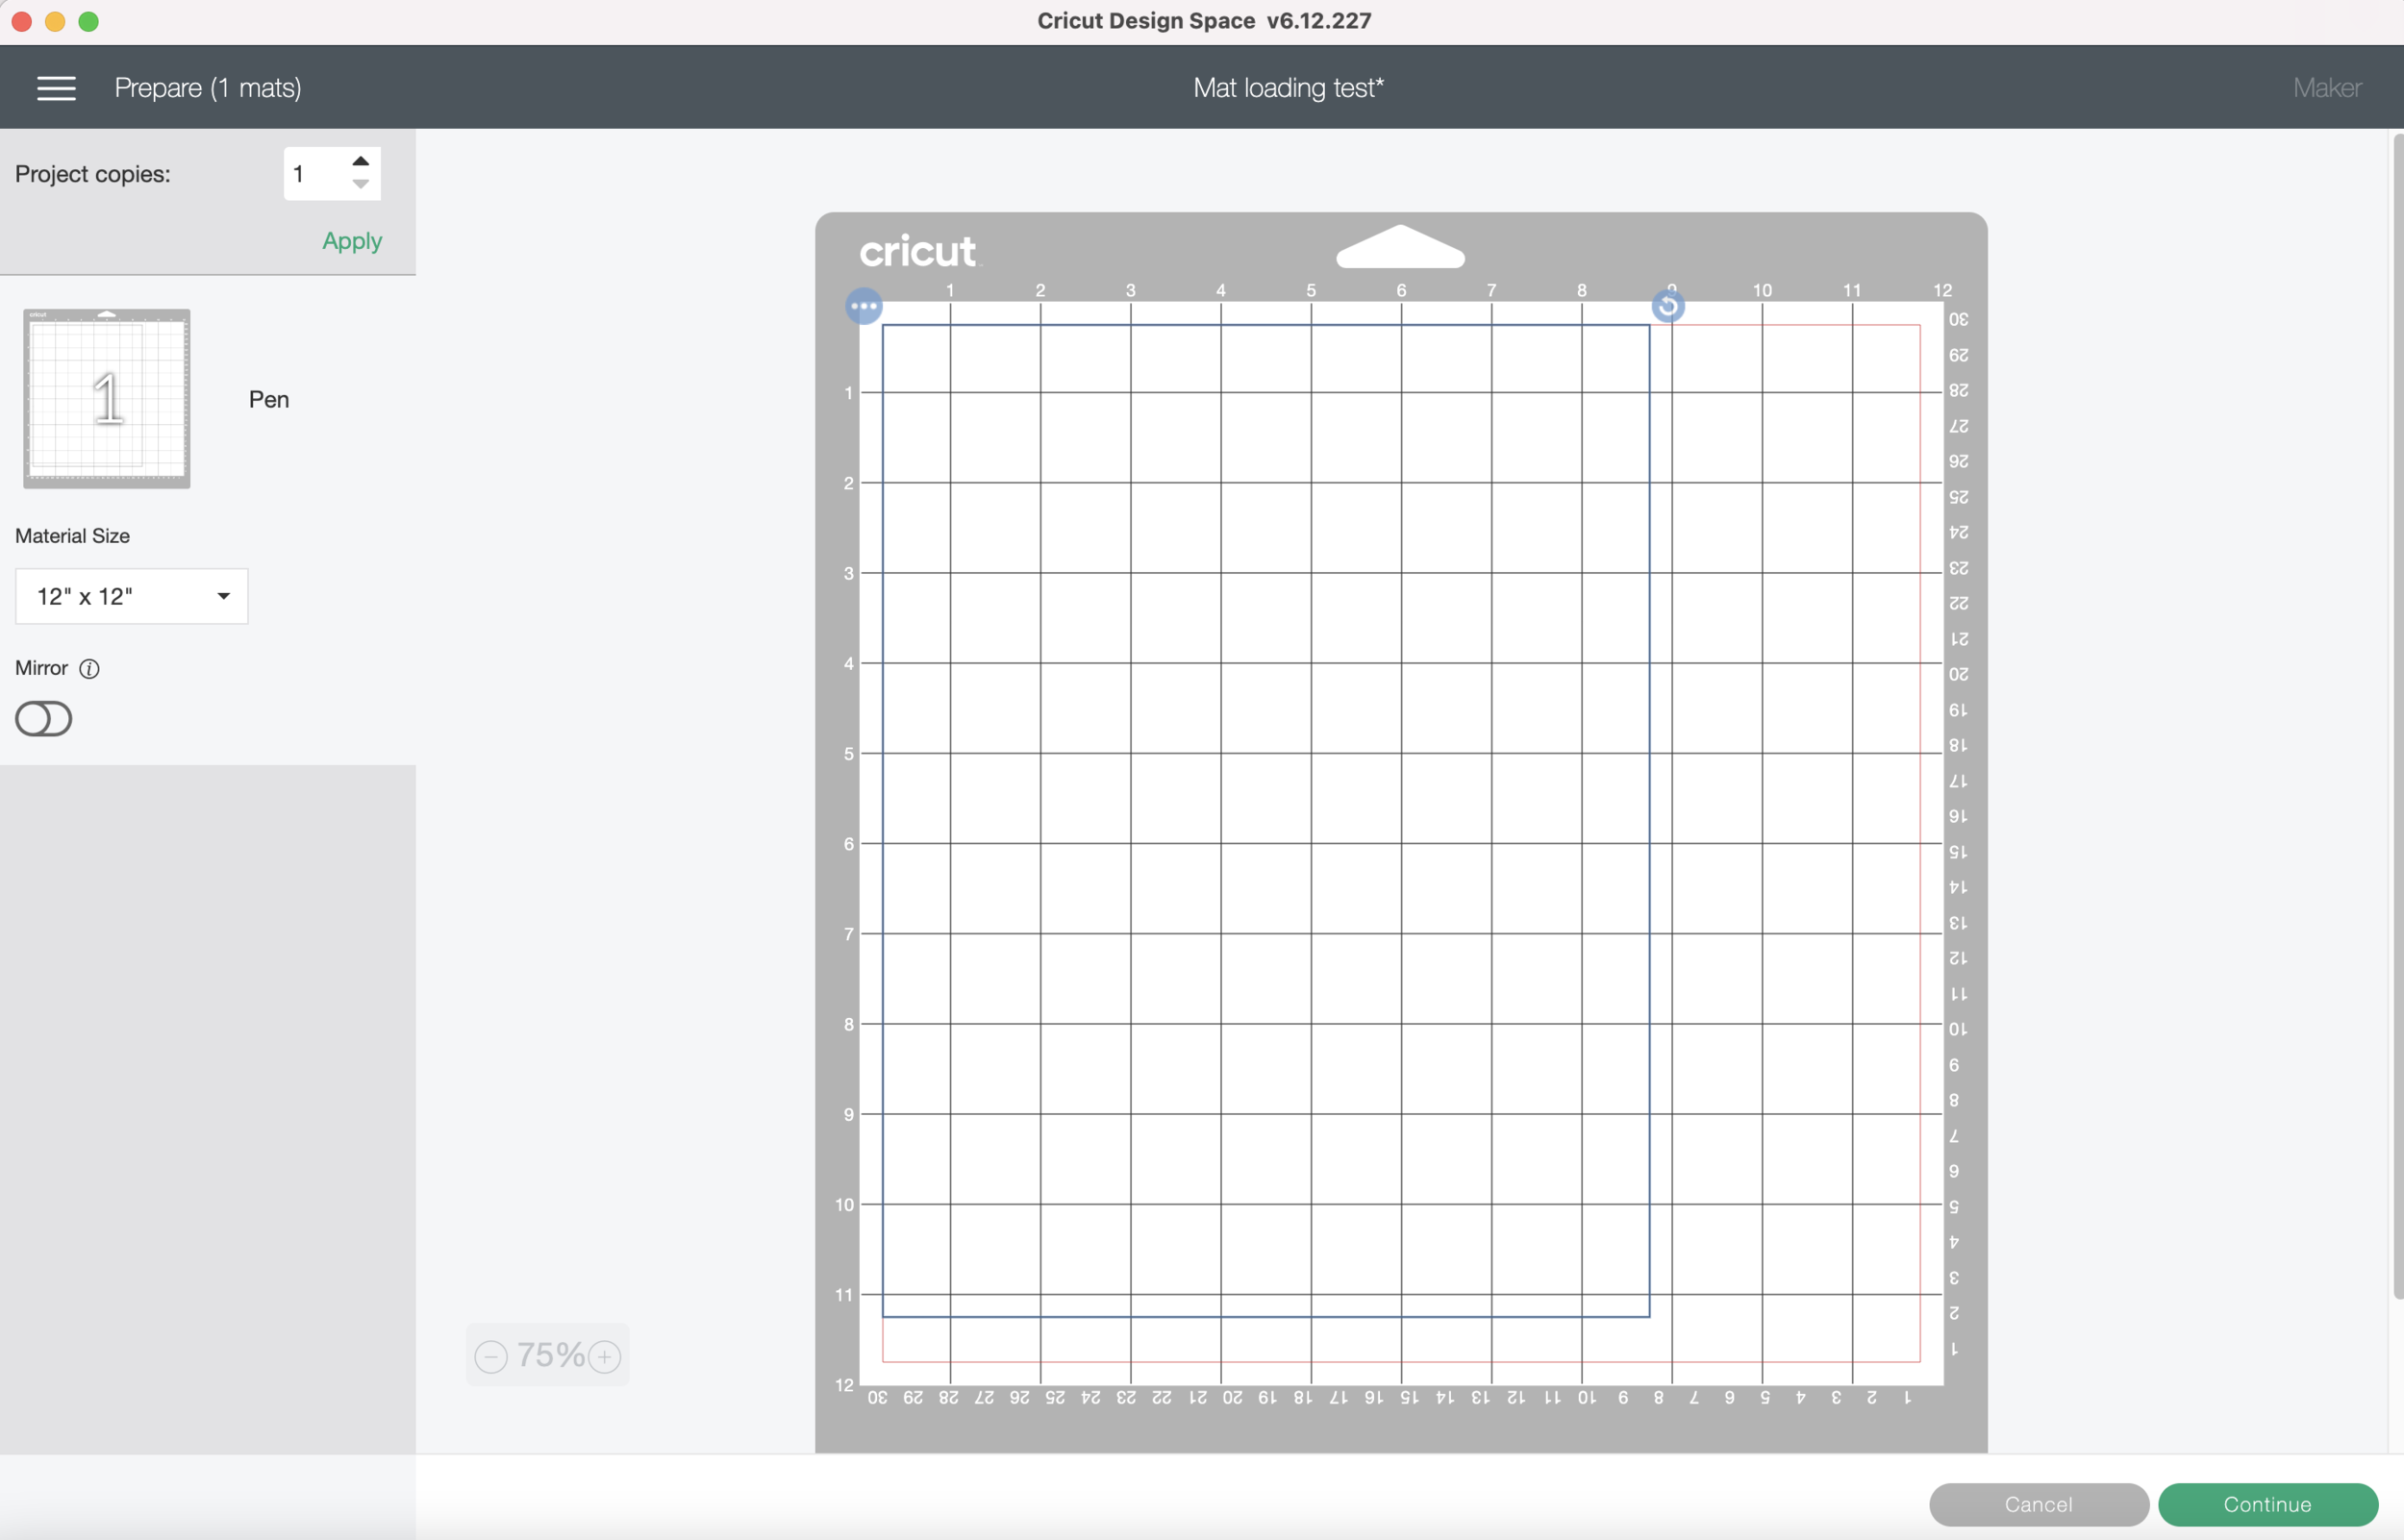
I click “Make it” and Design Space automatically puts my square in the upper left corner. But notice that it’s not completely in the left corner, there’s a red bounding box about a 1/4” inch inside the edges of the grid that I cannot move any elements outside of the red lines. This will be important later when we are setting up our sticker sheets for cutting.
Now I’m going to practice loading my mat - all the way against the left little bracket and up against the black rollers as far as it will go, without forcing it. (See photos above)
I press Go on my machine and let it cut out the square. After it’s done cutting, I’m going to unload my mat.
I’m going to leave the already cut cardstock on my mat and send it through my machine again, loading it the EXACT same way I did for the first cut.
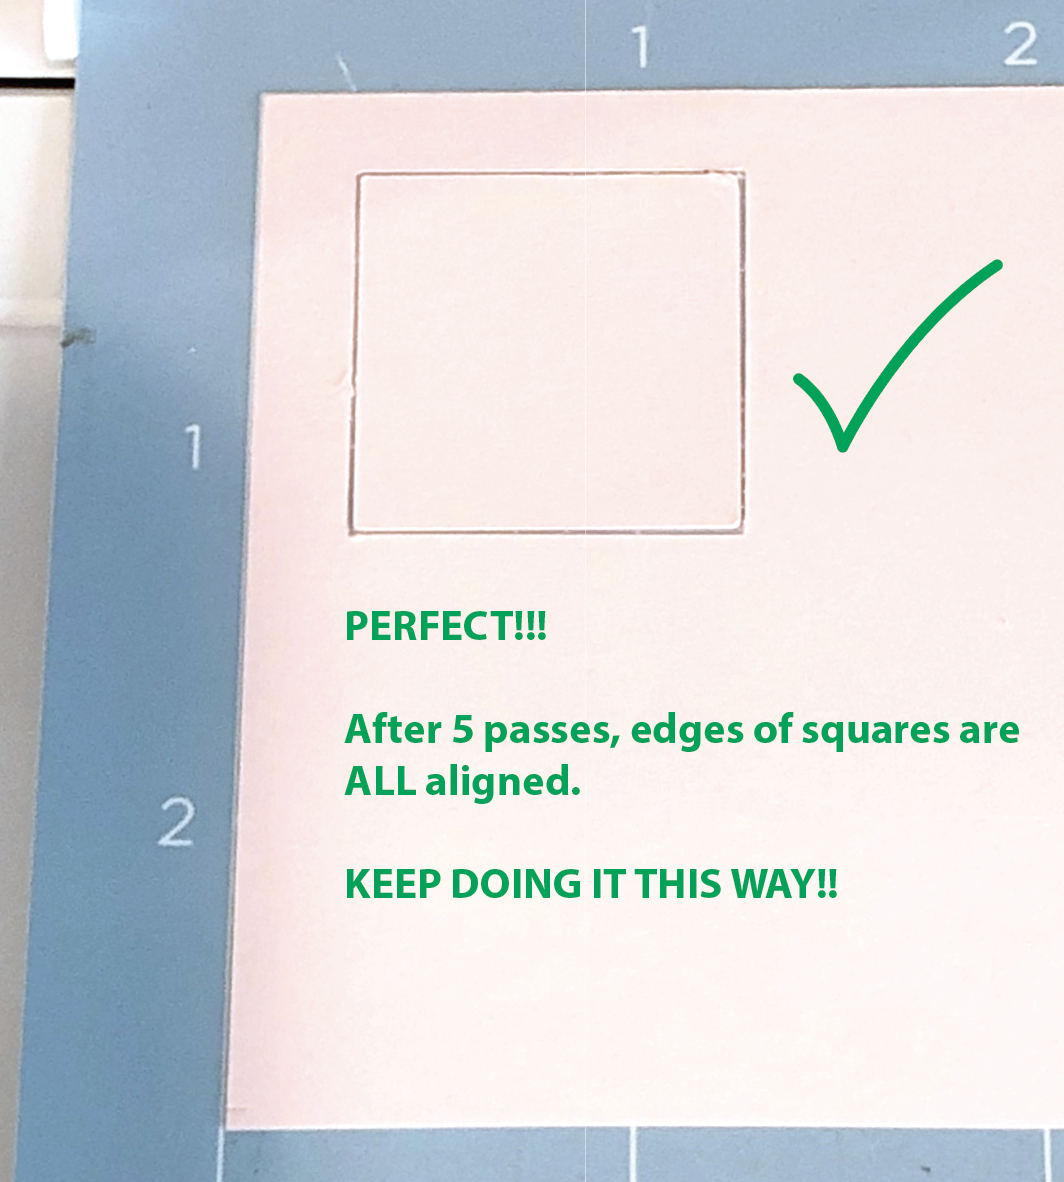
If you are loading your machine exactly the same way, the cut lines should be directly on top of the first set of cut lines. If you shifted the placement of your mat, the 2nd set of cut lines will be off.
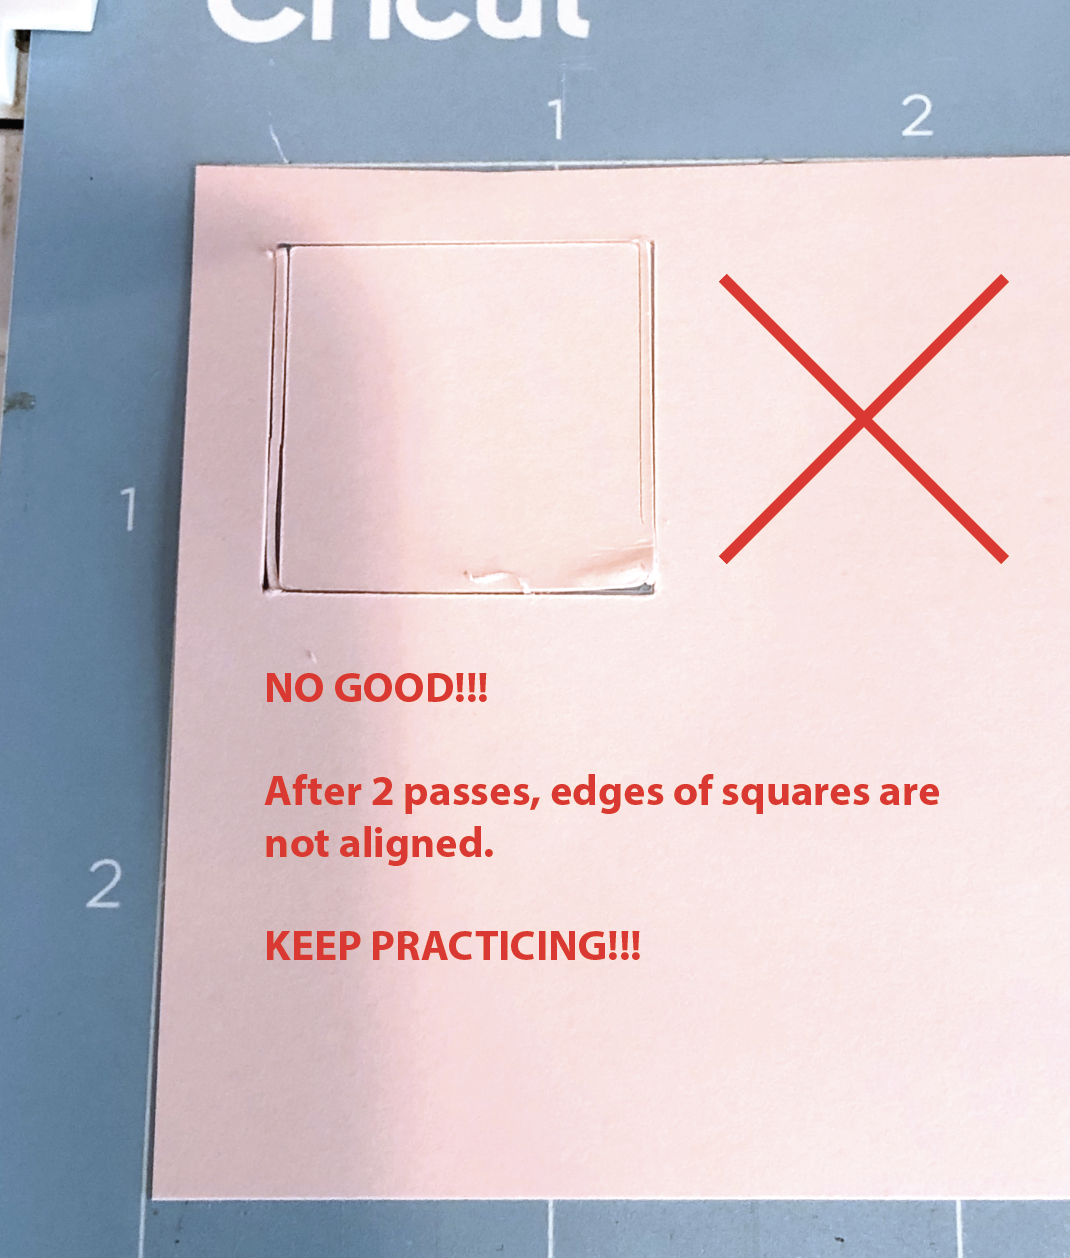
Keep practicing loading & unloading your mat so all of the cut lines are aligned.
Once you’ve mastered loading your mat, we’re going to mark our mat so we know where to place the sticker paper. You’ve probably seen people use tape or cardstock to mark their mats, I’m not going to use either of those. I’m going to use a fine tip pen to draw directly on my mat, so I will still be able use my full mat for other projects.
The sticker paper I use is 8.5” x 11”. If you are using A4 your paper size will be 210mm x 297mm (8.27” x 11.69”) so you can sub those measurements for the 8.5”x11” measurements.
In Design Space, I’m going to create an 8.5” x 11” rectangle (8.27” x 11.69” or 210mm x 297mm if you are using A4 paper). I’m going to change the operation from “Cut” to “Draw” so I can use my fine tip pen.
I’m going to press “Make it” and again, Design Space automatically puts my rectangle in the upper left corner, but there’s still that roughly 1/4” border around my mat. I’m going to keep the placement of the rectangle as it is.
My machine draws an 8.5” x 11” rectangle directly on my mat, and now we have a guide for where to place our sticker paper on the mat. Let the pen dry for a few hours or overnight, especially if you are using the Cricut brand fine tip pen, it smudges pretty easily.

Next week, I’m going to do a test print to check the placement of my cut lines before I actually cut the sticker paper.