full sheet stickers

Cutting Full Sticker Sheets with Your Cricut - Part 3 - Final Cutting

Hi Everyone!

This week we’re going to take everything we’ve practiced so far and cut our final sticker sheets!

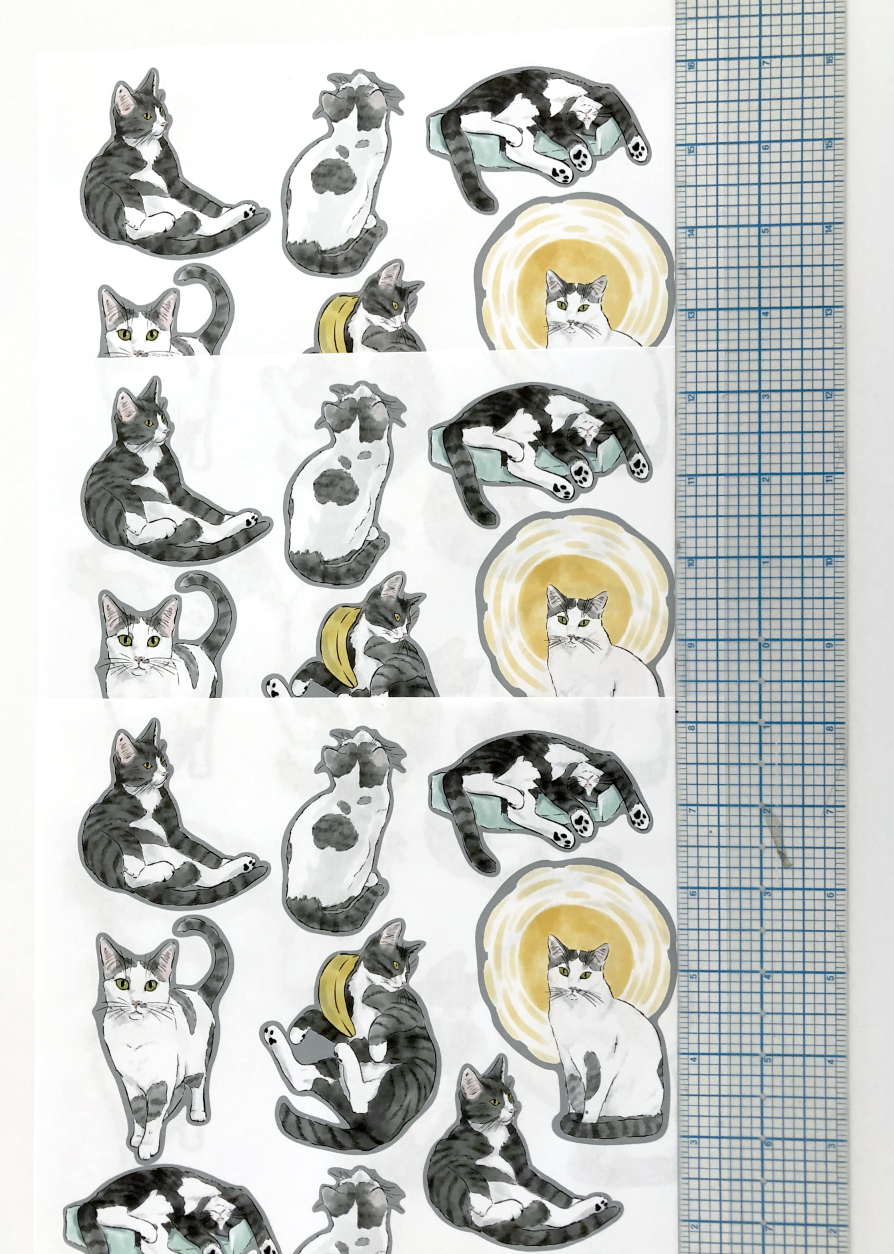
I’m using matte sticker paper from Online Labels. I’m printing them on the same Epson SureColor P600 printer that I used for my test prints.

I’m going to print one sheet initially to compare with one of my test prints from last week. I’m checking to make sure my stickers are printed in the same place on my sticker paper as the plain paper.

I am printing directly from Illustrator, but this time I’m hiding the cut lines layer, so the grey offset will not print on my actual stickers.

Printing stickers from Illustrator

Remember, make sure your print dialog box says DO NOT SCALE the artwork.

Printing stickers from Illustrator

My sticker paper is just a hair longer than my plain paper, the excess length is at the bottom of my print. So I have to keep that in mind when I’m placing the sticker sheet on the mat.

Printing stickers from Illustrator

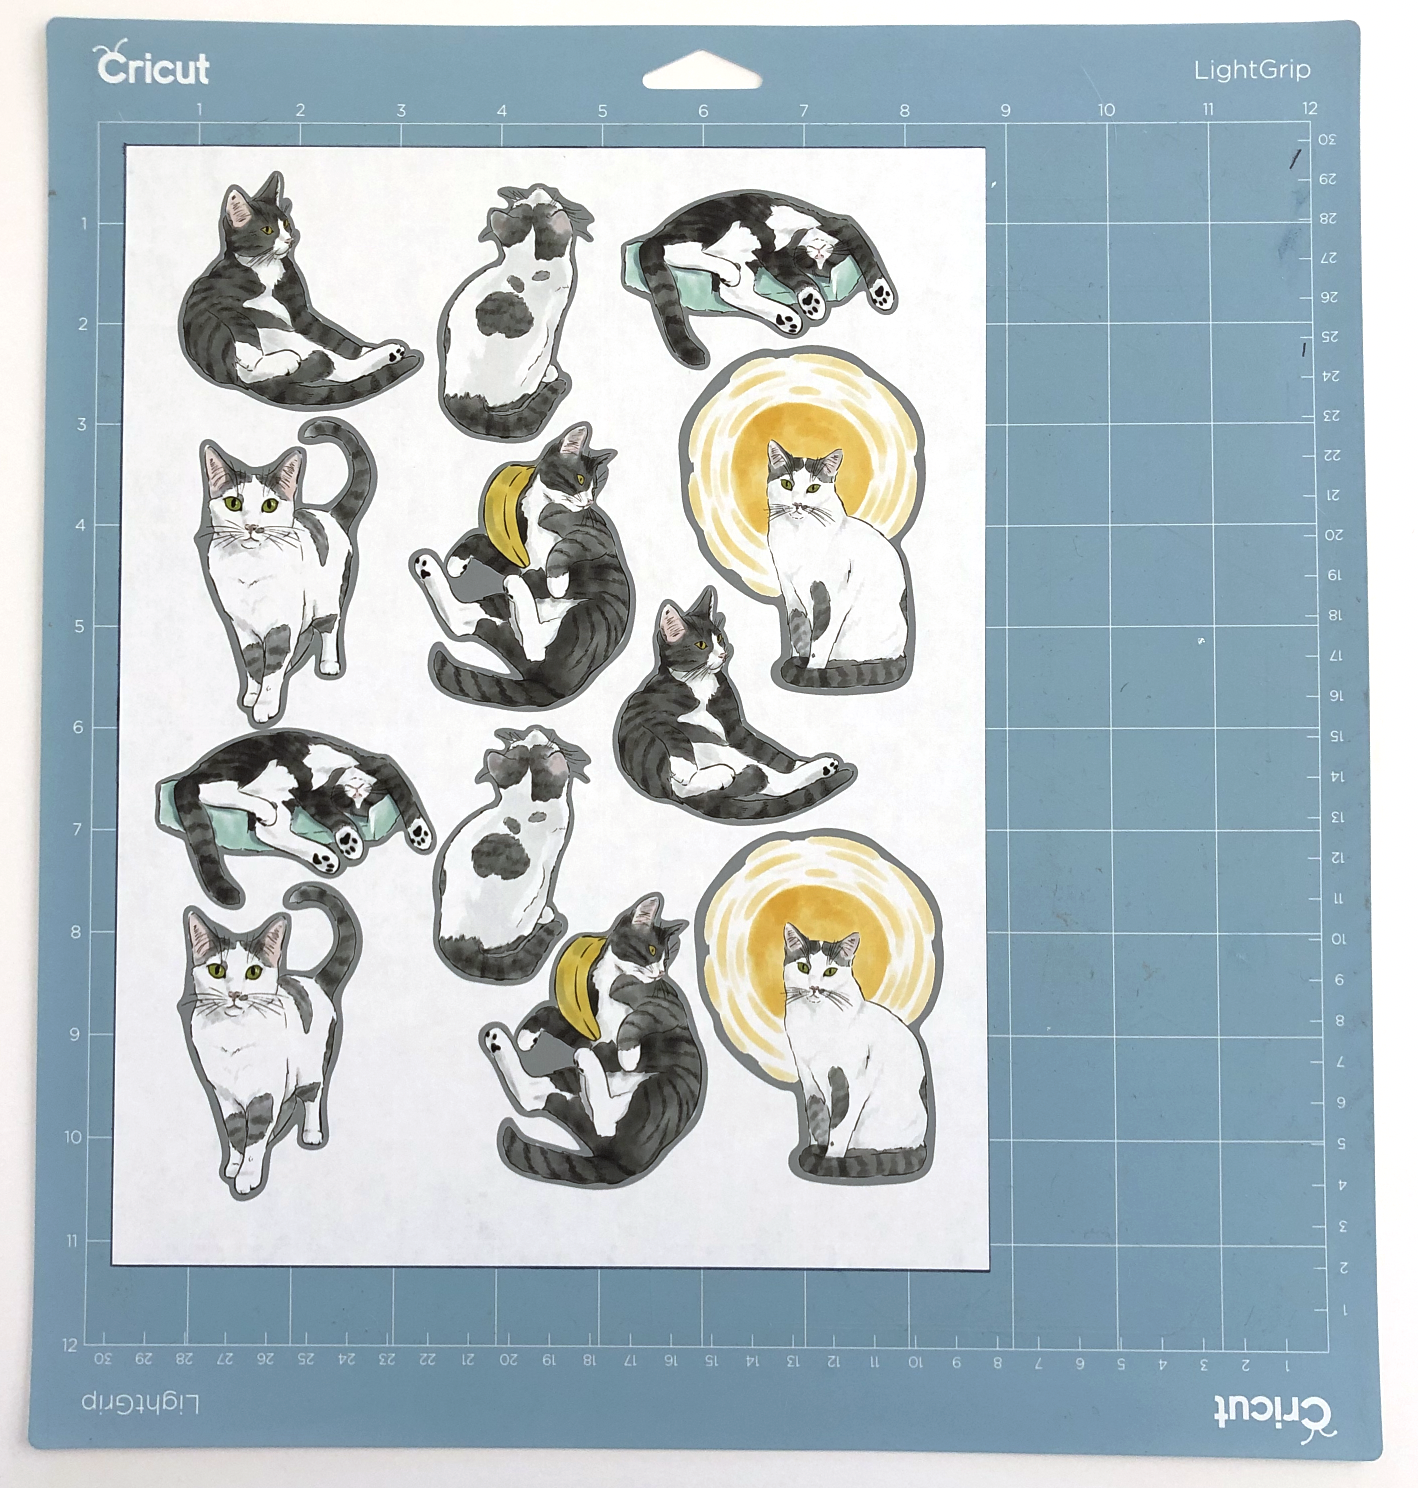
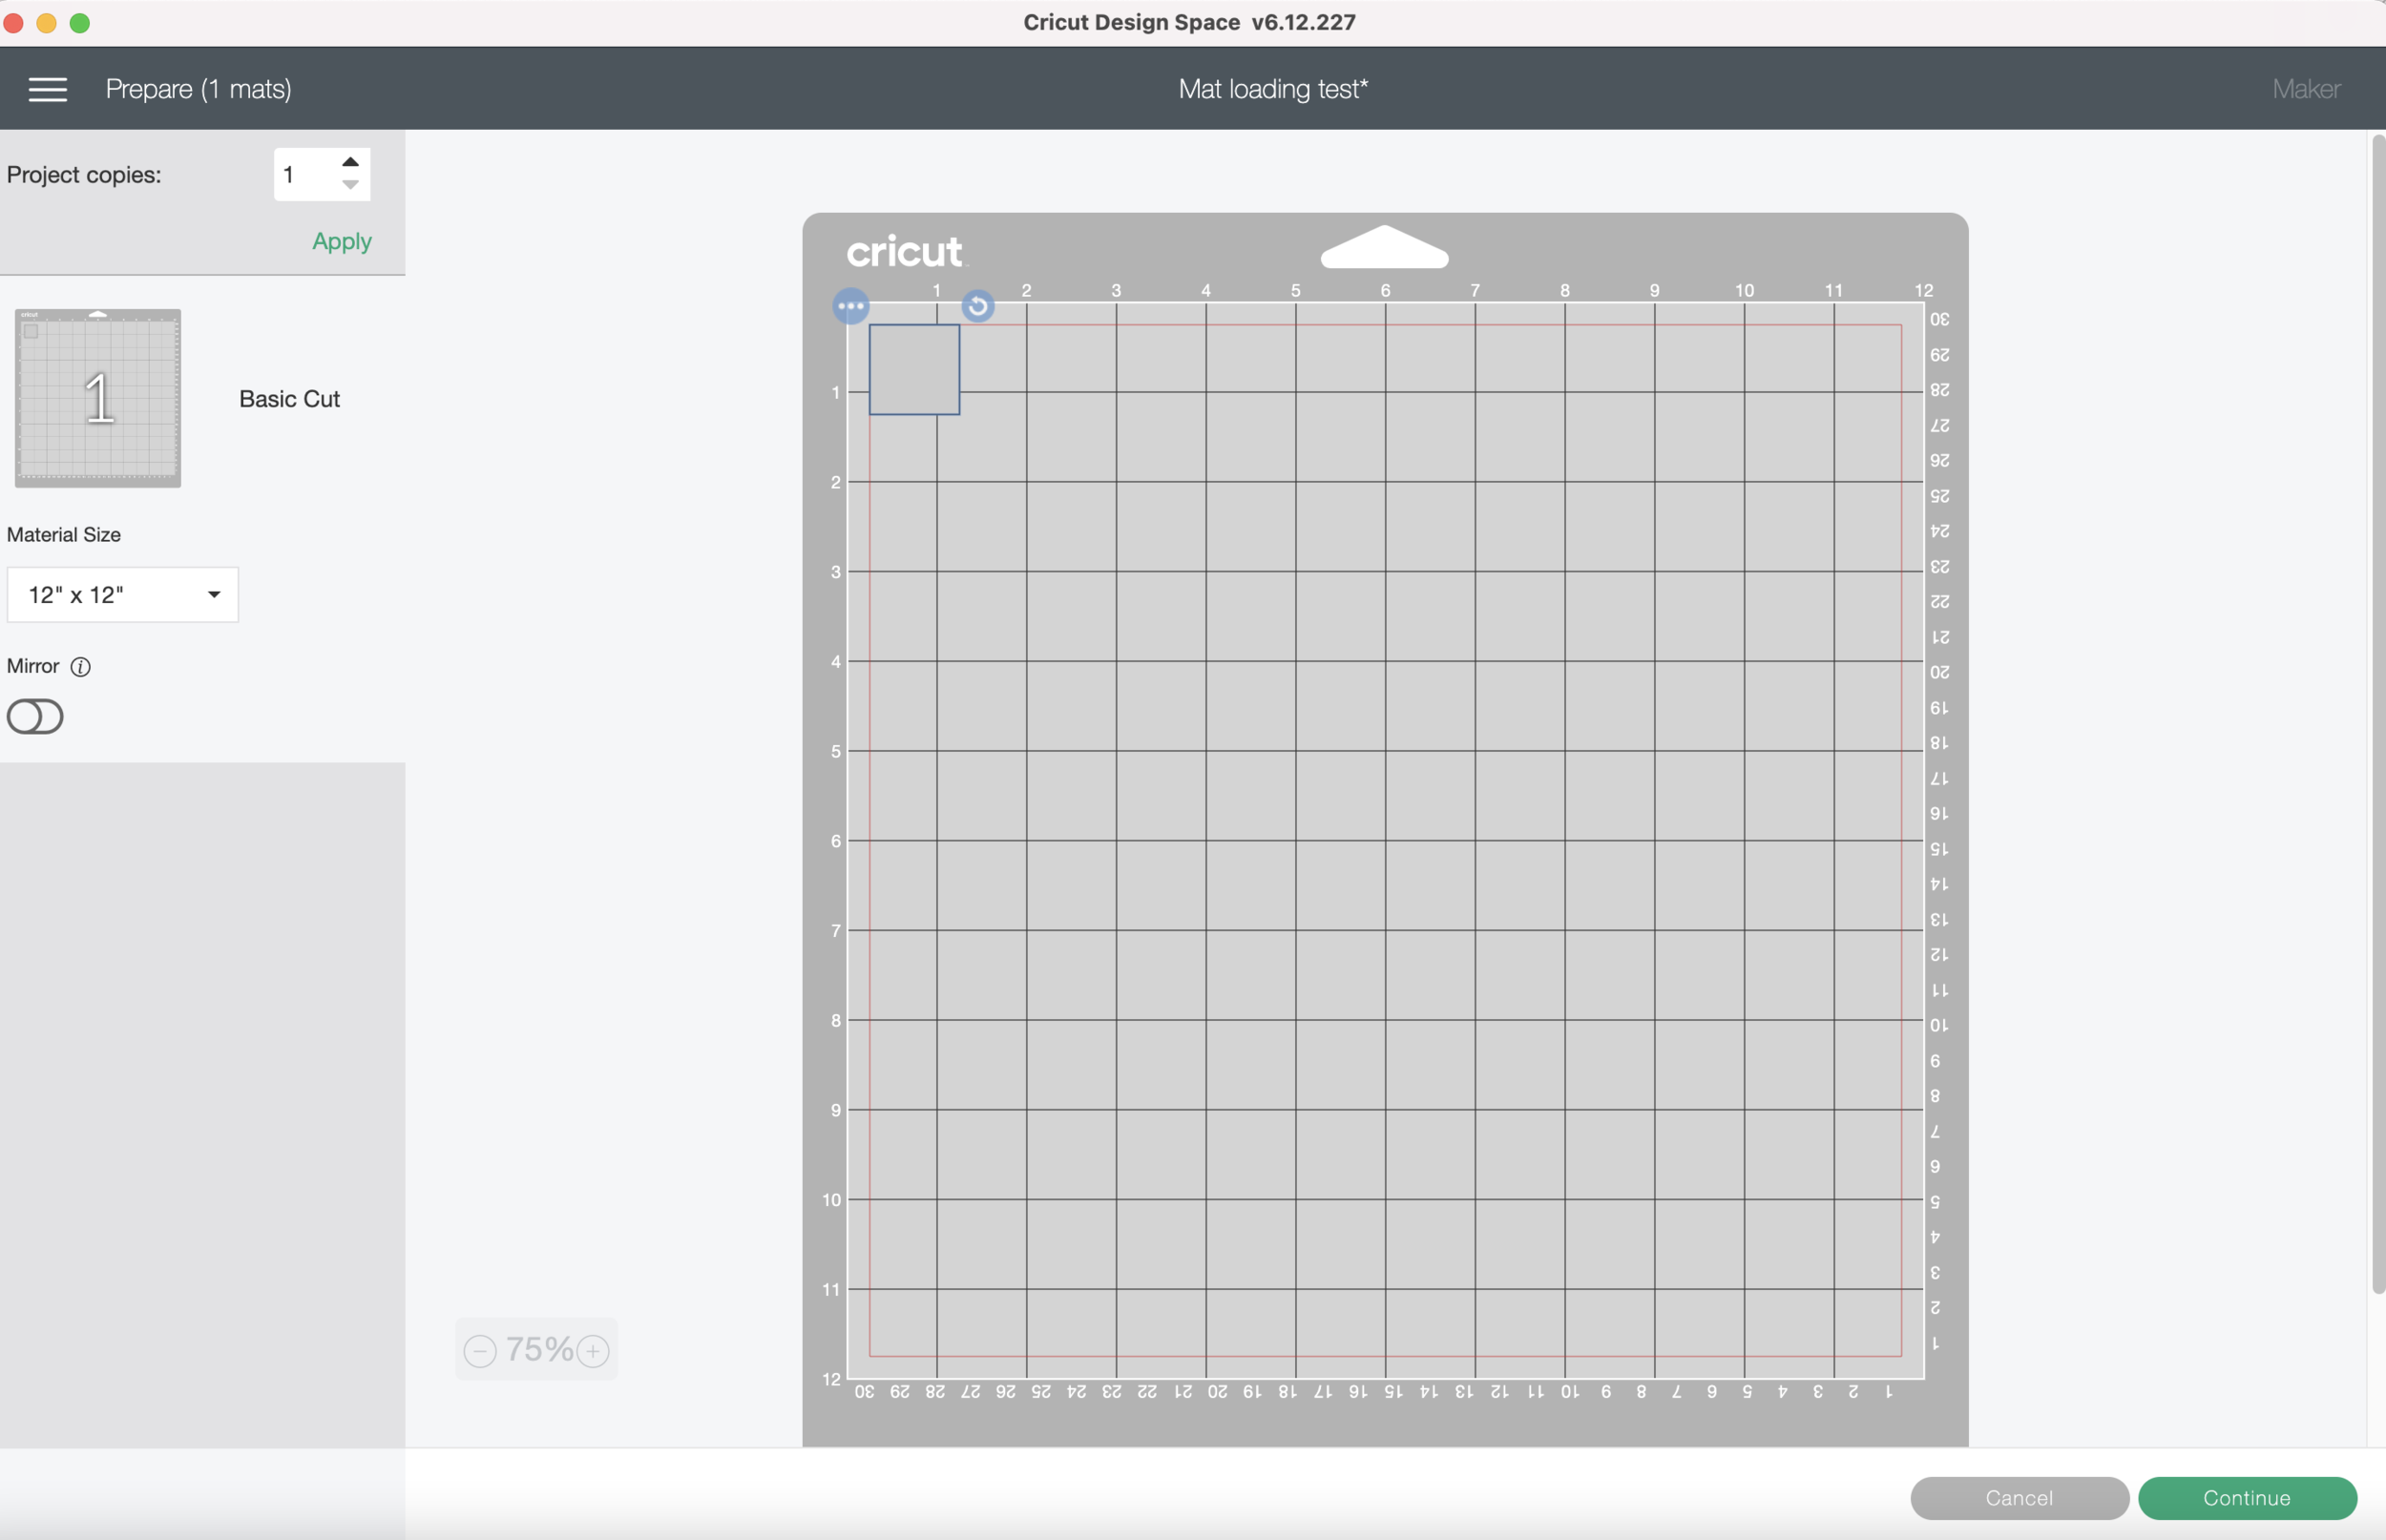
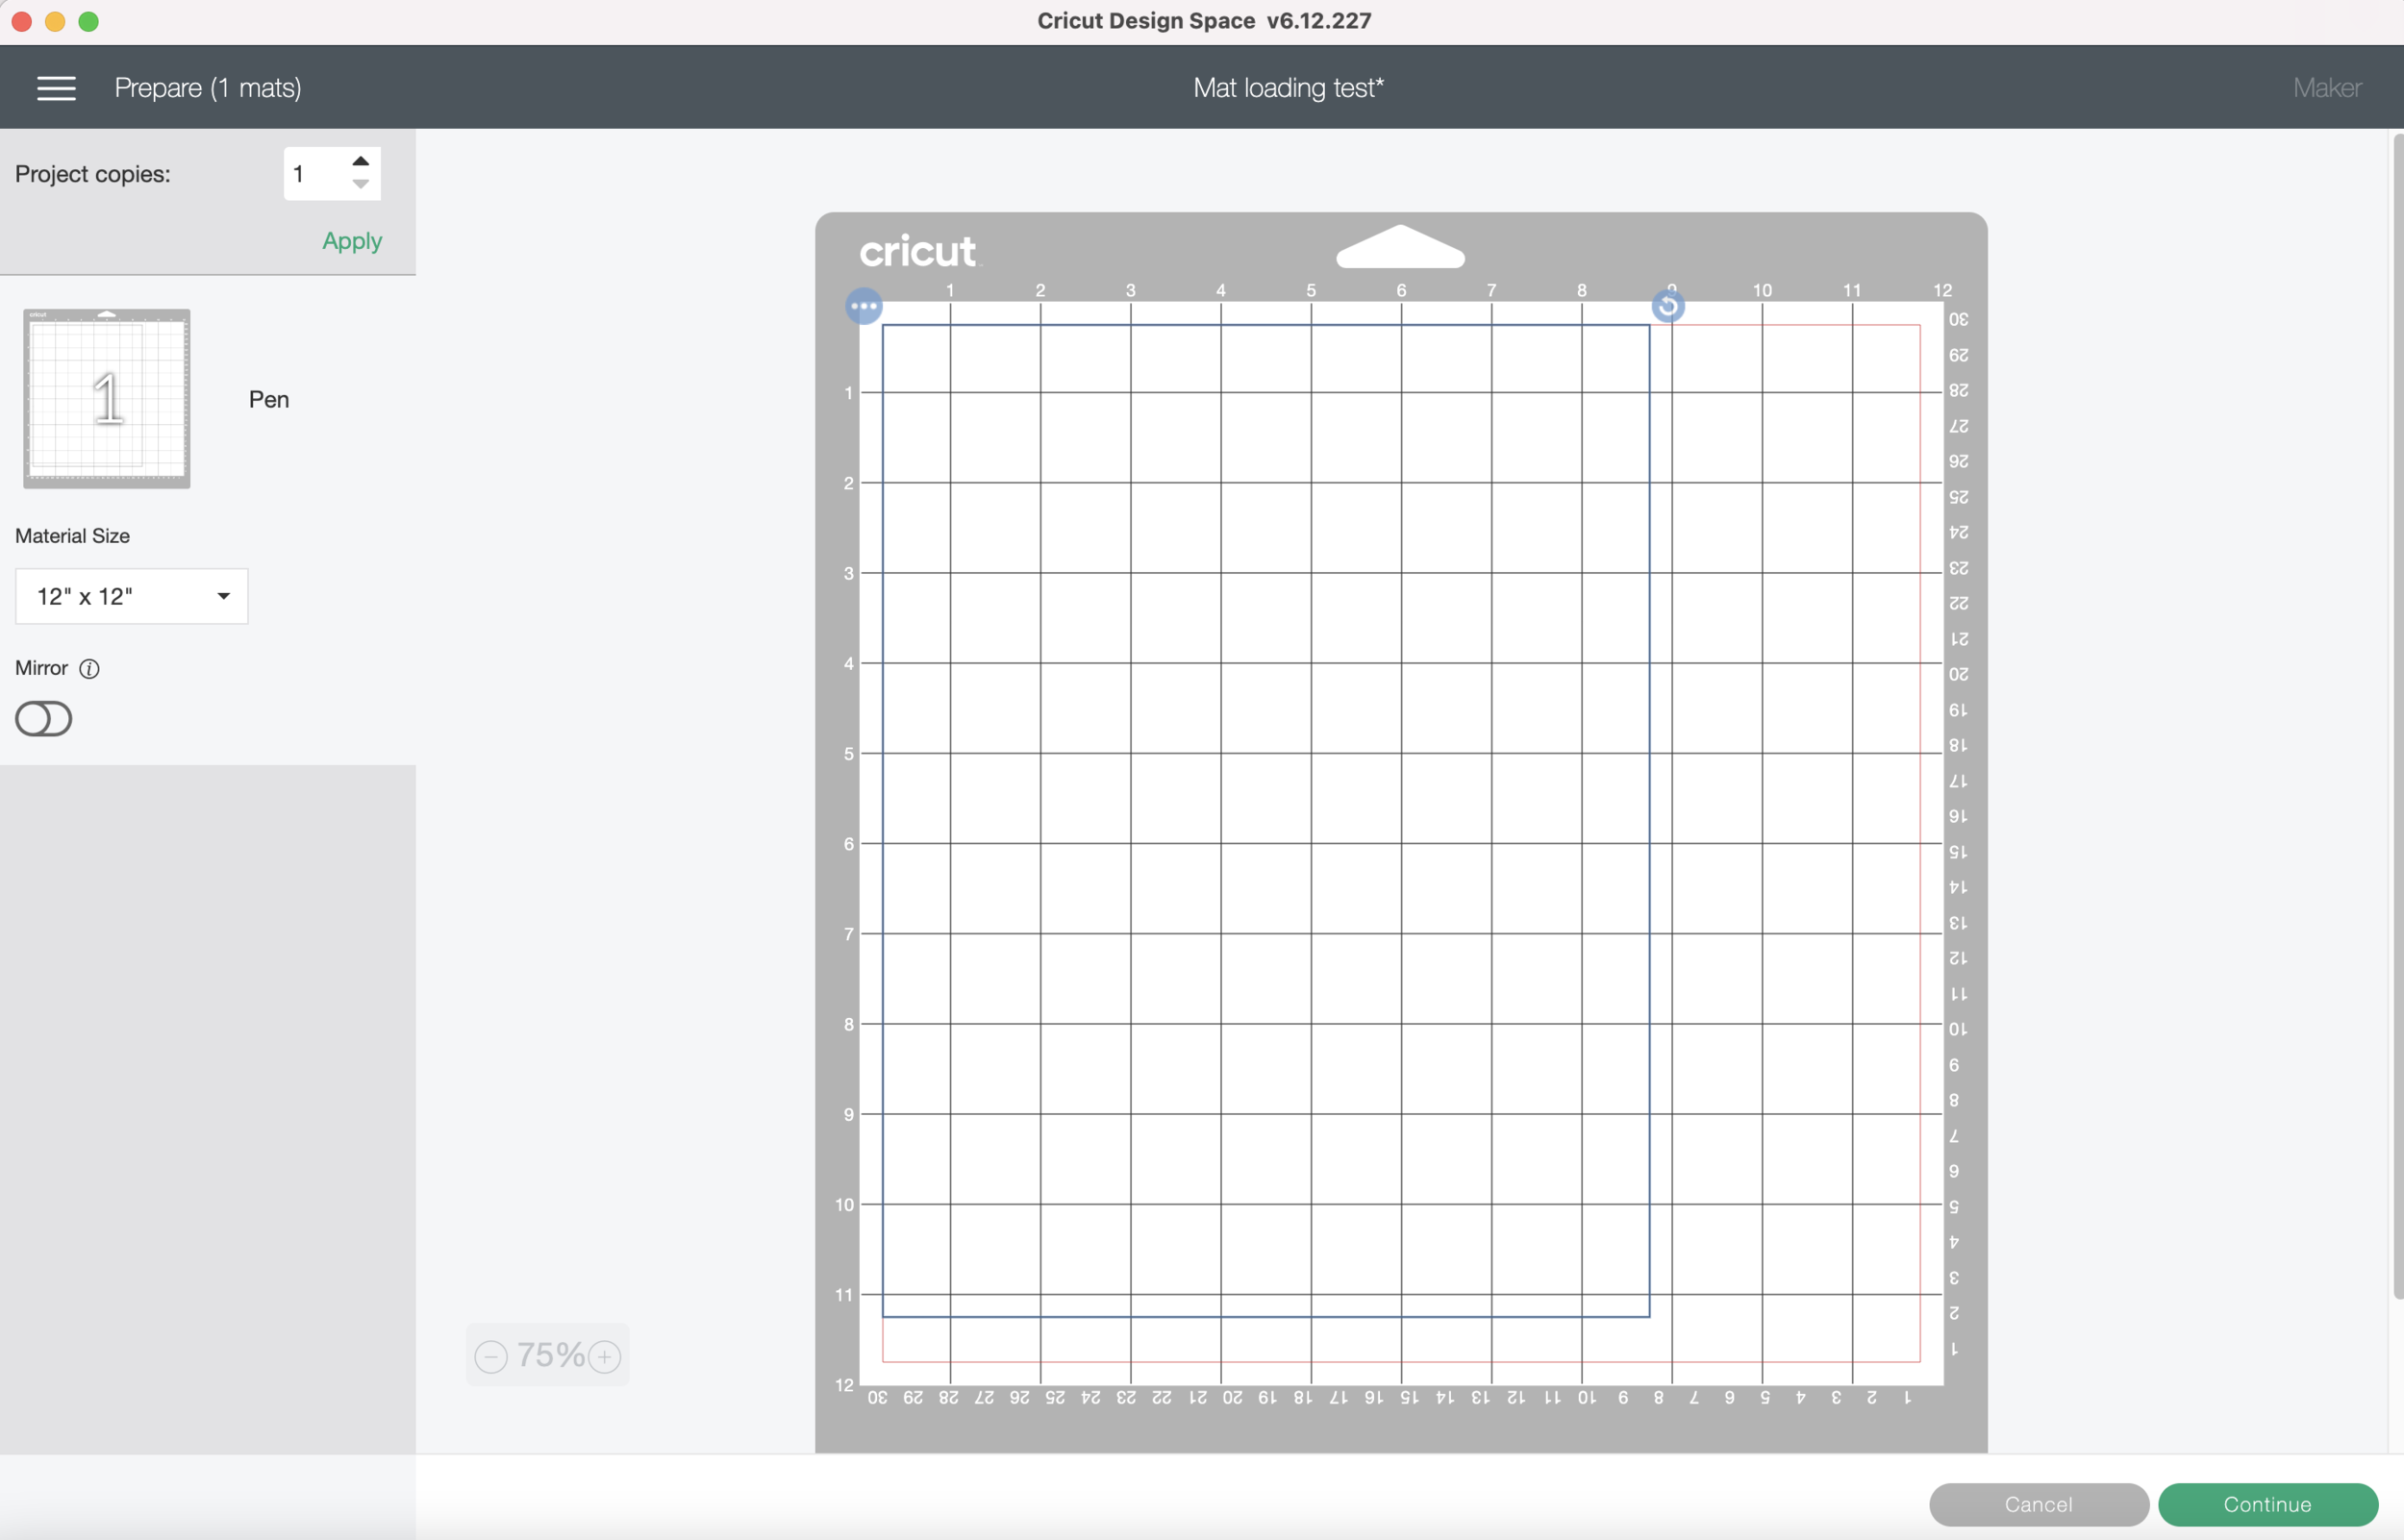
I’m going to carefully place my sticker sheet within the black lines on my mat, the longer bottom edge will slightly overlap the bottom black line.

Cutting stickers with Cricut machine

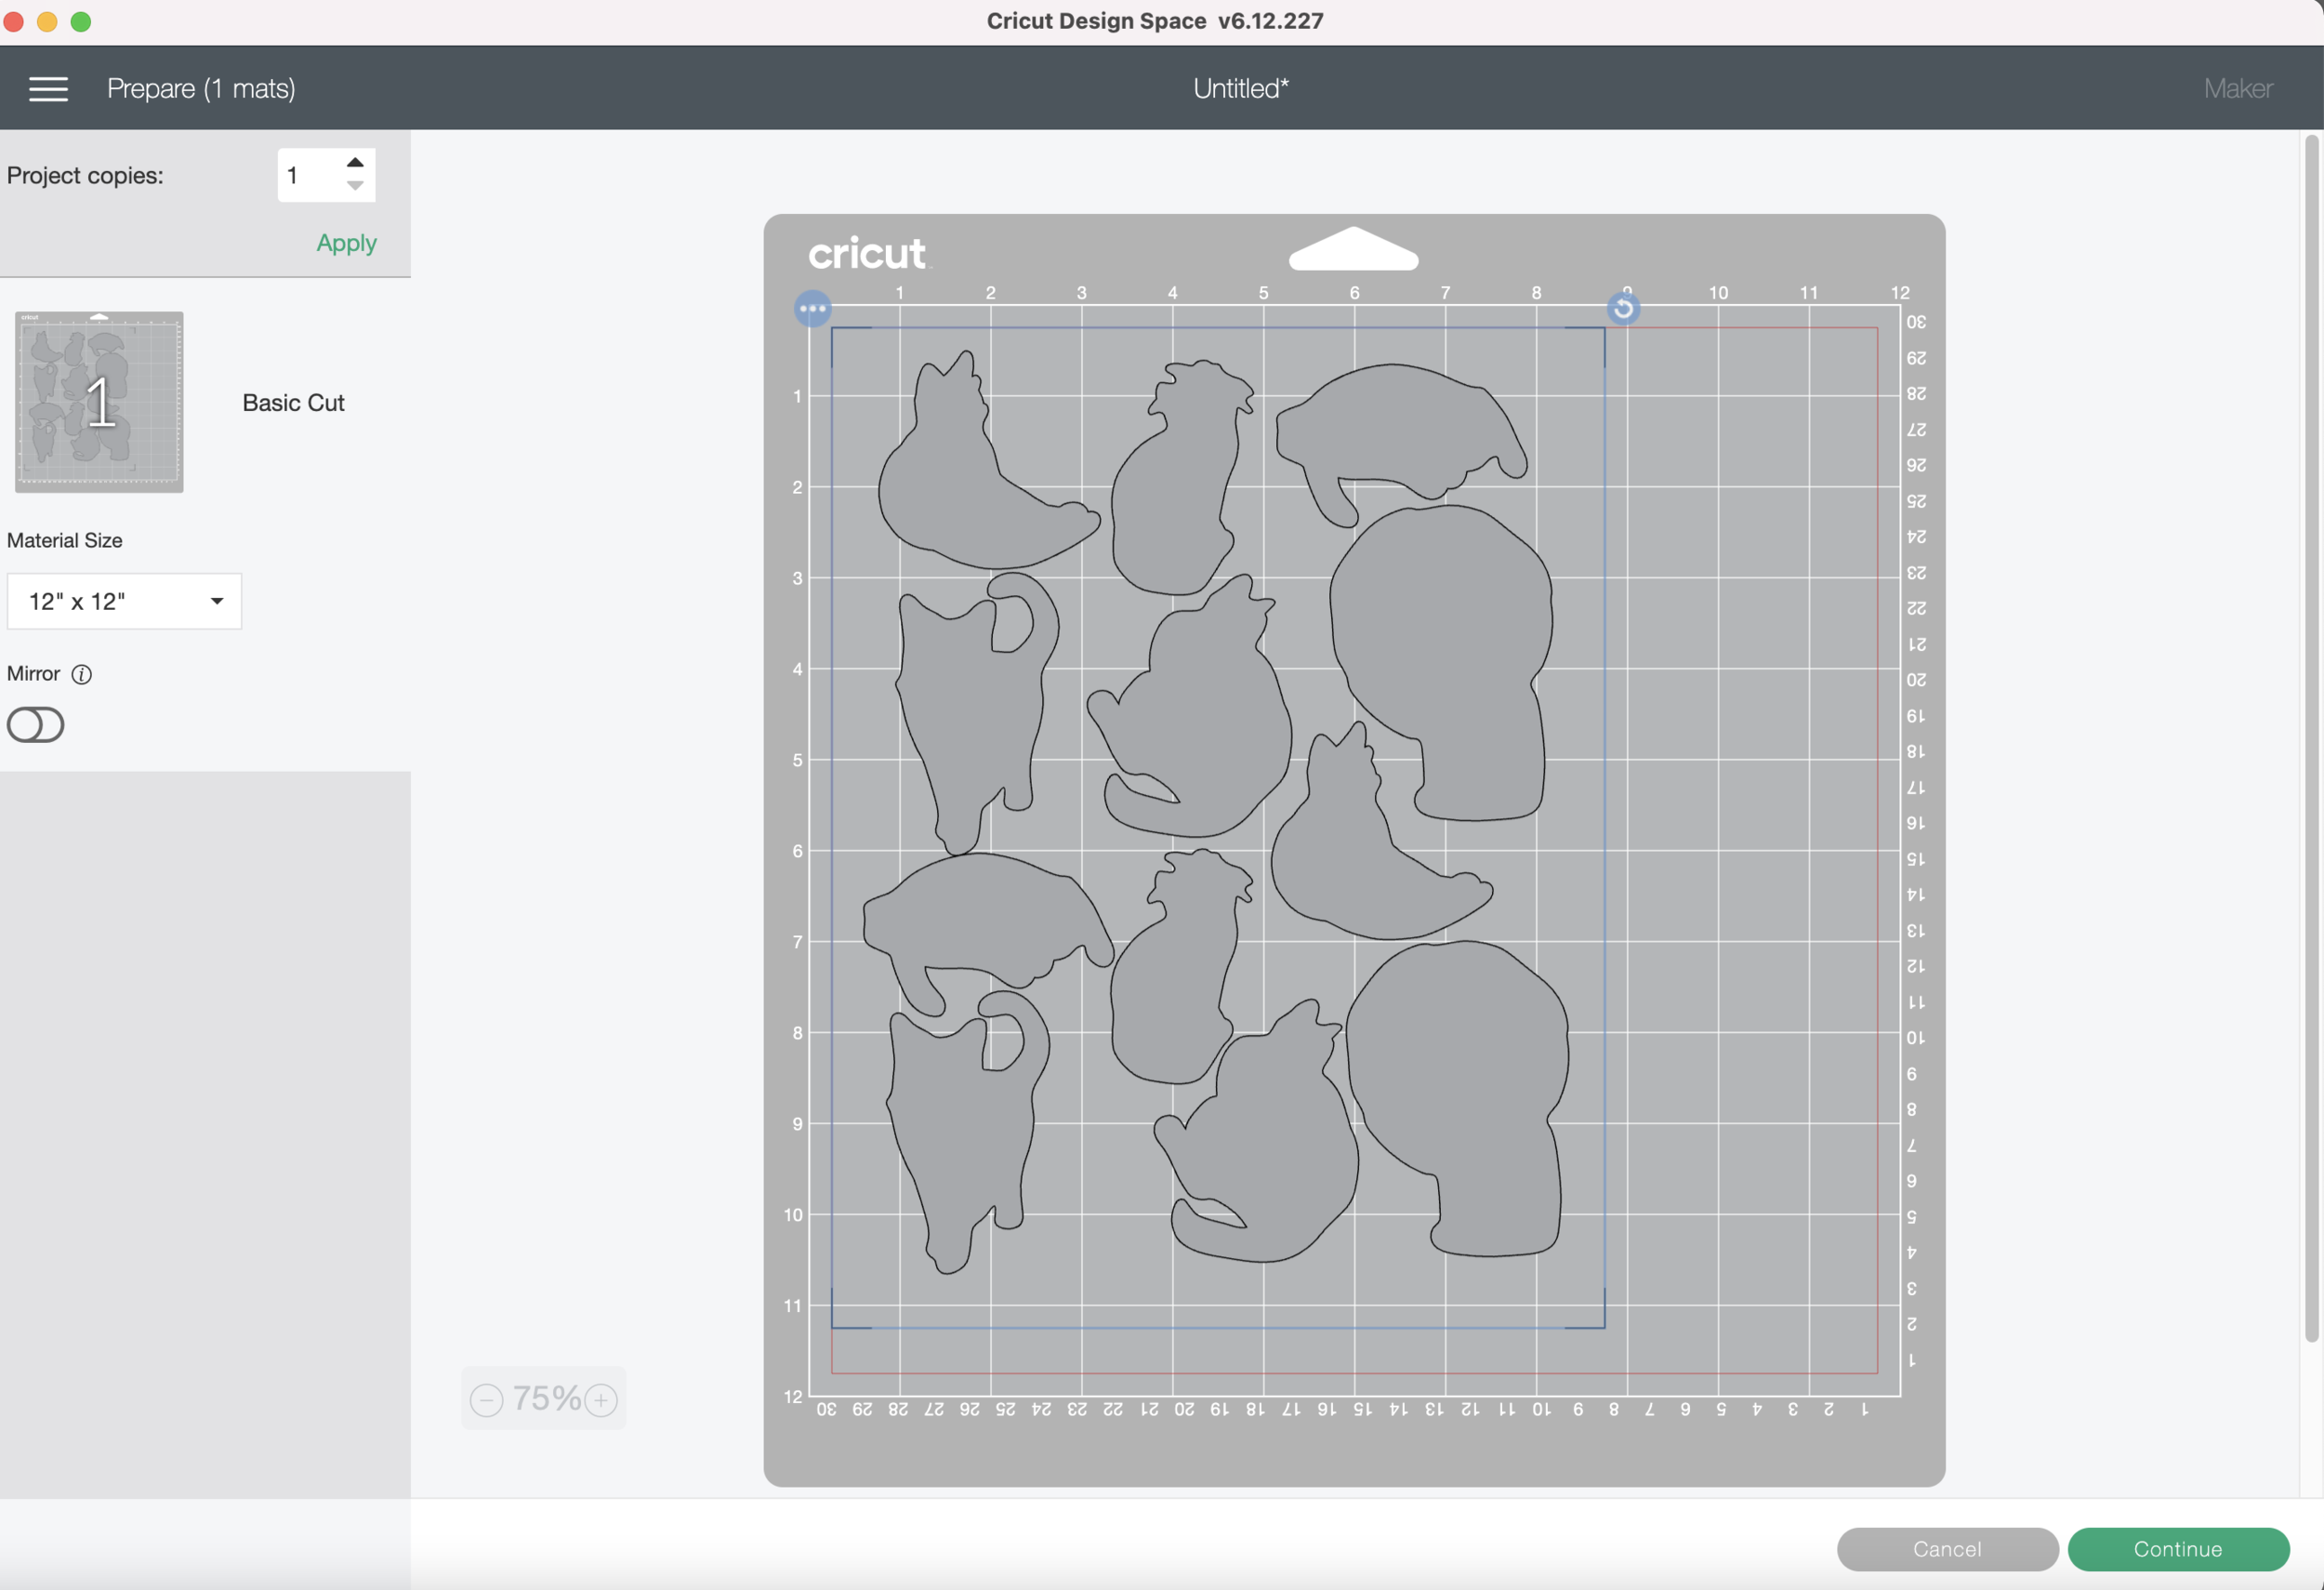
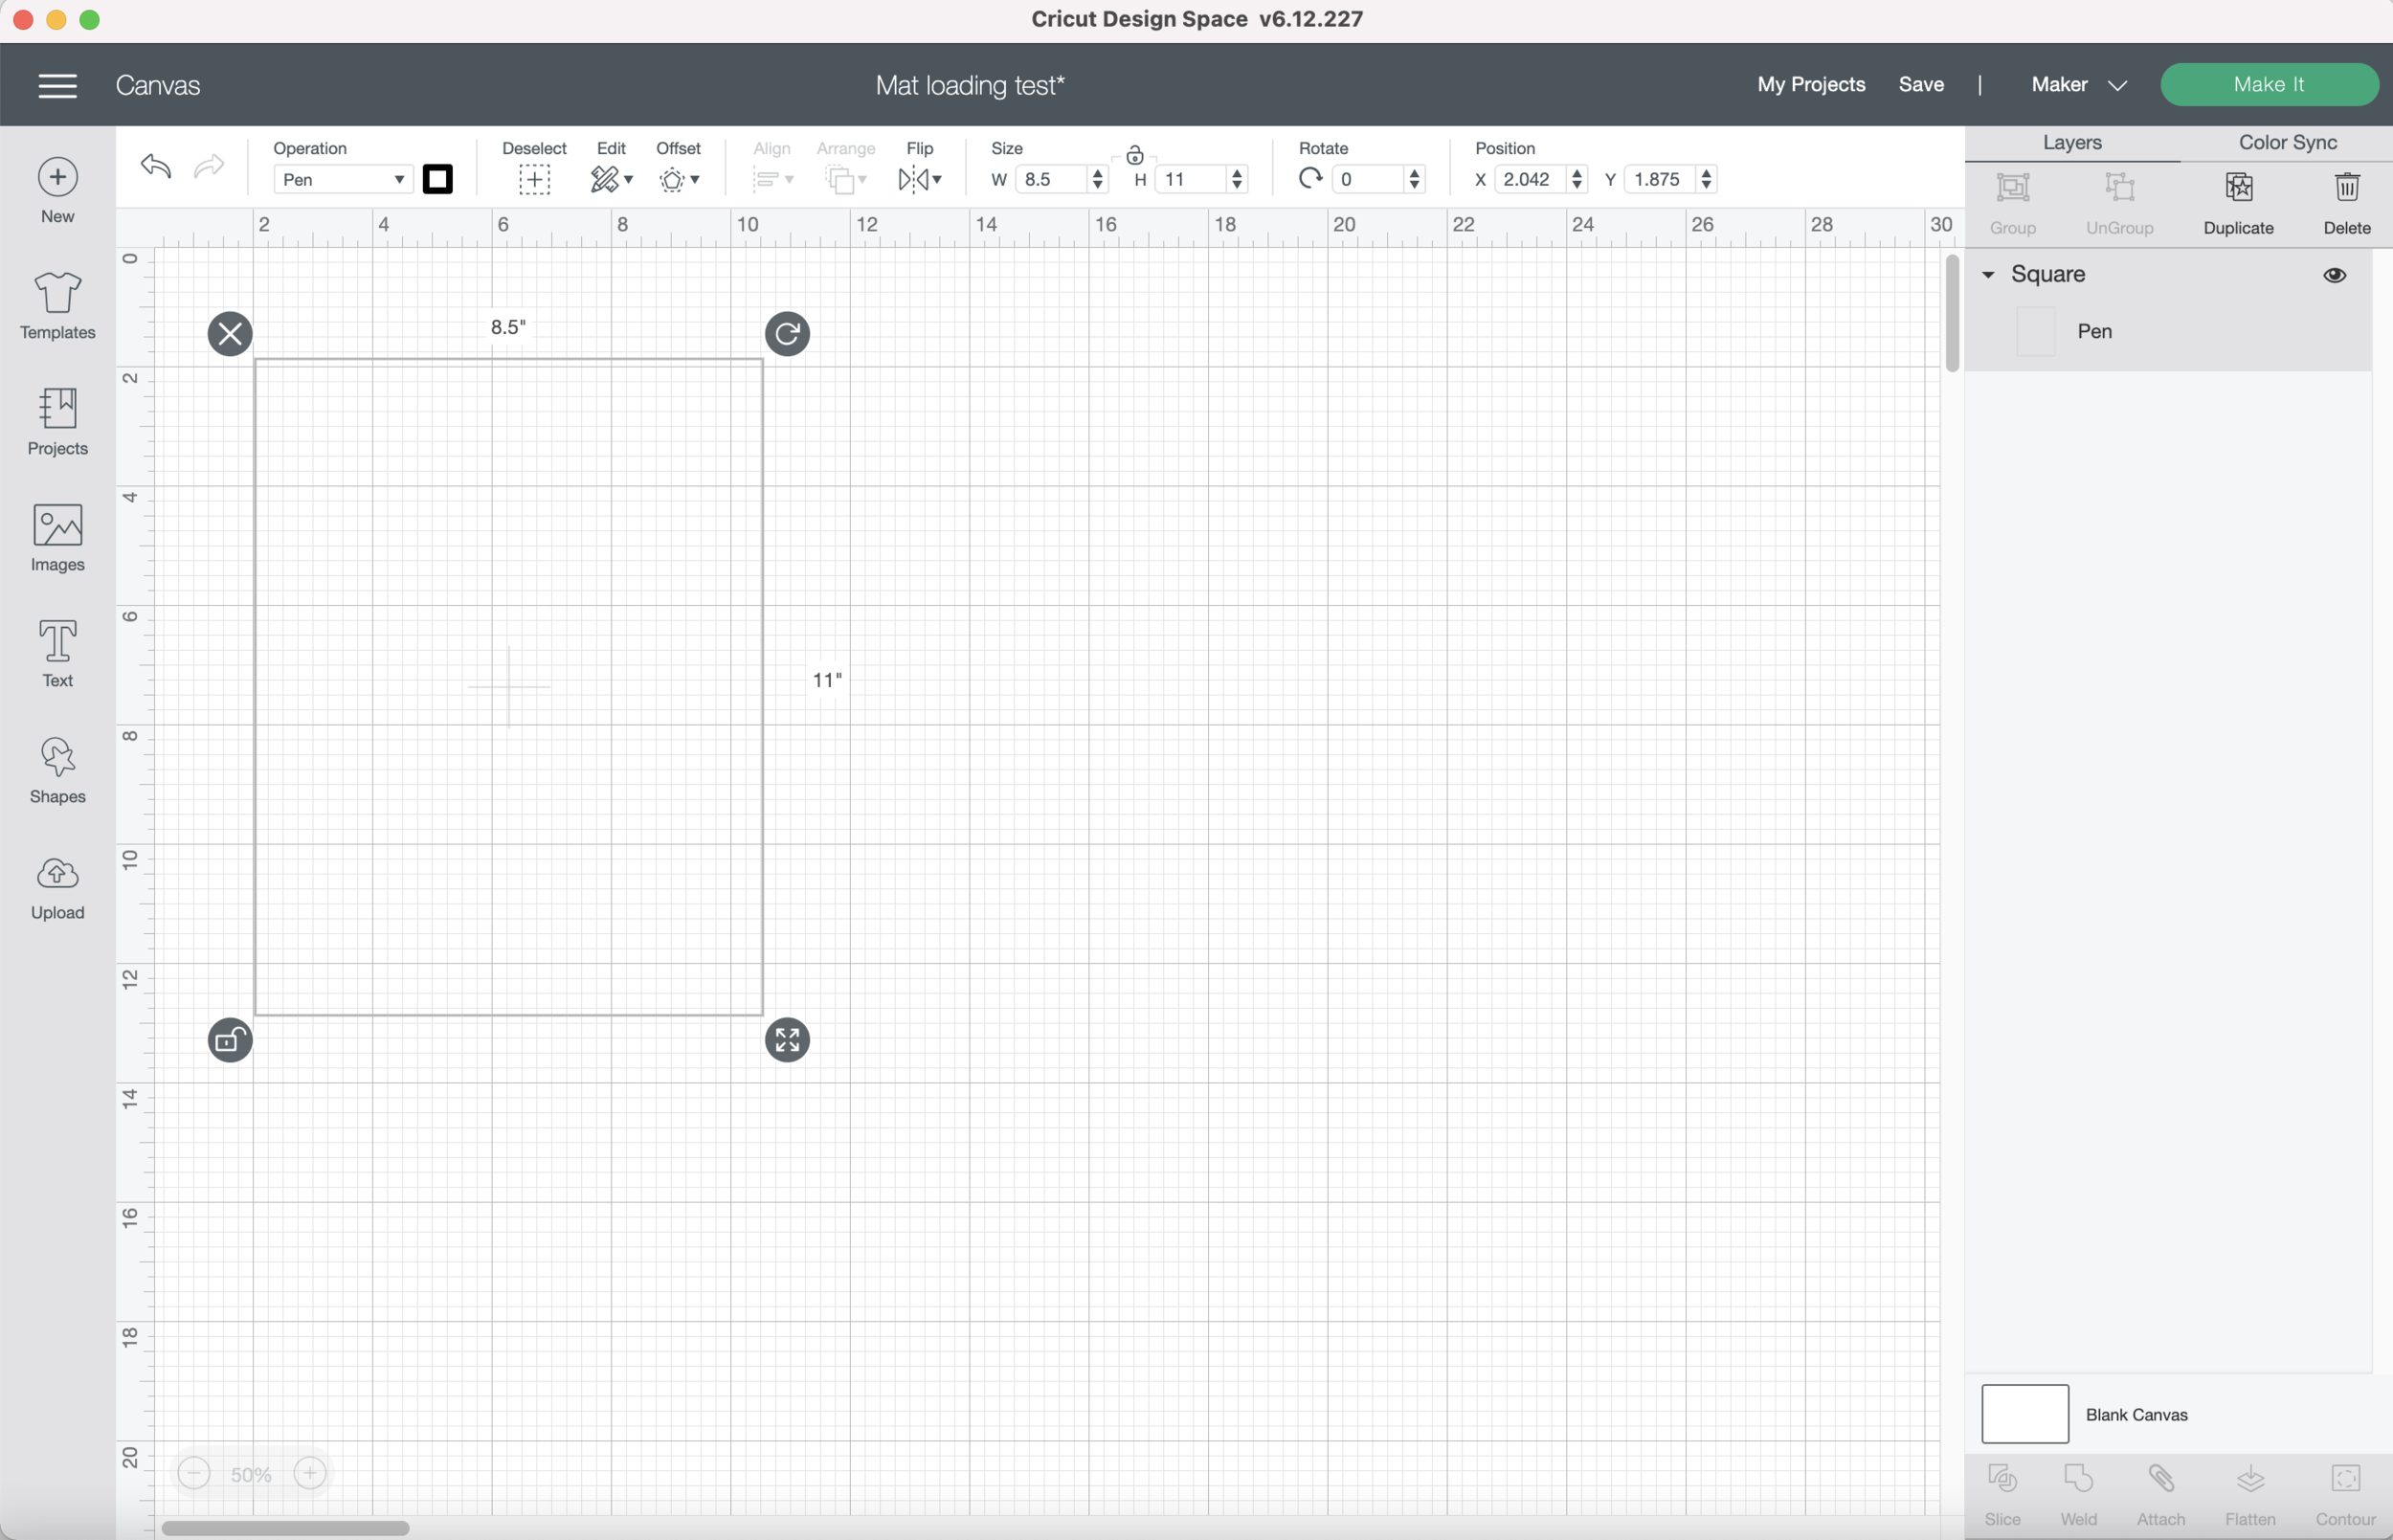
I’m using the same cut lines that I already uploaded to Design Space for my test cut.

Cutting stickers with Cricut machine

For this sticker sheet I’m going to do a Kiss Cut. So far I have found the Washi Sheet material setting works best for kiss cuts for this particular brand of sticker paper. I have to click on Browse All Materials to find the Washi Sheet material, unfortunately I keep getting an error when I try to save it to my favorites, so I have to search for it every time.

Cutting stickers with Cricut machine

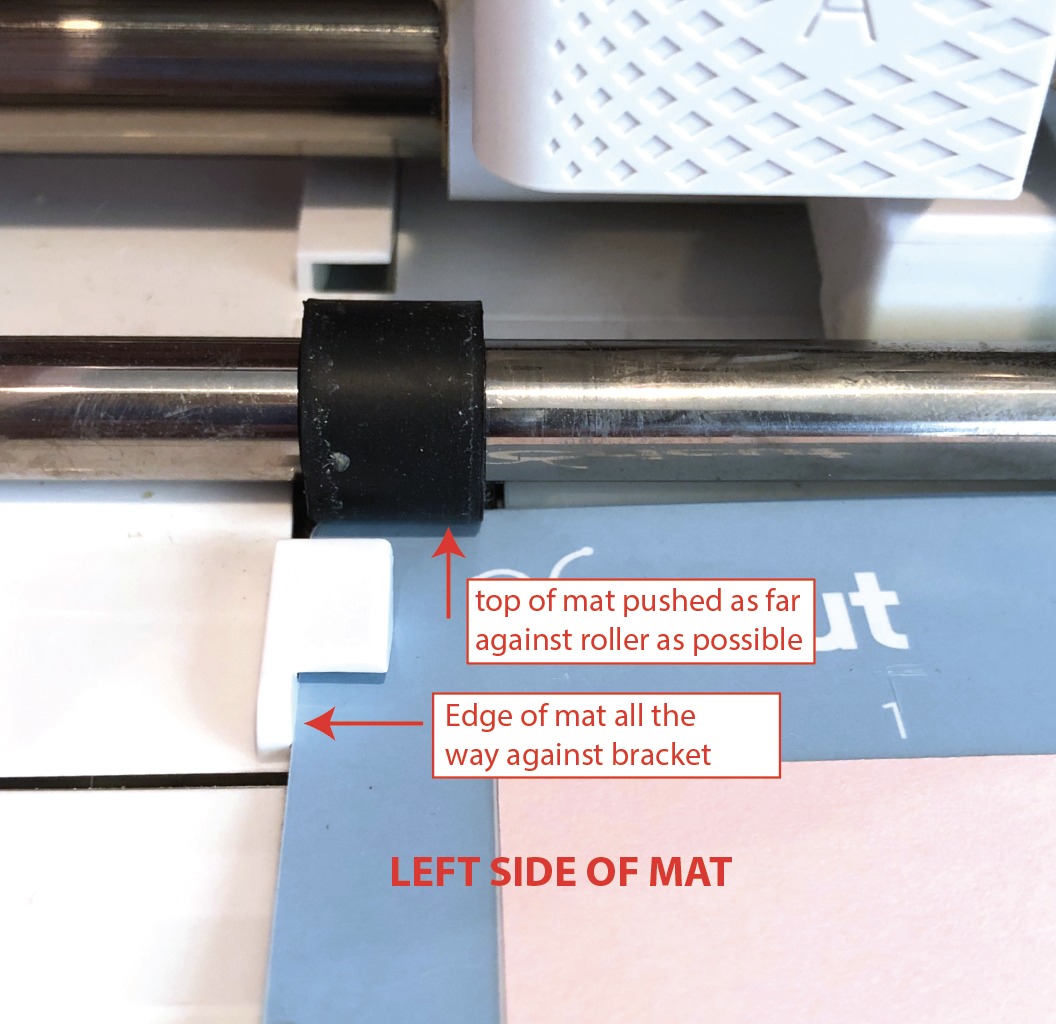
I load my mat like we practiced in Part 1 and press the Go button.

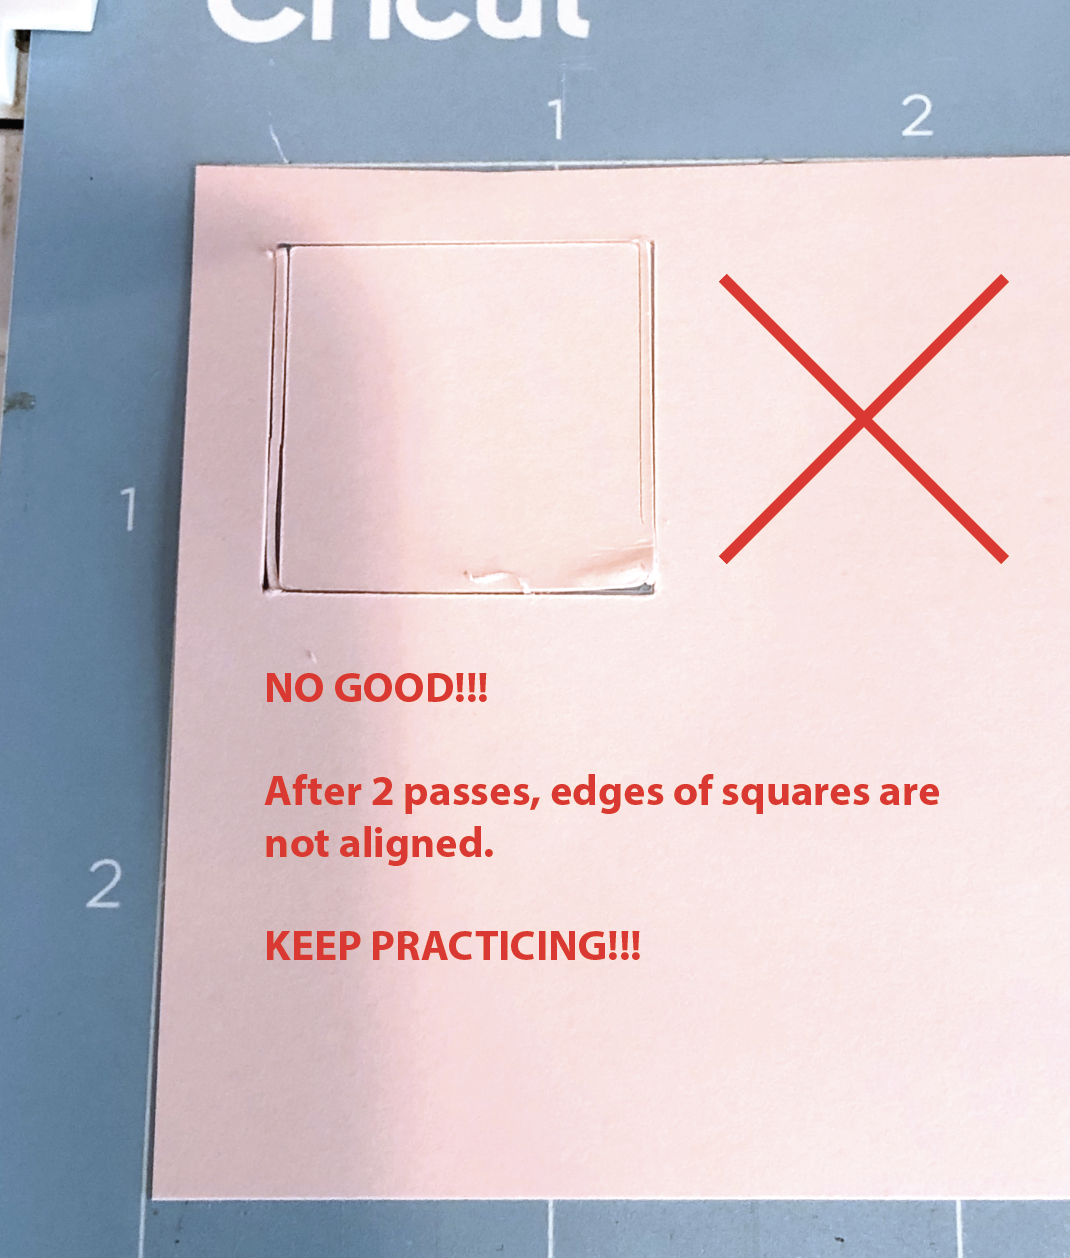
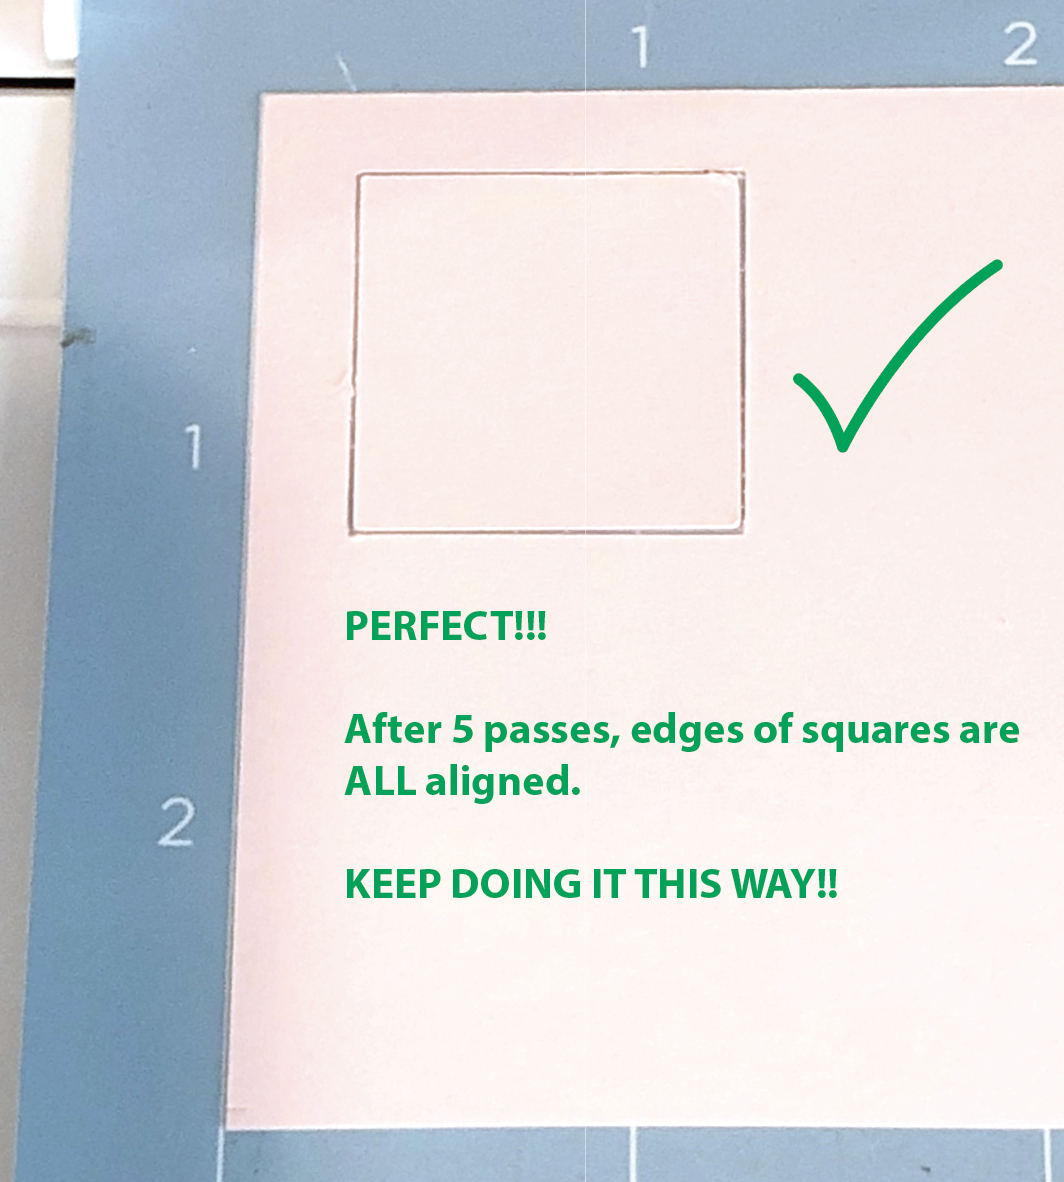
I check my cuts, everything looks good. So now I’m going to print and cut a few more! If you want die-cut stickers, try the regular sticker paper setting or the light cardstock setting. You may need to do 2 passes to cut all the way through the backing paper.

Cutting stickers with Cricut machine

This process is very tedious when you’re first starting, so don’t expect perfect results right away. But once you learn all the little nuances of your Cricut machine and your printer you won’t need to rely on the Print & Cut feature and you can cut full sheets of stickers!

Cutting Full Sticker Sheets with Your Cricut - Part 2 - Test Printing

Hi Everyone!

This week is another important step when creating full sticker sheets to cut on your Cricut Machine.

I always print a few test sheets on plain paper before I cut the actual sticker paper. Once you learn all the little nuances of your machine, you will probably be able to skip this step. But when you are just beginning to using this method, it’s best to practice, practice, practice before jumping into using your expensive sticker paper.

I already set up my artwork in Adobe Illustrator with my offset cutlines. If you need some guidance on creating offsets in Illustrator, you can check out my previous posts here and here.

Kitty Sticker artwork in illustrator

When I set up my art files in Illustrator I have 2 separate layers. First, the ARTWORK layer that we will use to print our stickers directly from Illustrator. Second, the CUTLINE layer that we will export as an SVG and import into Cricut Design Space.

Layers in Illustrator

Very Important: My cut layer contains a bracket in each corner of the 8.5” x 11” artboard. This is going to help us line up the cut lines in Design Space. Make sure you include these brackets when you set up your file!

Kitty Sticker artwork in Illustrator

For my test print, I’m actually going to print the grey cutlines with the artwork so I can really see how far off my machine cuts and make the appropriate adjustments.

I’m using an Epson SureColor P600 printer, but you can use any inkjet printer for this method. I do not recommend using a laser printer for this method. Since laser printers use heat, you will run into shrinkage issues with your paper and your cuts will be off unless you calculate the proper shrinkage. The shrinkage is very minimal, but it is noticeable.

I’m going to print 3 copies of my artwork on plain paper so I have a couple of extra to practice.

Your print dialog box will probably look different , but make sure the image is NOT SCALED when printing.

Print settings

Check your printouts carefully to make sure they are straight and the artwork is is the same position on all 3 printouts. If the artwork is shifted, at all, in any of the printouts you will need to test and/ or adjust your printer to make sure you are getting the same print placement everytime.

Checking print placement

After checking your print outs, carefully place one of the printouts inside the rectangle on the mat that we prepped in last weeks post. Take your time when doing this to make sure your paper is properly aligned within the rectangle.

Test Print placed on mat

Now we’re going to open our cut lines only in Design Space. I exported that layer as a separate SVG from Illustrator and imported it into Design Space.

Check that the dimension of the imported artwork are 8.5” x 11” like our file in Illustrator. Those very important brackets that you put in the corners on the artboard in Illustrator help ensure that the dimensions remain 8.5” x 11.

Cut Lines in Design Space

ATTACH all of your elements, and the press MAKE IT.

Those very important corner brackets are also going to help keep your artwork in the proper place in the upper left corner of the mat, but not beyond those red border lines in Design Space.

Cut lines in Design Space

I select Copy Paper and Default pressure for my material settings.

Now I carefully load my mat into the machine like we practiced last week, and press GO!!

After the machine is done cutting, load your mat and let’s check the results!

So on my first attempt, my paper is placed just a hair too high up on the mat. So for my next try I’m going to try to do a better job aligning the bottom edge of my paper to the bottom line that’s drawn on the mat.

First Cut Attempt

My 2nd attempt is much better! Remember it’s never going to be absolutely perfect, there are so many variables that go into this process and there will always be some level of human error. But it’s up to you how much time and effort you want to spend trying to perfect your cuts. Also, the more you do it, the better you’re going to become.

2nd Cut Attempt

Since the offset on my actual stickers will be white, I’m ok with my second attempt. I’m really going to focus on lining up my paper along the bottom line on my mat for my future cuts.

2nd cut attempt

If you are doing a colored offset, make sure you add some bleed around the edges so if it cuts slightly off there won’t be any white showing. Also, a wider offset will make a slightly off cut less noticeable.

Next week we’ll print on the actual sticker paper and cut some stickers!

Cutting Full Sticker Sheets with Your Cricut - Part 1 - Prepping your mat

Hi Everyone!

This week I wanted to start sharing how I cut full sticker sheets with my Cricut. I’m going to demo on my Cricut Maker, but you should be able to do this method on any of Explore or Explore Air machines as well.

I’m going to break this up into a few posts since it is a bit of a tedious process in the beginning. But once you get everything set up it should be pretty easy.

Today we’re going to start with prepping your mat. You don’t need to use a brand new mat, but it needs to be sticky enough that the paper staying in place while the machine is cutting. I will be using a blue mat since it’s not as sticky as the others, but you could also use an older green mat that’s not as sticky anymore.

Before we even print anything to cut, we need to practice loading our mat the SAME WAY EVERYTIME. This is probably the most important part of getting your stickers to cut in the right place eveytime. It’s best to practice, practice, practice before we waste any of our precious sticker paper.

I have a scrap piece of cardstock on my mat the upper left corner. For now, we’re just practicing loading and unloading our mat consistently, so you can also use just a plain piece of paper.

The easiest, most consistent method that works for me is having my mat pushed all the way against the left little bracket and up against the black roller as far as it will go, without forcing it. The right side will have a small gap where it doesn’t touch the bracket, but the mat will still need to be pushed as far against the black roller as it will go, without forcing it.

Screen Shot 2021-08-29 at 8.30.04 PM.png

In Cricut Design Space, I made a simple 1” x 1” square to cut from my scrap cardstock. You can use whatever shape you want, this is just to test that I am loading my mat the same way every time.

I click “Make it” and Design Space automatically puts my square in the upper left corner. But notice that it’s not completely in the left corner, there’s a red bounding box about a 1/4” inch inside the edges of the grid that I cannot move any elements outside of the red lines. This will be important later when we are setting up our sticker sheets for cutting.

Screen Shot 2021-08-28 at 12.33.18 PM.png

Now I’m going to practice loading my mat - all the way against the left little bracket and up against the black rollers as far as it will go, without forcing it. (See photos above)

I press Go on my machine and let it cut out the square. After it’s done cutting, I’m going to unload my mat.

I’m going to leave the already cut cardstock on my mat and send it through my machine again, loading it the EXACT same way I did for the first cut.

If you are loading your machine exactly the same way, the cut lines should be directly on top of the first set of cut lines. If you shifted the placement of your mat, the 2nd set of cut lines will be off.

Keep practicing loading & unloading your mat so all of the cut lines are aligned.

Screen Shot 2021-08-29 at 8.41.58 PM.png

Once you’ve mastered loading your mat, we’re going to mark our mat so we know where to place the sticker paper. You’ve probably seen people use tape or cardstock to mark their mats, I’m not going to use either of those. I’m going to use a fine tip pen to draw directly on my mat, so I will still be able use my full mat for other projects.

The sticker paper I use is 8.5” x 11”. If you are using A4 your paper size will be 210mm x 297mm (8.27” x 11.69”) so you can sub those measurements for the 8.5”x11” measurements.

In Design Space, I’m going to create an 8.5” x 11” rectangle (8.27” x 11.69” or 210mm x 297mm if you are using A4 paper). I’m going to change the operation from “Cut” to “Draw” so I can use my fine tip pen.

Screen Shot 2021-08-29 at 3.19.56 PM.png

I’m going to press “Make it” and again, Design Space automatically puts my rectangle in the upper left corner, but there’s still that roughly 1/4” border around my mat. I’m going to keep the placement of the rectangle as it is.

My machine draws an 8.5” x 11” rectangle directly on my mat, and now we have a guide for where to place our sticker paper on the mat. Let the pen dry for a few hours or overnight, especially if you are using the Cricut brand fine tip pen, it smudges pretty easily.

Screen Shot 2021-08-29 at 8.50.04 PM.png

Next week, I’m going to do a test print to check the placement of my cut lines before I actually cut the sticker paper.