Hello and welcome! This is my first blog post and published tutorial! I’m JoAnna, I love creating textile and surface pattern designs, sewing, drawing, and painting. I hope to bring a tutorial or quick little tip to you weekly.
This week I’m going to start with a cute little project for Valentine’s Day that I created on my Cricut Maker. I designed the artwork for these pillow boxes as draw files to be used with the Cricut Foil Transfer Tool, We R Memory Keepers Foil Quill, or Cricut Pens. They’re perfect for filling with Valentine’s day goodies, like my personal fave, chocolate.
If you have any questions about this tutorial, feel free to ask in the comments and I’ll get back to you as soon as I can!
Here are the supplies you will need for this project: (Links below may be affiliate links and I may earn a small commission if products are purchased via the links.)
My Valentine’s Day SVG files (available here in my Etsy shop)
Cricut machine (I have a Maker, that’s what I will be using for this demo)
Cricut Design Space (must be the desktop version, the foil transfer tool is not supported by the app)
Cricut Scoring Wheel or Stylus
Cricut Foil Transfer sheets 4x6 or 12x12 (trimmed down to 4x6)
Lightweight Cardstock (I’m using Recollections Essentials 65 lb/ 176gsm, 8.5'“x11”, from Michaels for this project, but feel free to use whatever you have on hand)
Glue or double sided tape
Whatever you want to put inside once it’s finished! I like to use pre-wrapped candies.
Let’s get started!
Download and save the SVG files to your computer.
After downloading and saving the SVG files to your computer, upload it to Cricut Design Space and press SAVE.
Select the image from the recently uploaded images, and press INSERT IMAGES.
The file is going to look a little weird at first, but we’re not done yet!!
In the layers panel, select the top most “group” under “Retro valentines”, and in the “linetype” drop down
select DRAW if you are using Cricut pens or the We R Memory Keepers foil quill.
select FOIL if you are using the Cricut Foil Transfer Tool.
I’m going to be using the Cricut Foil Transfer tool Medium tip for this project.
Next, we’re going to fix our score lines. select the layer under our Foil/ Draw artwork “retro valentines” and change those from CUT to SCORE under the LINETYPE drop down.
I’m going to change my background material color, just so all of my cut/ score/draw lines are easier to see.
Select the very top “Retro Valentines” layer and select UNGROUP along the top of the layers panel.
Select just the top layer called GROUP and click ATTACH.
Then select the only the 2 layers called “Retro Valentines” and click ATTACH.
Let’s save what we have so far!
After saving, press MAKE IT.
Your project is going to be separated onto 2 mats, but you really will only be using 1 mat.
**I’m doing it this way because I prefer to set up my foil on my mat before it’s loaded into my machine. If you attach everything onto one mat, it wants to score first, then foil. I find it difficult to add the foil once the mat is in the machine**
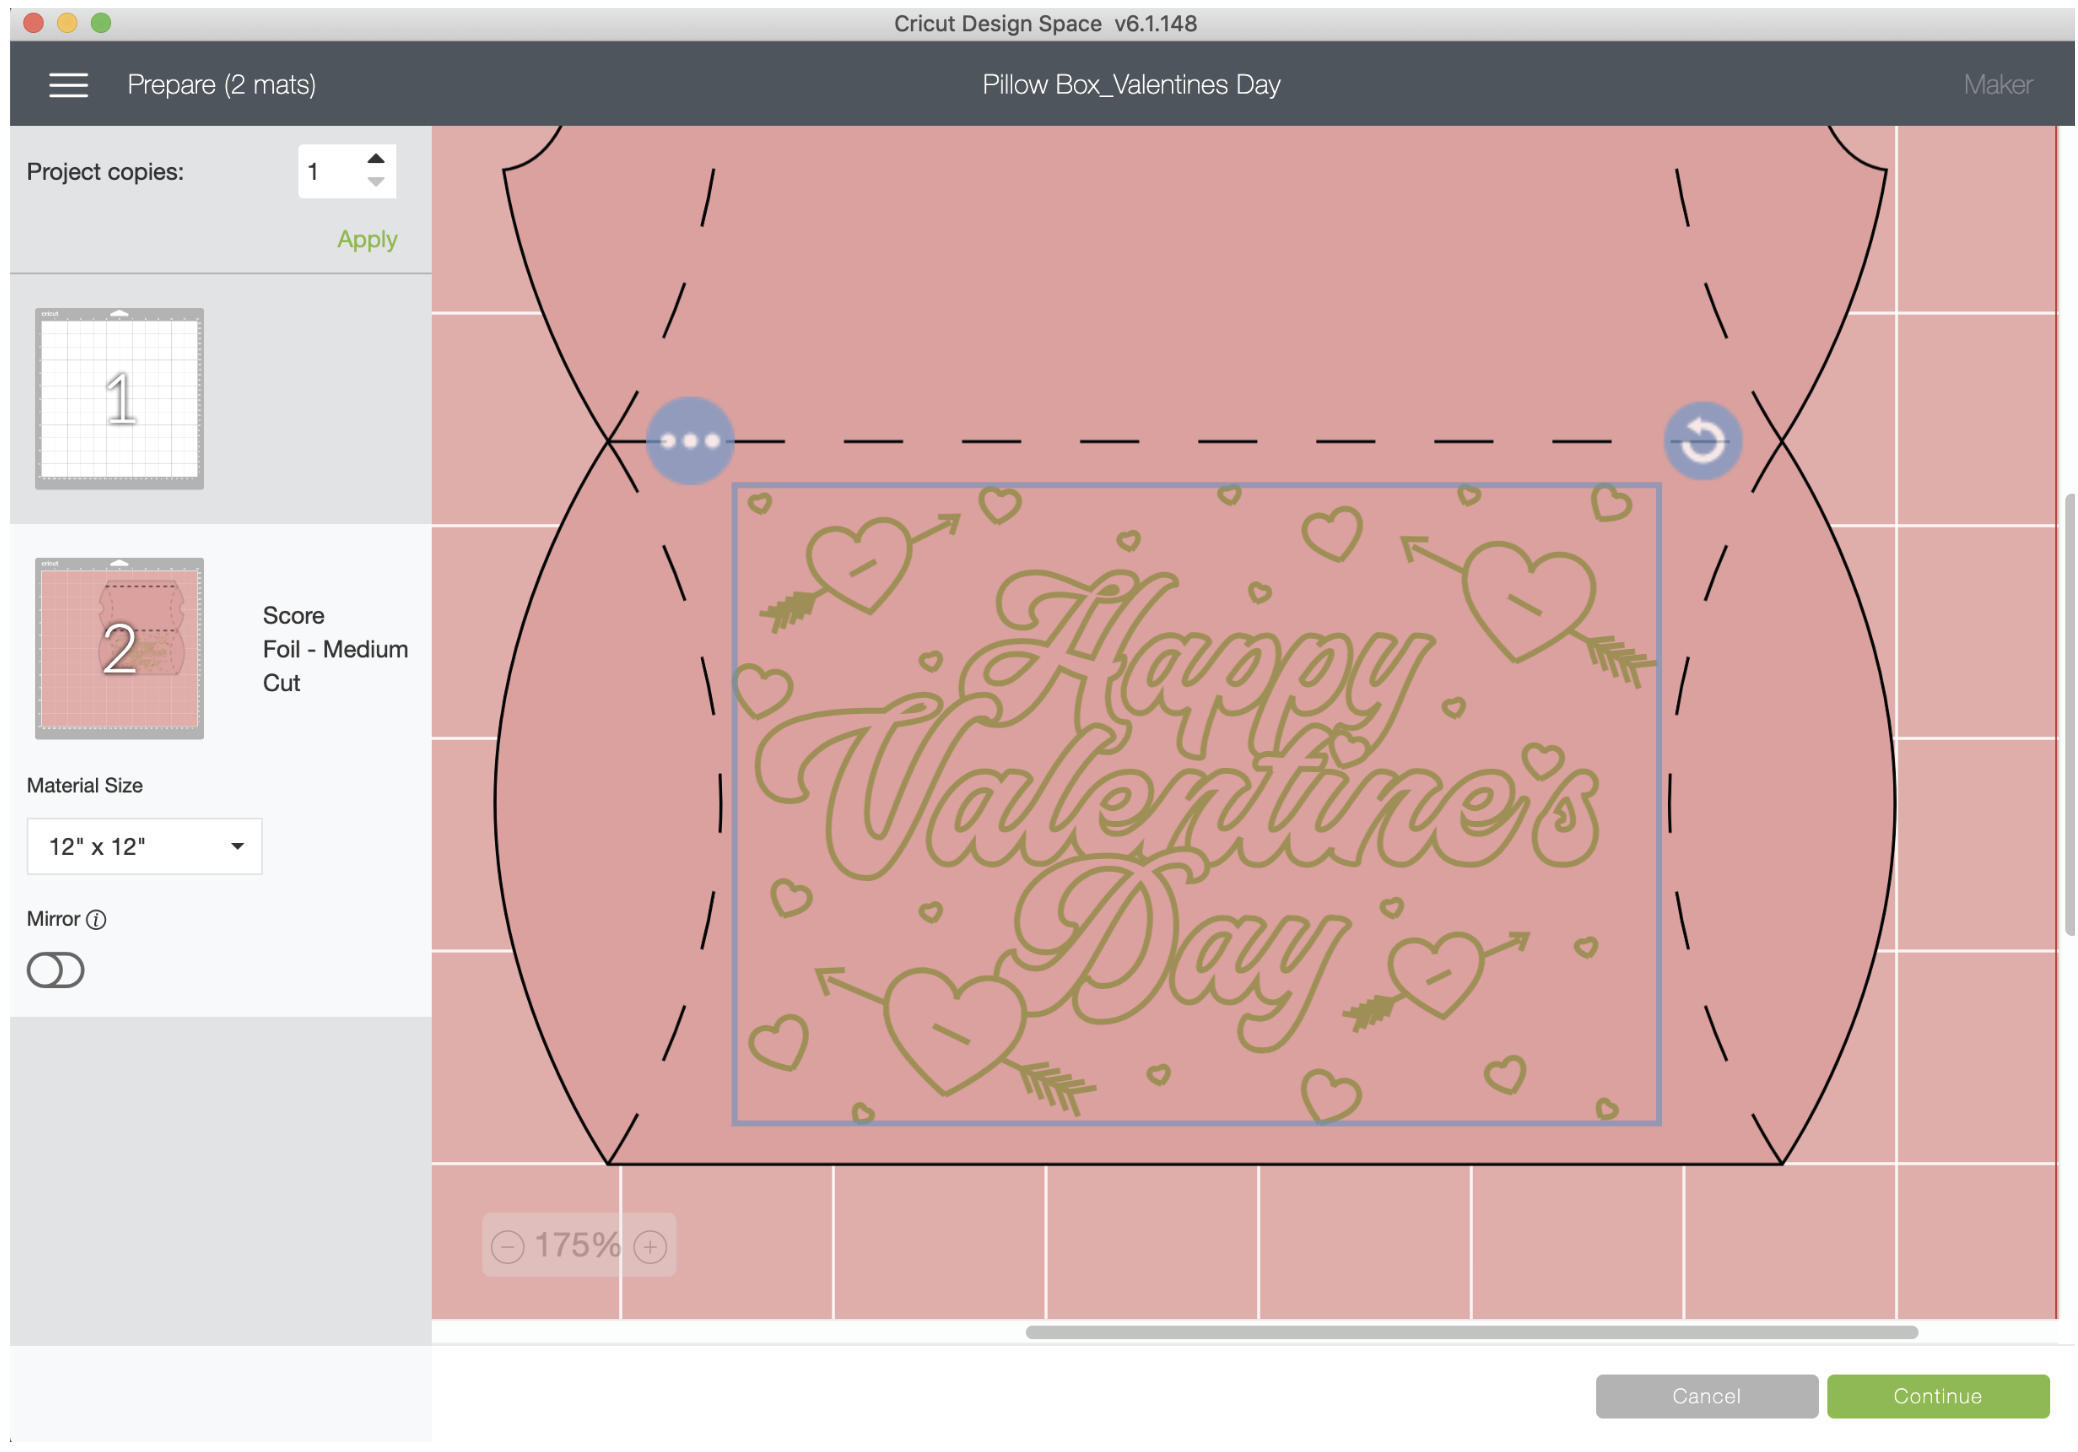
I’m using 8.5 x 11 cardstock, but I’m keeping my material size at 12 x 12 so I can move my artwork & cutlines around on my mat.
First i’m going to move my cut & score lines over to the right of my mat. I’m lining up my piece on the 11” and 8” lines on my mat. I’m really zooming in to get it lined up as close as possible.
Then, I’m going to line up my drawing with the cut & score lines.
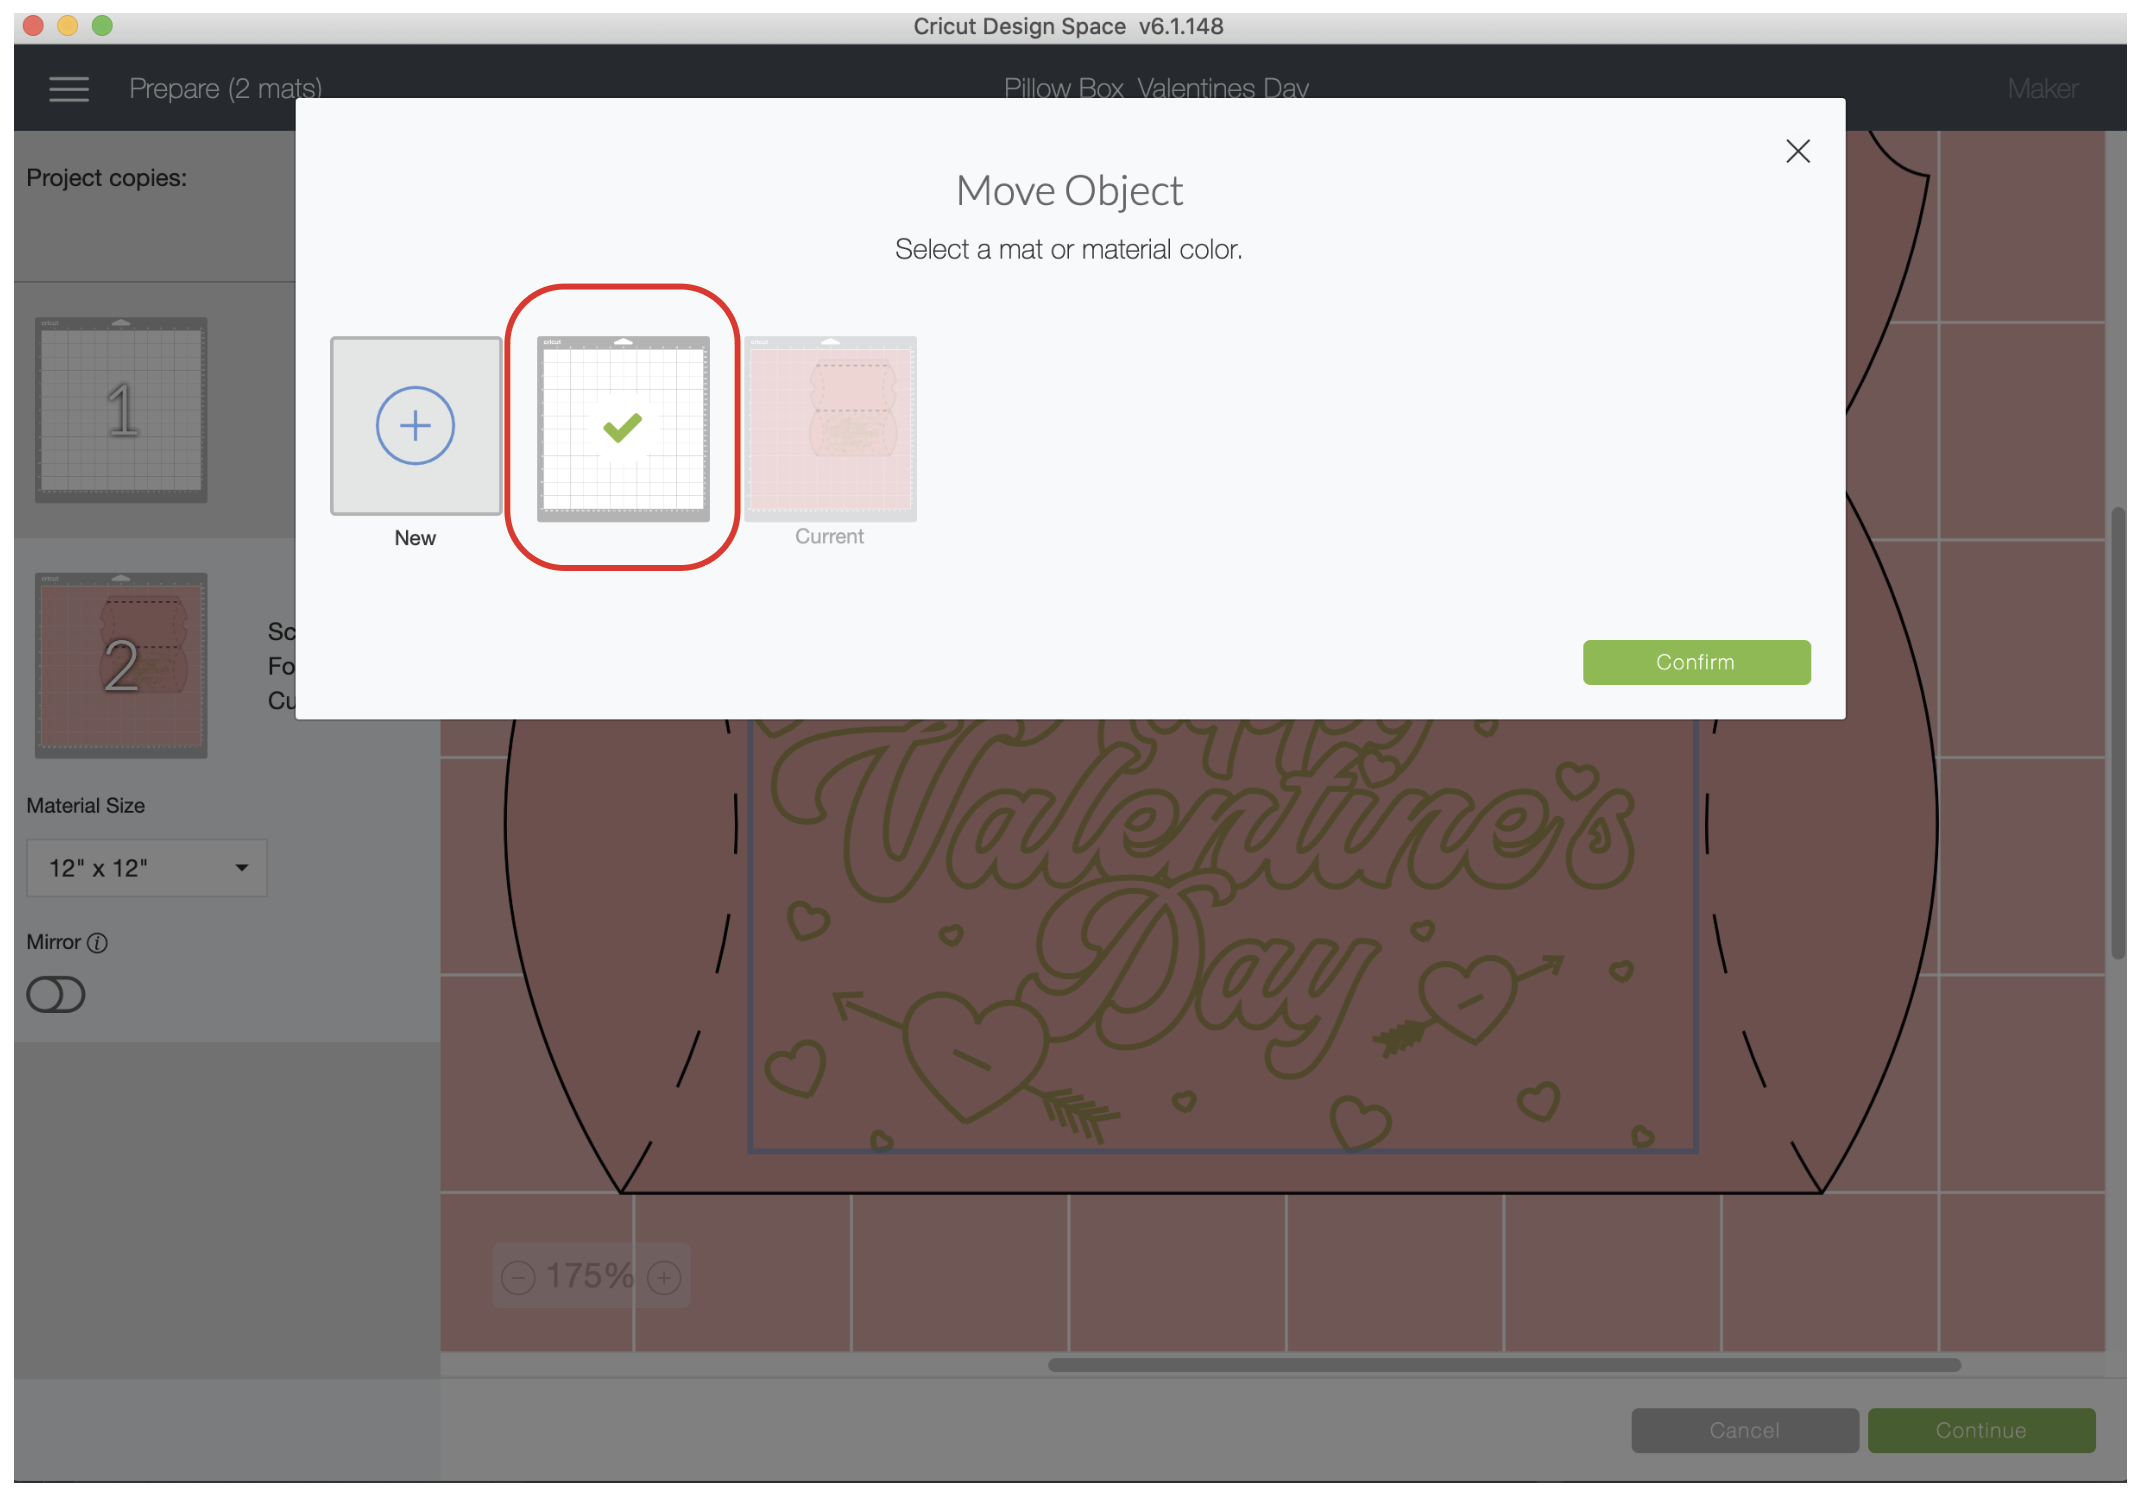
Select mat number 1.
Click the bubble with the 3 dots in the upper left corner of the artwork and select MOVE OBJECT
Select the mat with the pink cardstock, and click CONFIRM.
Now place the artwork where you want it on the pillow box pattern . I’m really zoomed in to line it up how I want it .
Once you’ve got the artwork aligned with the cardstock how you would like it, select just the artwork again and click the 3 dots in the upper left corner. select MOVE OBJECT and click the first mat with the white cardstock.
Press CONTINUE. For the base material I have LIGHT CARDSTOCK selected. I am changing the pressure for the foil transfer tool to LESS (with my machine, I find i’m getting better results with less pressure on the light cardstock).
Place your cardstock on the cutting mat and tape the foil over the cardstock how you arranged it in the step above.
Load your foil tool and mat into the machine as instructed.
PRESS GO!!
When the foiling is done, press the flashing arrows, but do not actually remove the mat from the machine!!
Carefully peel off the foil.
Insert the scoring wheel as instructed in Design Space. For the scoring as cutting, I change the pressure to MORE so I get a better fold line and the cardstock gets cut all the way though.
Once the machine is ready, press the flashing arrows to load the mat again. Everything should line up pretty well if you did not remove the mat from the machine.
Once the scoring is done, change to the Fine Point Blade as instructed.
After the cutting is done, eject the mat from the machine and carefully remove your project from the cutting mat .
I like to go around and pre-fold all my score lines before final assembly.
Apply glue or double sided tape along the bottom flap. Fold the front of the box down so it covers the flap.
Fold in the sides, and you’re done! Now you can just pop open an end and add whatever you like inside.


