
Hi Everyone! This year one of my goals is to better organize all of my craft and art supplies. I have A LOT! I don’t have a pretty little workspace like you see all over Pinterest. They’re very cute, but just not practical for me. ( I’m guessing these people don’t have cats or dust in their house.)
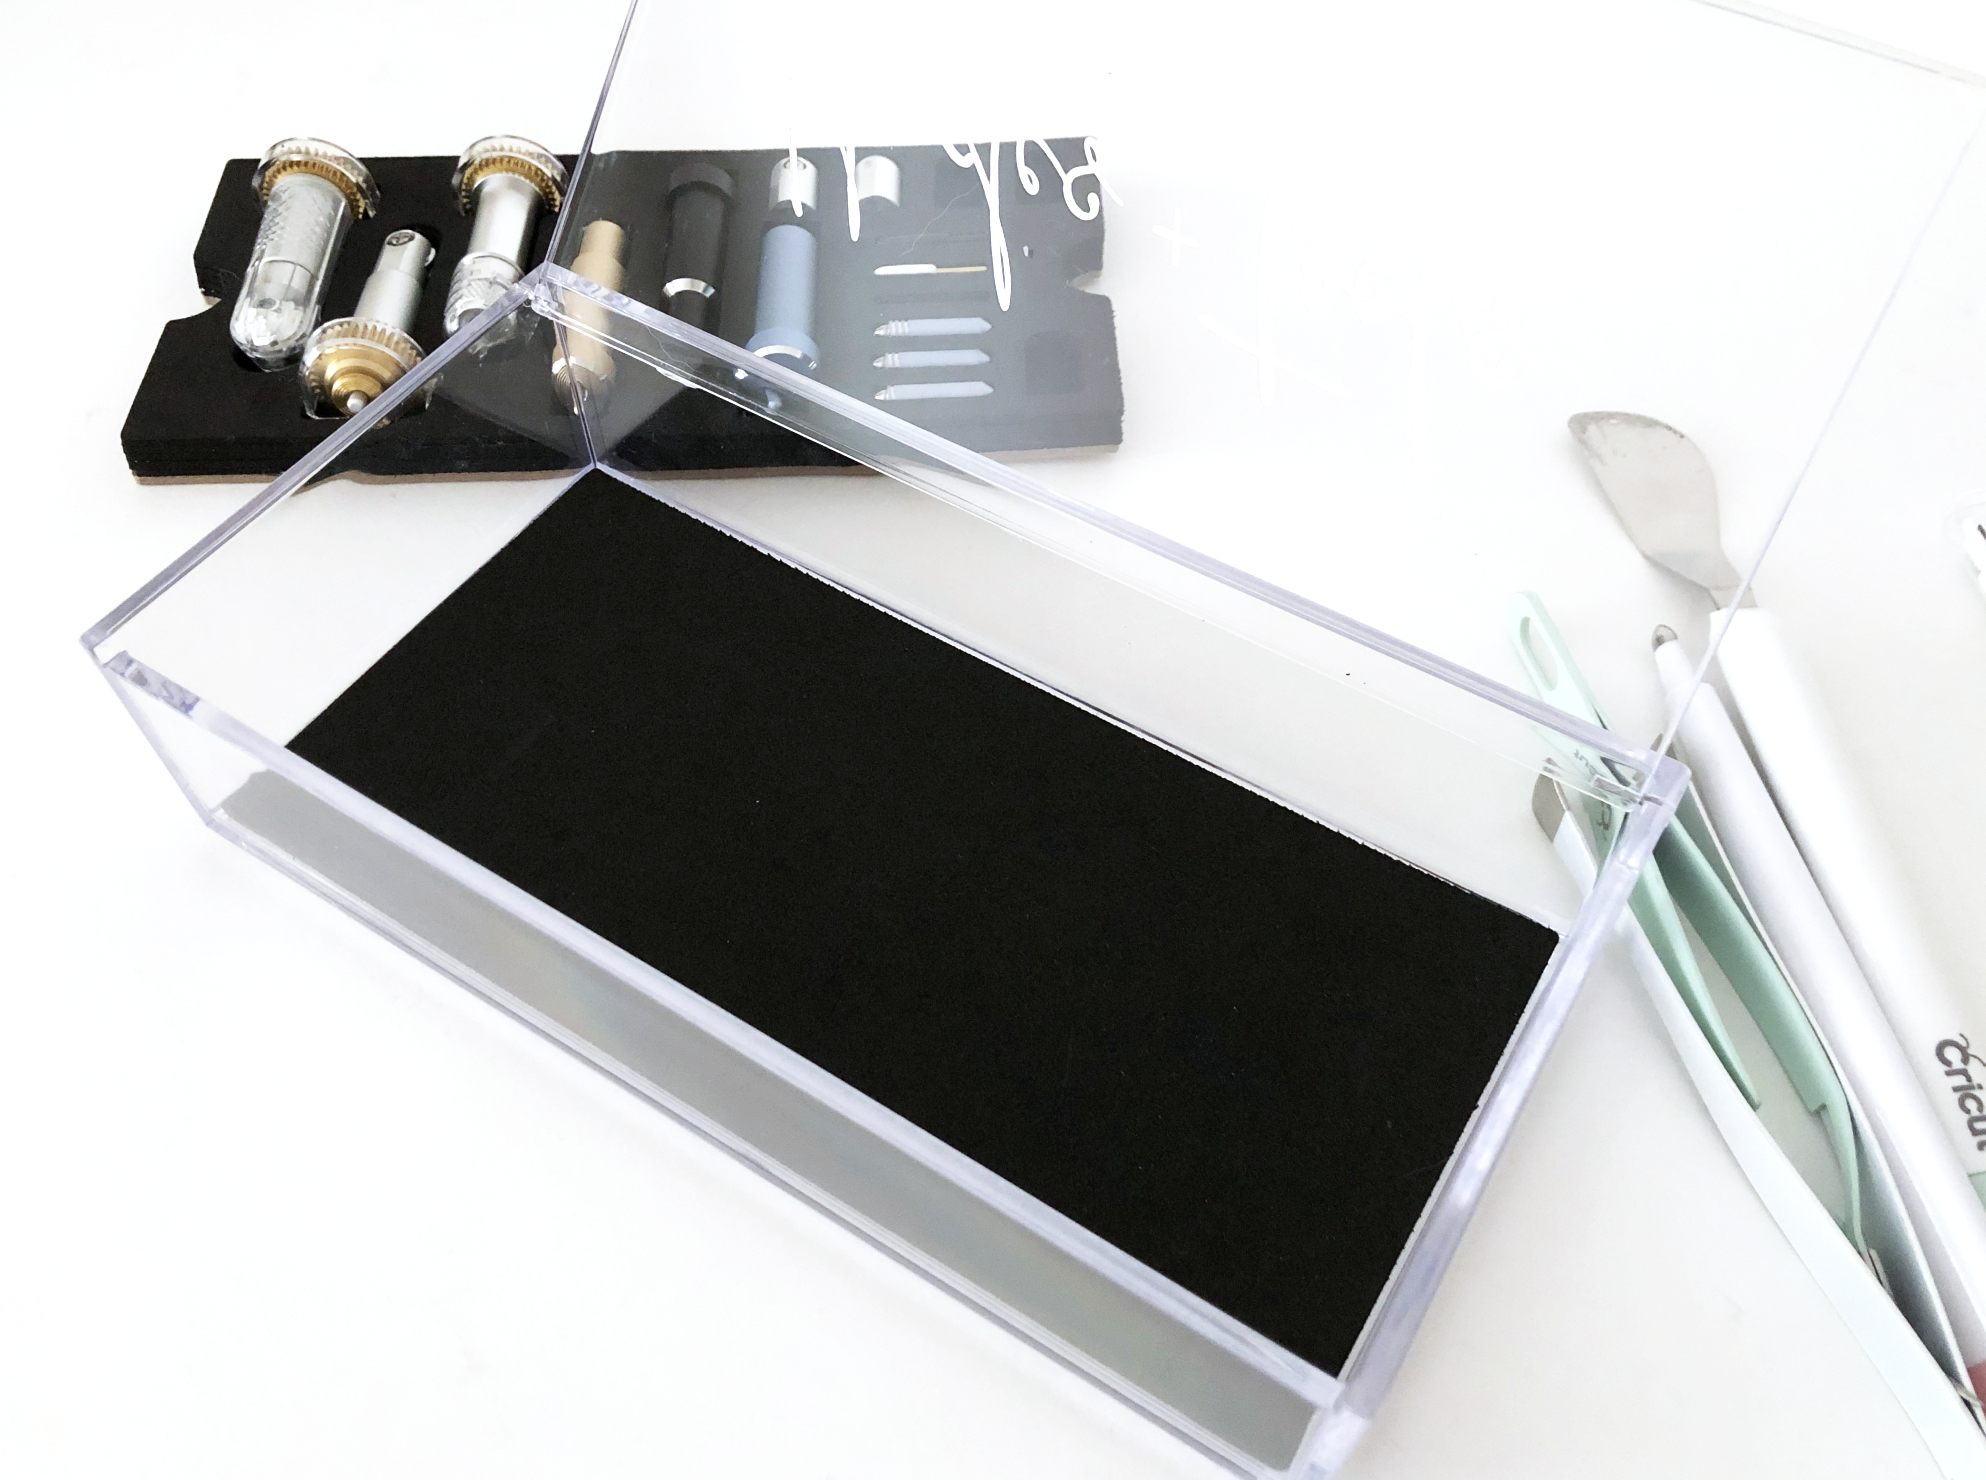
I’ve been buying a lot of clear acrylic storage bins on Amazon to help organize my stuff. They MUST have a lid to help keep the dust out and they have to fit in one of the cubbies at them end of my work desk.
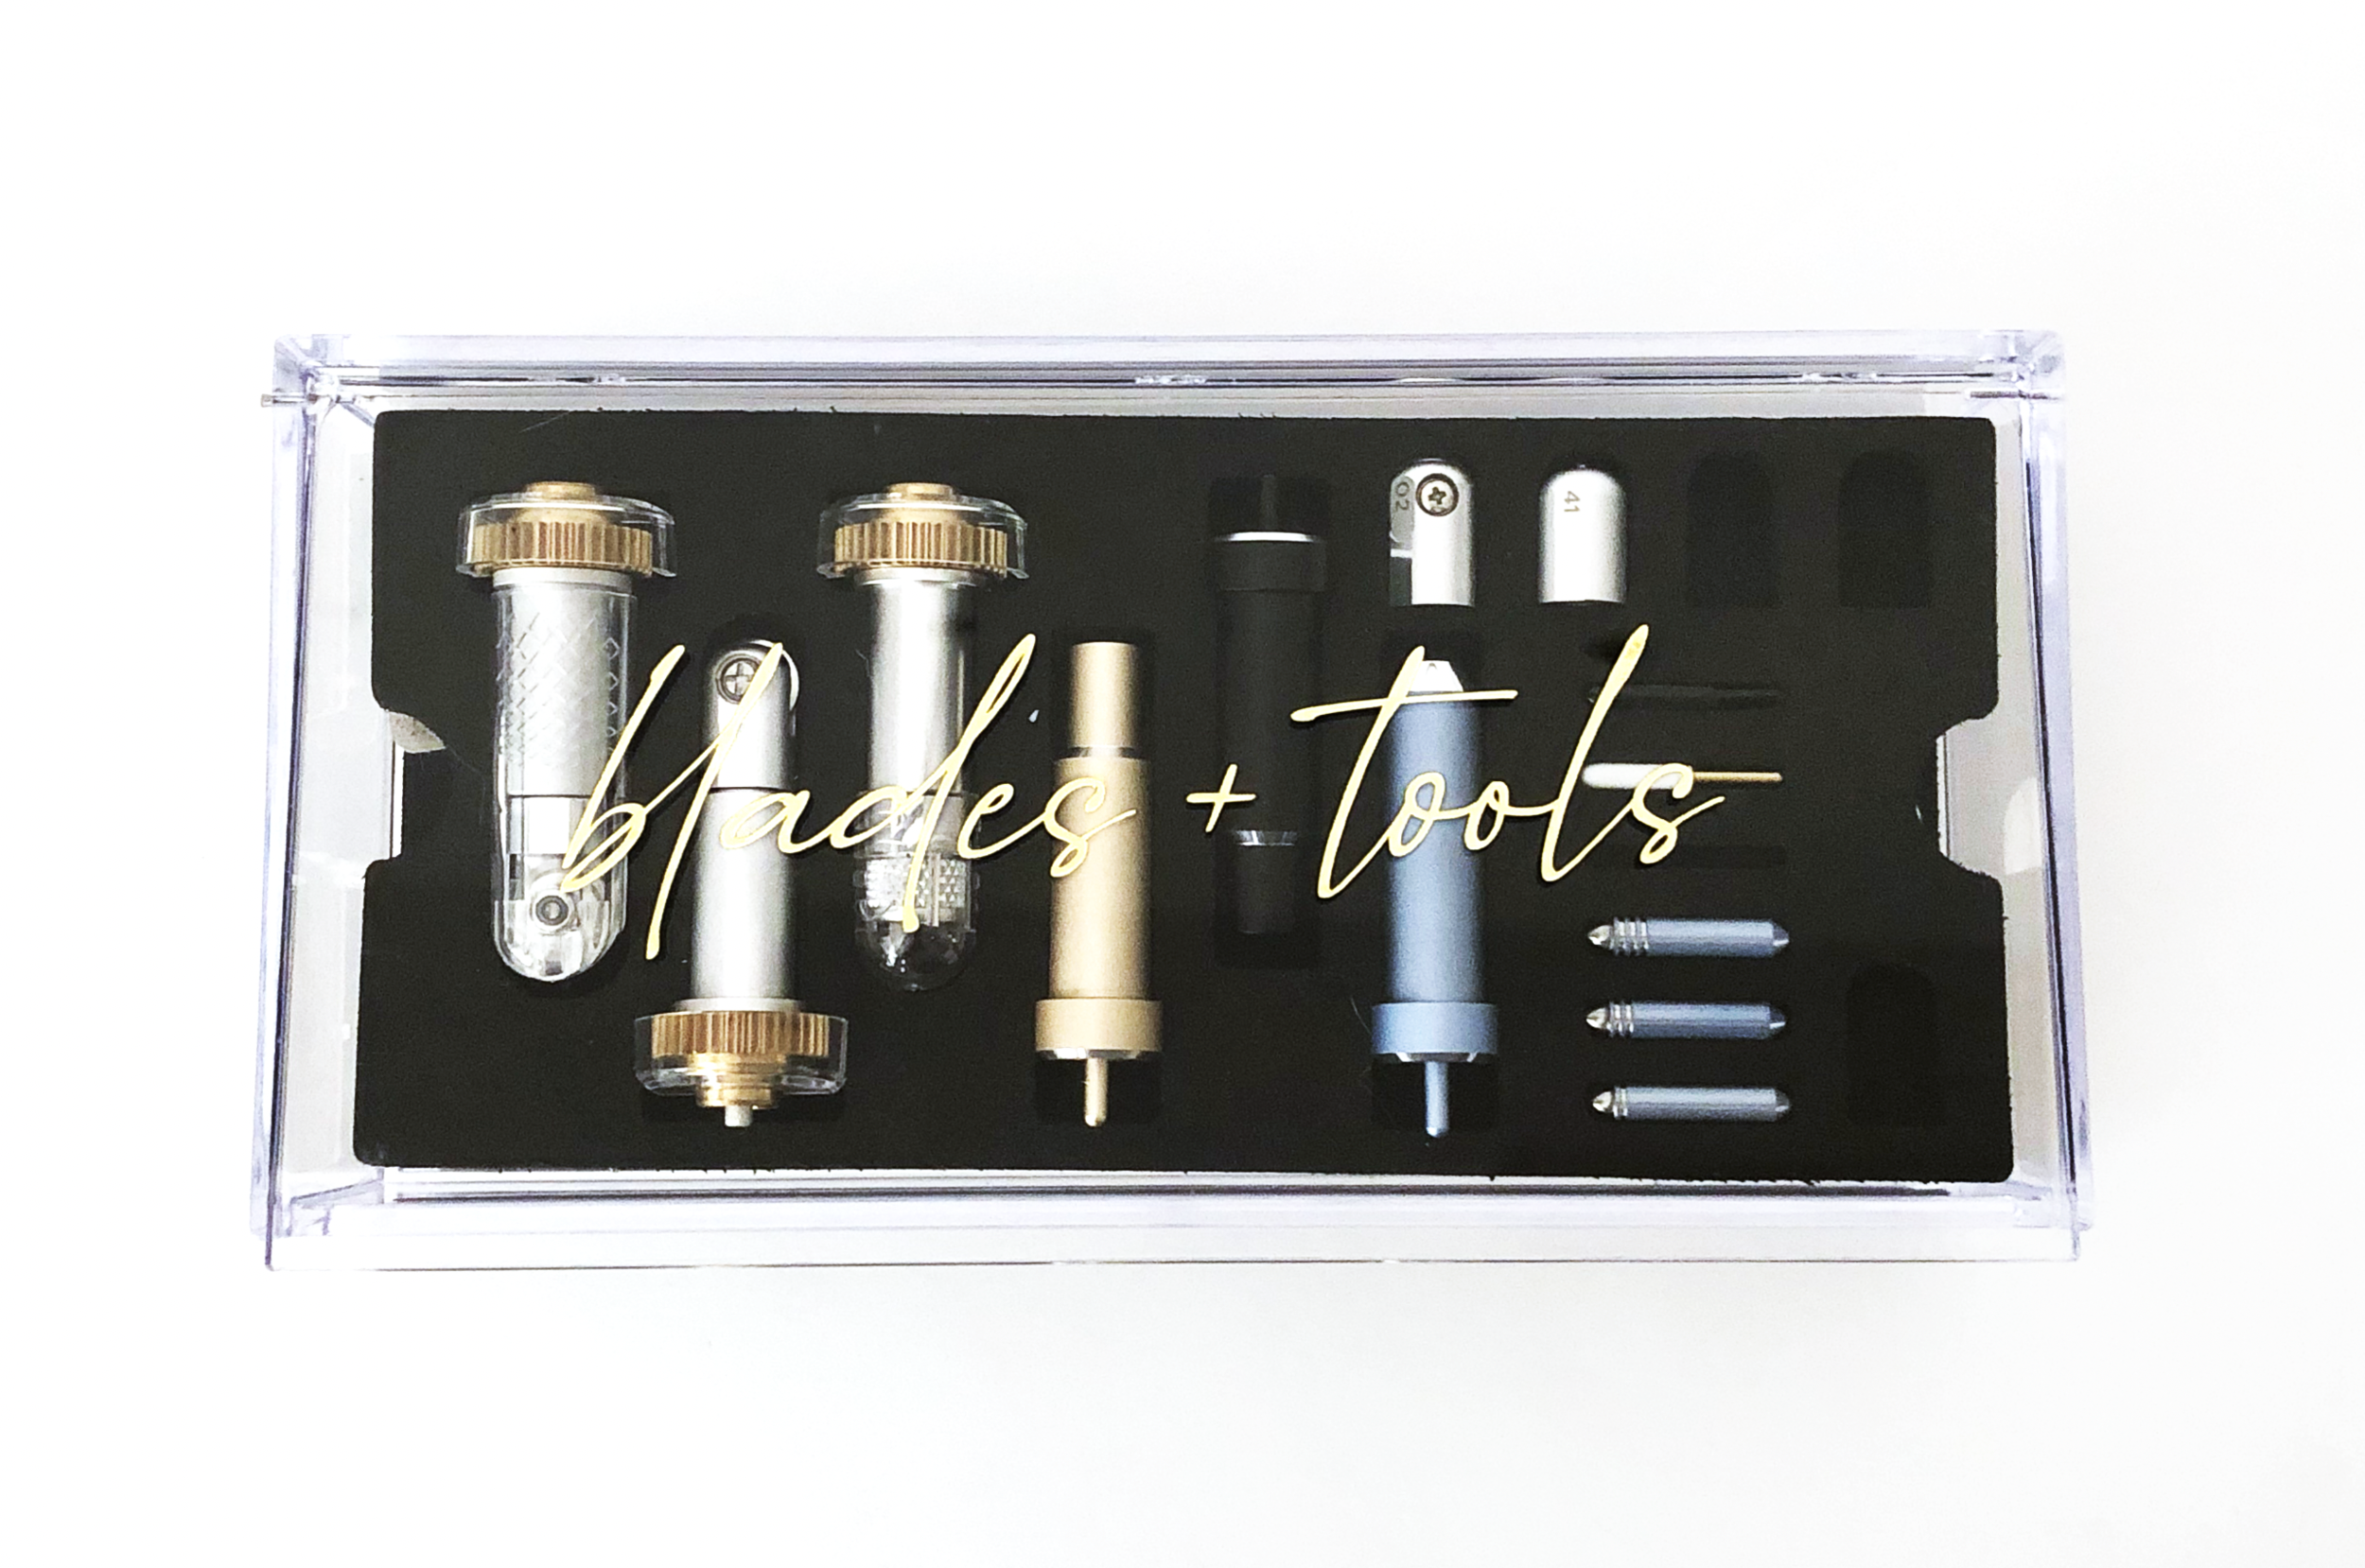
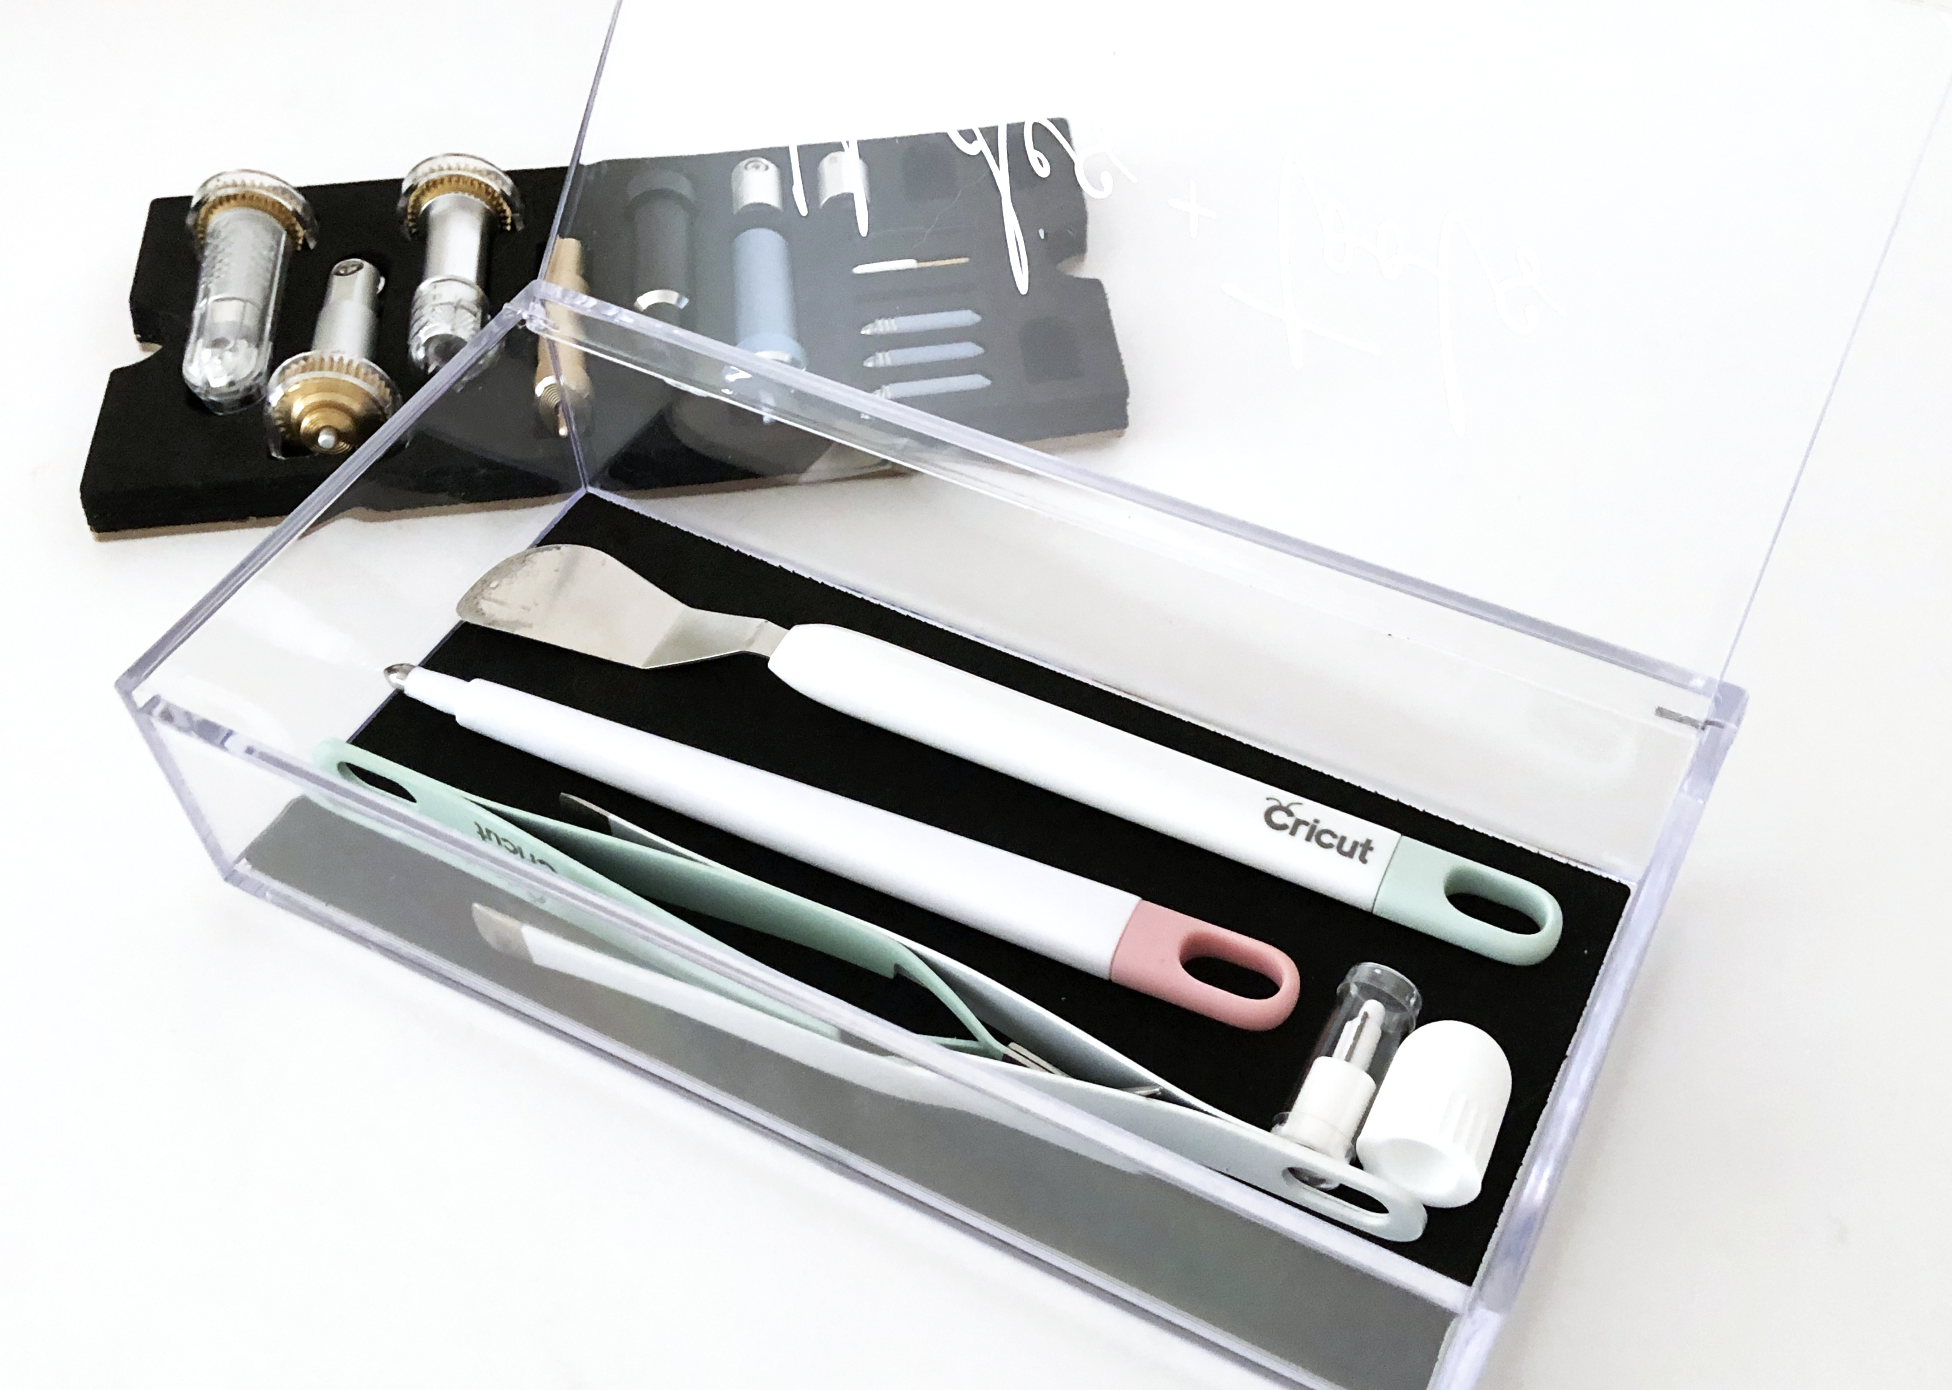
I found some smaller one’s intended for make up brushes, but I decided to use one for my Cricut tools and blades. Yes, I know Cricut has their own round organizer, I almost bought it. But then I realized, it won’t fit in my storage tote with my machine, it won’t fit in my desk cubbies with my other bins, and I don’t intend to leave it out on my desk. You can also store the blades in the front flap of the machine, but I know myself, and I will forget to take out all the blades/ tools I need for a particular project before I start my machine.
So today I wanted to share how I made my storage solution that works for me. I’m also sharing the template that I made for FREE!
If you have any questions, feel free to ask in the comments section. I’ll get back to you as quickly as I can!
Supplies: (Links below may be affiliate links)
Small Acrylic Make Up Brush Organizer Box from Amazon (this is for a set of 2, you can make another one for your friend or use it to organize other stuff)
My template, you can download the SVG file here for FREE (for personal use only, please do not sell or redistribute my file)
Strong Grip Mat (the purple one)
Deep Point Blade (to cut the foam)
Knife Blade (to cut the chipboard, you should be able to use this for the foam too if you don’t have the deep cut blade)
2mm 9”x12” Foam Sheets (at least 2 sheets) I’m using black, but you can use any color.
2mm Heavy Chipboard or other stiff material for backing
masking tape or painter’s tape
glue
a paintbrush you don’t care about ruining to apply glue
Optional:
Adhesive Foil (I used Gold)
Let’s get started!
Upload the FREE SVG file to Design Space and press SAVE.
Tip: If you are using Safari, right click on the button below and select “Download linked file” and it will save the SVG file to your Downloads folder. If you are using Chrome, right click on the button below and select “Save Linked file” and choose where you want to save the SVG file.

Select the Image and press INSERT IMAGES.

Change the color of your MATERIAL so you can actually see the cut lines. I’m using pink, but you can use any color other than black.
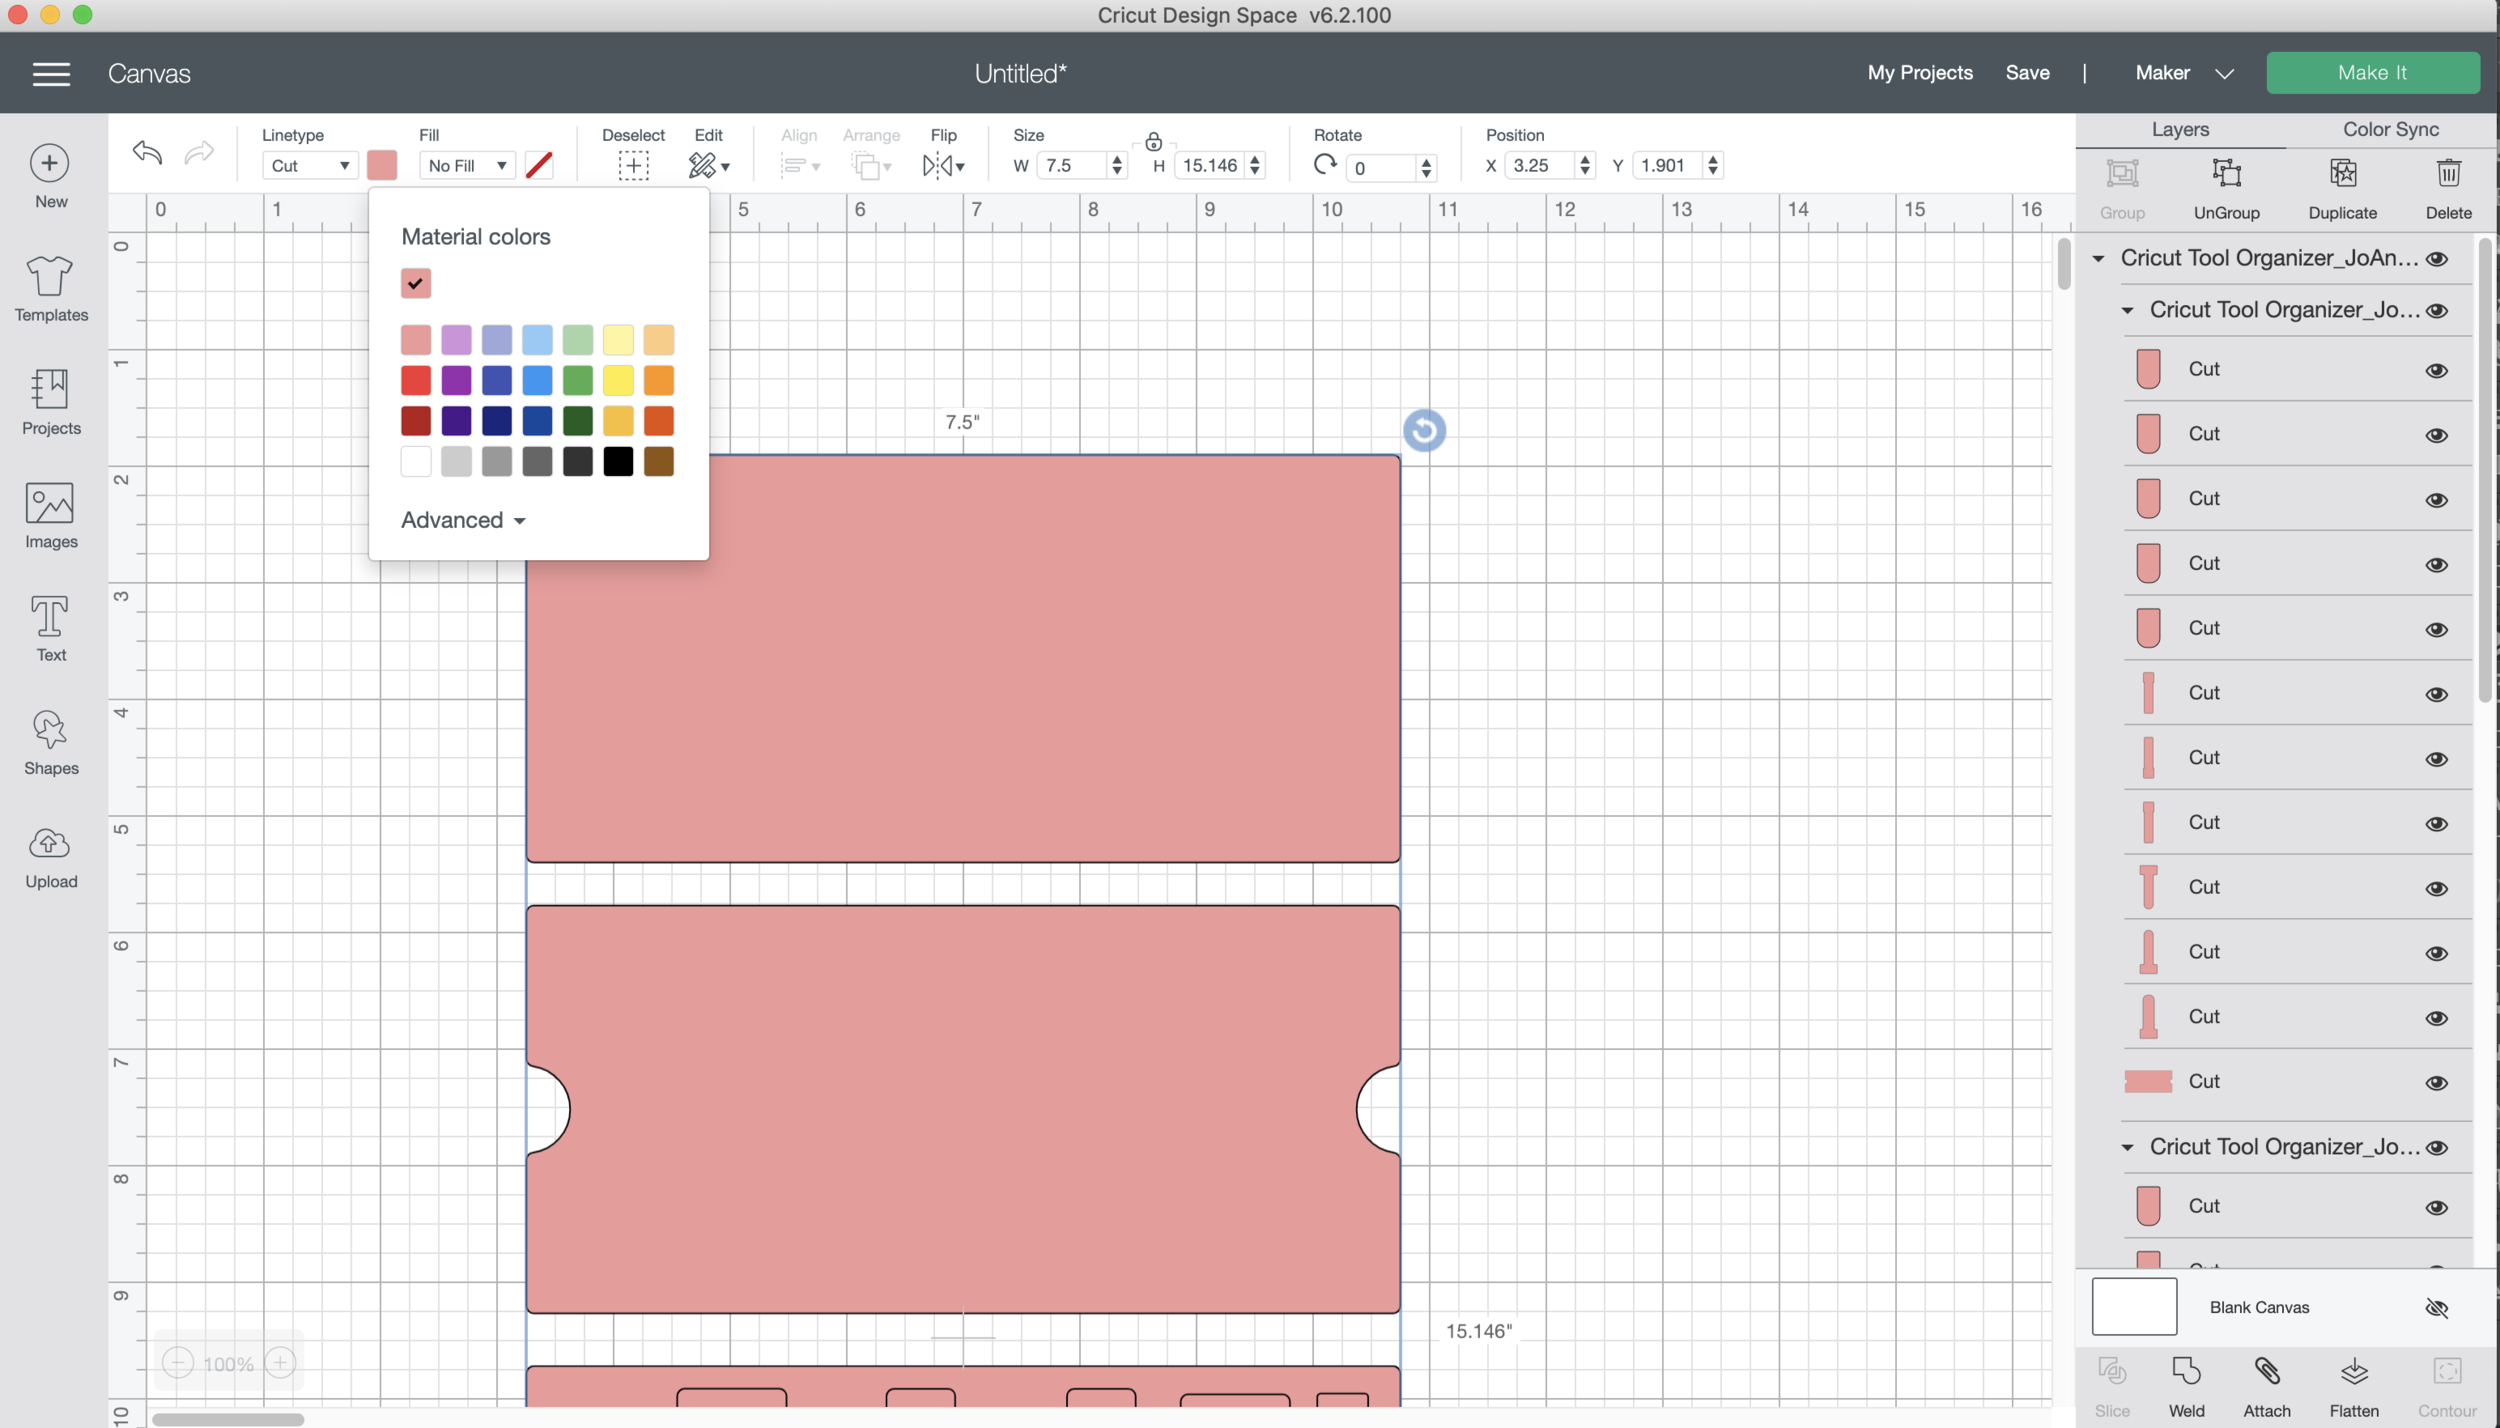
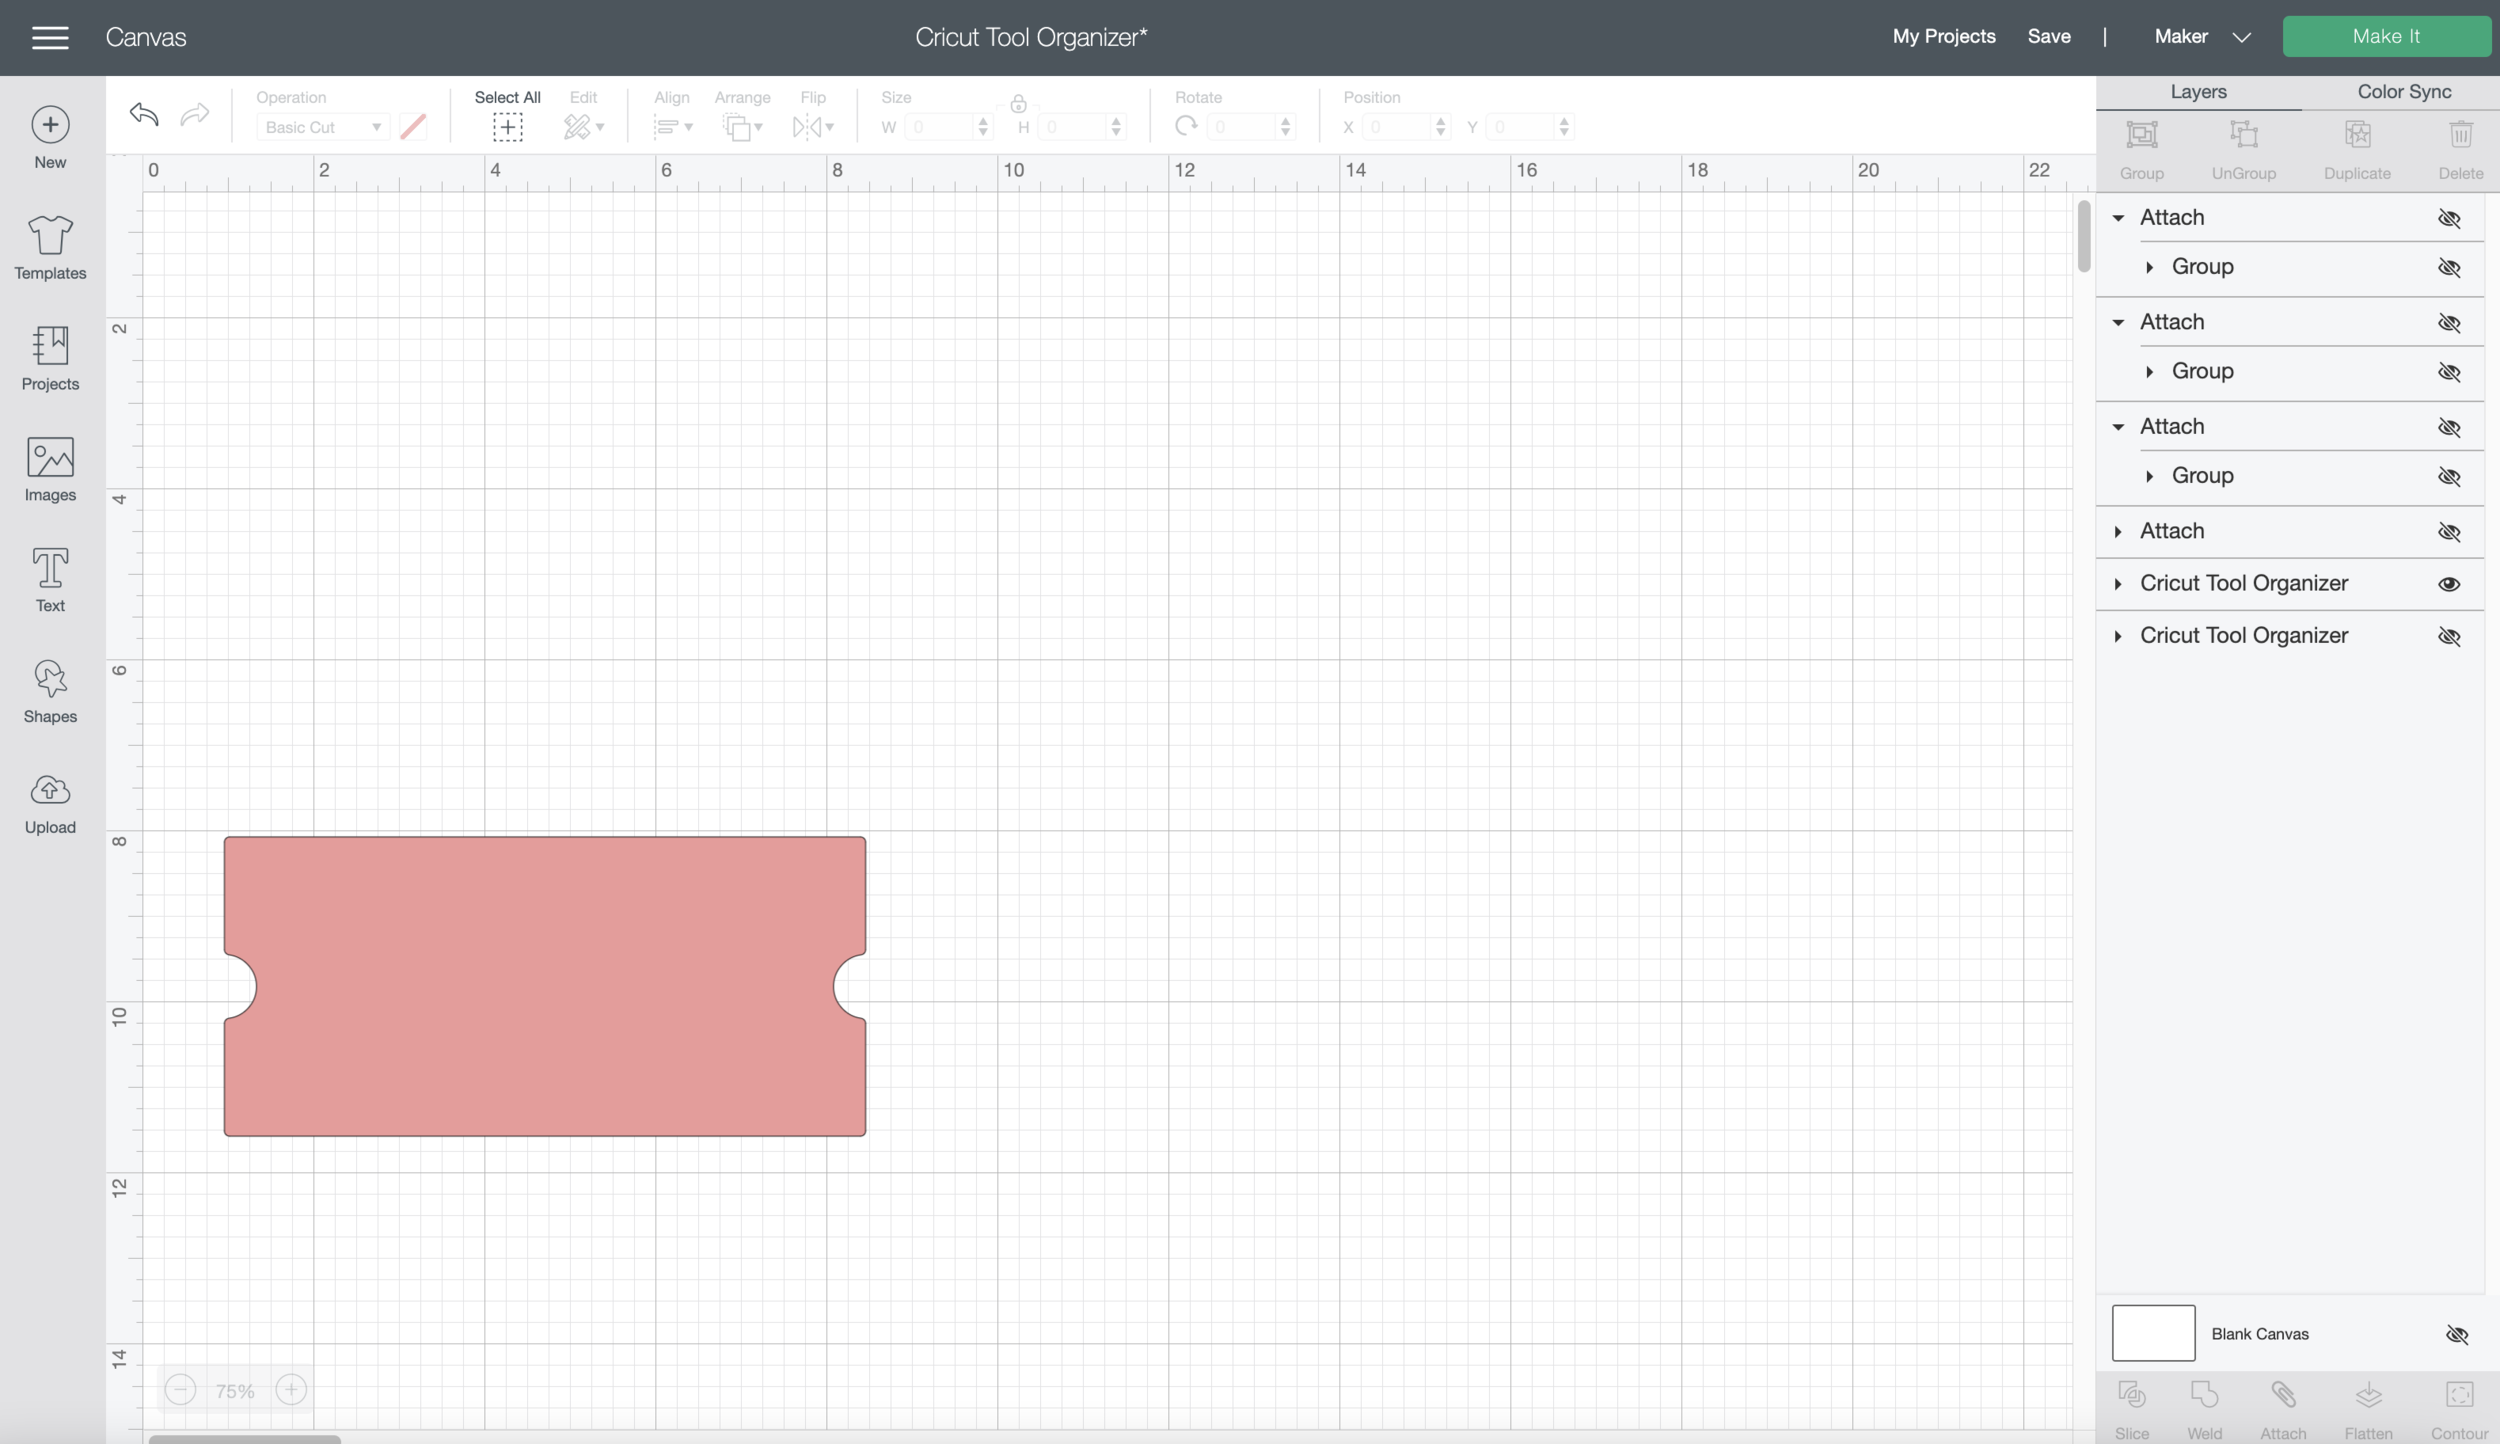
Select the top most layer and click UNGROUP.

Select the top most group and click ATTACH.

Select the next group and click ATTACH.
Now I’m going to pre-set up my mats. I only have one Strong Grip mat, so I’m going to do it one mat at a time.
Side note: I tried using my regular green mat, it’s a little old, I don’t think it was sticky enough, the foam kept getting pulled up and ripped by the blade, even with the masking tape around the edges. If you have a fresh new green mat, it might be sticky enough.
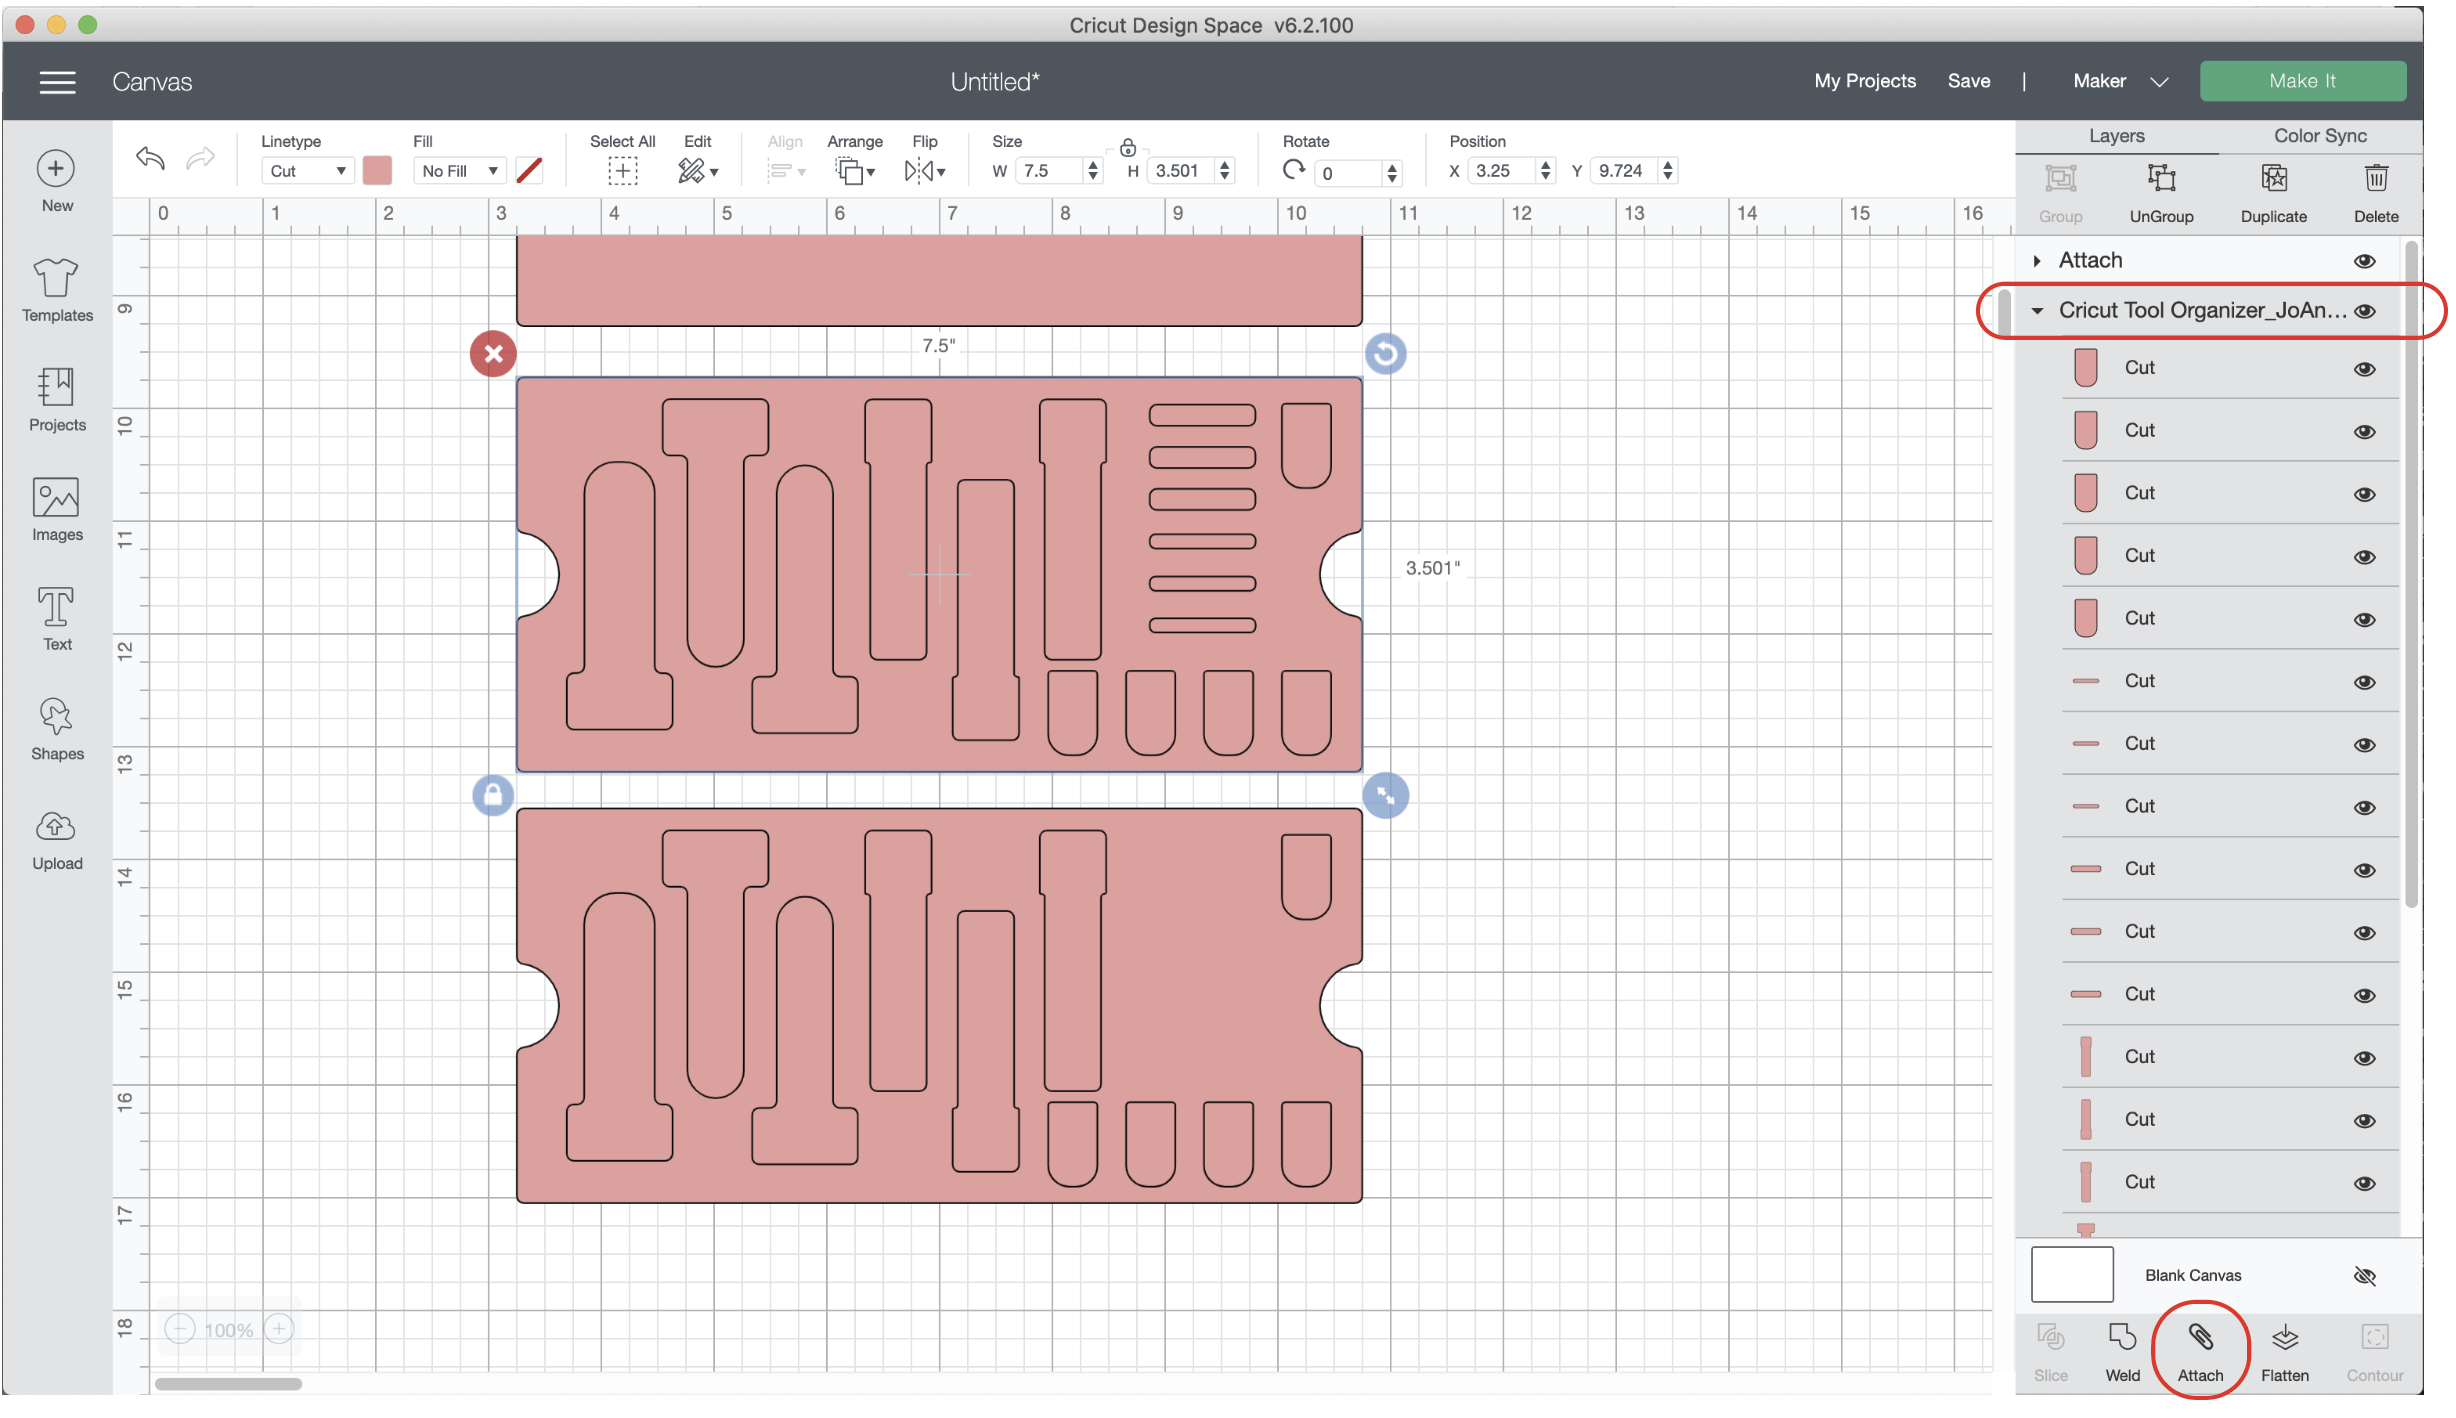
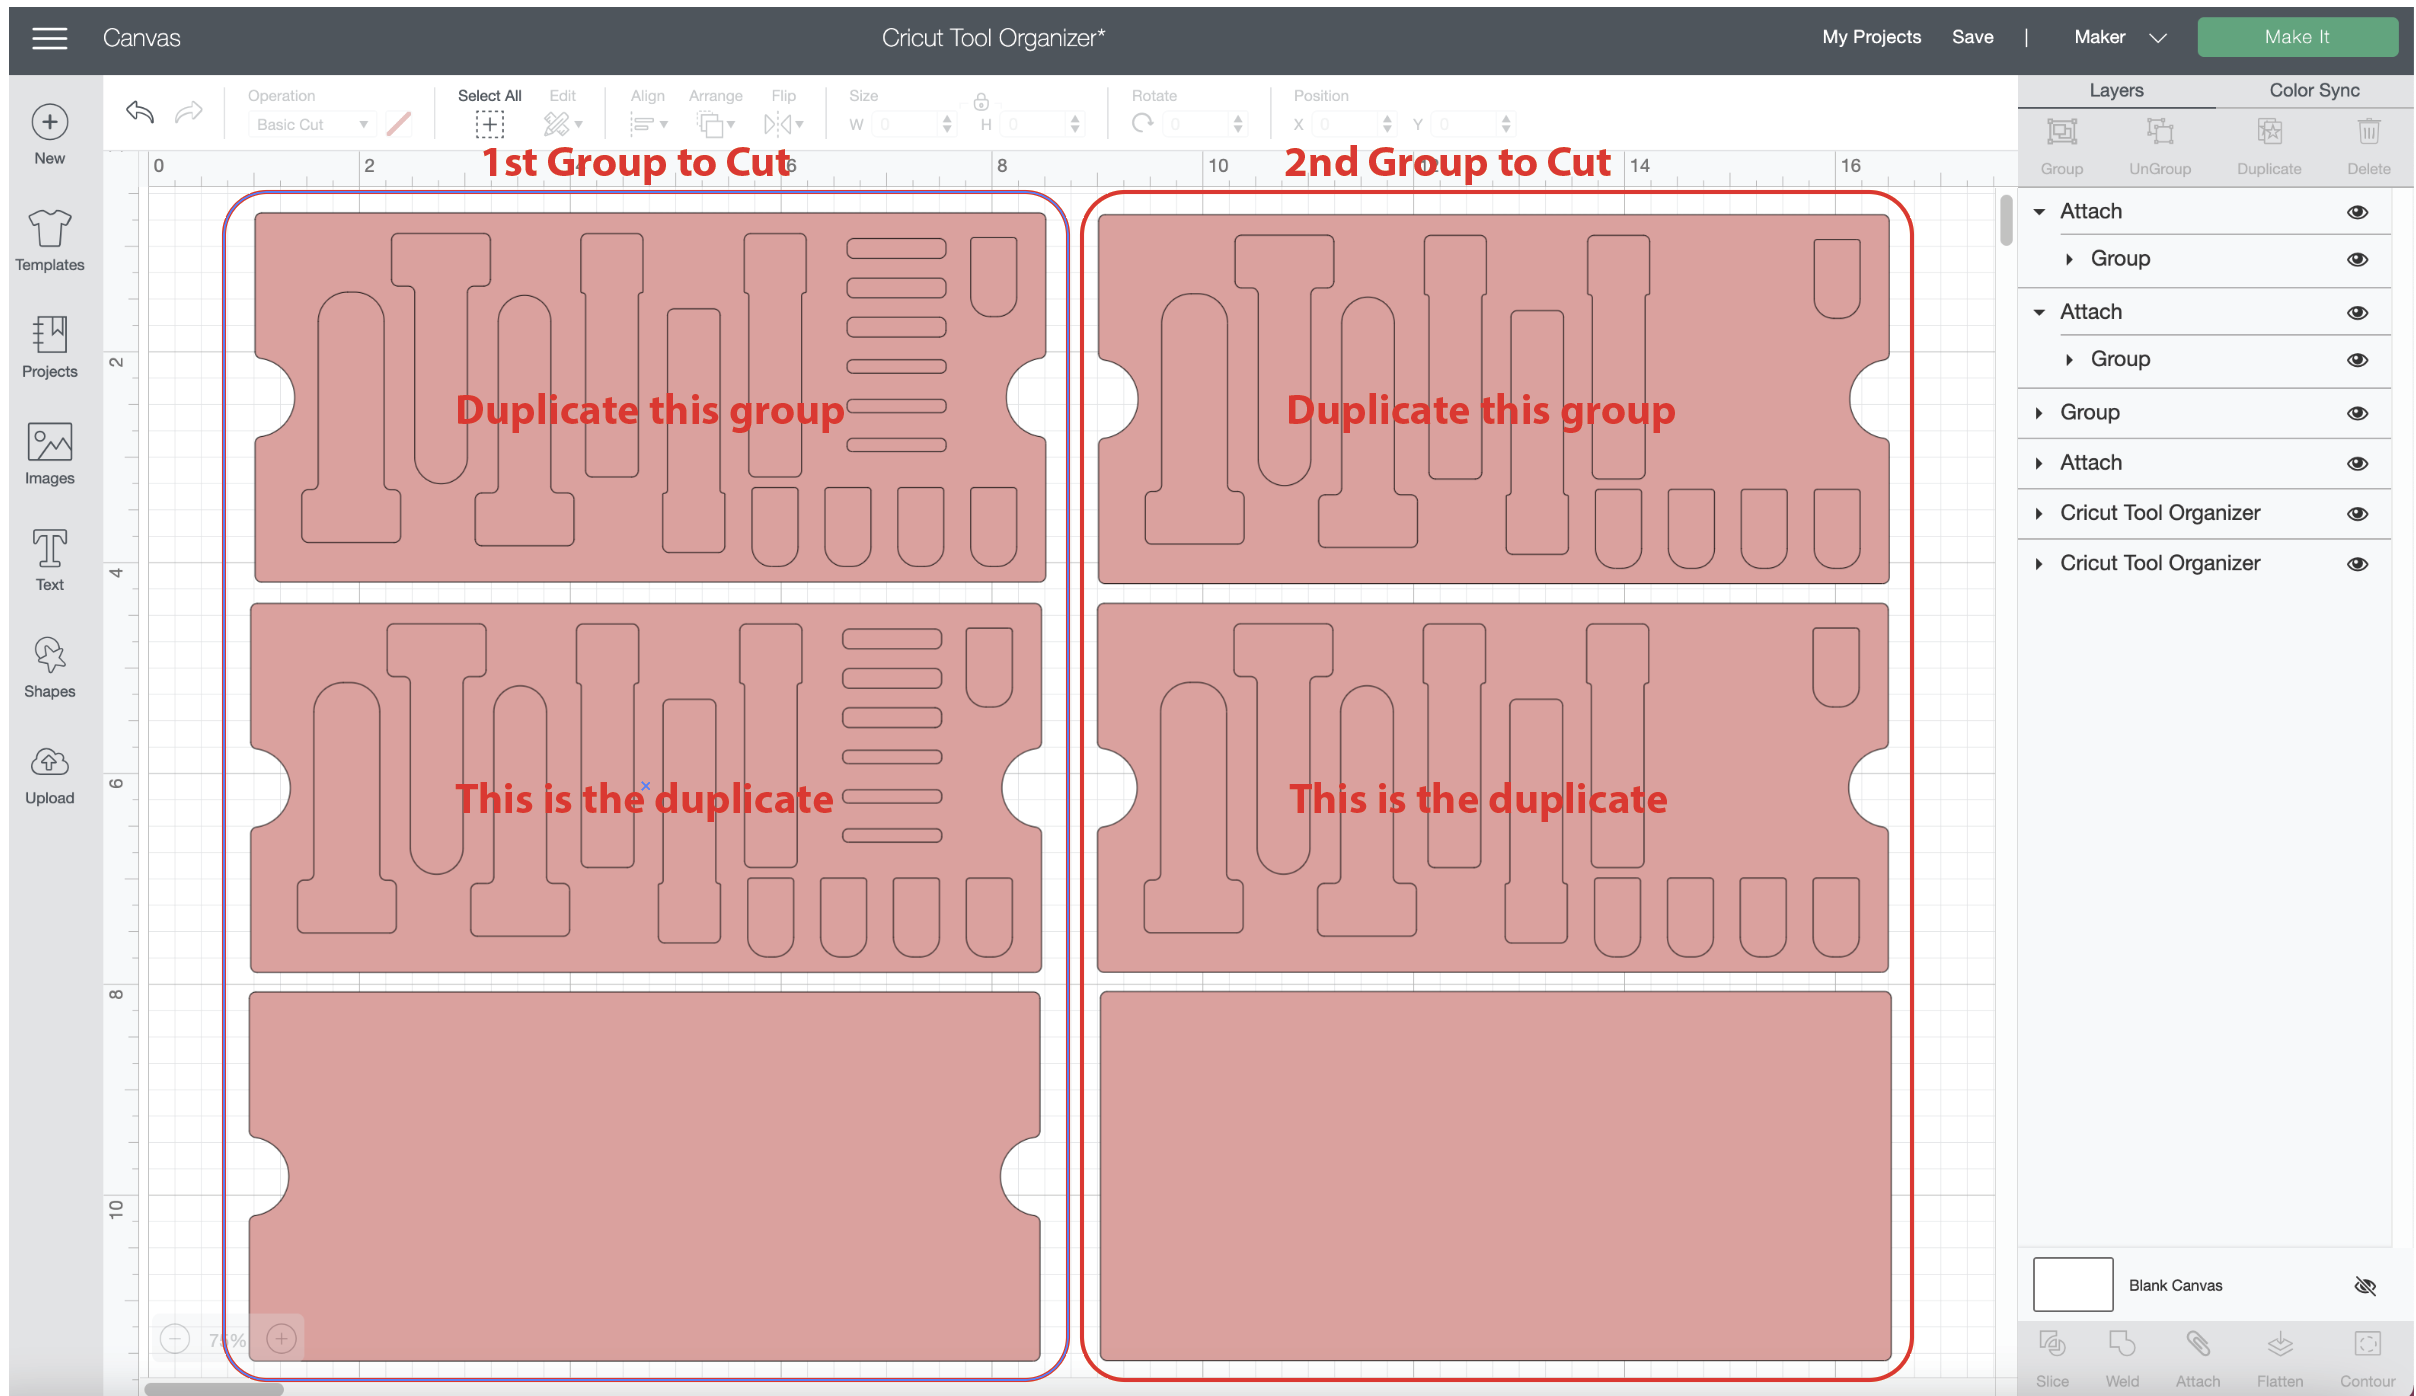
For the 1st group to cut, duplicate the group with the tool shape cut outs (you will now have 2 of these showing) place the solid rectangle with finger holds below.
For the 2nd group to cut, duplicate the group with the tool shape cut outs, then place the solid rectangle below.
These will be your 2 mats.
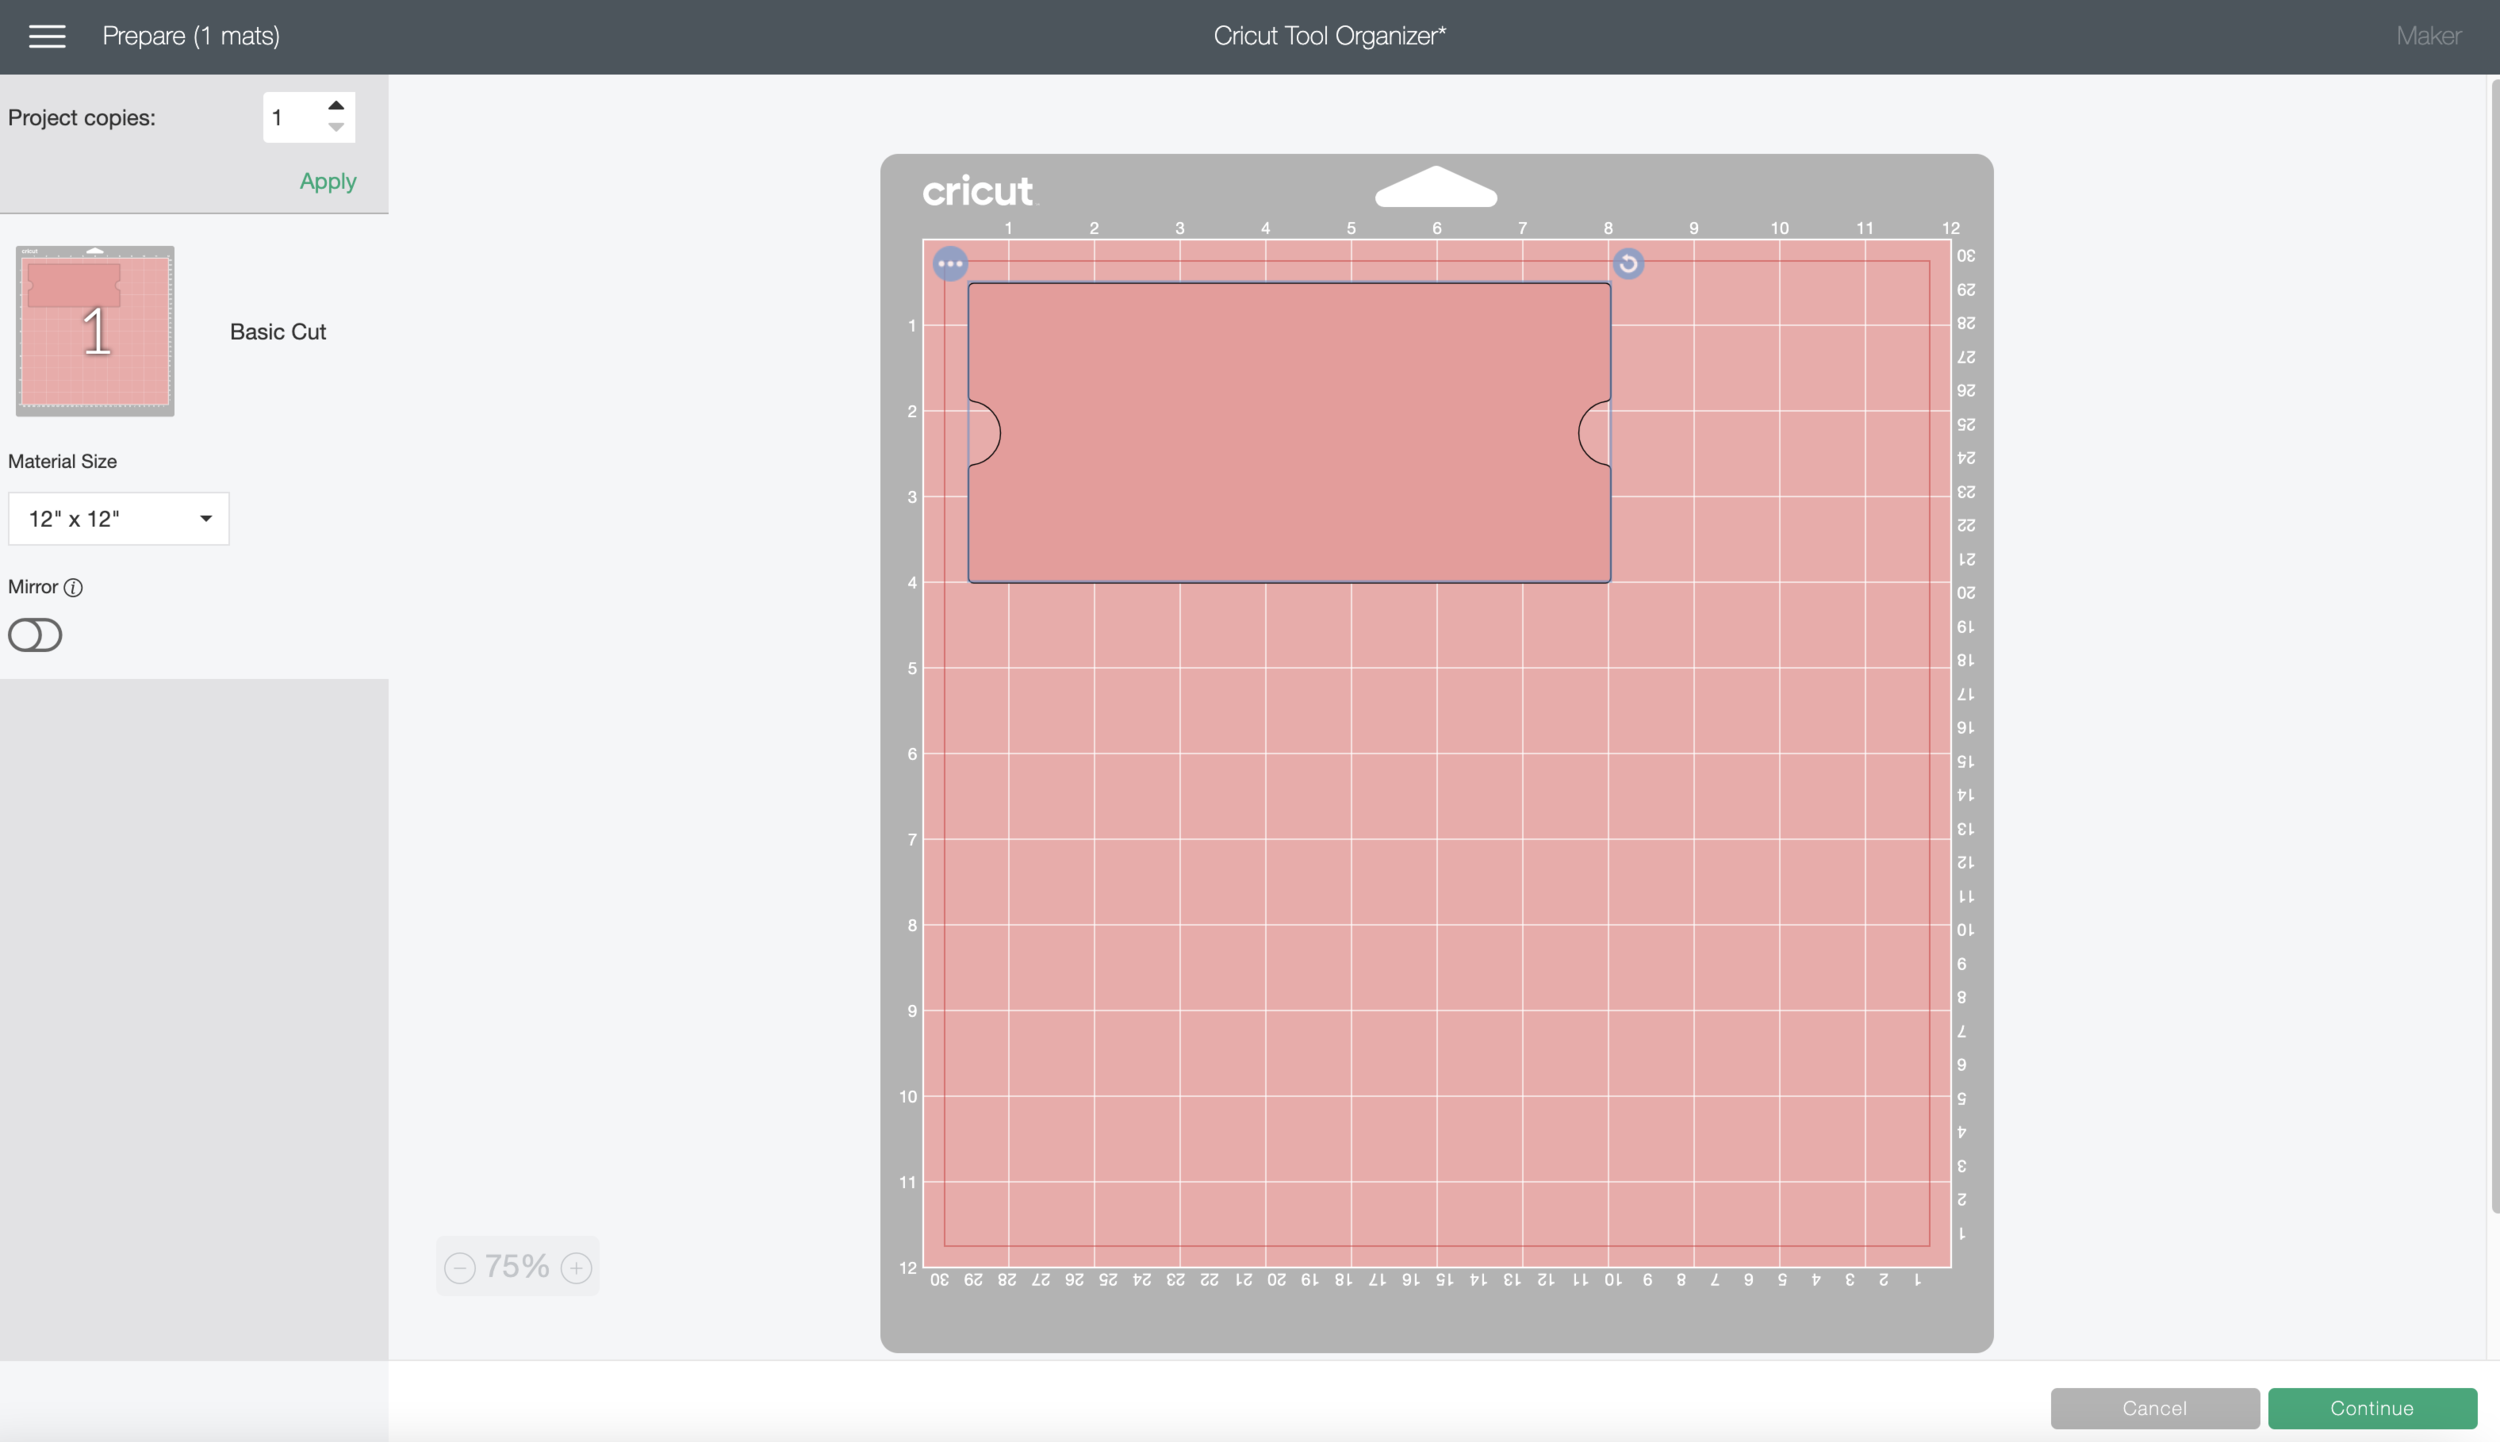
Keep the material size at 12x12, so you can move your pieces toward the middle of the mat. I had better success cutting the foam if I placed toward the middle of my mat. Select the 2nd mat and move those pieces toward the middle of the mat also.

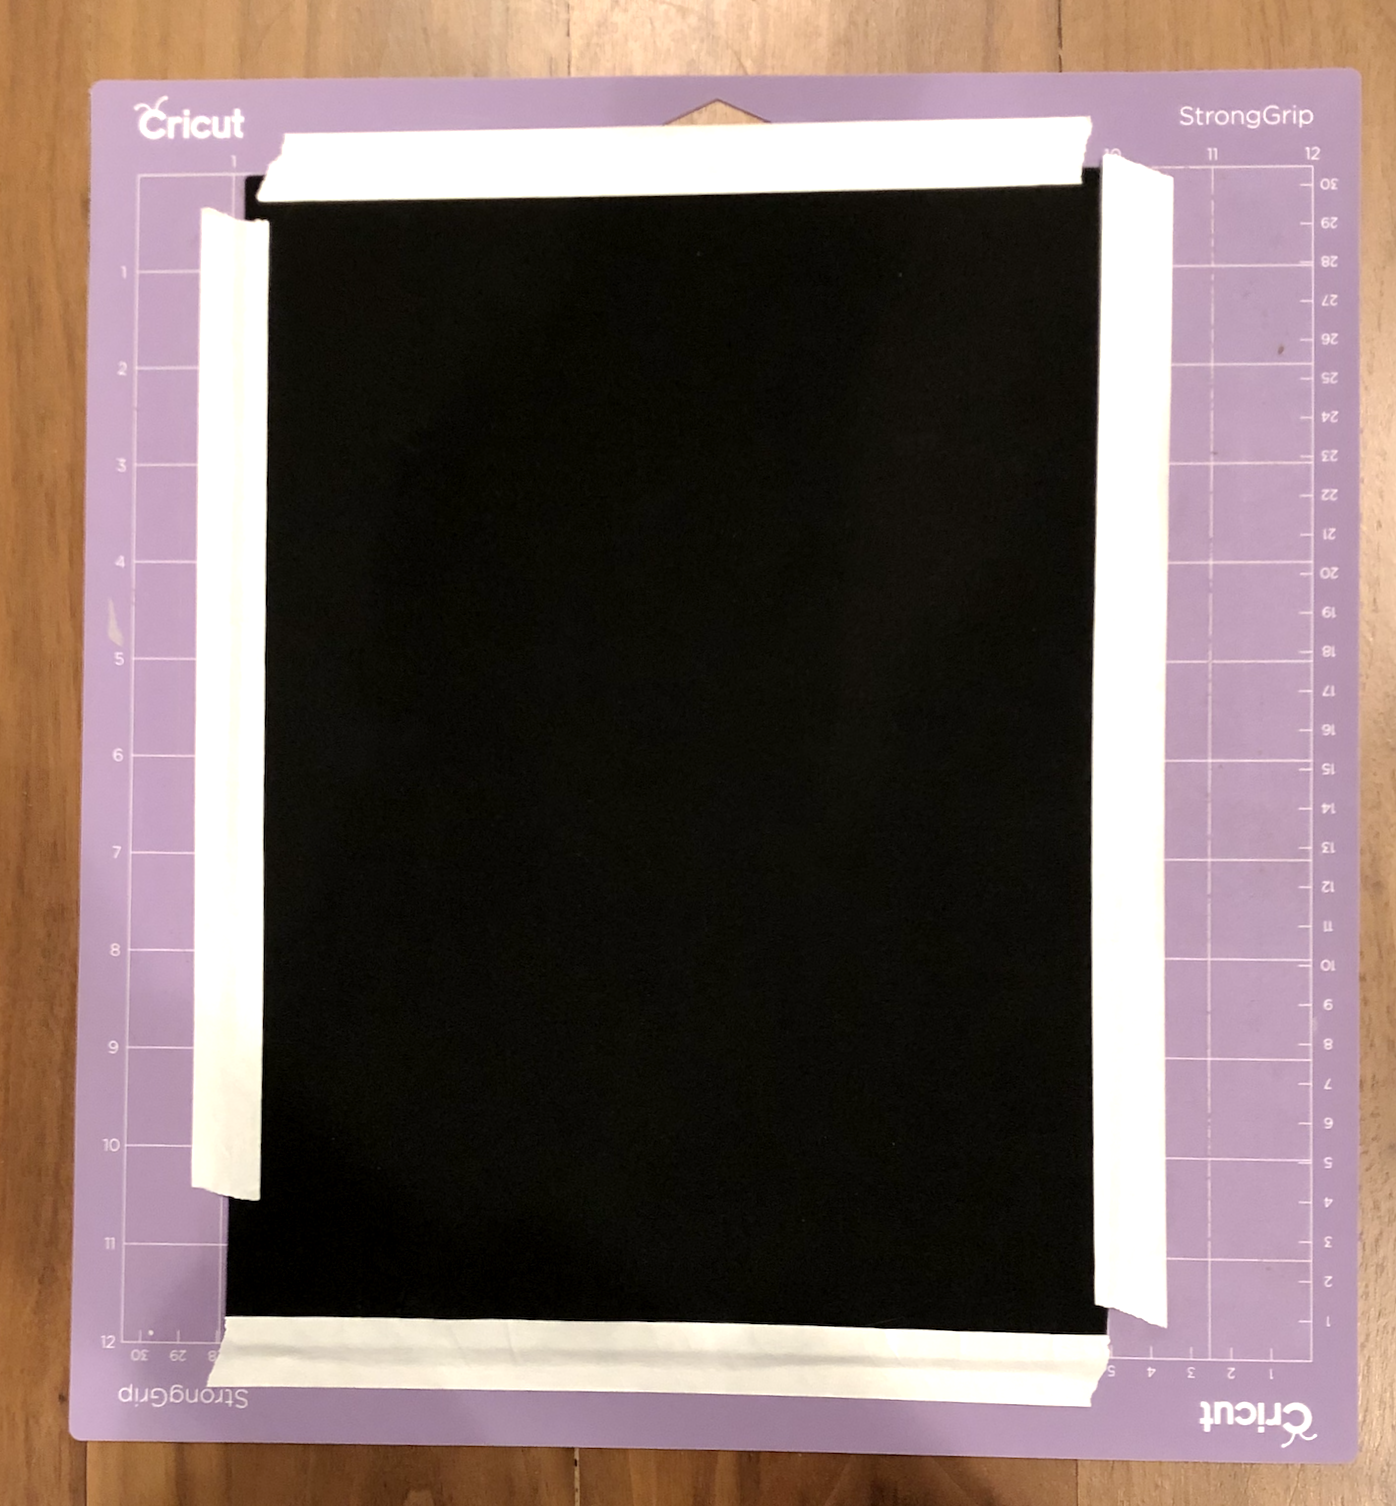
Place one of the foam sheets centered on the mat. Make sure the foam is oriented so the cut lines fall within the masking taped edges.
Press CONTINUE in Design Space.
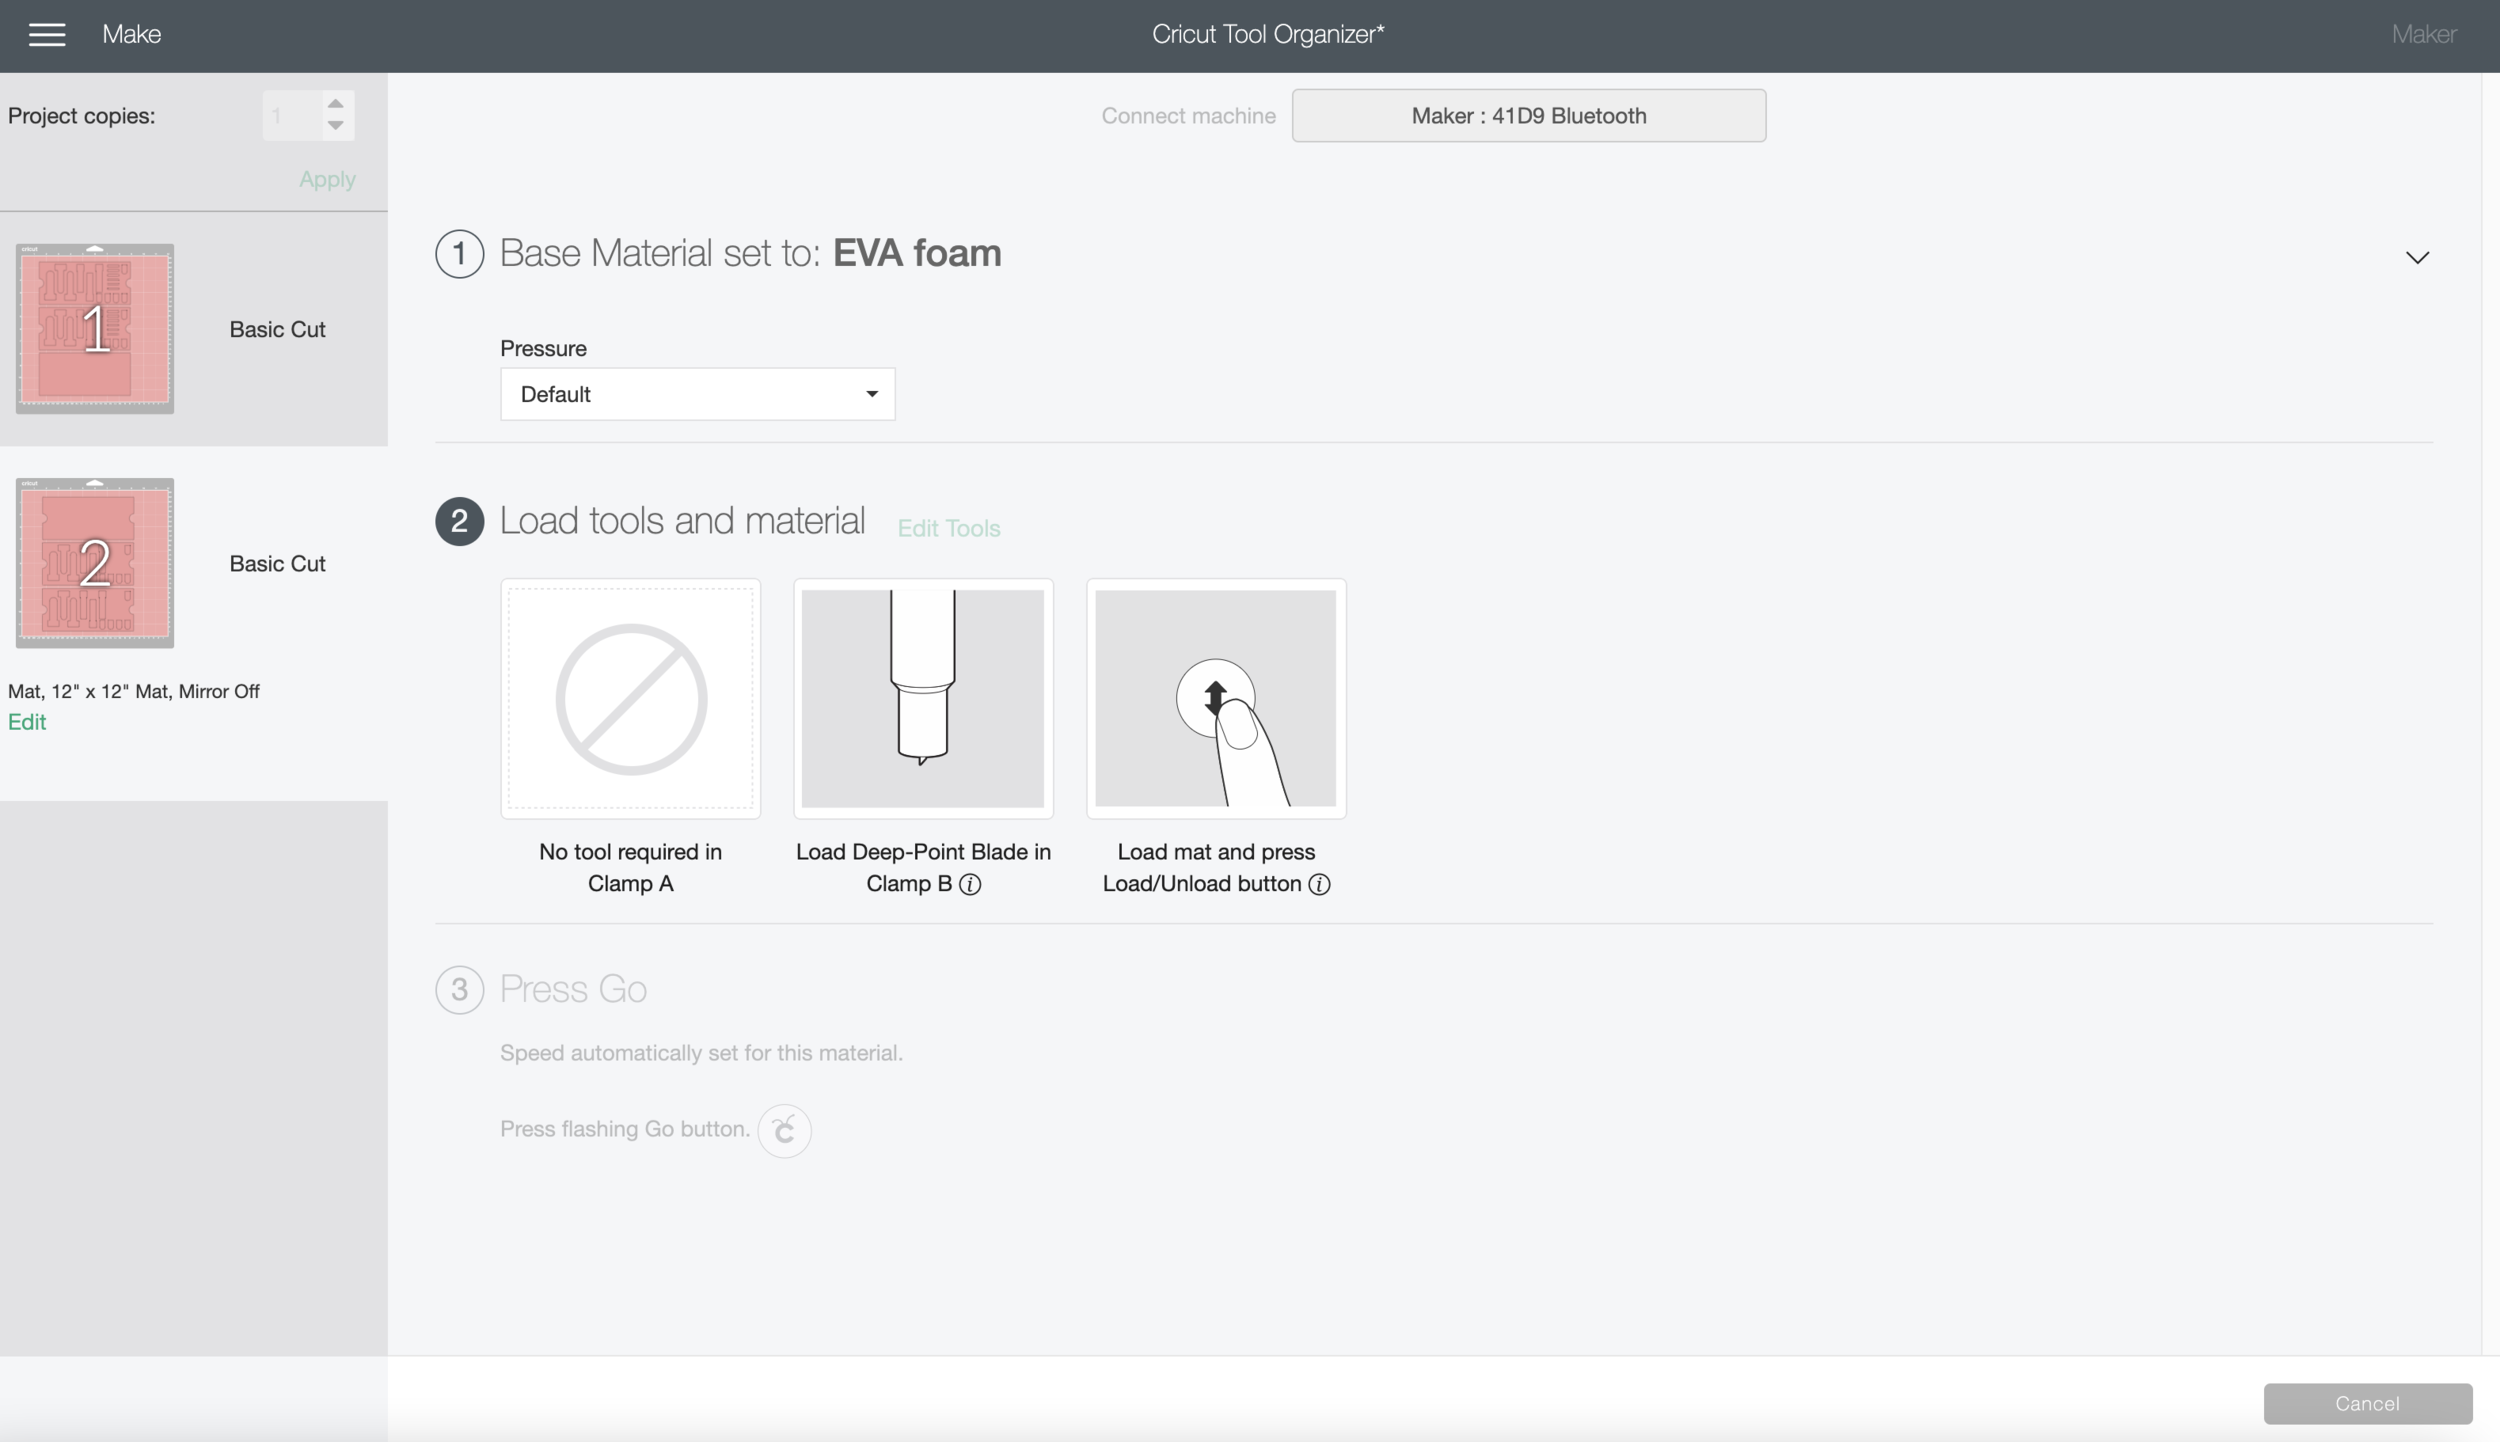
Select EVA foam from your materials (I tried Craft Foam, but my pieces kept tearing).
Load the Deep Cut Blade or the Knife Blade into your machine.
Load the mat into your machine and press GO!
Once the machine is done cutting, check your cut to make sure it went all the way through, if it’s good, unload your mat.
Carefully remove the cut pieces from the mat.
Attach the 2nd piece of foam to the mat, making sure your cut lines fall within the taped edges. Load the mat into the machine and press GO!
Once the machine is done cutting, check your cut to make sure it went all the way through, if it’s good, unload your mat.
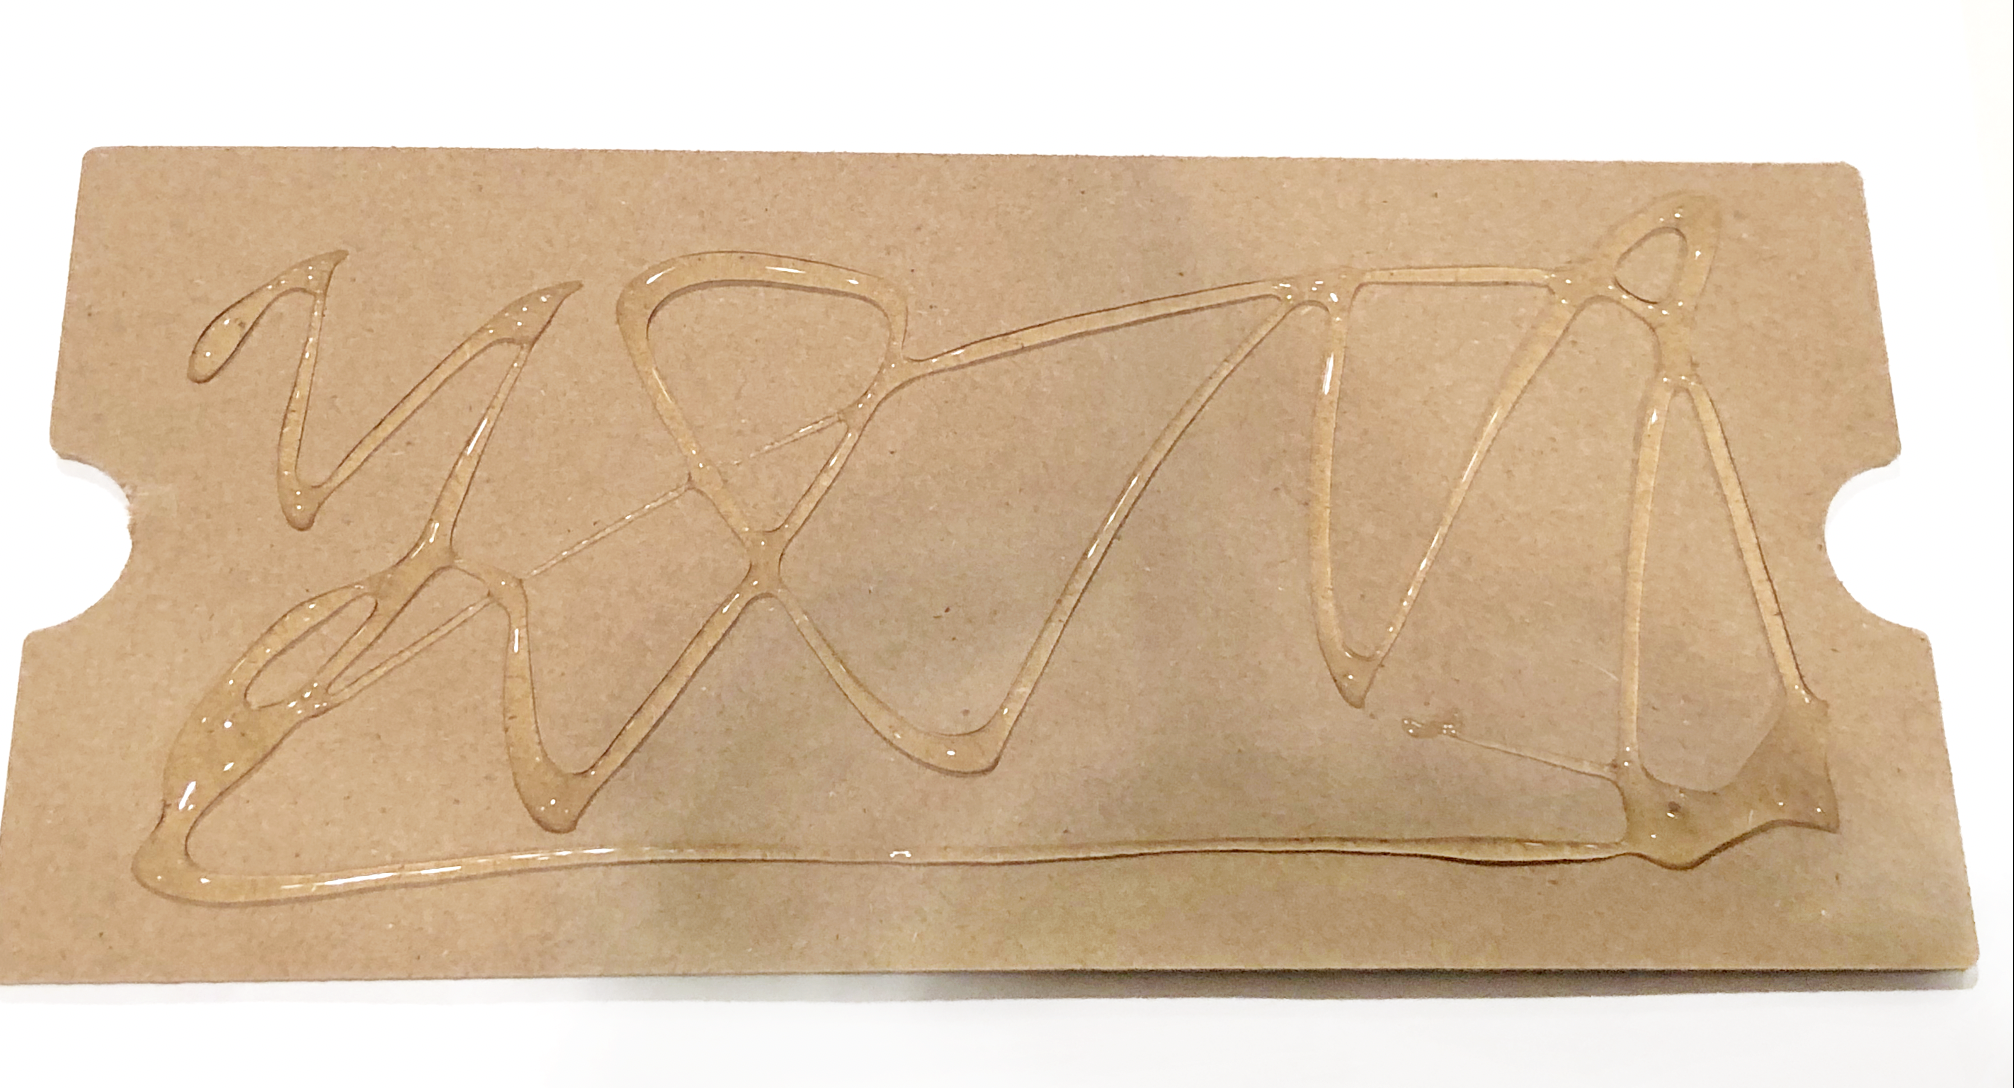
Go back to the CANVAS screen and and hide all the layers except for the solid rectangle with finger holds, we’re going to cut just this piece out of 2mm Chipboard or whatever other stiff material you have selected.
Press MAKE IT.
Move the piece slightly away from the edges of the mat. Use masking tape to attach the Chipboard to your mat.
Press CONTINUE.
Select 2mm Chipboard from your materials (or whatever material you are using). Load the Knife Blade into your machine, load the mat and press GO!
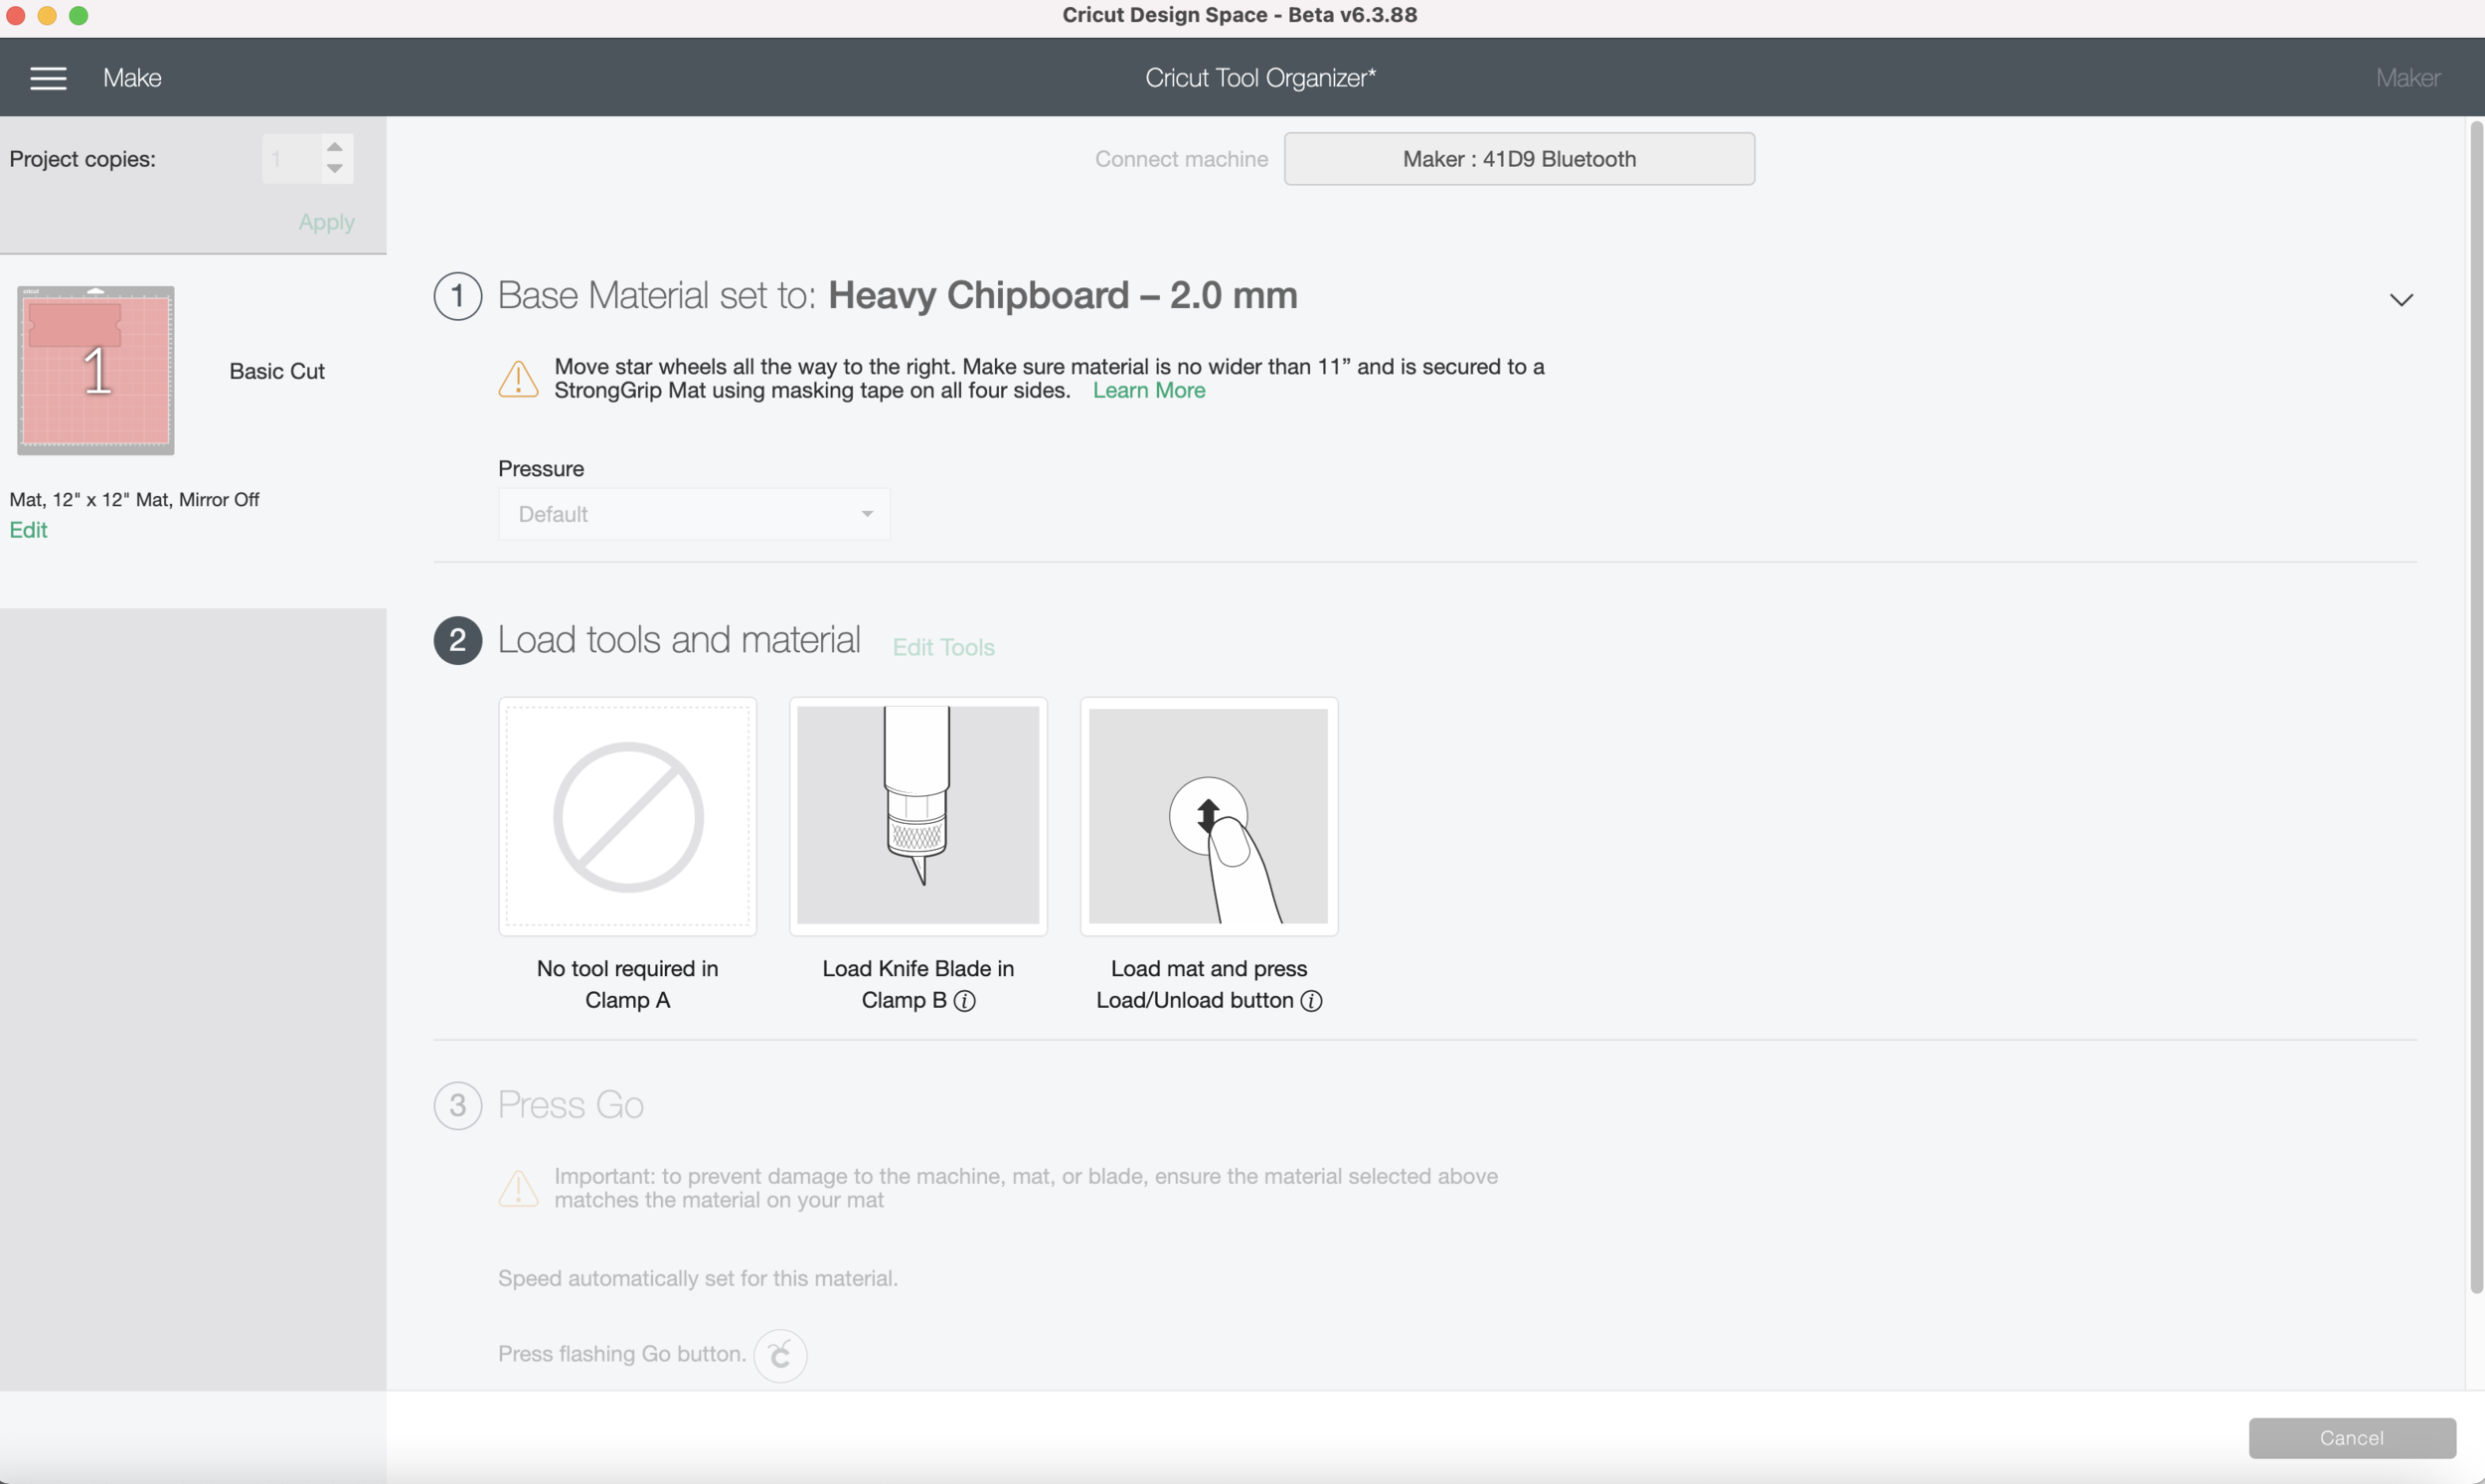
After a few passes, press the PAUSE button on your machine to check the progress of your cut. If it’s not cut all the way, press the GO button again and let it do a few more passes.
My machine was finished cutting after the 8th pass! No need for the 24 passes my machine wanted make, it would have cut clear through my mat! I hope Cricut will let us adjust the Knife Blade settings in the future.
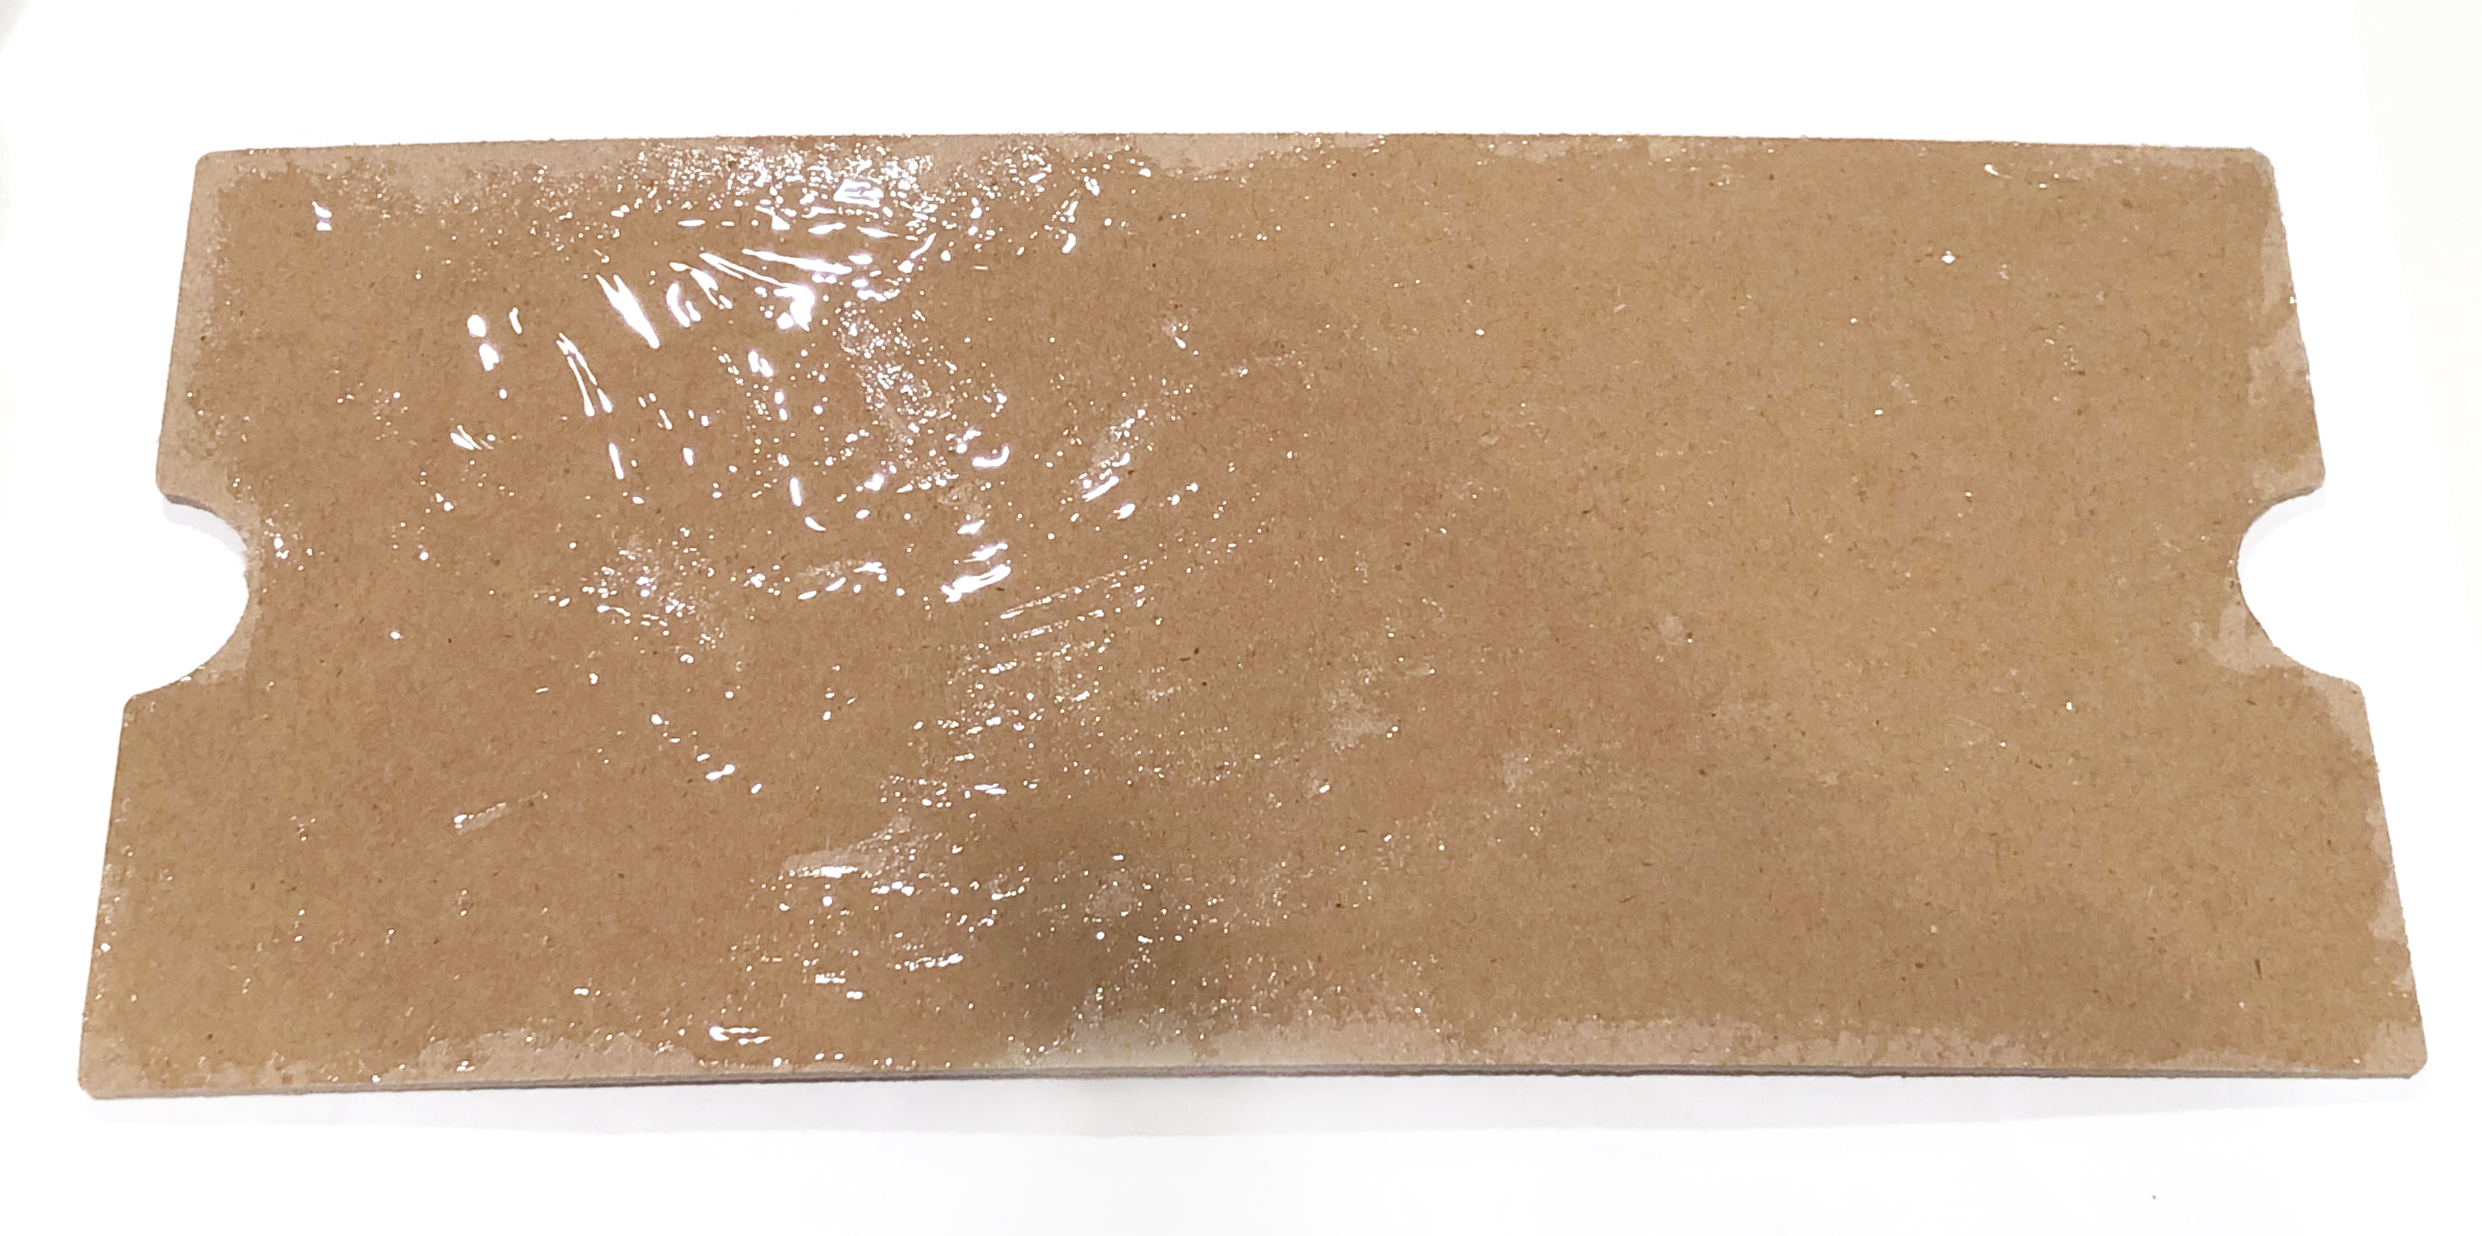
When your cut is finished, eject your mat from the machine. Carefully remove the Chipboard from the mat.
Now we’re going to assemble all of our cut pieces. Let’s start from the bottom up.
I’m using the solid rectangular piece of foam for a little padding in the bottom layer. I just laid it in the bottom of the acrylic box, no glue or anything.
For the 2nd layer that hold the blades, I applied glue to the chip board first, spread out the glue into a thin layer with the paintbrush.
Then I placed the solid foam rectangle with the finger holds on top of the glue. While the glue is still wet you can slide the pieces around a little to make sure they are aligned.
The next layer is the foam with the cut outs for the blade housings and quick swap tips, glue the back side of this layer, then apply it to the top of the chipboard with the foam.

Next is the 2nd piece of foam with the cut outs for the blade housings and quick swap tips, glue the back side of this layer, then apply it to the top of the chipboard with the foam. Make sure to line up your edges while the glue is still wet.
Then apply glue to back of the one of the foam pieces with the cut outs for the blade housings, quick swap tips, and extra blades. Attach it to the chip board with the other foam layers, align your edges.
Finally, apply glue to the back of the remaining foam piece. Attach it to the chip board with the other foam layers, align your edges.
The wet glue makes the chipboard and foam warp a little bit. Place your foam and chipboard piece under a heavy book overnight to flatten it out.

Once your foam and chip board piece is flattened out, you can add your tools and blades!


For a finishing touch, you can make a label out of adhesive vinyl. You can download my FREE SVG Blades + Tools or create your own!
