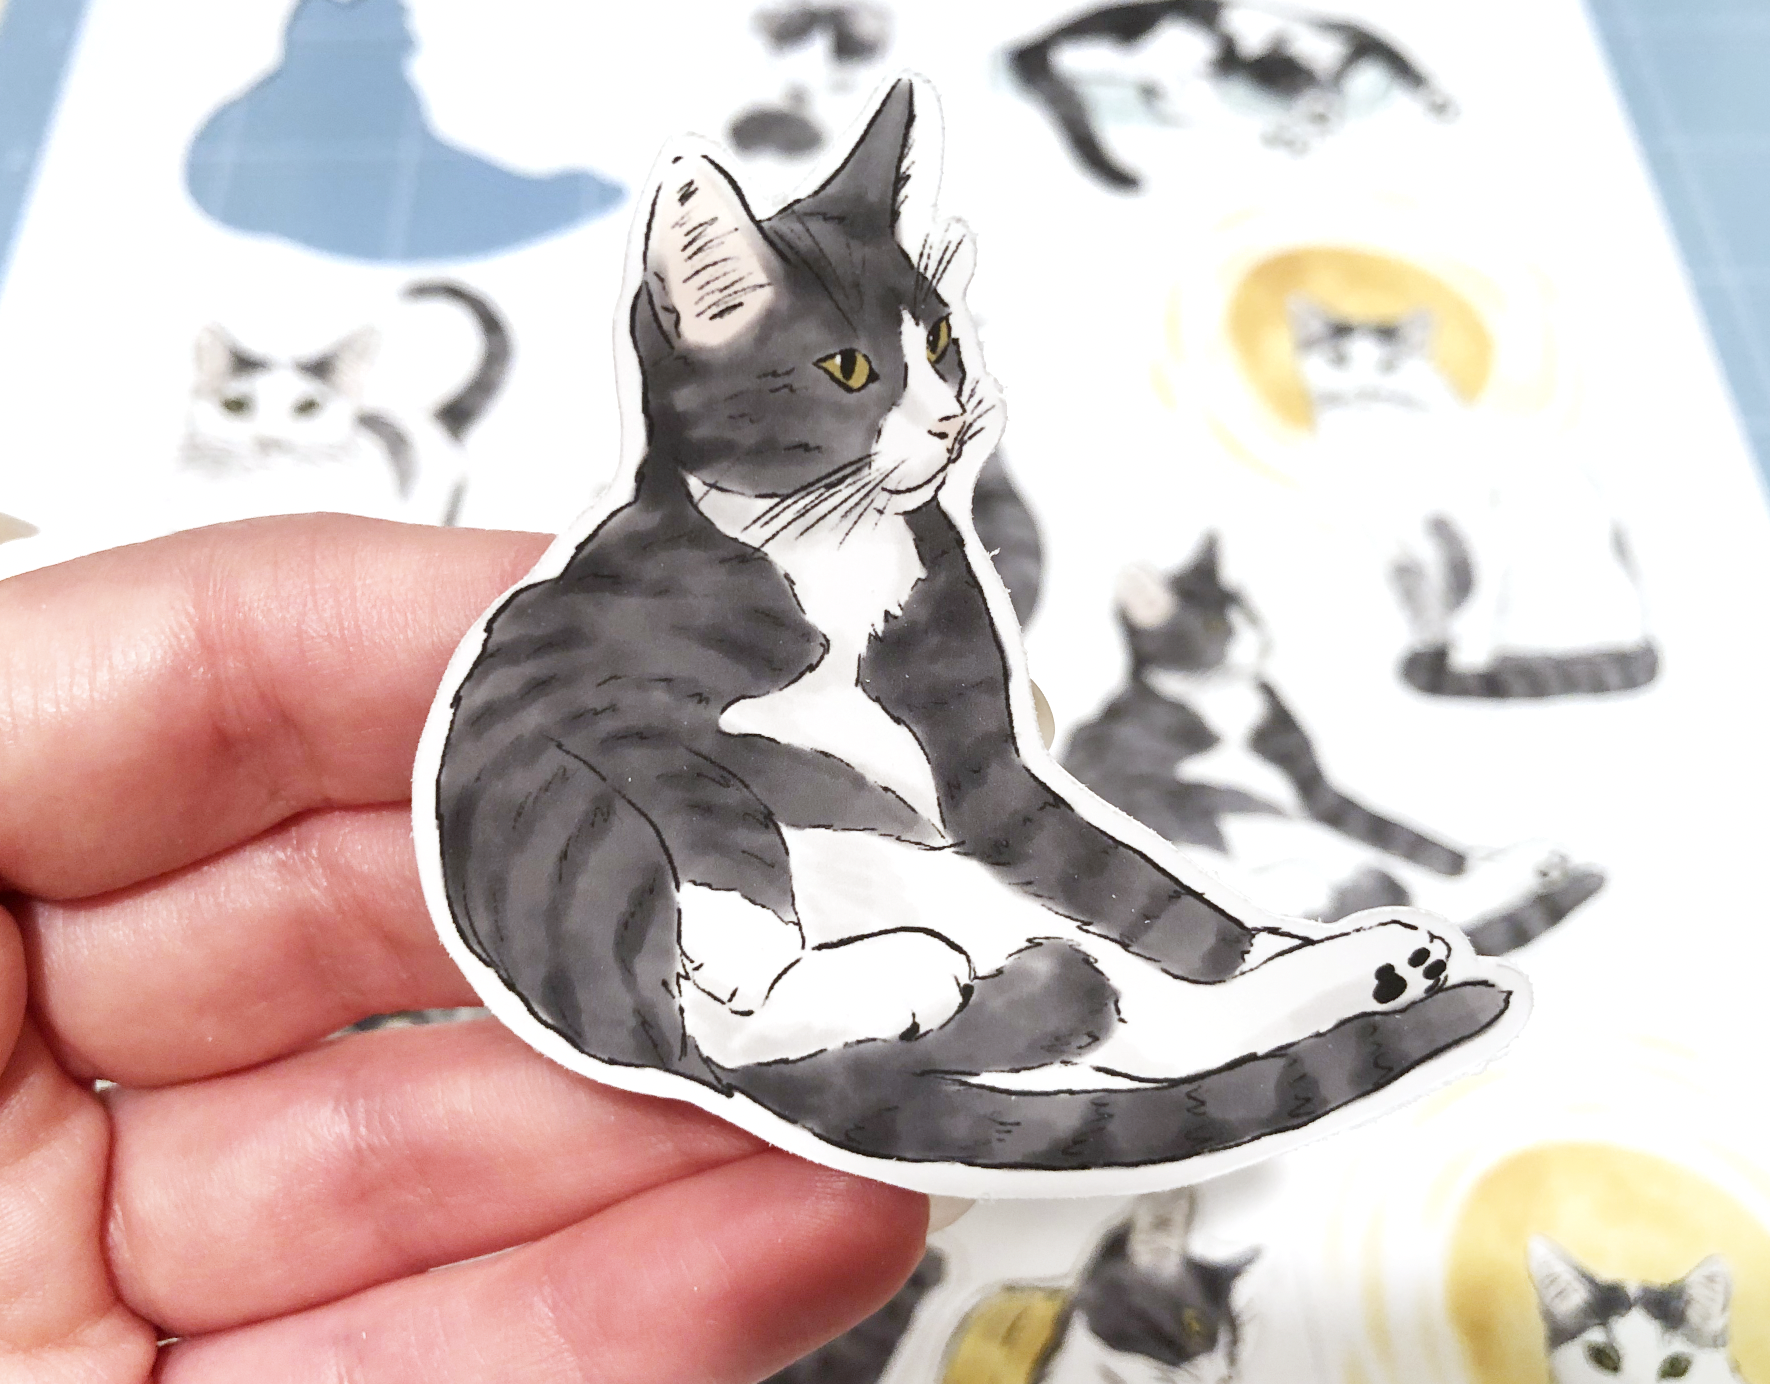
Hi Everyone! This week I want to share one of the methods I use to create offsets for my stickers. This is just one of the methods you can use. I like it because you can get a clean and simple cut line. I’ll be sharing some other methods in future posts.
For this method I will be using the Blob Brush tool in Adobe Illustrator.
Let’s get started!
Supplies: (Links below may be affiliate links)
Sticker artwork (I’m using artwork I created in Adobe Fresco, you can use your own artwork)
Adobe Illustrator CC
Inkjet printer
Sticker Paper (I’m using this waterproof vinyl paper)
Cricut Maker or other Cricut machine
Light Grip Mat (the blue one)
My artwork is a PNG file. I created it in Adobe Fresco and then exported it as a PNG so there is no background. I’m placing my artwork in Adobe Illustrator.
After I place my artwork, I create a new layer below my artwork layer. This is where we will be making the offset.
Lock the layer with the artwork so you don’t accidentally select it.
I’m picking a bright contrasting color so I can easily see my offset that I’m creating.
Select the Blob Brush tool (Shift + B)
I start “painting” around the edges of my artwork. I’m just going around the outer edge and making a small border around my artwork.
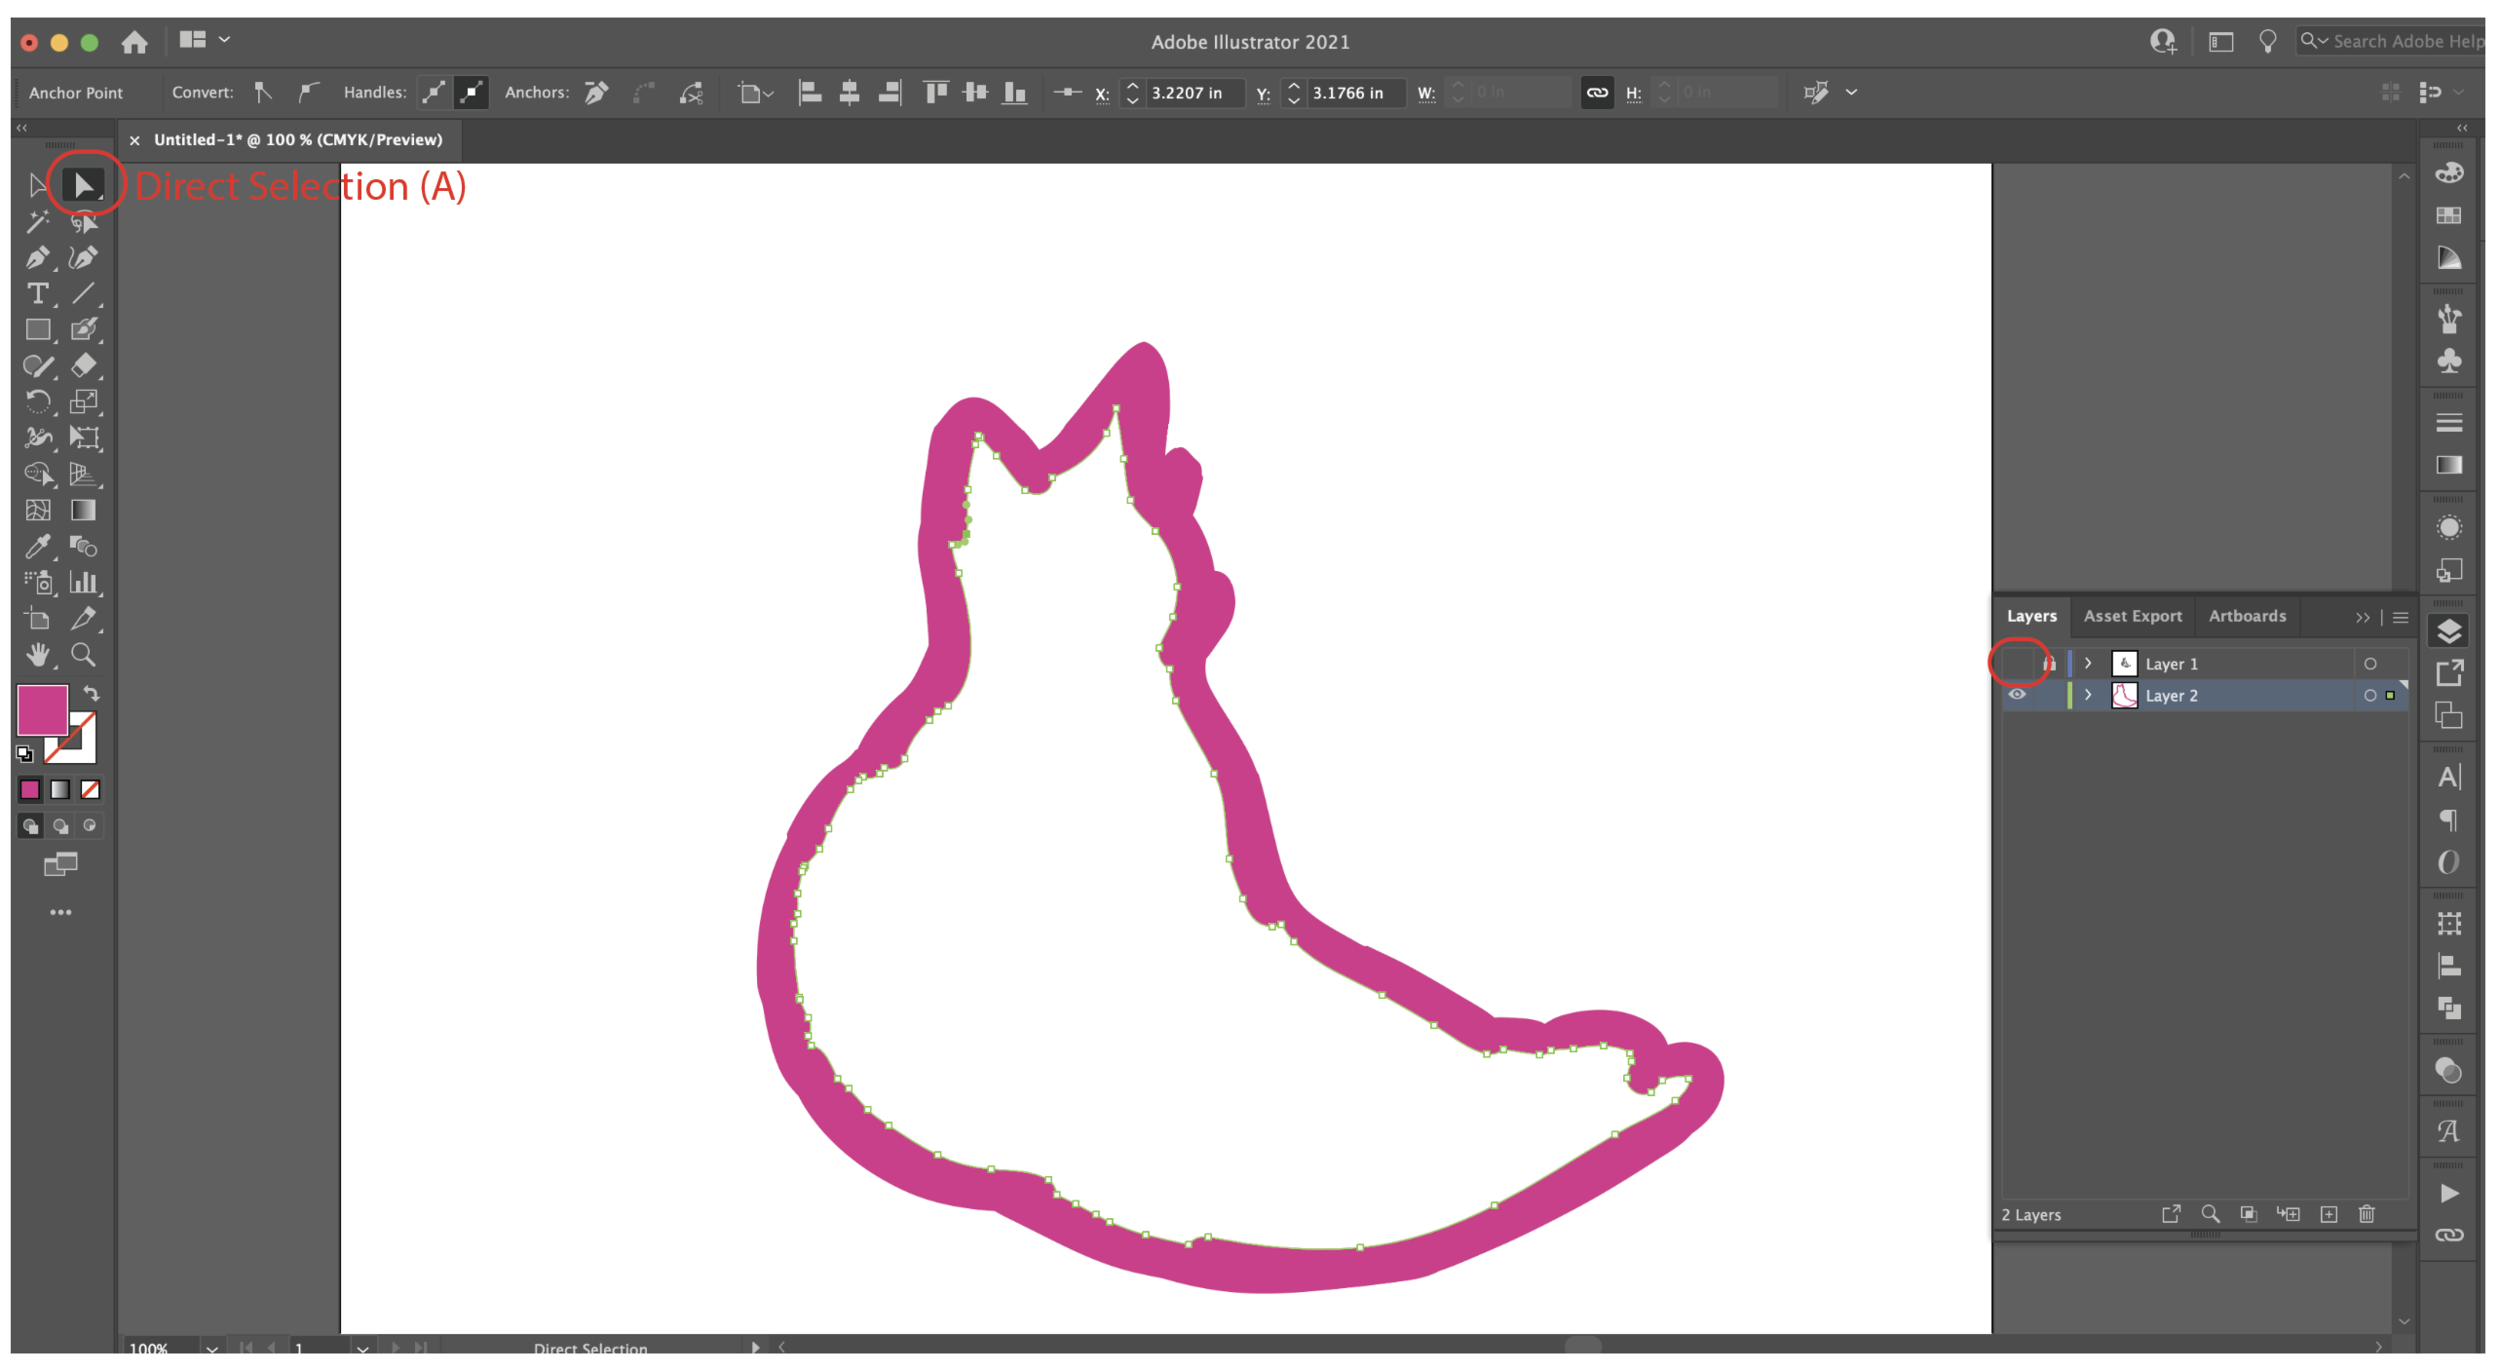
Once you are finished going around the edge, I turn off my artwork layer (click the eyeball in the layers panel). Now I’m only seeing the outline that I just painted.
Using my direct selection tool (white arrow, keyboard short cut “A”) I’m going to select the just the inside path and press DELETE.
Now you have a solid filled shape. If I want to refine my shape even more, I will go around the edges with the eraser tool (Shift + E) and the Smooth Tool.
I’m going to add a few more stickers, resize, and layout my artwork on my page.
Then add crop marks to the corners.
Next, I’m printing a test page directly from Illustrator to check the scale of my stickers. I’m keeping the offset showing on my test print so I can determine how far off my machine alignment is since I’m not using the Cricut Print and Cut function.
Once I’m happy with the scale of my stickers, I’m going to place my test print onto my blue cutting mat in the upper left corner. (My white border is the area that Design Space will not allow you to place your artwork beyond.)
I’m going to save my artwork file with the stickers and cut files as an AI (Illustrator file). Then I’m going to delete the sticker artwork, leaving only the cut lines and crop marks, and save this as and SVG file that we will upload into Cricut Design Space.
Upload the SVG file to Design Space and press INSERT IMAGES.
Select the very top layer and click ATTACH so all the cut lines and crop marks stay together.
Then press MAKE IT.
Make sure your top left crop mark is as far to the top left as Design Space will allow and press CONTINUE.
I am using the Printable Sticker Paper (white) material setting. I load my mat into the machine and press GO.
My machine alignment looks pretty good. I’m not going to get too fussy since it will be a white border.
Since my alignment is good, I’m going to print my designs from Illustrator on the actual sticker paper, without the cut lines showing.
Load my mat with the sticker paper this time. Select the Printable Sticker Paper material setting again. Load my mat and press GO.
Once the machine is done cutting, DO NOT REMOVE the mat. Check to make sure it cut all the way through the material. It took about 4 passes to get all the way through the sticker paper, I might try another material setting next time.
Now we have some cute kitty stickers! These are vinyl and waterproof so you can stick them on a water bottle, phone case, laptop, notebook, etc.


