Hi Everyone! This week I’m going to compare how to curve text in Cricut Design Space versus Silhouette Studio.
Let get started!
Cricut Design Space
Truth be told, I usually don’t make any of my text directly in Design Space, it’s such a headache! Curving text in Cricut Design Space is pretty easy, but VERY primitive and limited. I typically make my text and do any curving or warping effects in Illustrator, then upload my file as an SVG into Design Space.
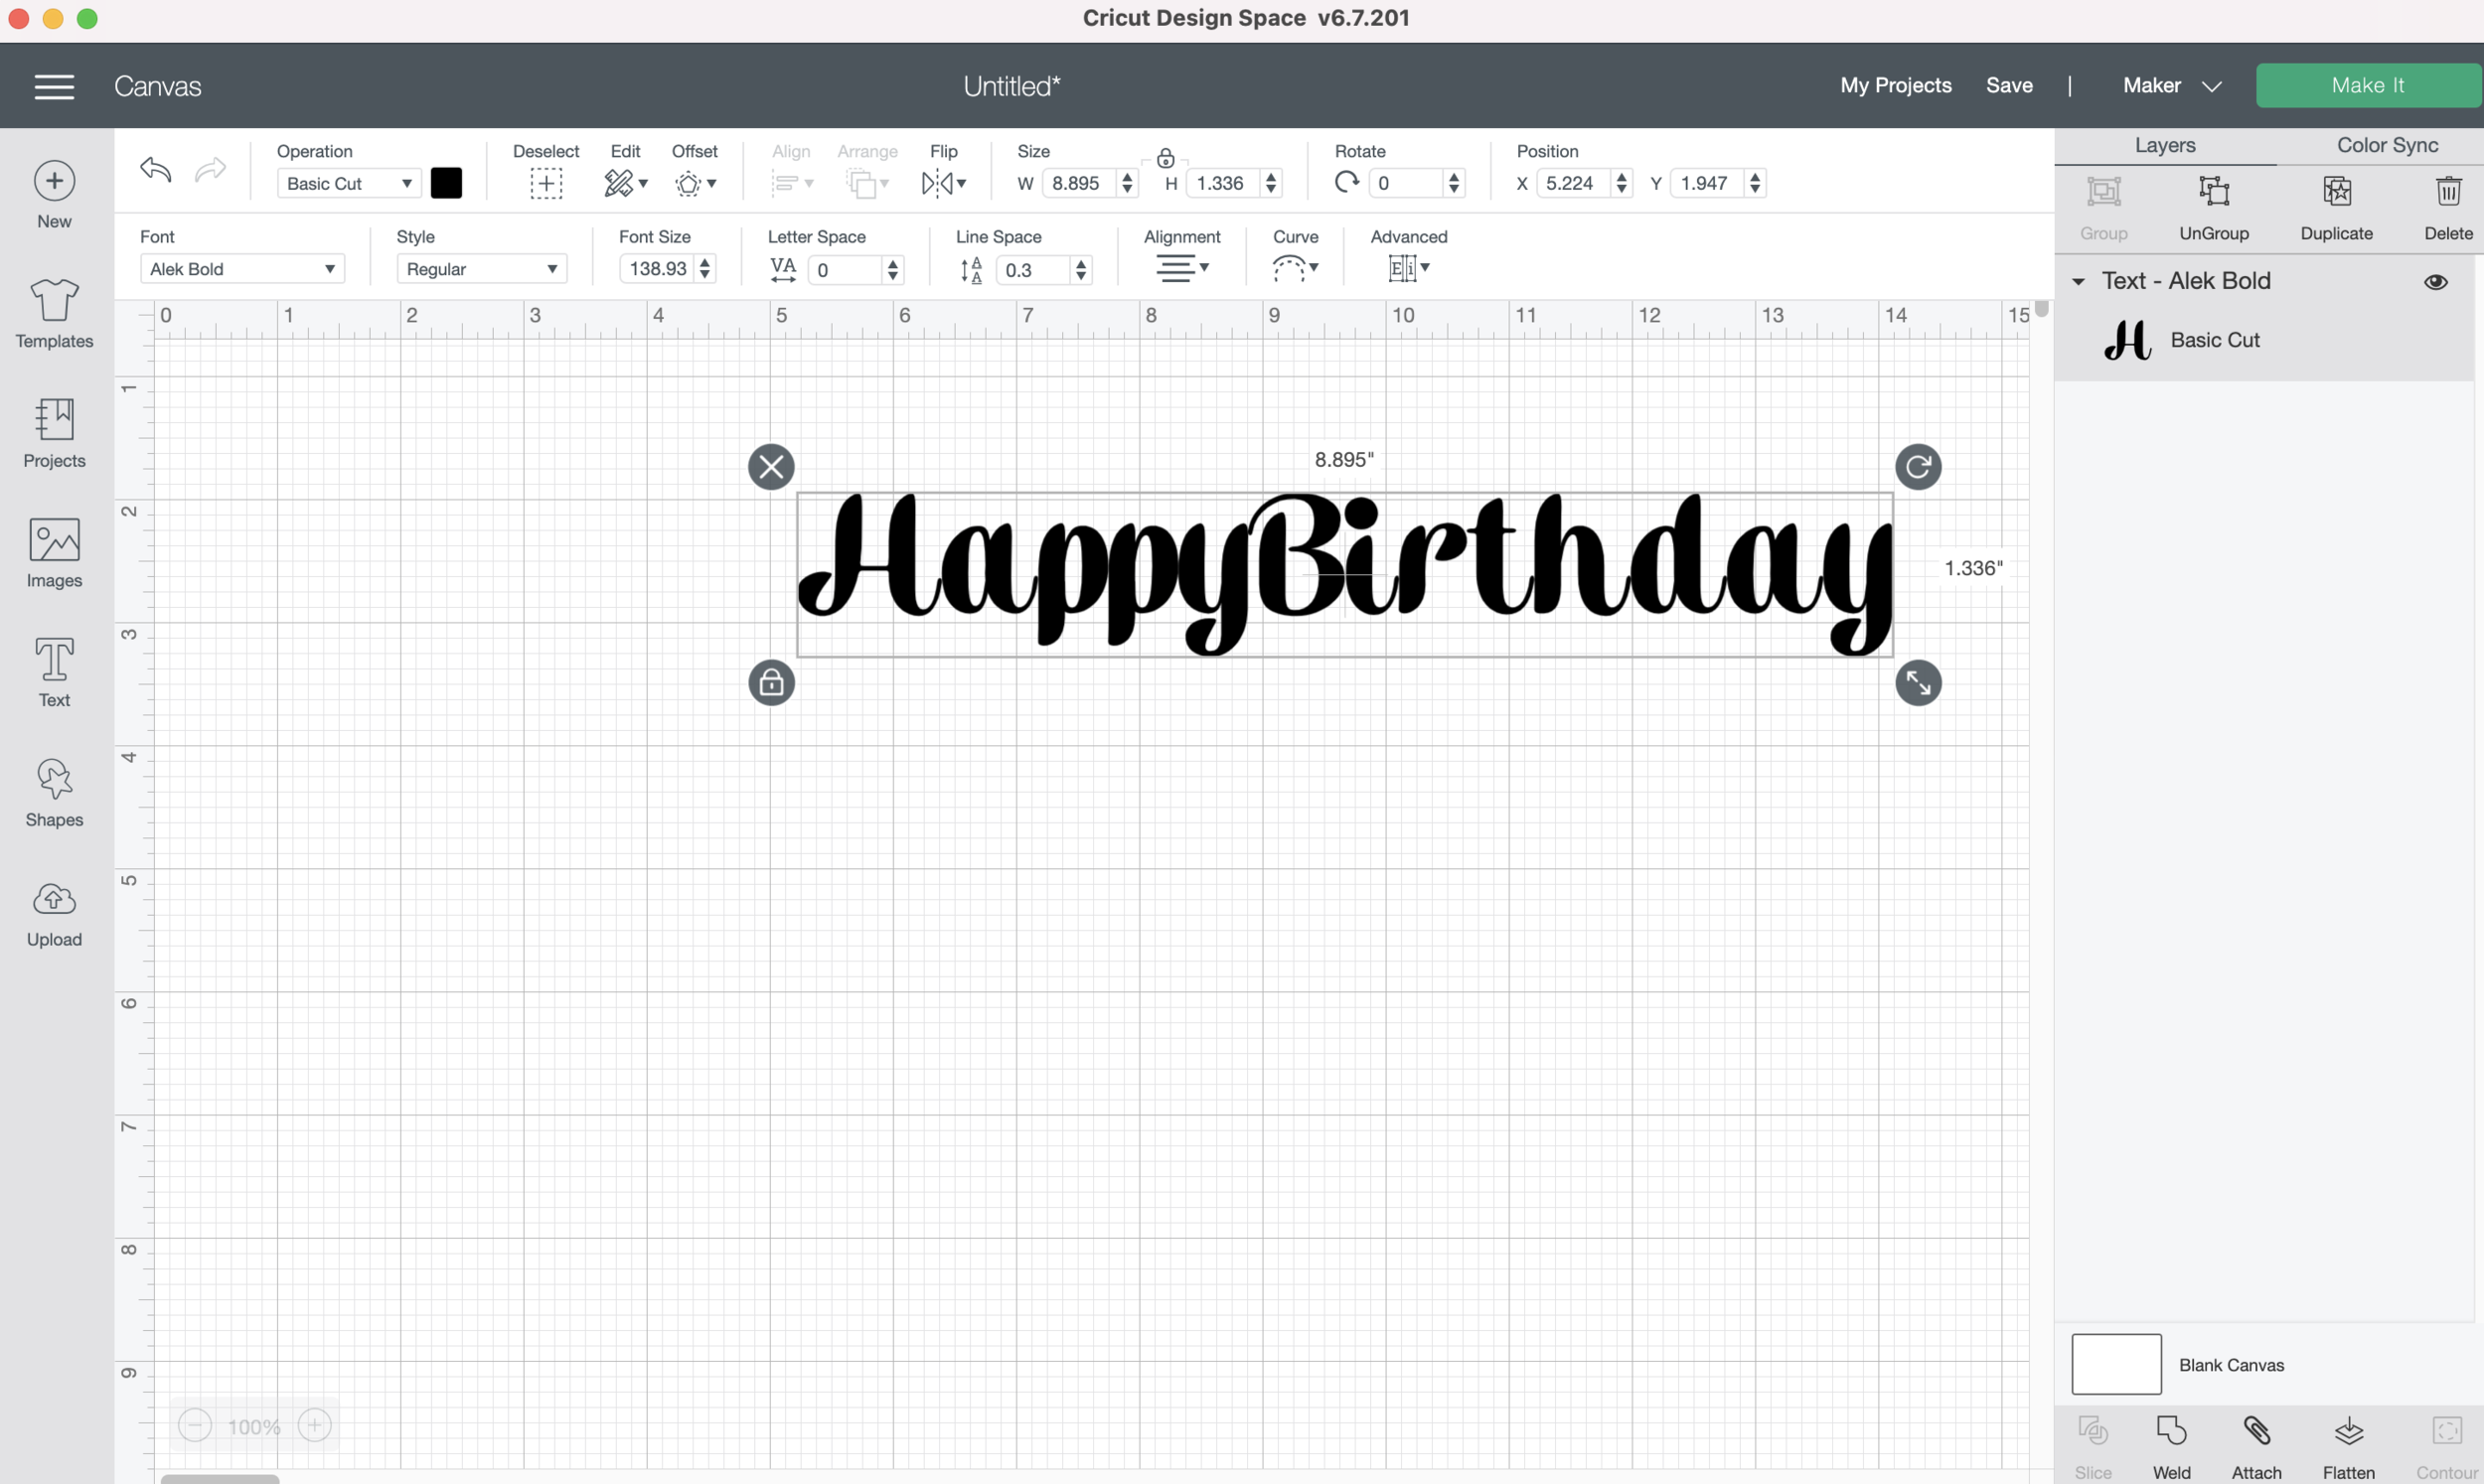
But I’m going to go ahead and demo making the text only in Design Space so you can see for yourself. First, I’ll start by typing my text. I’m going to do something pretty simple like “Happy Birthday.” The font I’m using is called Alek Bold, it’s one of my system fonts. I refuse to pay for Cricut fonts.
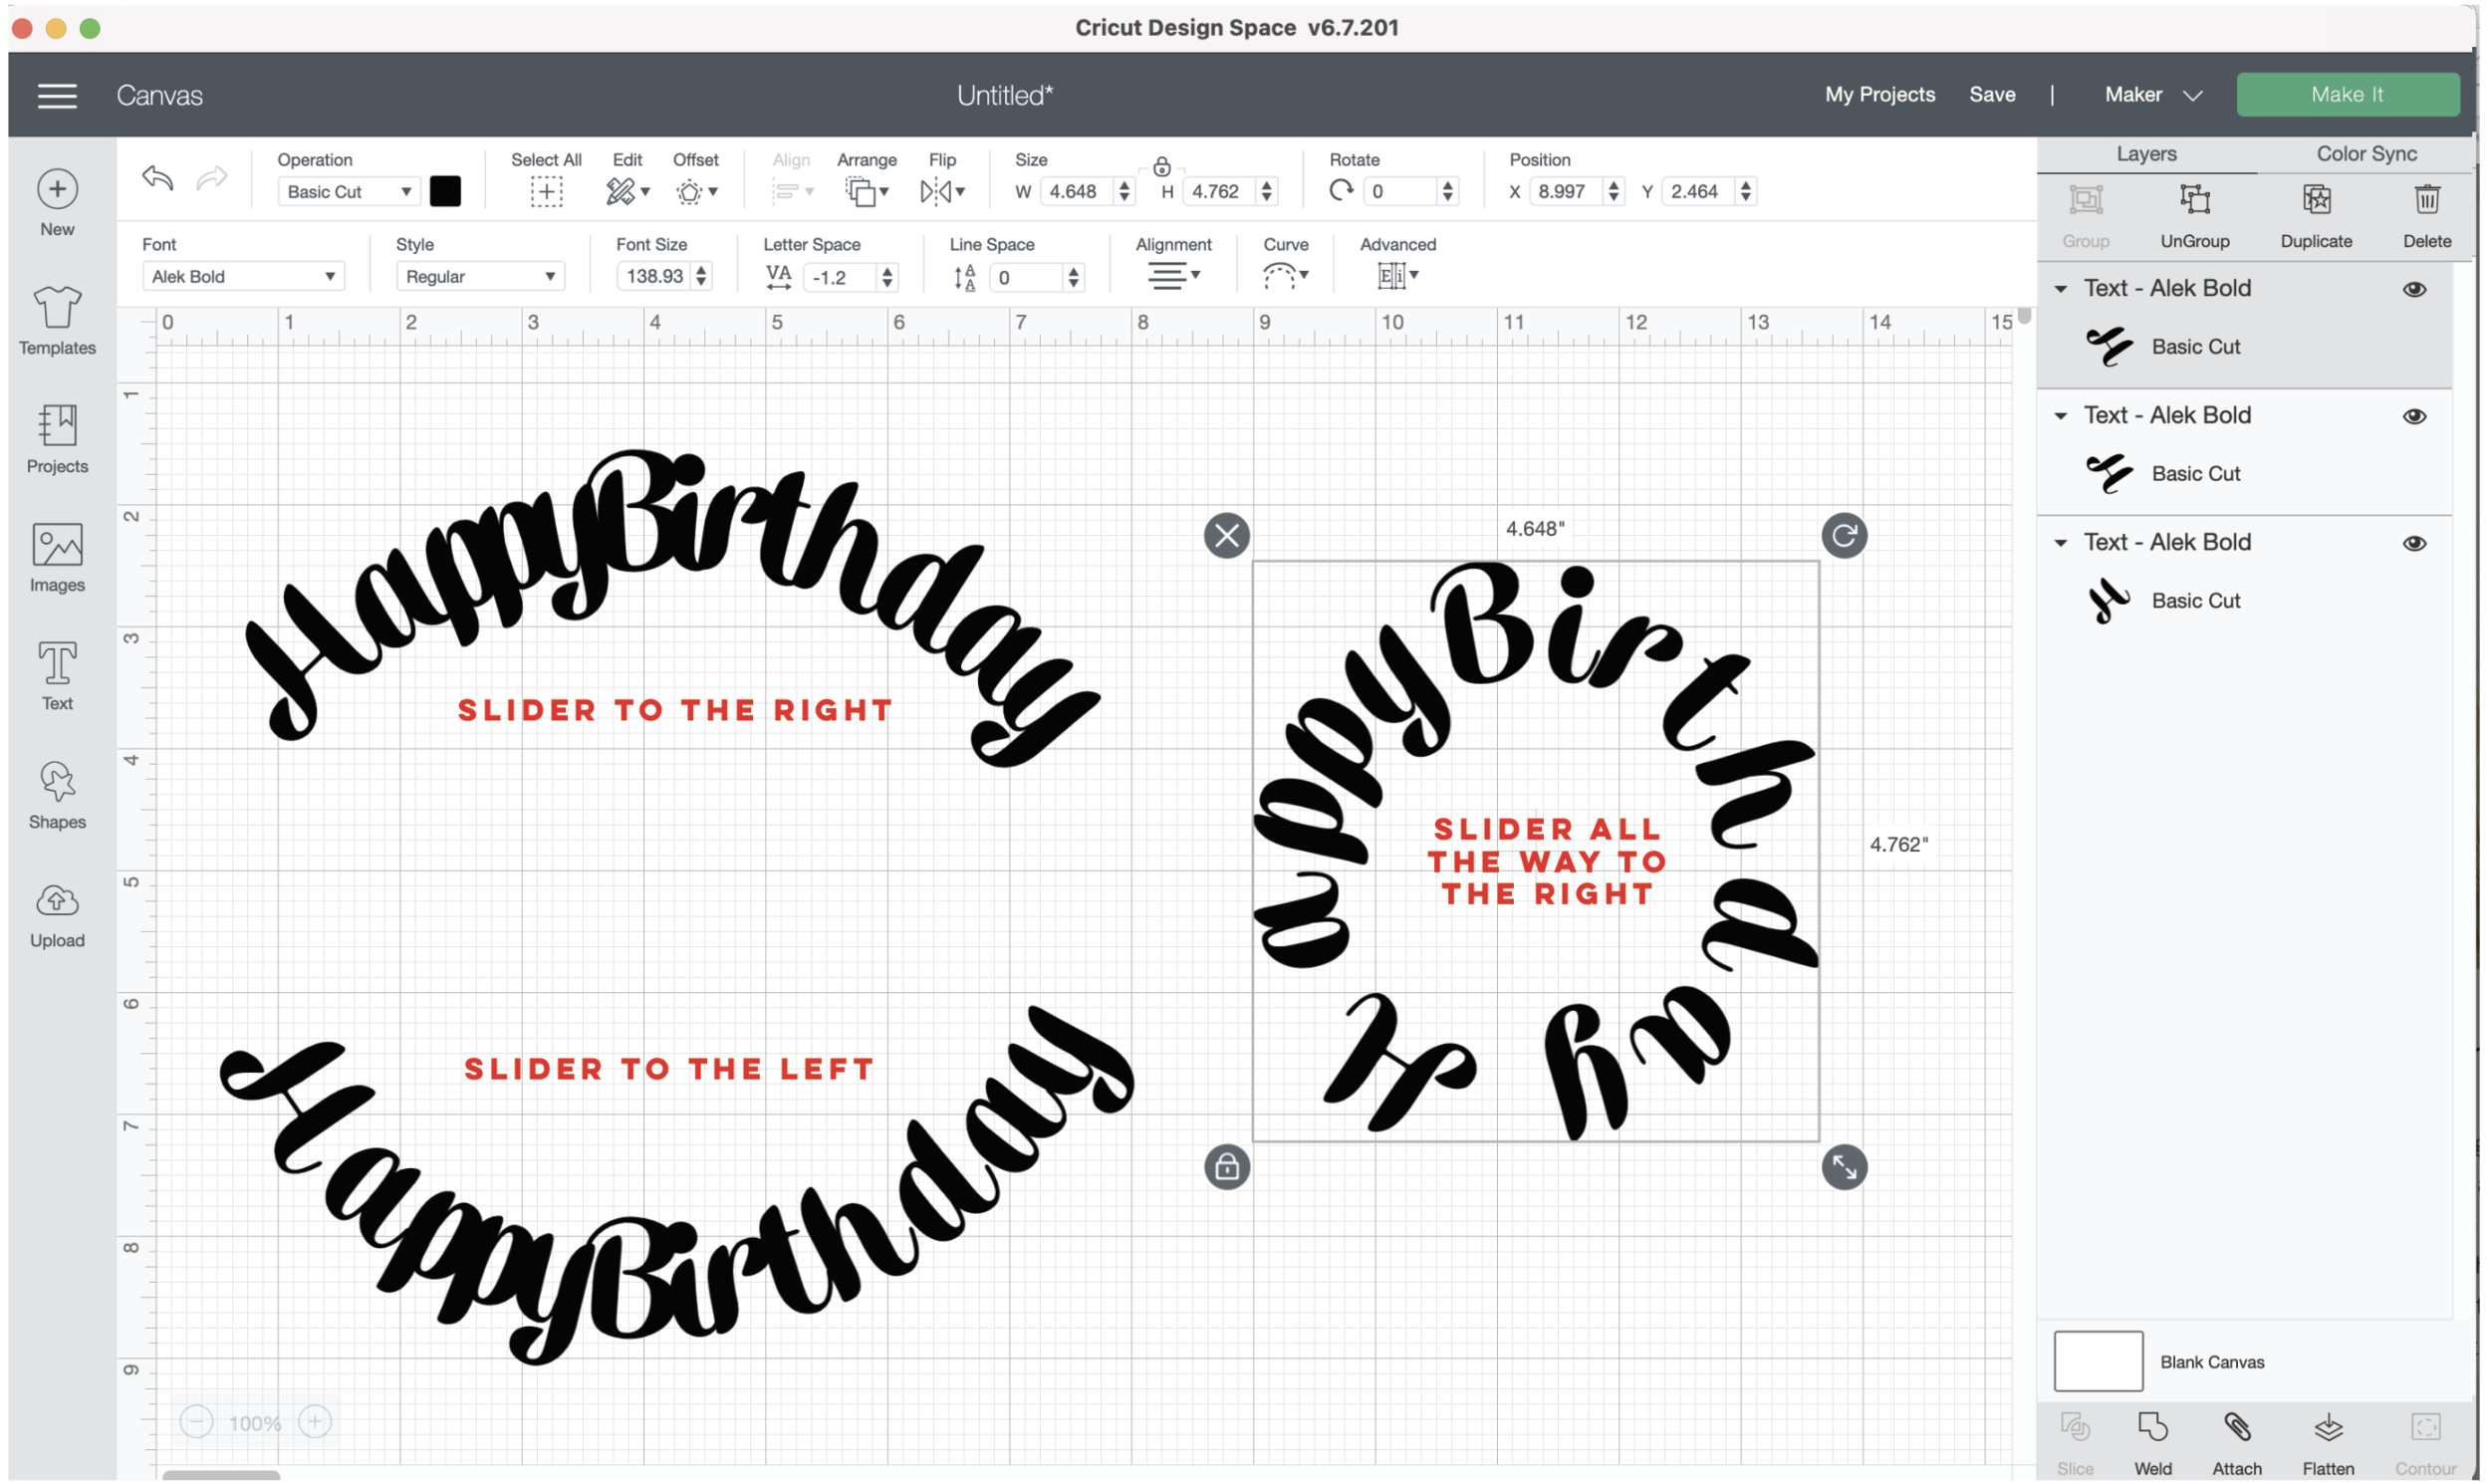
Once I’ve typed my words and selected my font, I will adjust the kerning (Letter Space) so my letters are touching. For some reason by default Design Space really likes to S P R E A D out the letters.
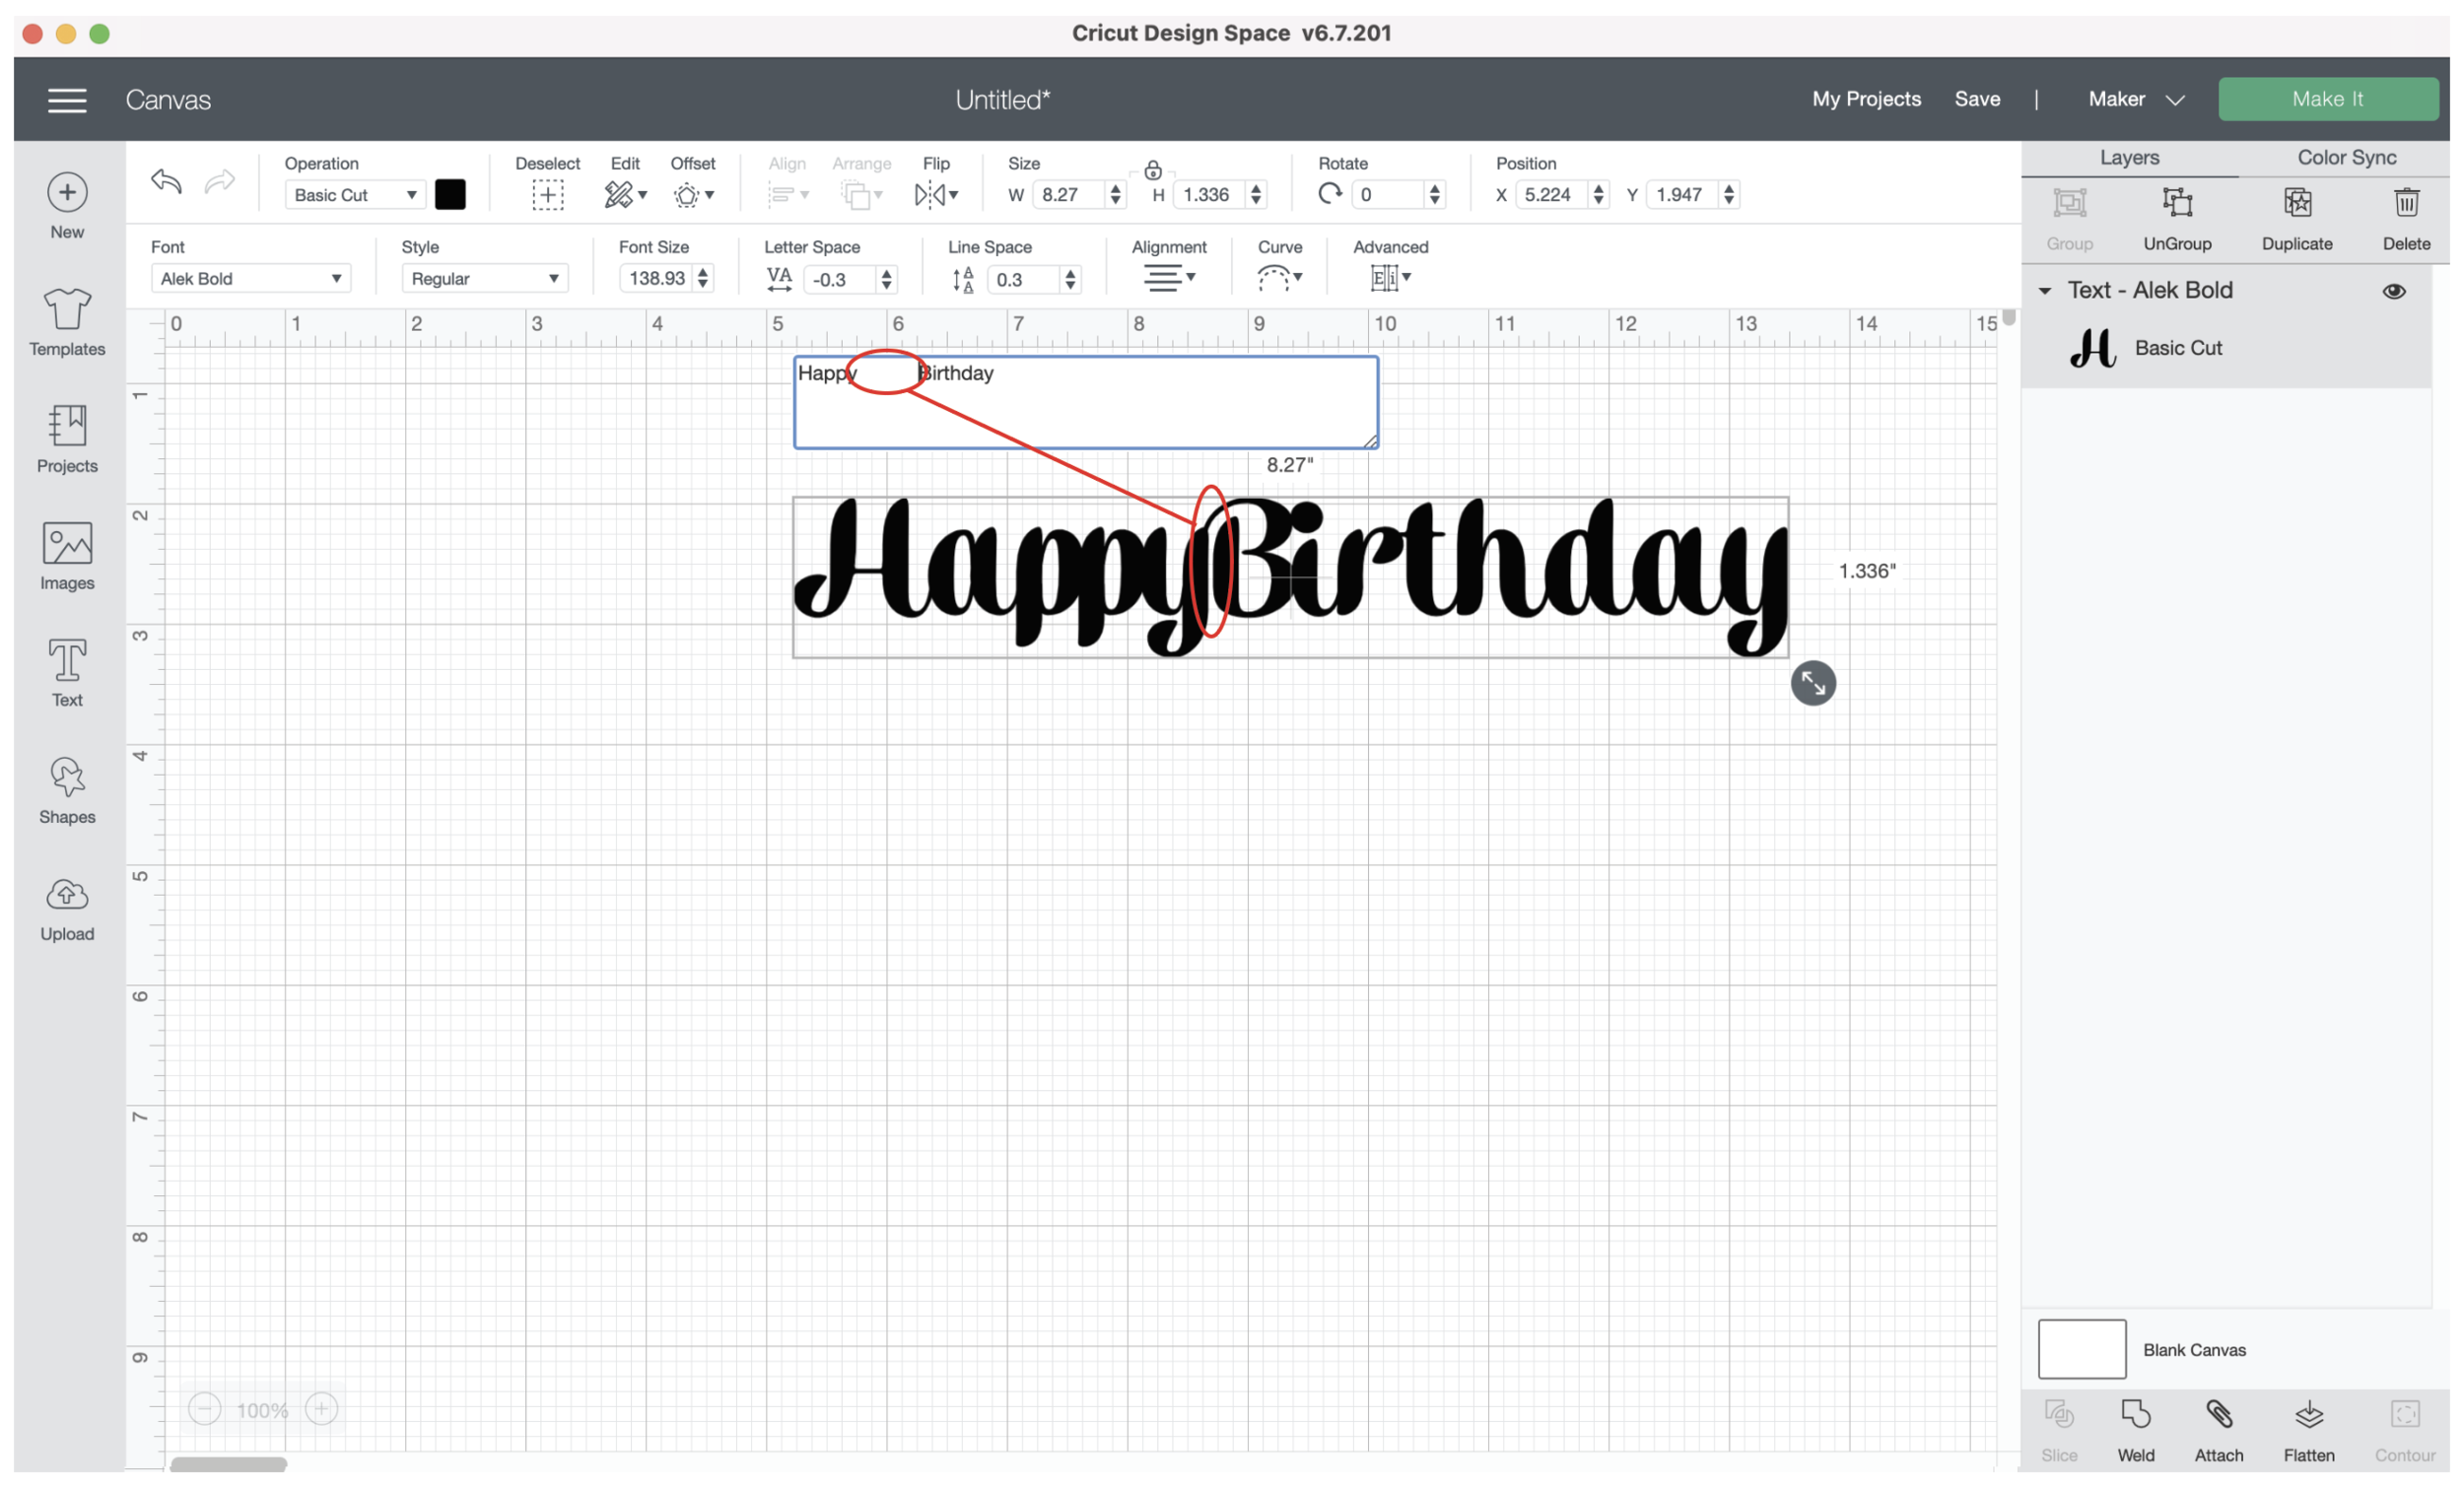
I bring my letters closer together to they’re actually touching like they’re supposed to. But now my space in between Happy and Birthday is gone! Even if I add extra spaces in the text box, nothing!! Super annoying, but moving on.
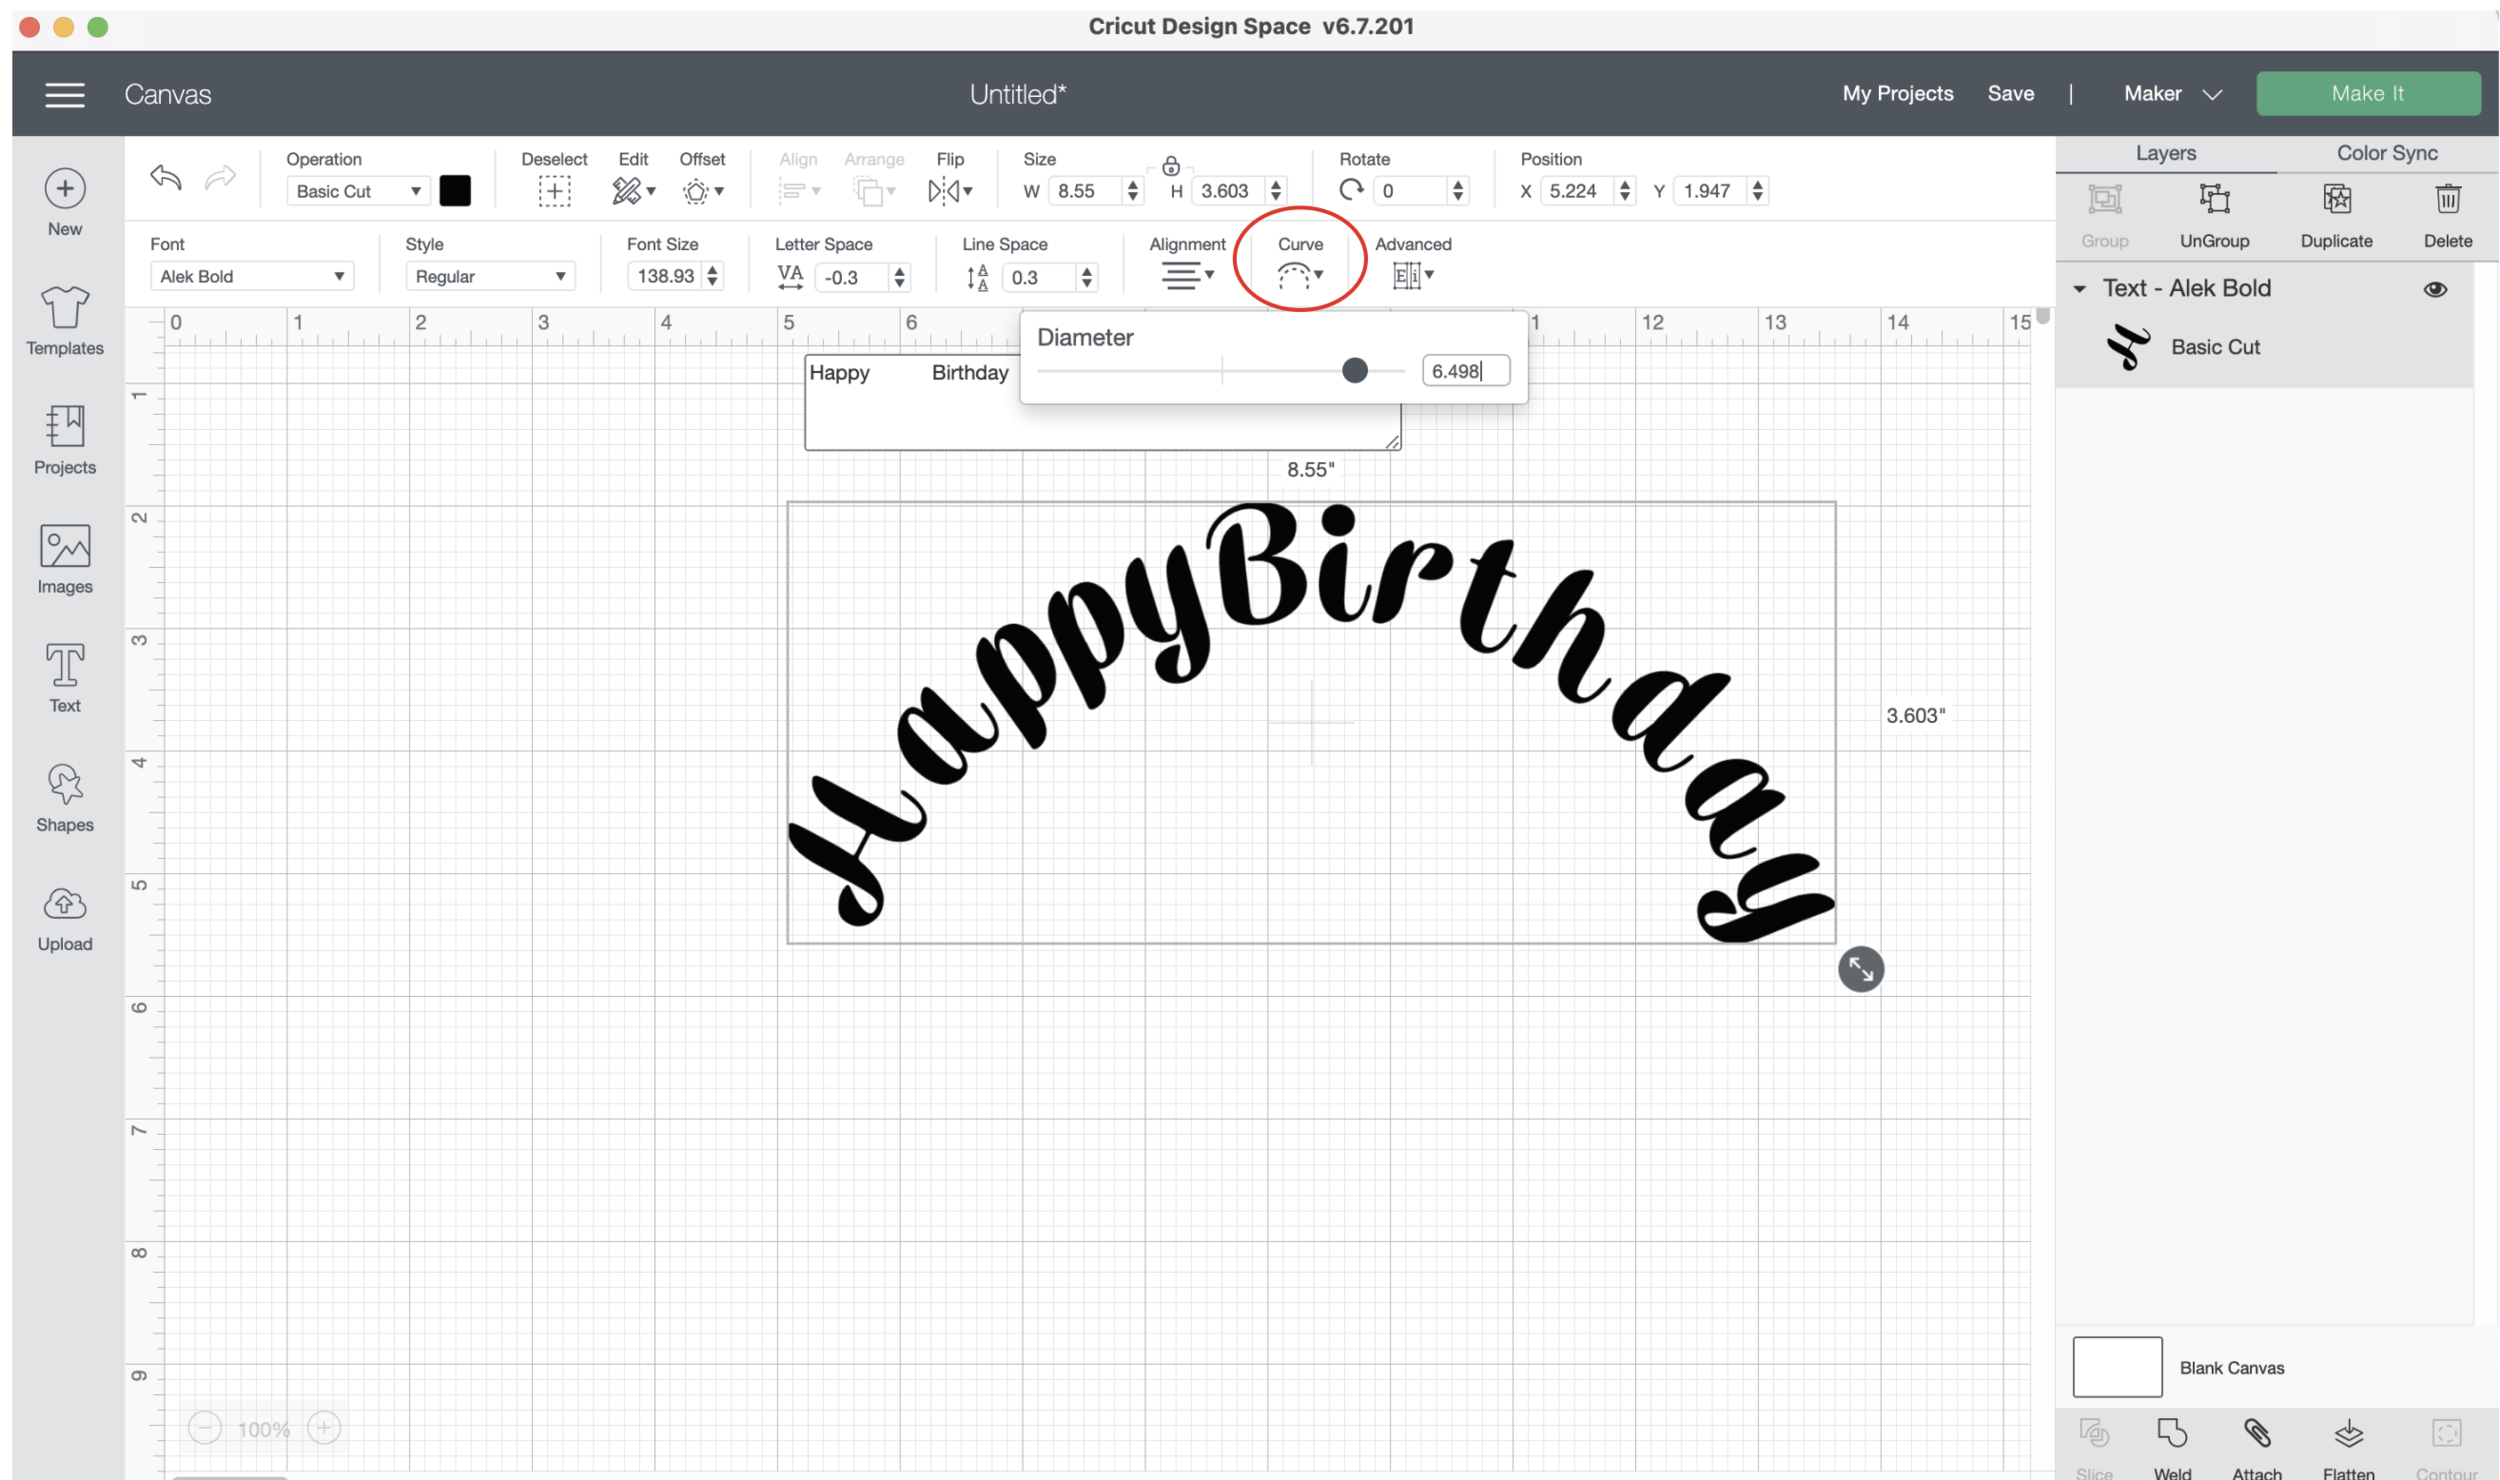
With my text still selected, I will click on “Curve” in the toolbar across the top. I move the slider to the right to get a nice curve.
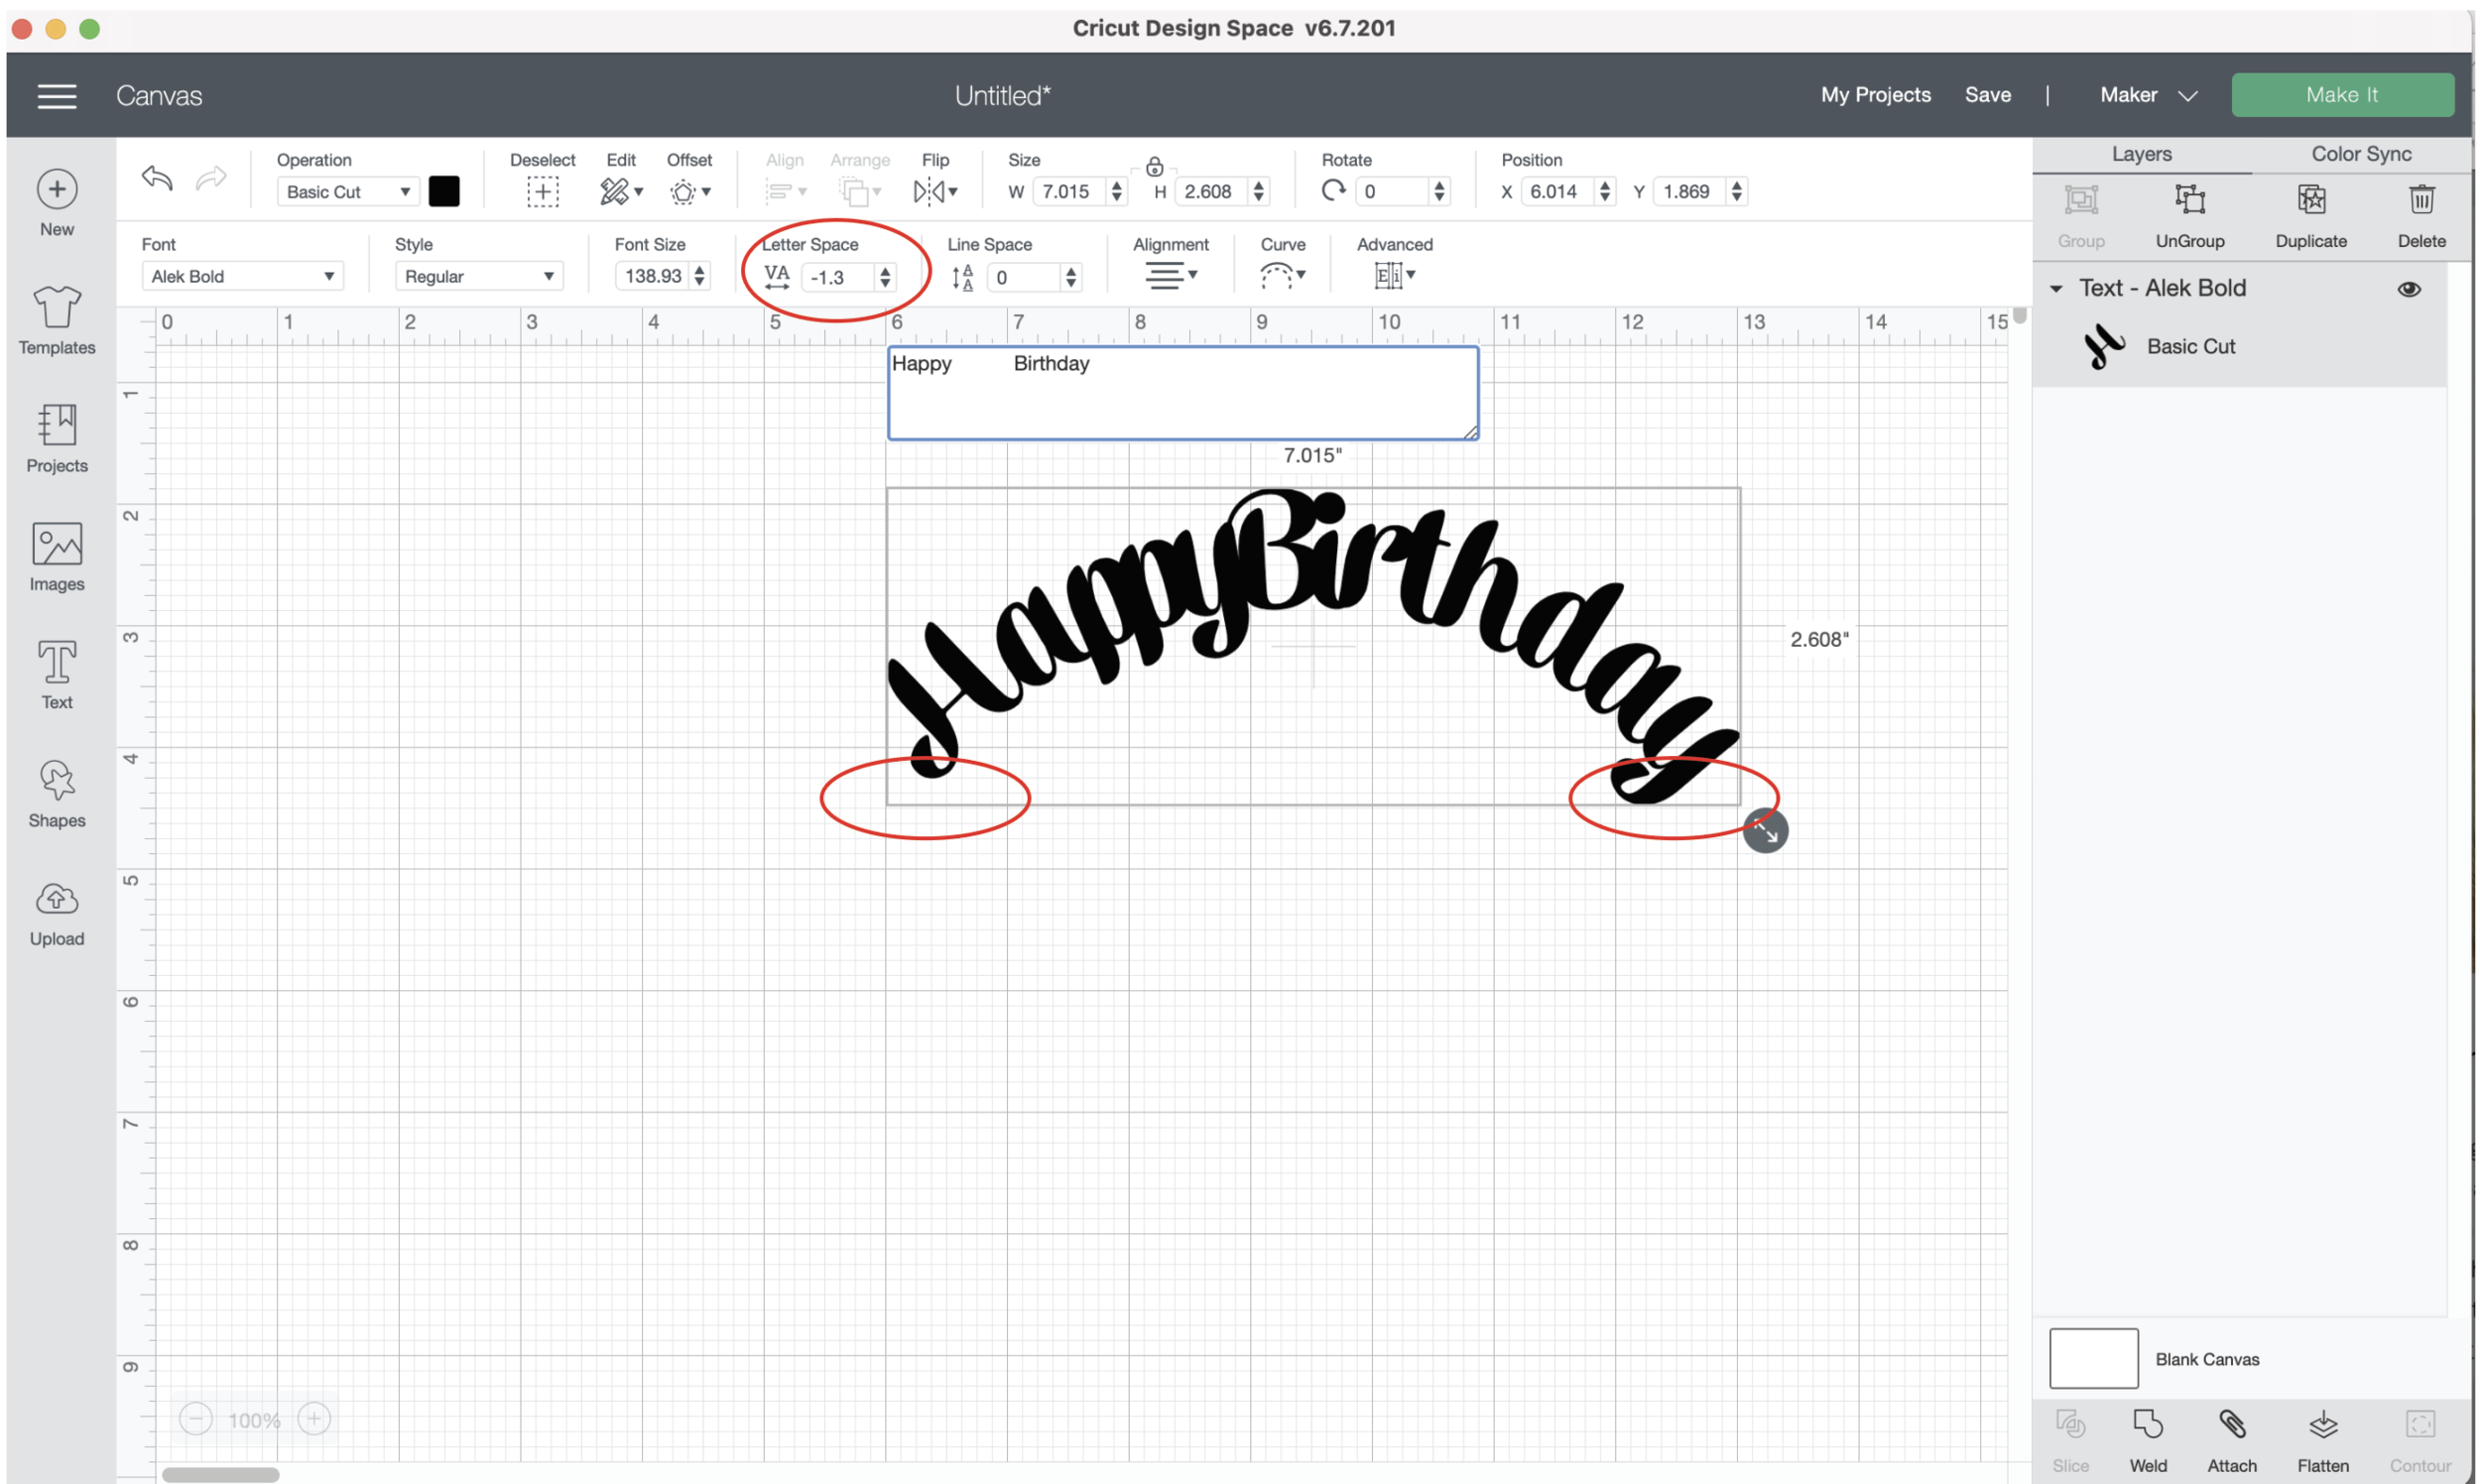
My letters get spread out on the curve so I need to adjust my kerning (letter spacing) again. Still no space between Happy & Birthday :(
I also wish I could move my letters along the curve so my H and Y at the ends are level with each other.
You can play around with the slider to get convex or concave curves or you do a complete circle (the letter spacing looks even more ridiculous). And that’s about all you can do with curved text in Design Space. So far, I’m still very underwhelmed with the feature and will continue creating my type in Illustrator or Silhouette Studio.
Silhouette Studio
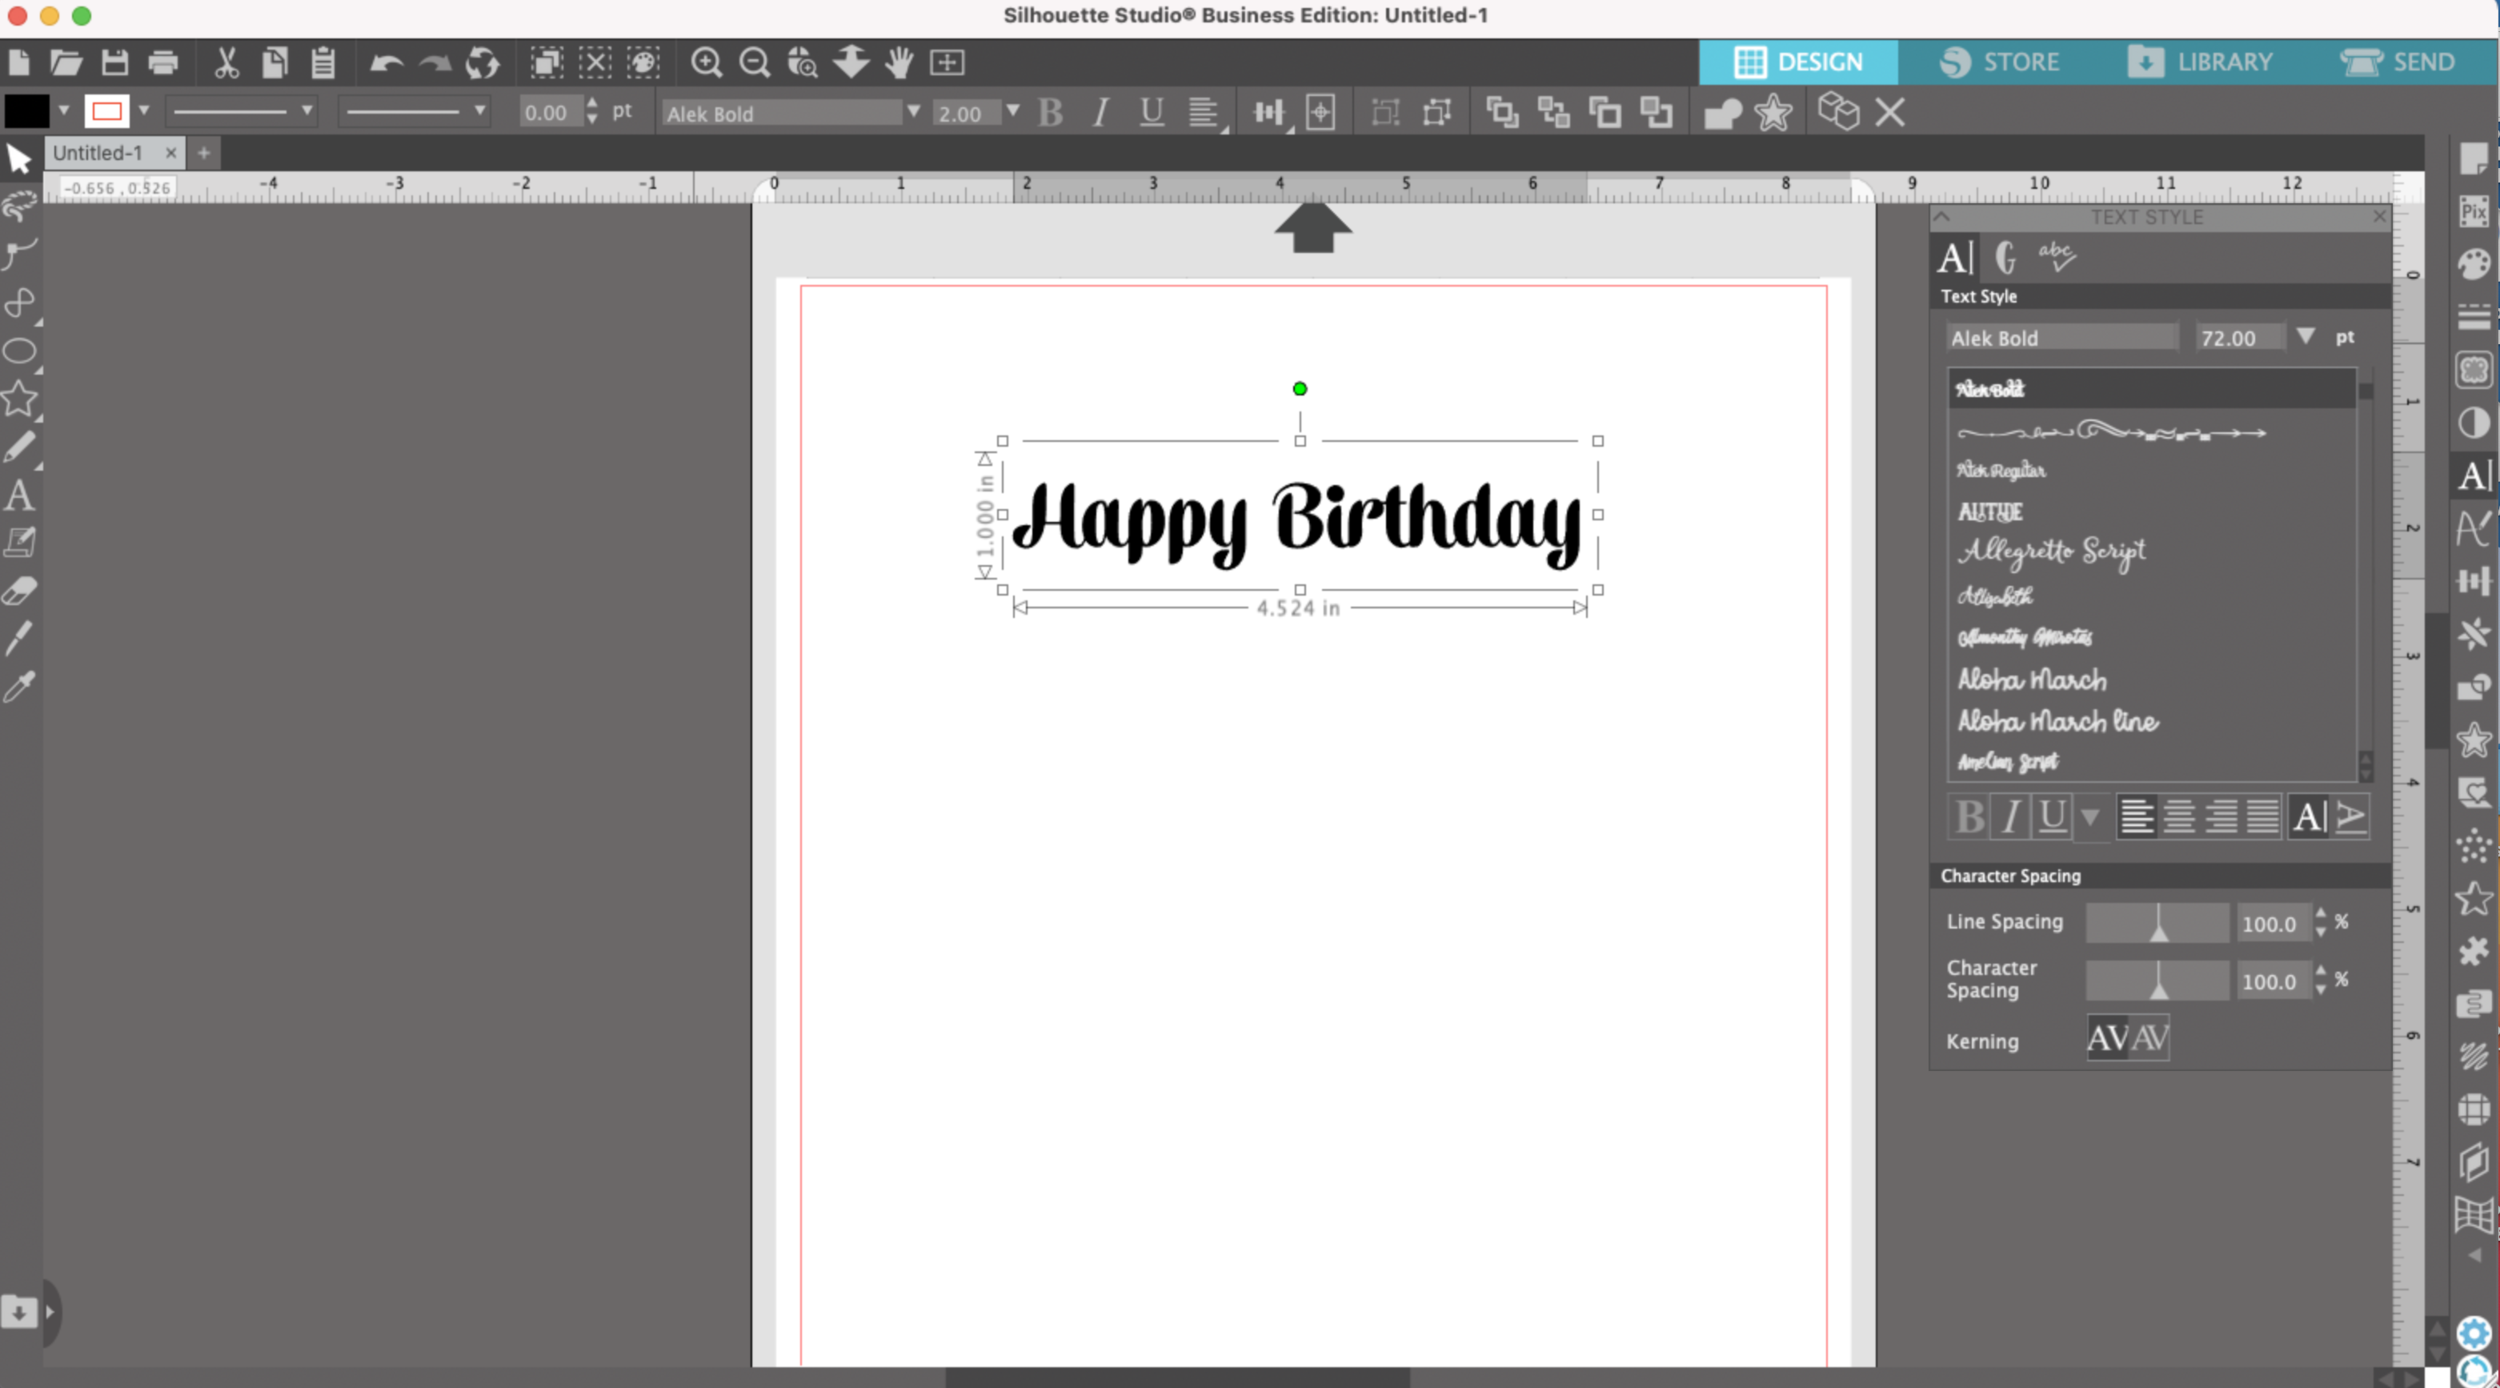
I’m going to try Happy Birthday in the same font in Silhouette Studio. I don’t have to adjust the kerning in Silhouette Studio yet, it uses the default for the font, yay!!
Silhouette Studio has a really cool feature called Text to Path that I’m going to use to curve my type.
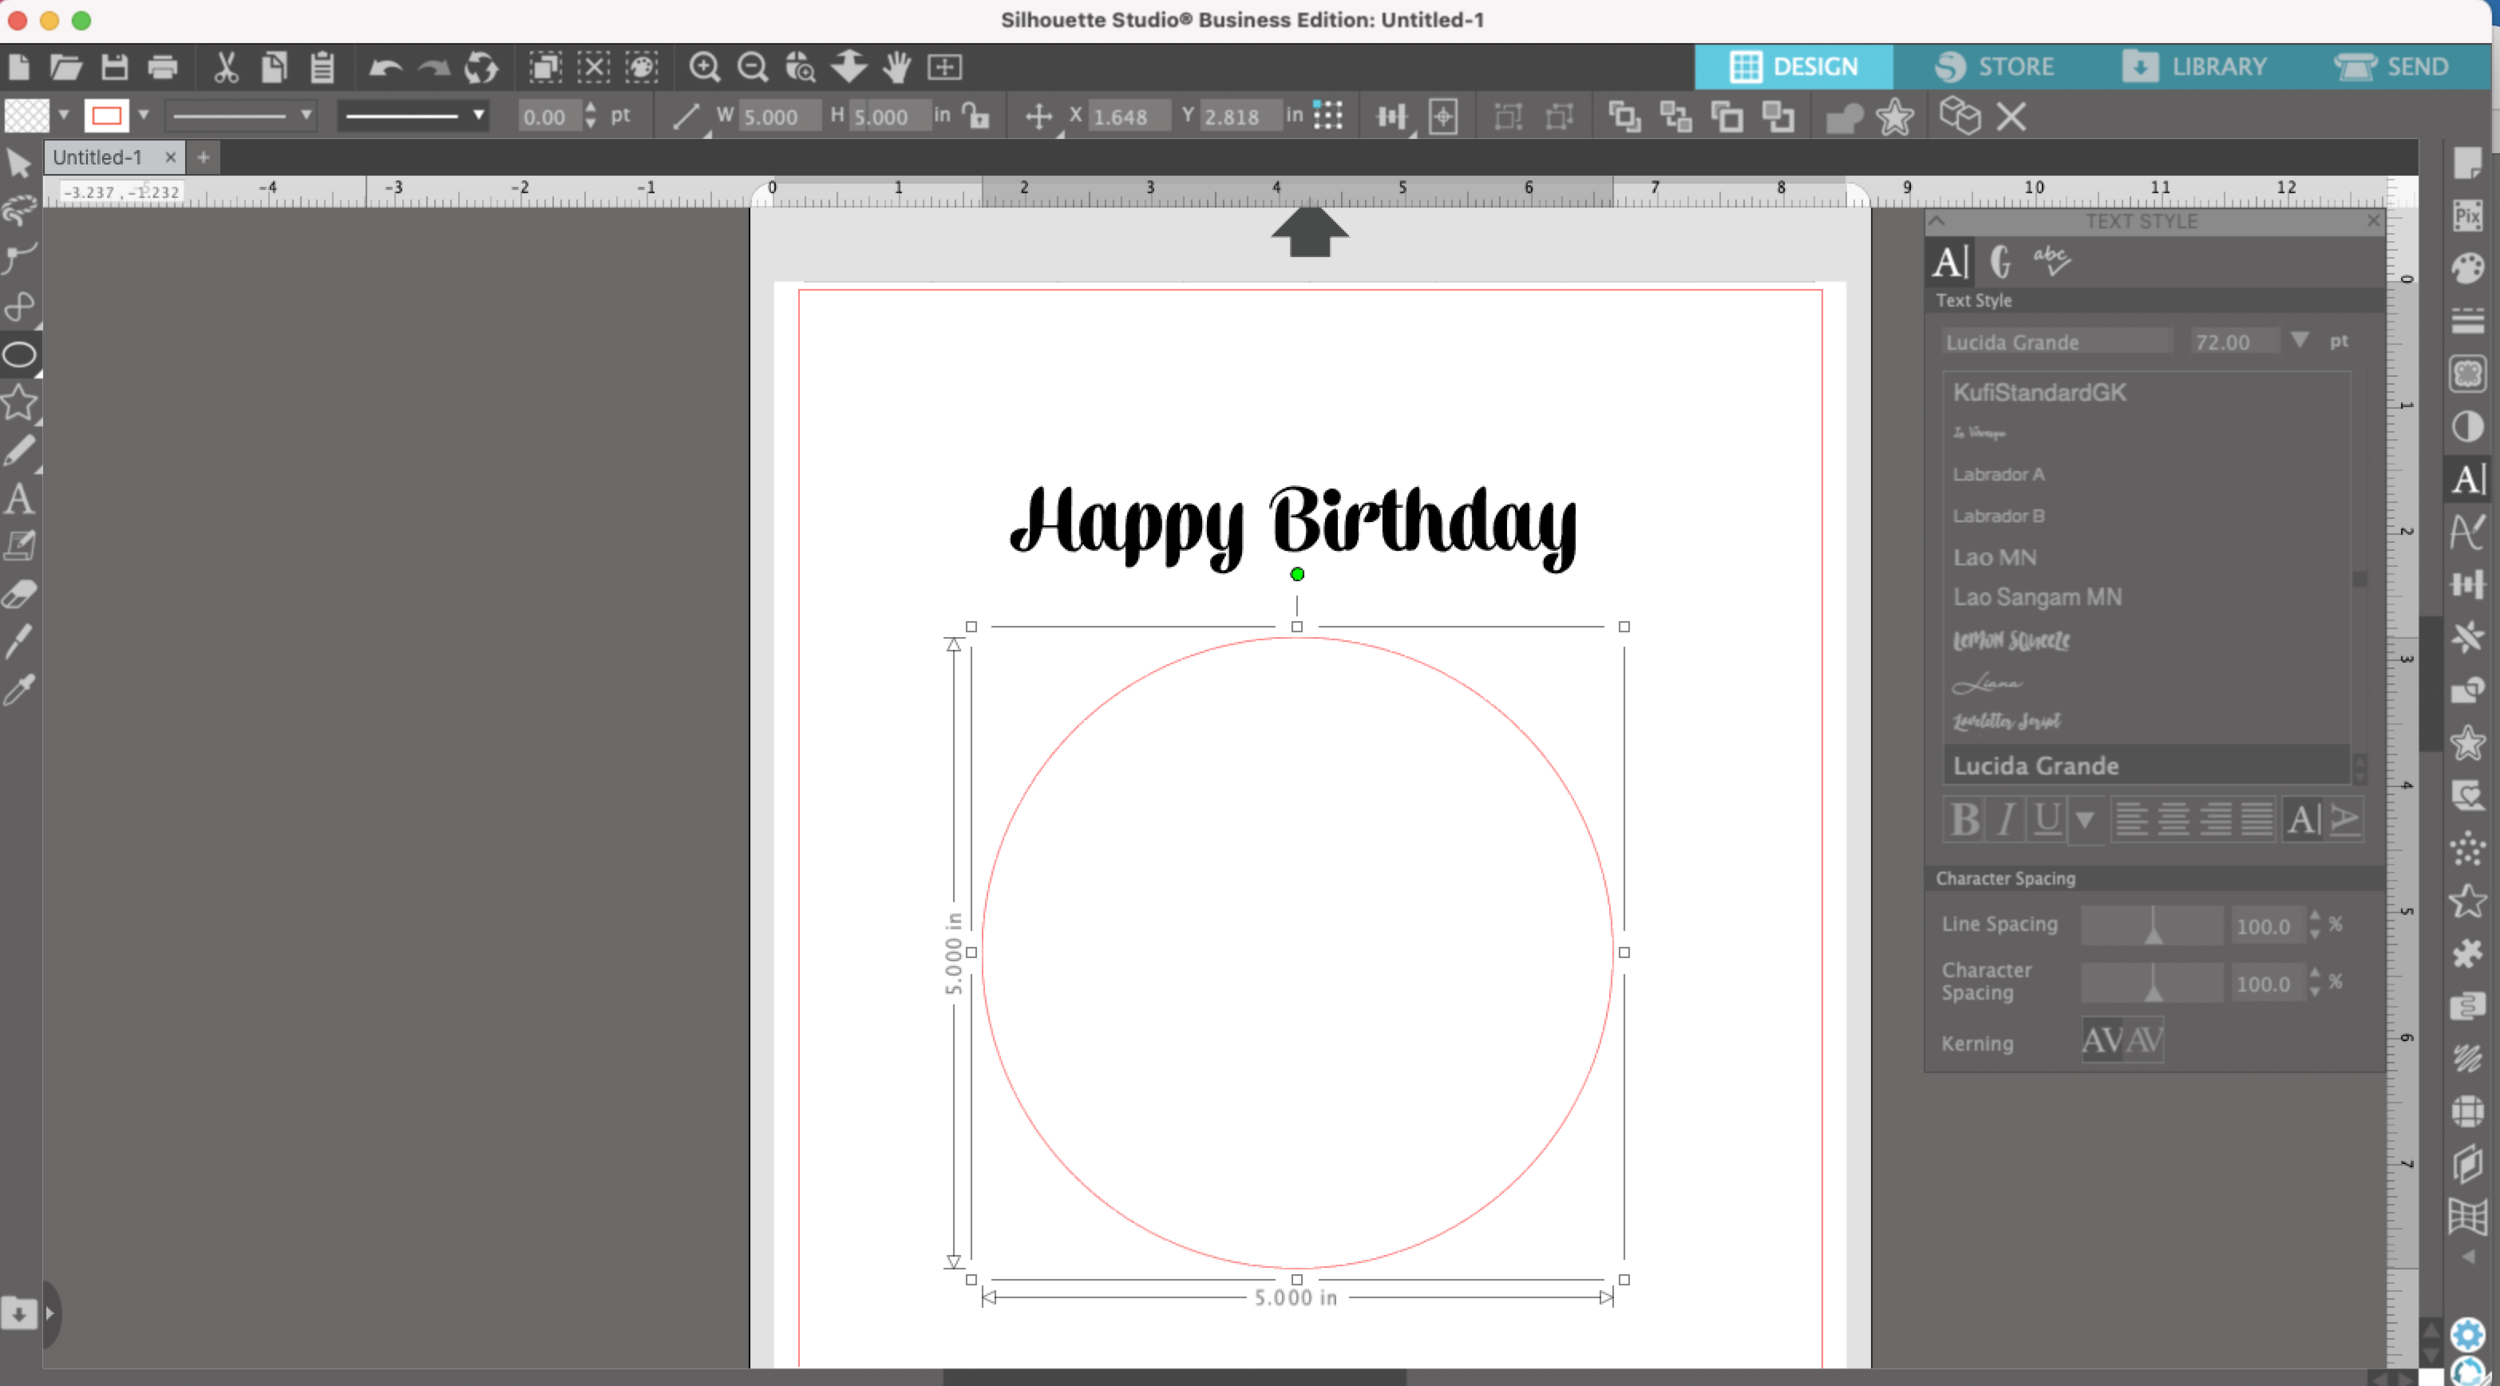
First I’m going to draw a circle.
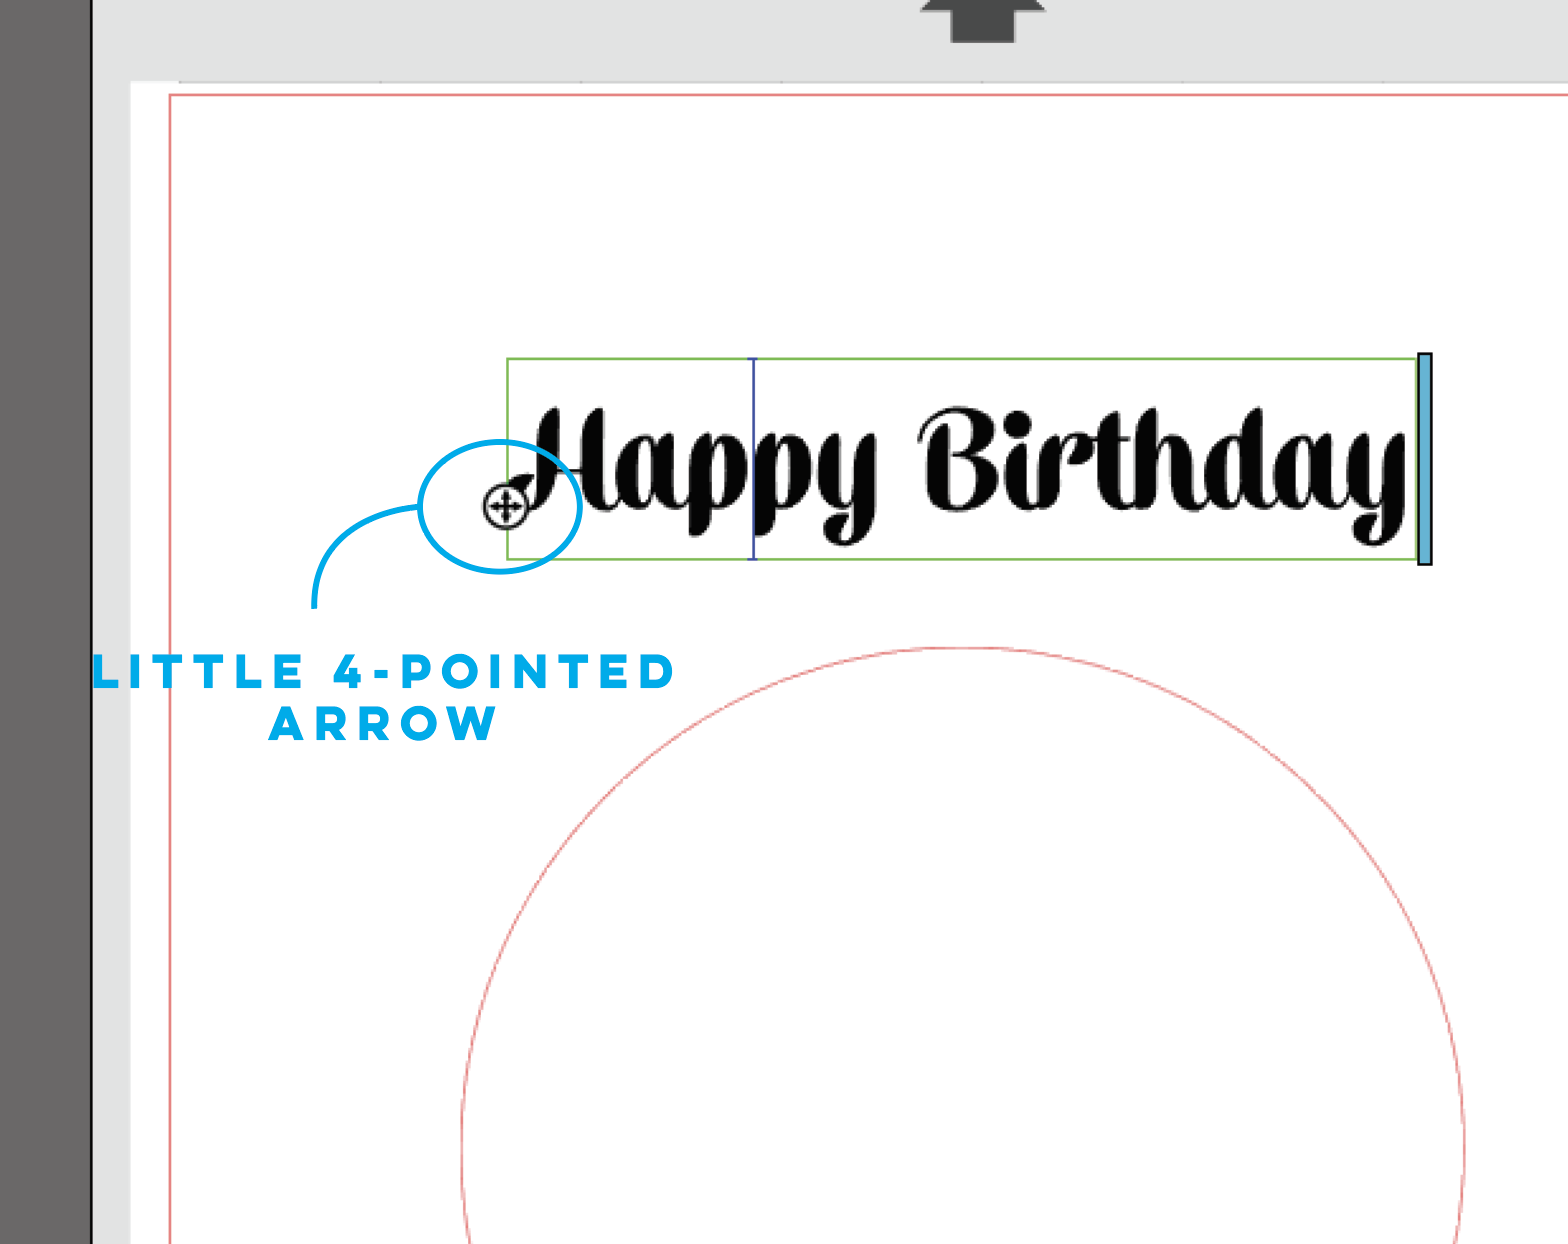
Then I’m going to Double Click on my text so a little 4-pointed arrow shows up.
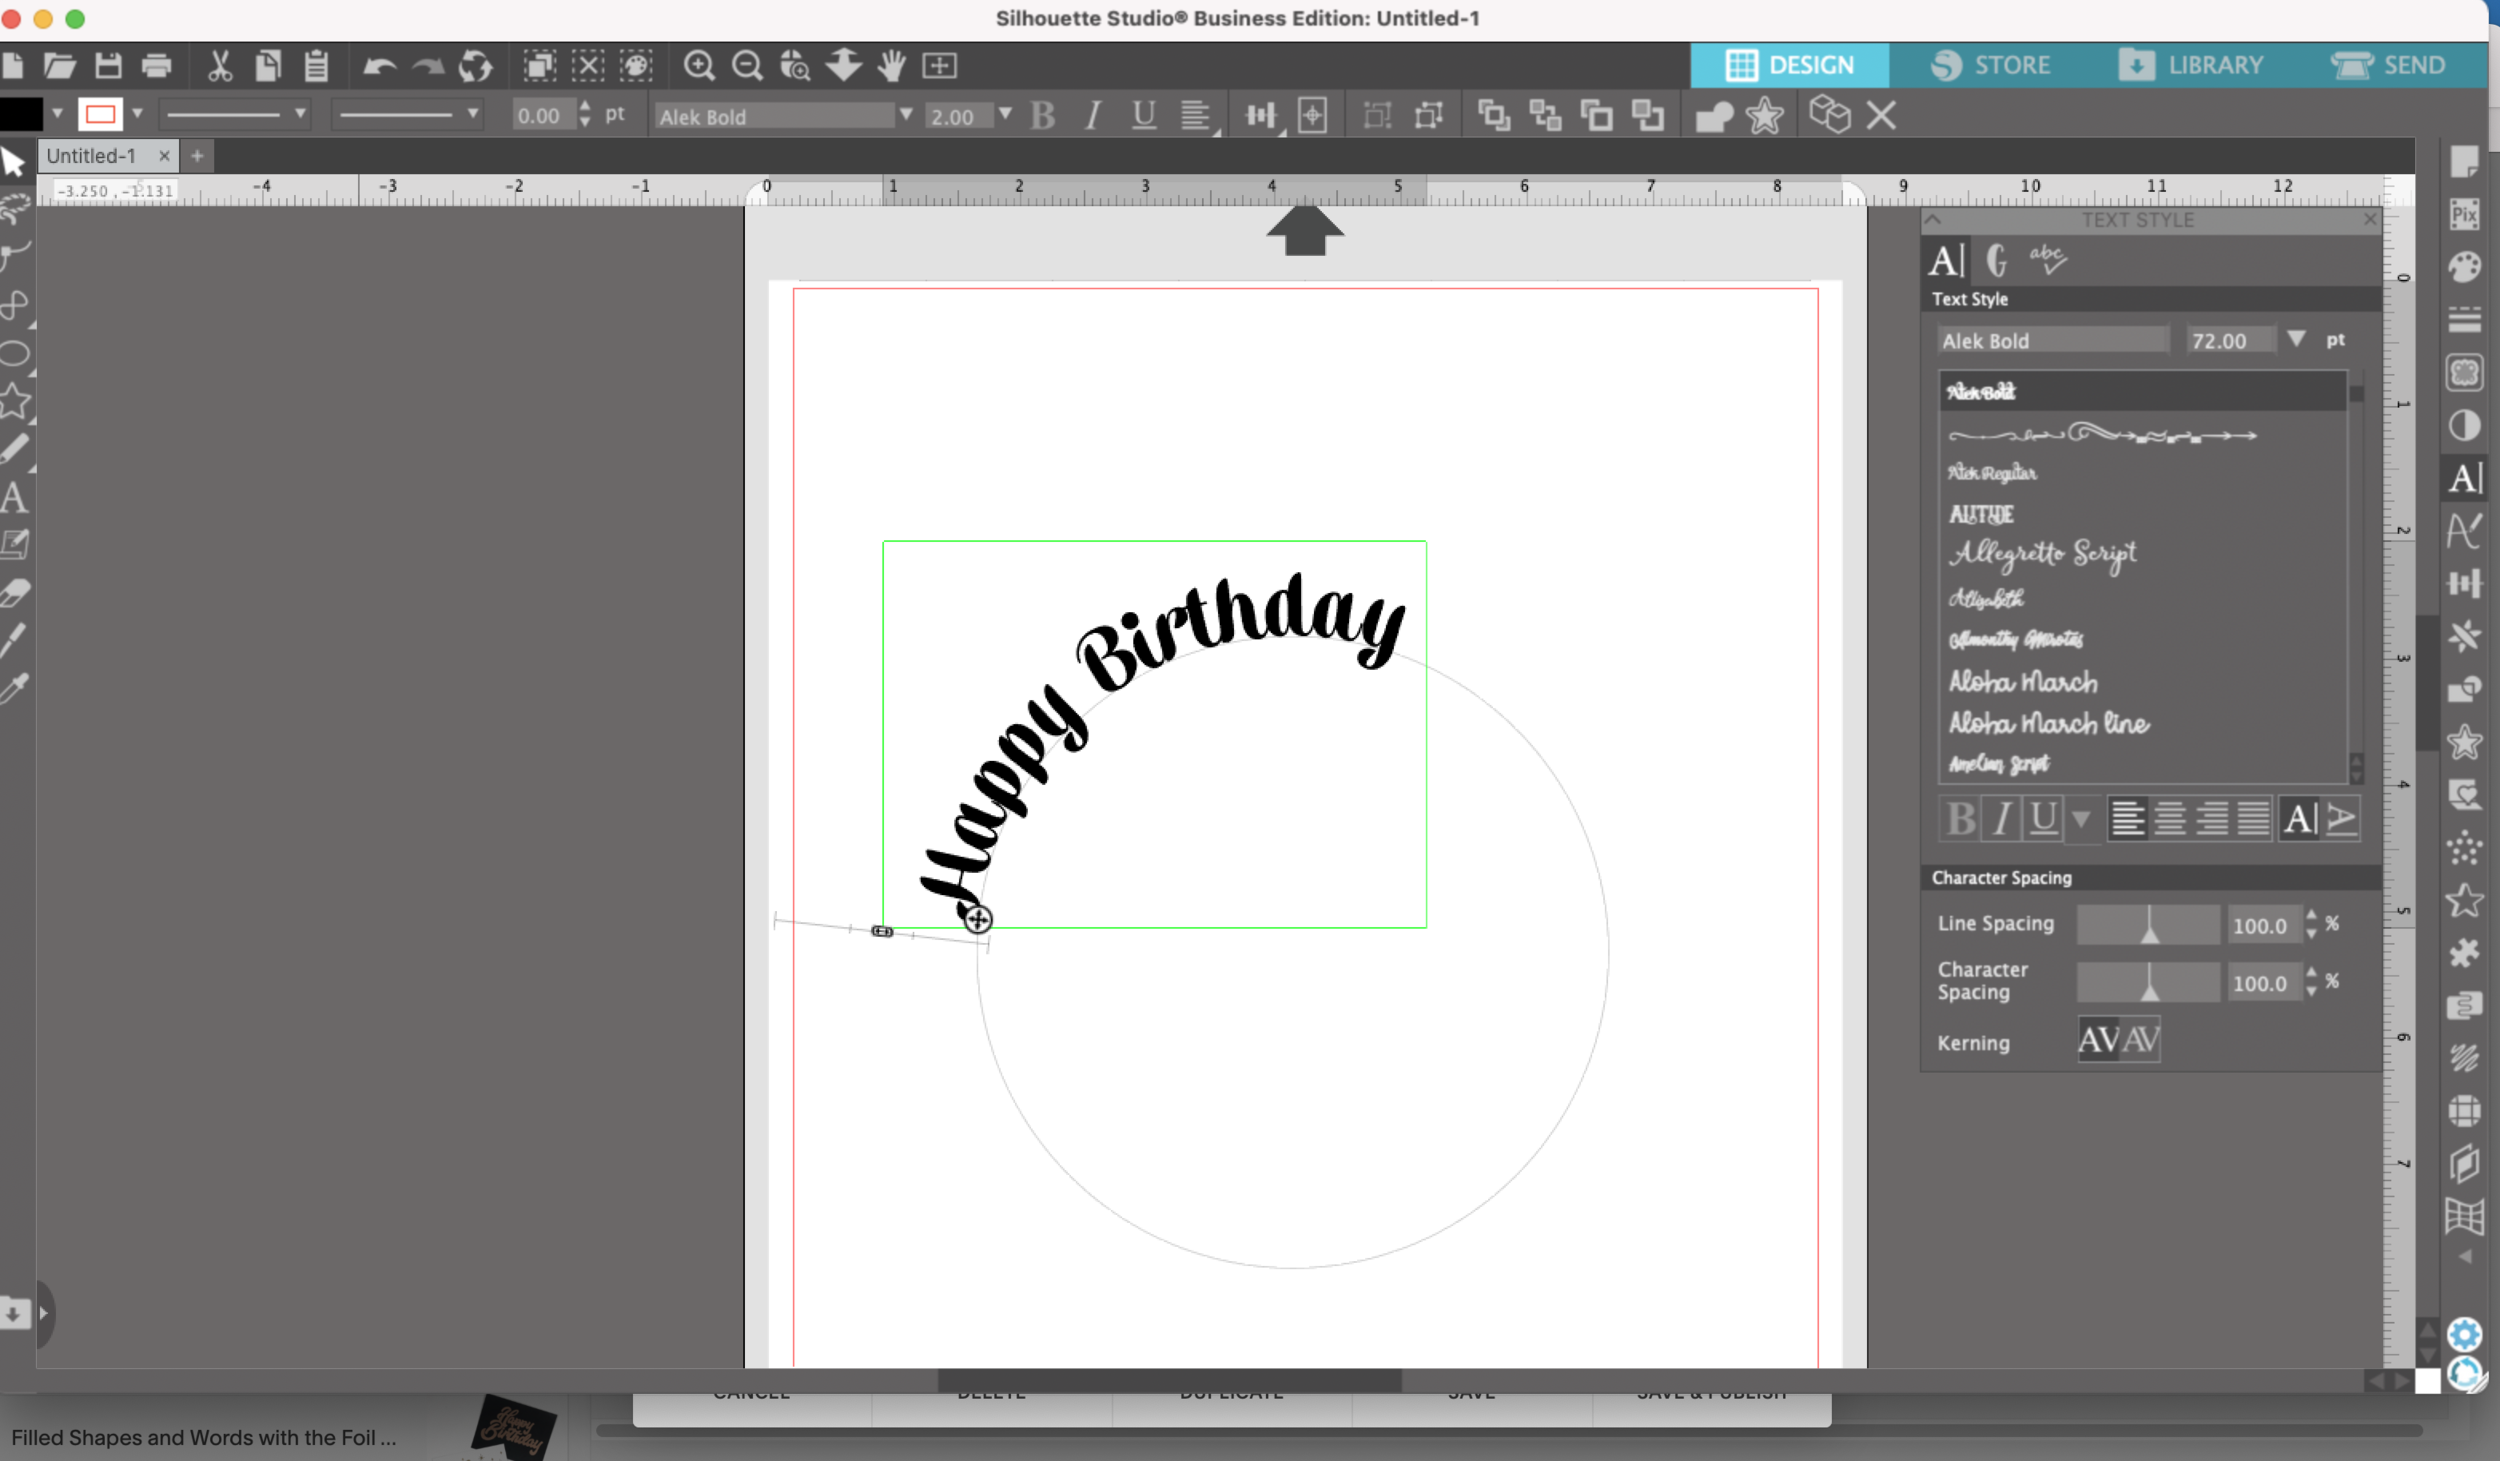
I’m going to click on the 4 -pointed arrow and drag my text over the outline of the circle. My text will snap to the circle starts following the curve!!
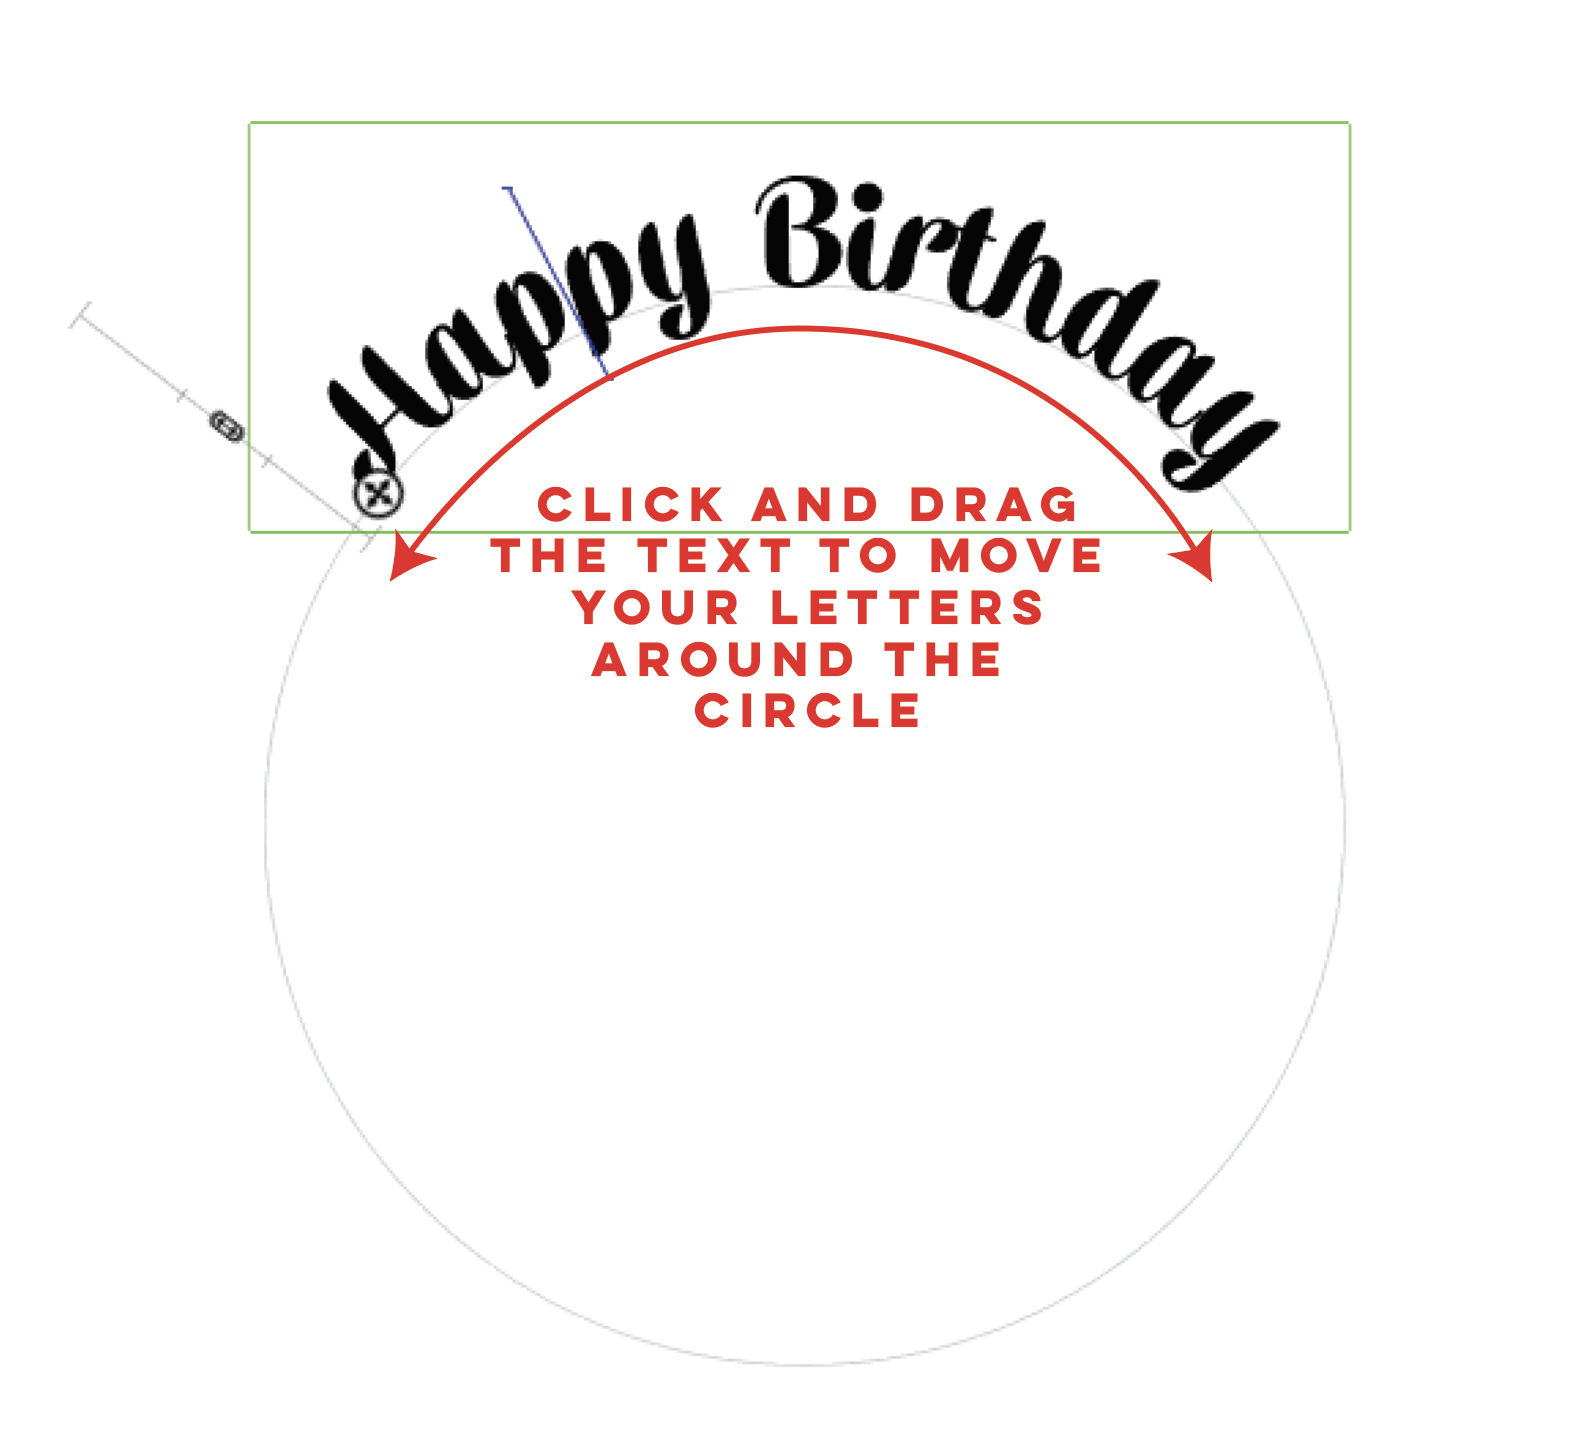
I can click and drag my text to slide my letters along the circle so I can get the placement I want.
Now I’m going to adjust my kerning (character spacing) a little bit, but I still have have the space between Happy & Birthday and my letters are touching!
I can also use the little slider to make my text move above the baseline of my shape. Again, I may need to do a little adjusting to the kerning.
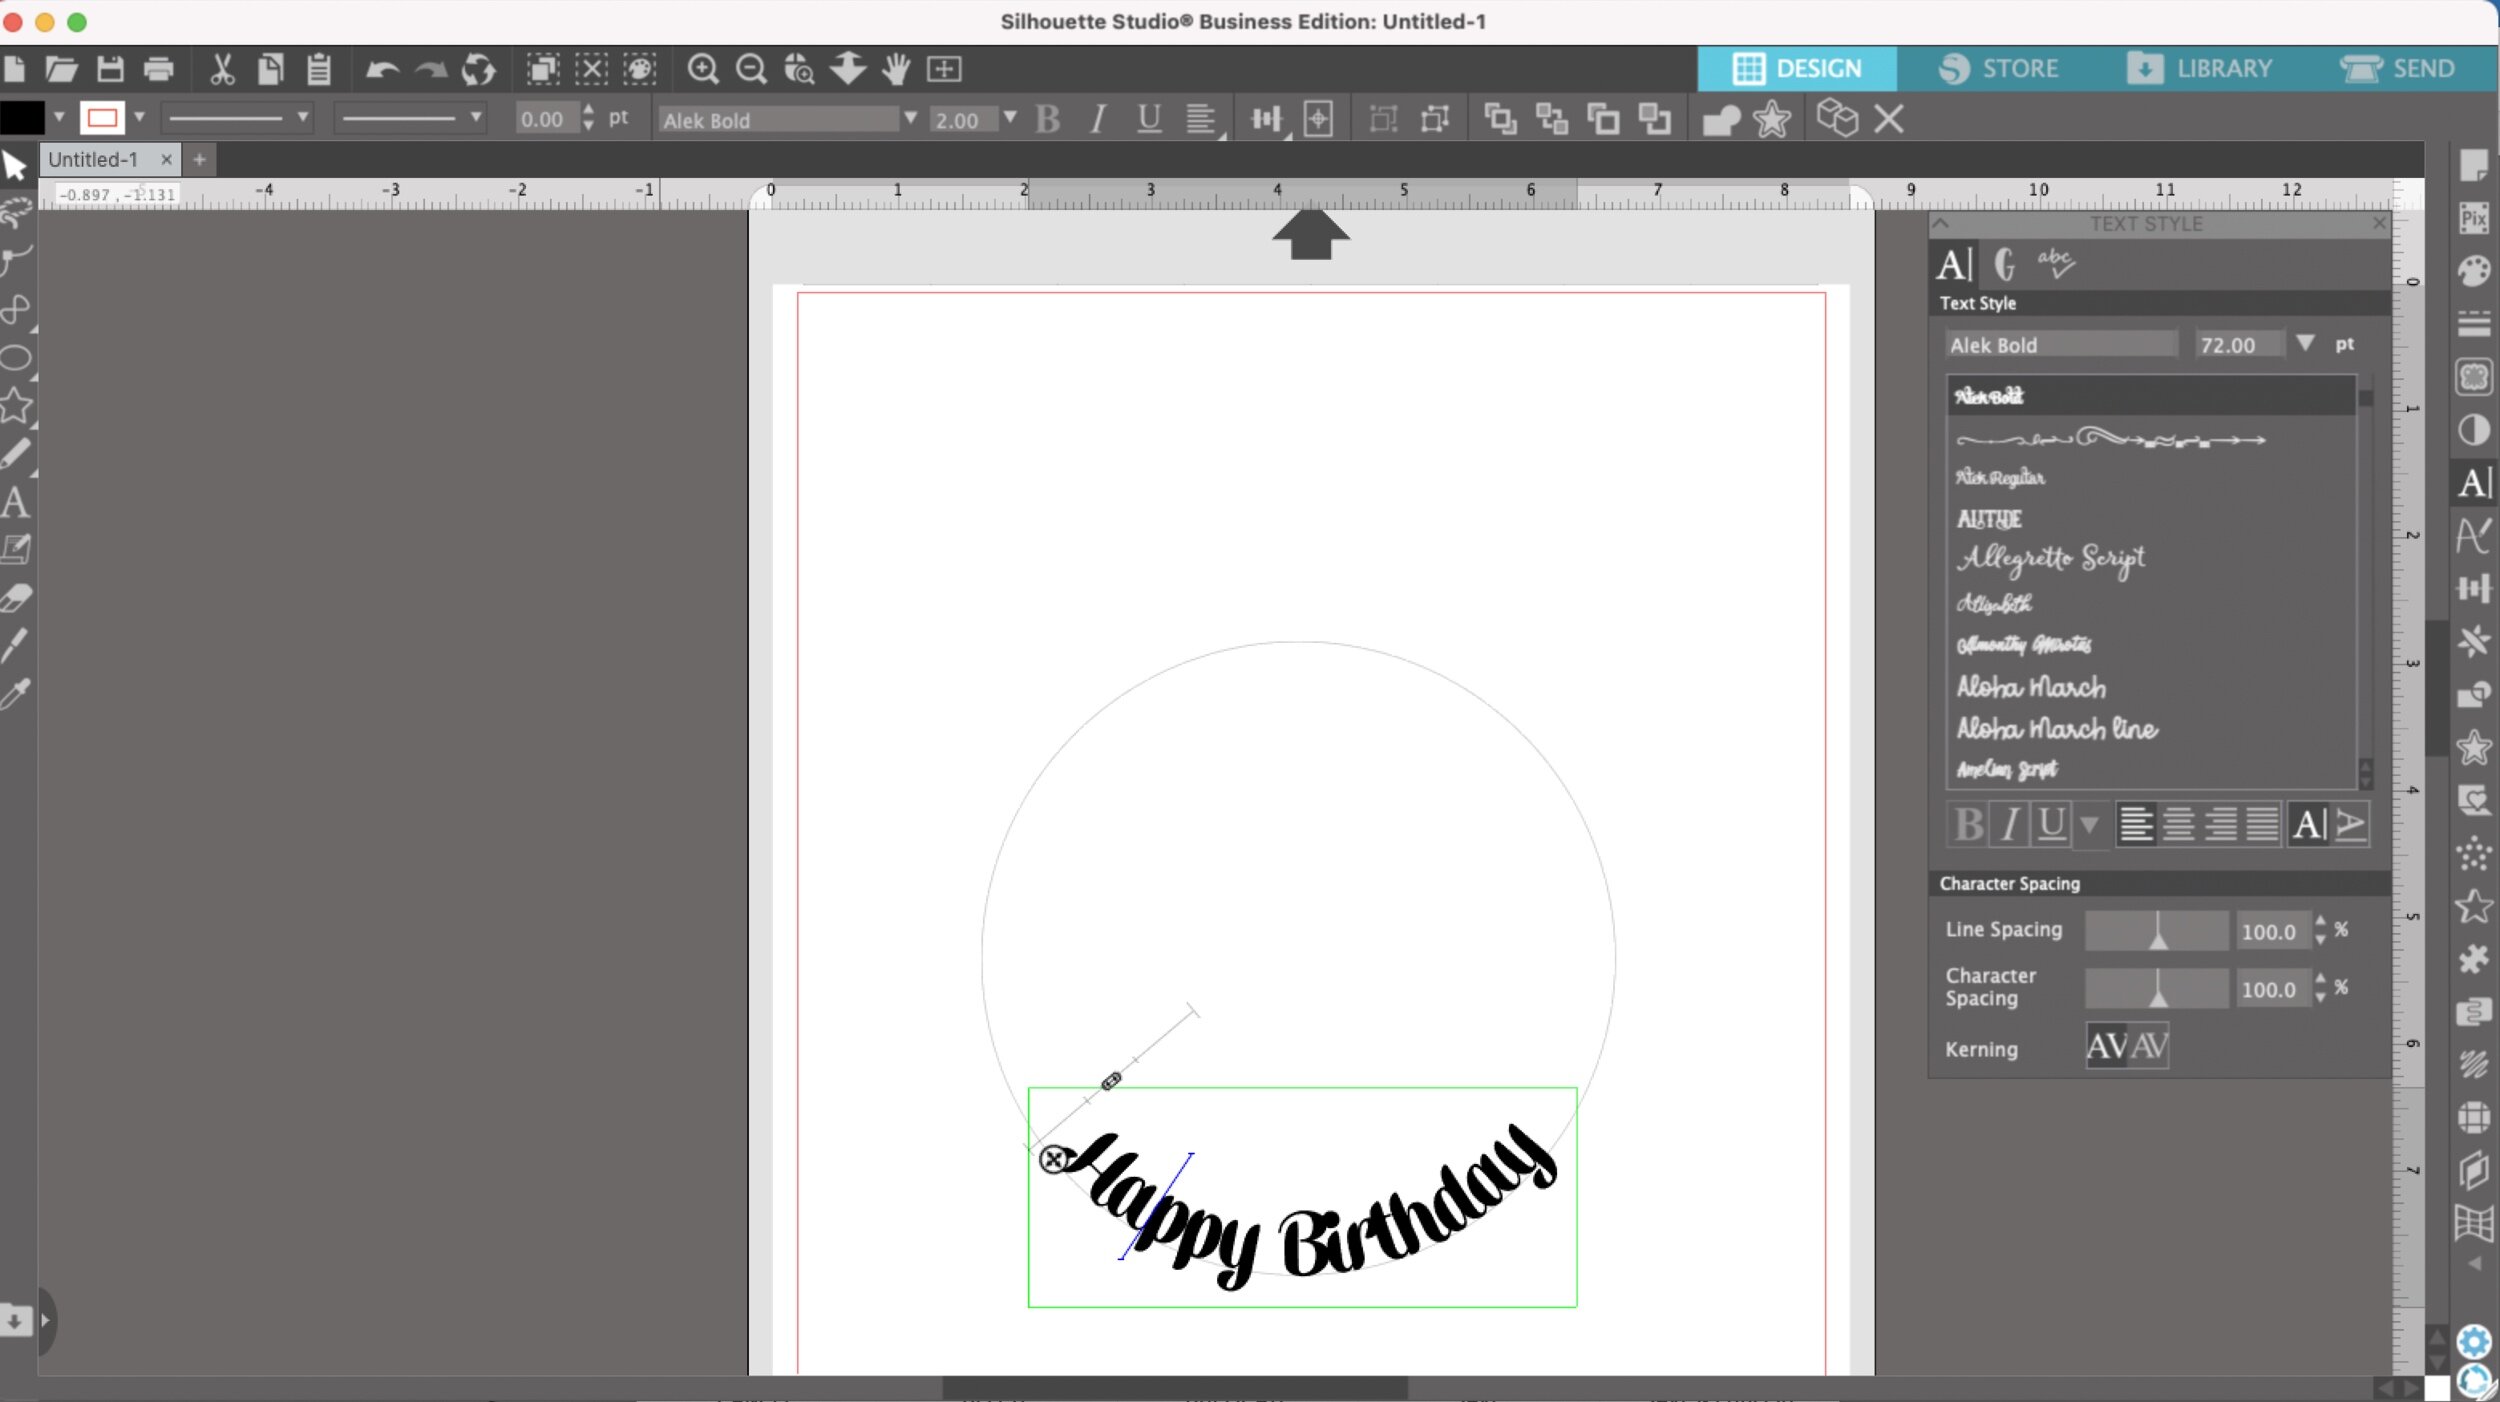
Or I can move my text to the bottom of the circle.
And again, use the little vertical slider to move it further out from the circle.
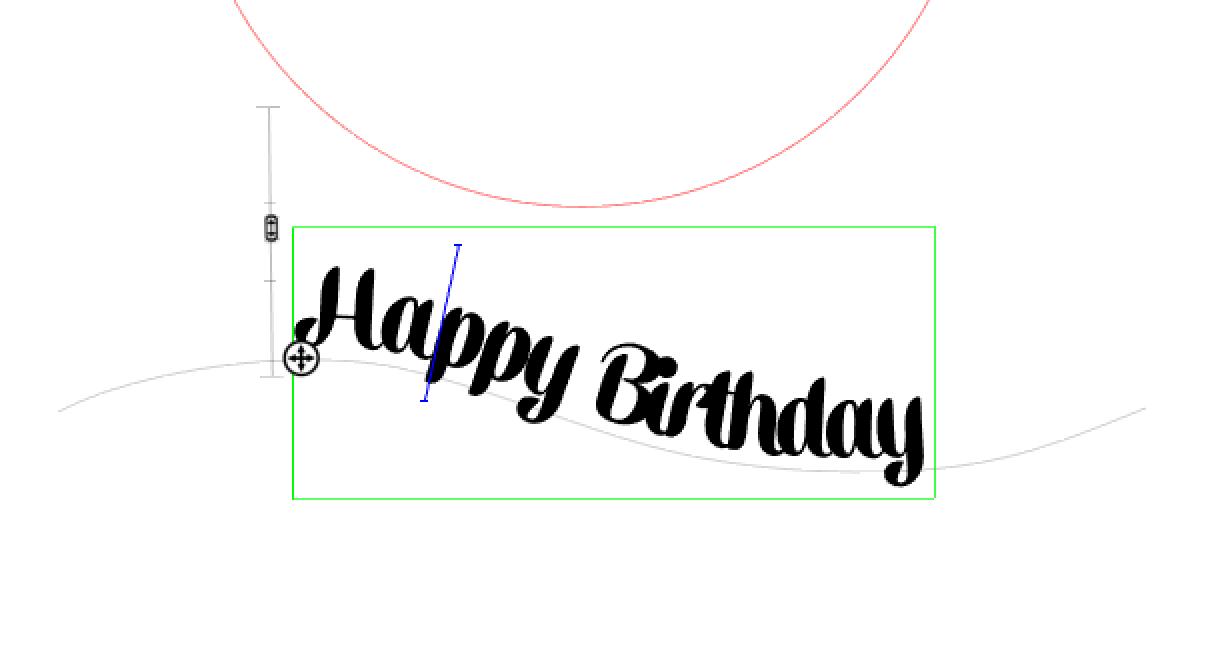
The Text to path also works on a regular path. I can draw a wavy line and the text will follow the line!
Once again, Silhouette Studio is so much more powerful than Cricut Design Space!


